


 本文介绍了Maven私服的概念、特点,包括安全性、性能提升和团队协作功能。详细讲解了如何使用SonatypeNexus搭建Maven私服,以及本地Maven配置和仓库管理,包括配置步骤和仓库类型的选择。
Maven私服是什么
maven私服是一种特殊的远程仓库,它一般搭建在内网,用来代理位于外部的远程仓库,里面经常放一些公司内部的包,当配置了私服后,项目中下载依赖的顺序就如下:
- 从本地仓库查找
- 从私服仓库中查找
- 从外部仓库中查找
先从本地仓库查找,没有的话再去私服仓库中查找,私服中还没有最后去外部中查找
Maven私服的特点
- 安全性:Maven 私服允许您在内部网络中创建一个受控的环境来存储和共享软件包。私服可以配置访问权限,只允许授权用户或团队访问和下载特定的软件包。这样可以确保只有经过审查和验证的软件包才能被使用,提高了项目的安全性。
- 性能:私服可以作为本地镜像,缓存外部存储库(例如 Maven 中央存储库)的内容。当构建项目时,Maven 将首先尝试从私服获取所需的软件包。如果私服中已经存在该软件包,Maven 将立即下载,从而提高了构建过程的速度,并减少了对外部存储库的依赖。
- 可靠性:私服允许您在内部网络中创建一个稳定的软件包分发渠道。这样一来,即使外部存储库不可用或出现故障,您的团队仍然可以从私服获取所需的软件包,保证项目的可靠性和稳定性。
- 自定义:私服允许您自定义软件包的发布和分发策略。您可以根据特定的需求和流程设置私服,例如添加额外的元数据,设置访问权限,定义代理规则等。这种灵活性使您能够根据项目的要求进行自定义配置,并更好地满足特定需求。
- 团队协作:私服为团队协作提供了便利。团队成员可以通过私服共享和分发自己的软件包,提高团队内部的开发效率。私服还可以用于管理和记录内部软件包的版本和变更历史,方便团队成员进行跟踪和回溯。
搭建Maven私服
Sonatype Nexus 是当前最主流的 Maven 仓库管理器,本文就使用这个来讲解
使用docker-compose搭建
创建挂在文件目录
mkdir data
添加docker-compose.yml
version: '3.7'
services:
  nexus:
    restart: always
    image: sonatype/nexus3:3.57.1
    container_name: nexus-test
    privileged: true
    ports:
      - 8081:8081
    volumes:
      - ./data:/nexus-data
启动docker-compose
docker-compose up -d
访问仓库
http://192.168.20.19:8081/

Nexus仓库登录
默认情况下,Sonatype Nexus 的管理员账号是 “admin”,密码是 “admin123”,这是在初始安装时设置的默认凭据。
请注意,这是一个非常基本和常见的凭据组合,不够安全。因此,在实际使用中,强烈建议您更改管理员账号的密码以增强安全性。
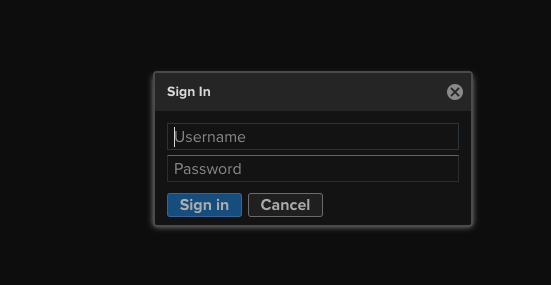
登录
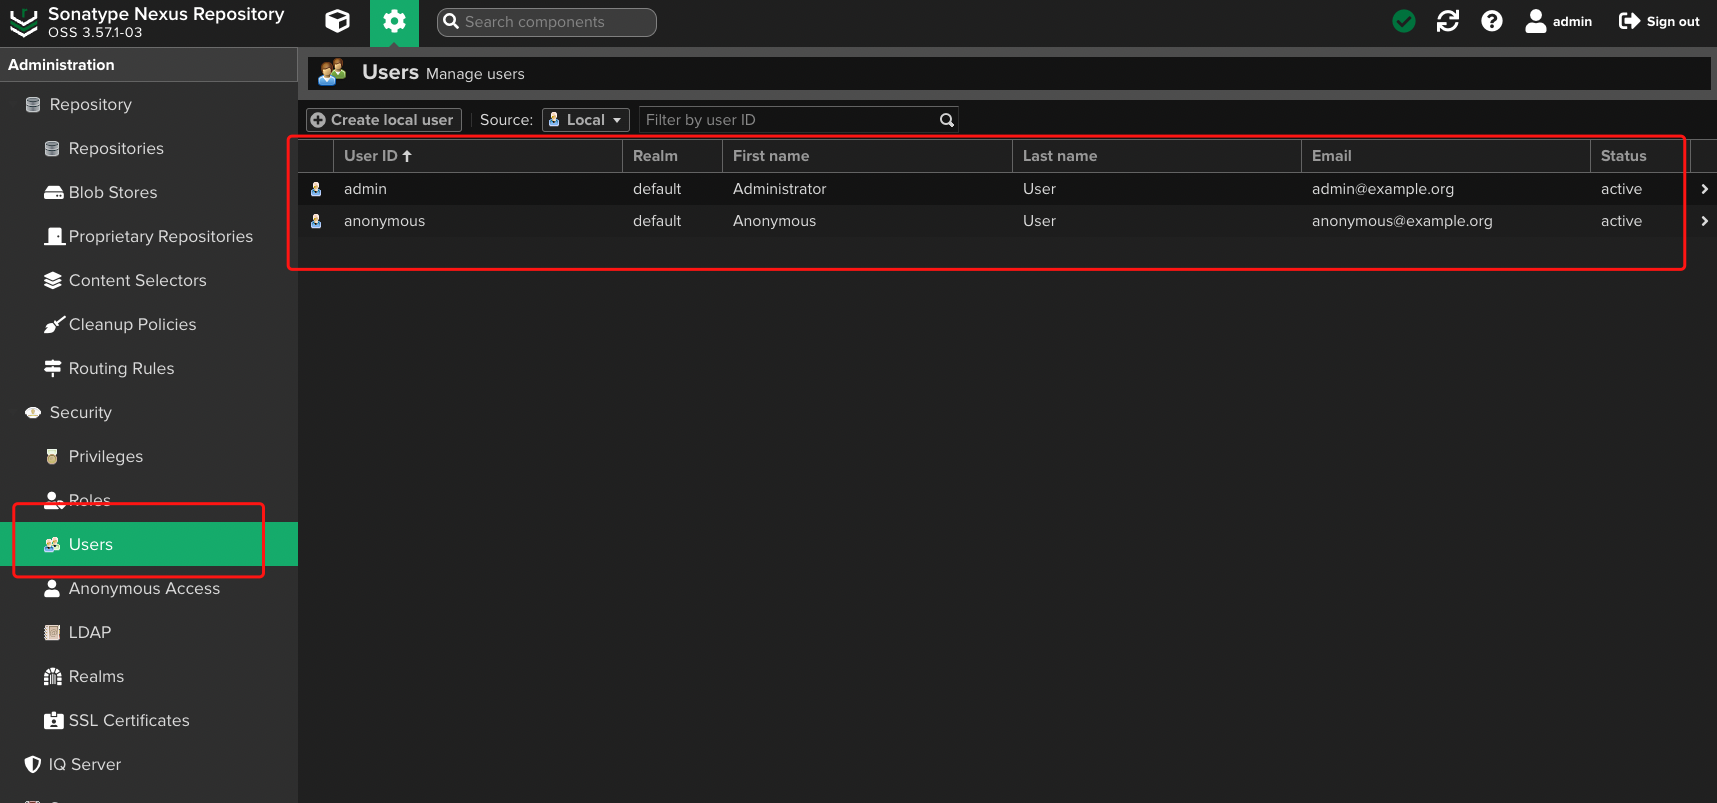
默认有两个用户
admin:拥有所有权限 ,anonymous 只有查看权限
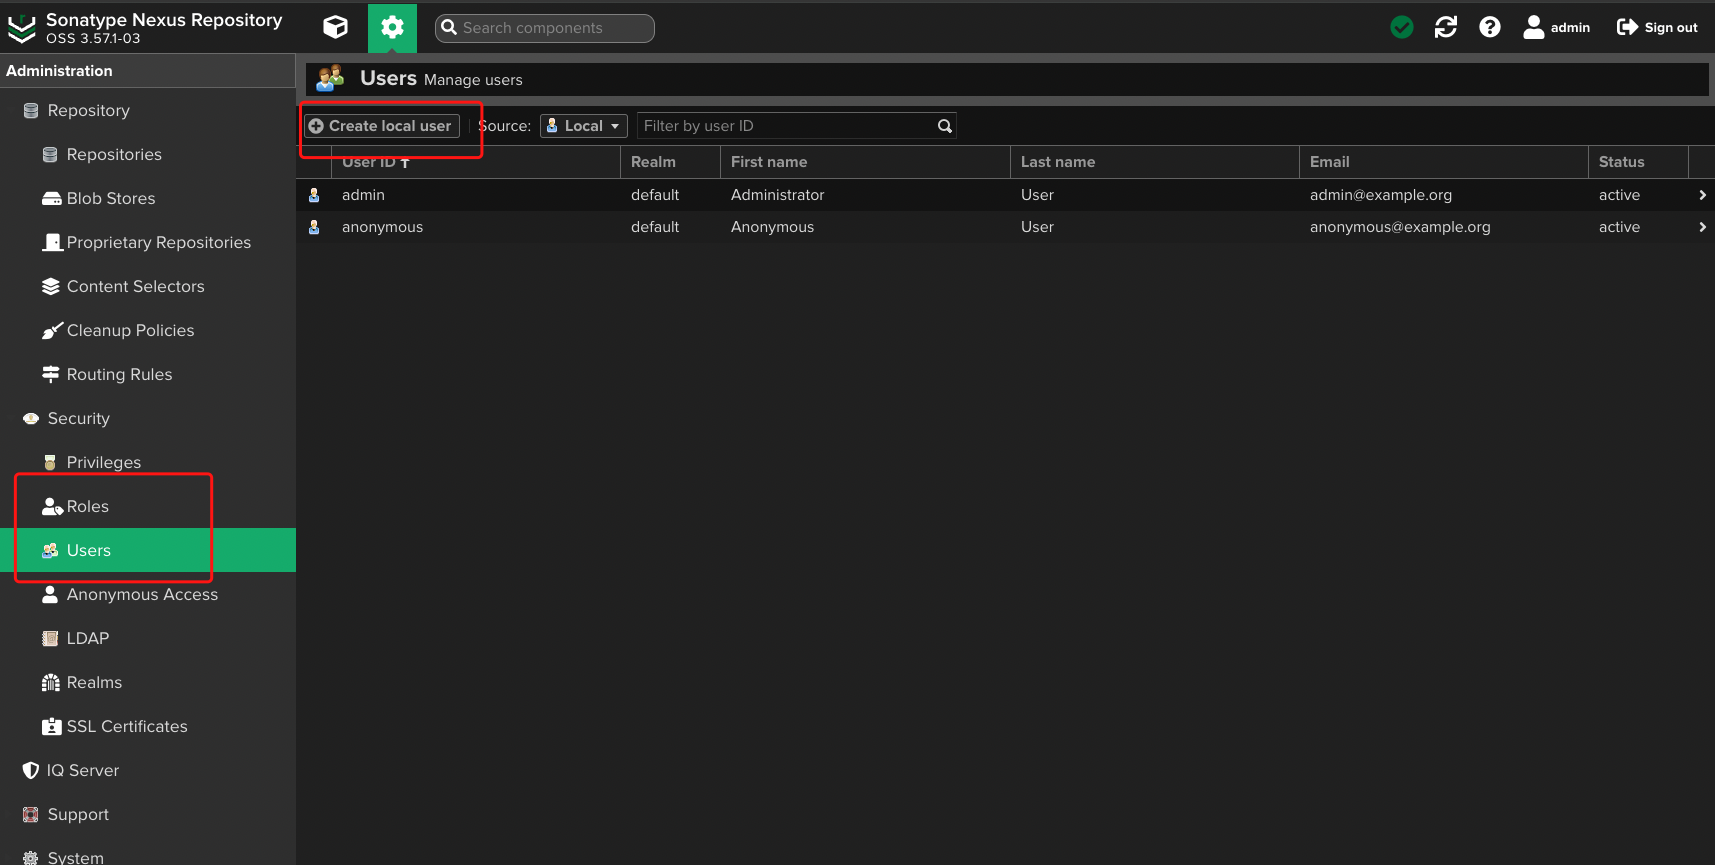
新增用户和权限
可以在这里新增用户和权限,这里就不展示了
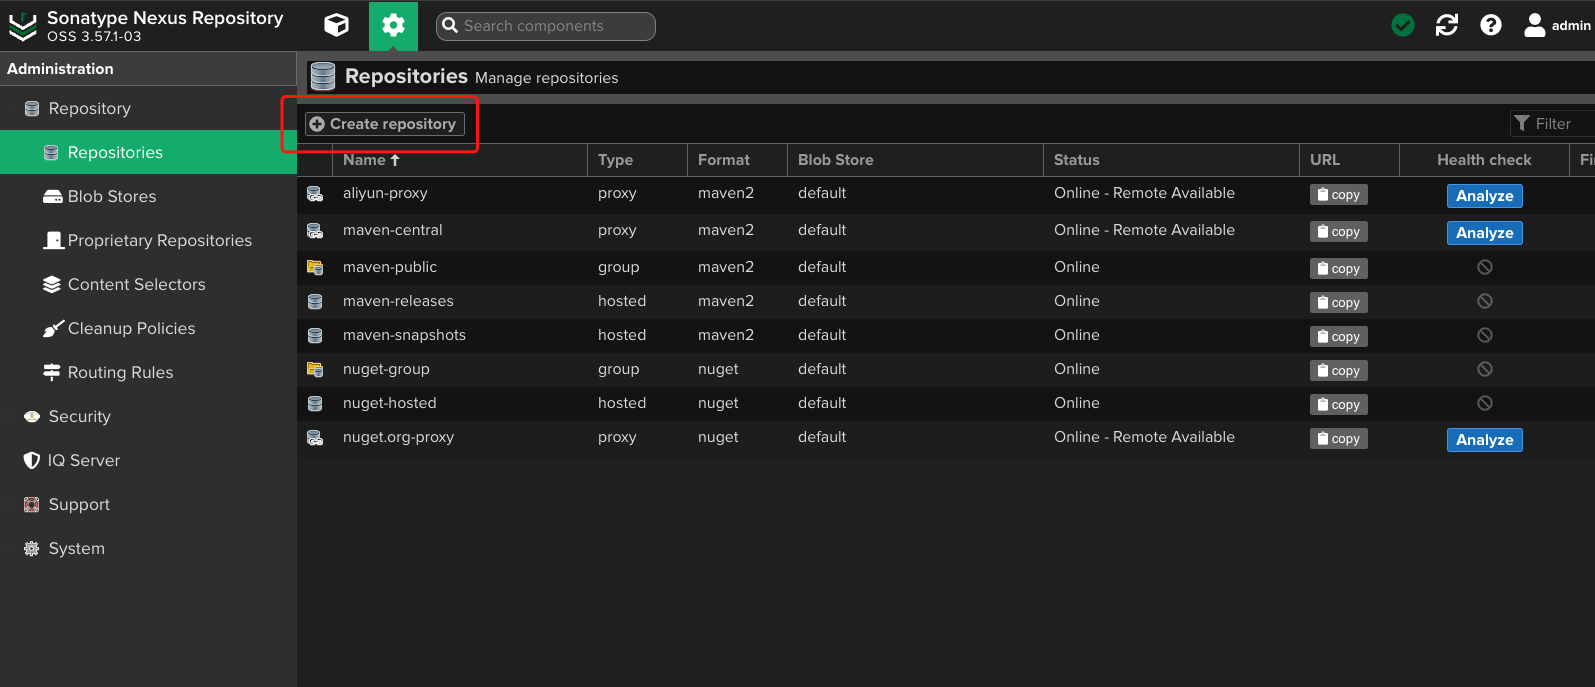
仓库
仓库是Nexus中最核心的功能
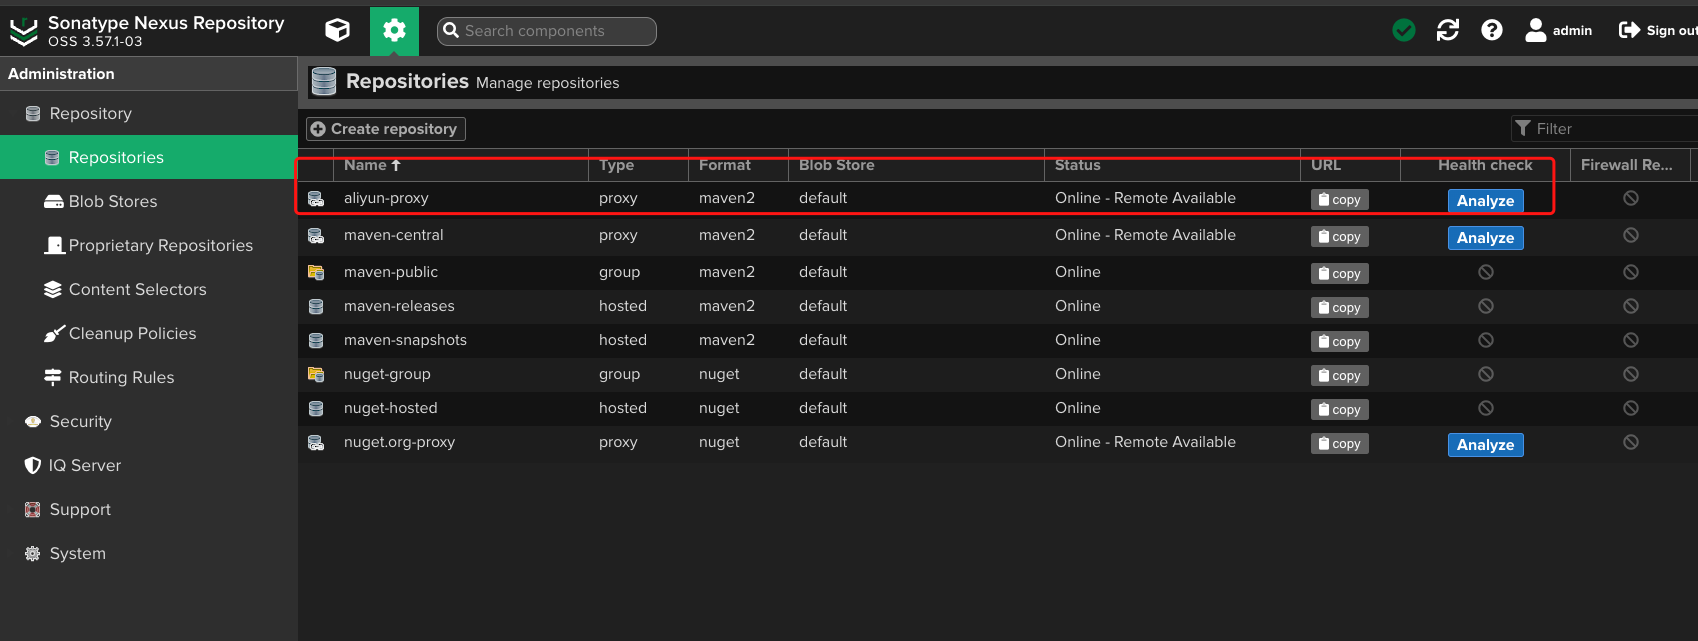
仓库类型
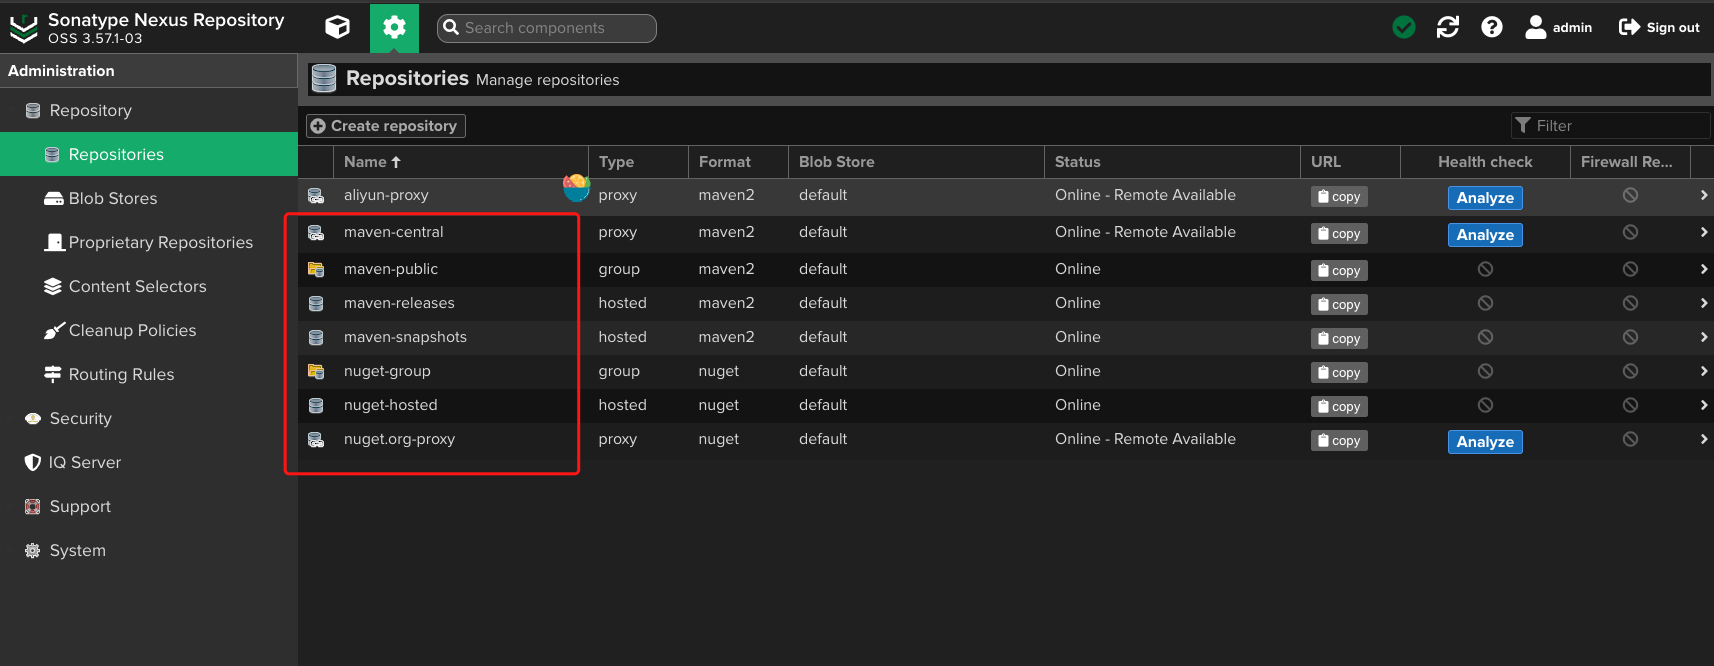
**这里除了aliyun-proxy仓库其他都7个仓库是自带的,**我们只需要关注Format为maven2的仓库就好了
仓库类型介绍:
maven-central:该仓库用来代理 Maven 中央仓库,包含了大量的开源软件包和框架。
maven-releases:存储和托管 Maven 发布(Release)版本的仓库,该仓库用于存储经过测试和验证的发布版本,确保团队成员可以轻松地获取到可靠的构件。
maven-snapshots:存储和托管 Maven 快照(Snapshot)版本的仓库,通常用于测试和开发目的。该仓库允许开发人员在构建过程中发布和共享快照版本,以便团队成员可以及时获取最新的开发进展。
maven-public:仓库组,默认聚合了以上三个仓库。
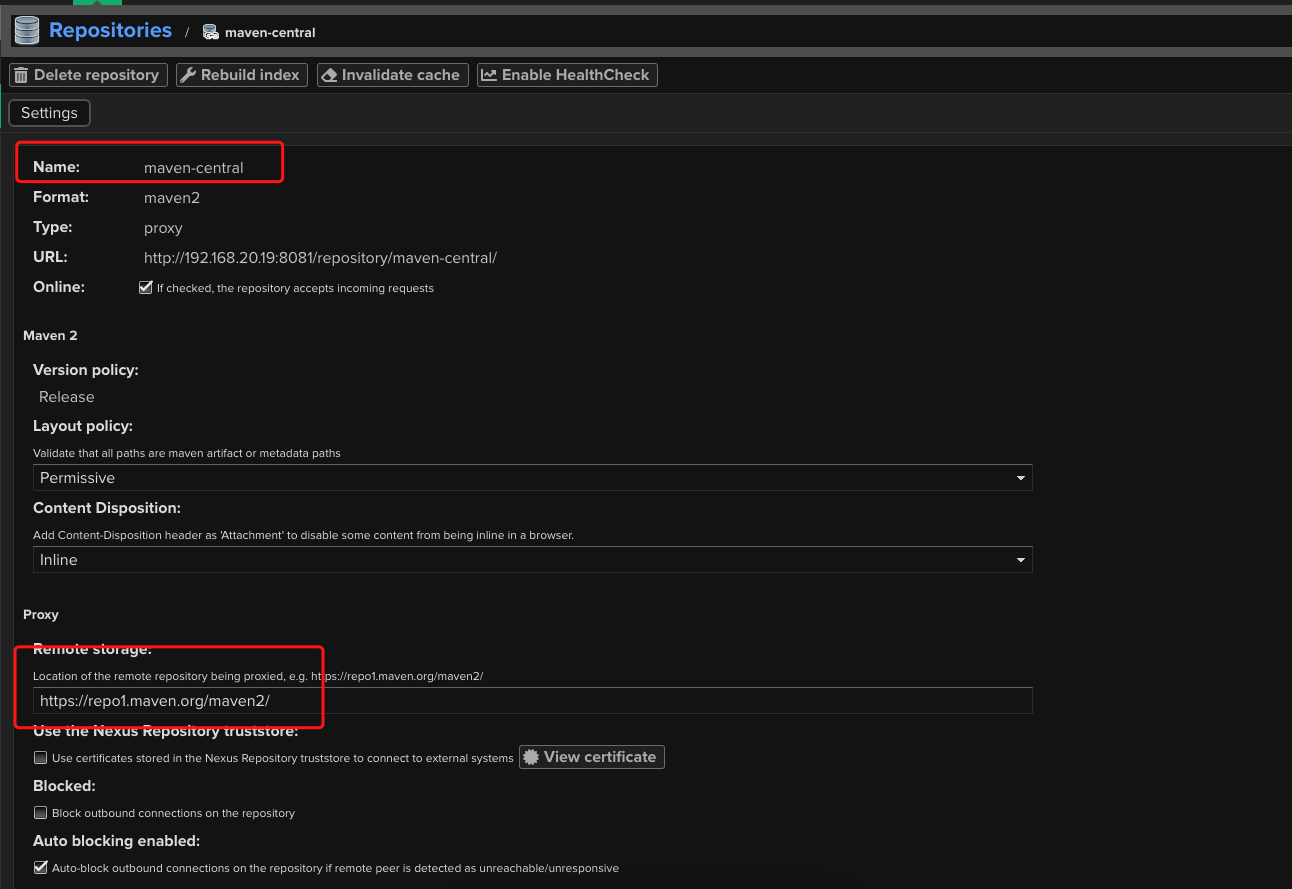
maven-central仓库
可以看到maven-central配置了外部的仓库路径
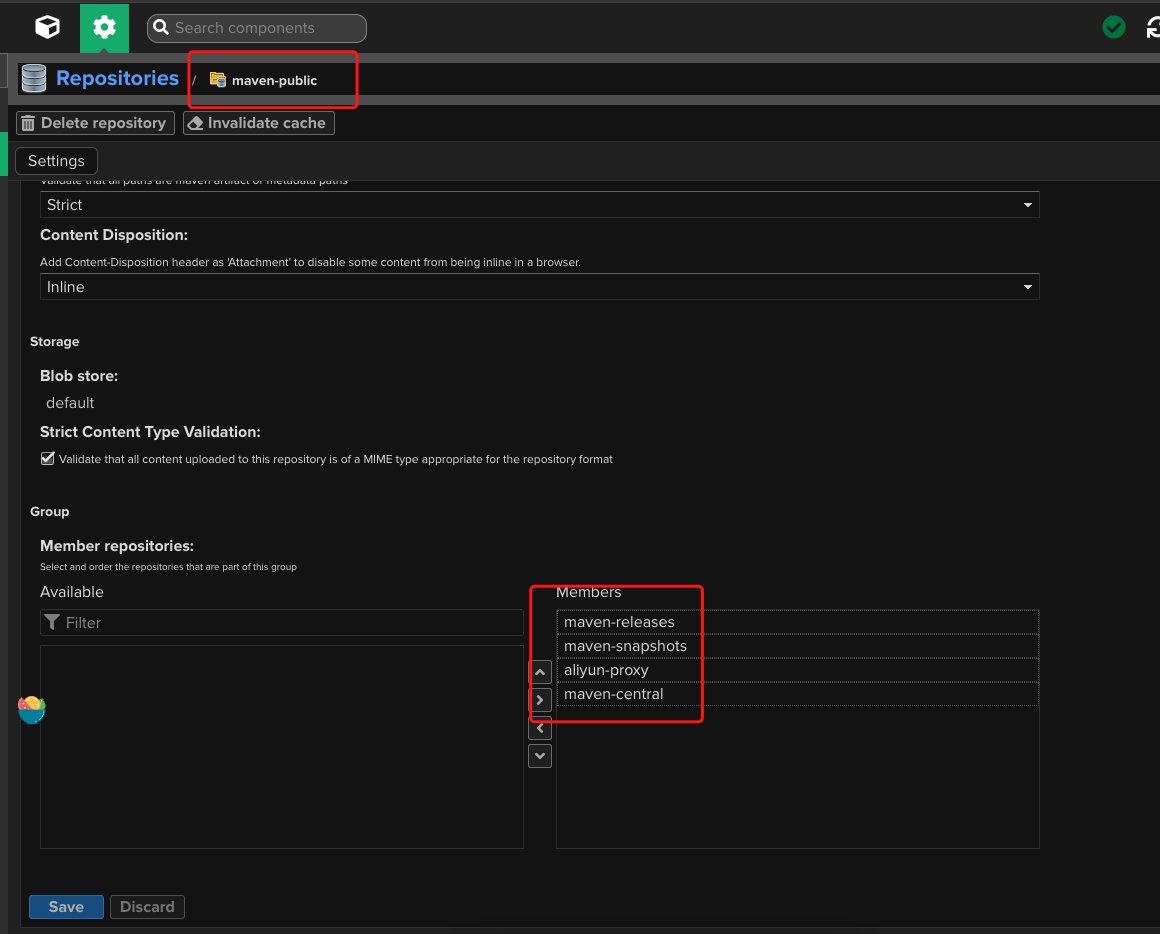
maven-public仓库
可以看到maven-public仓库整合了其他几个仓库
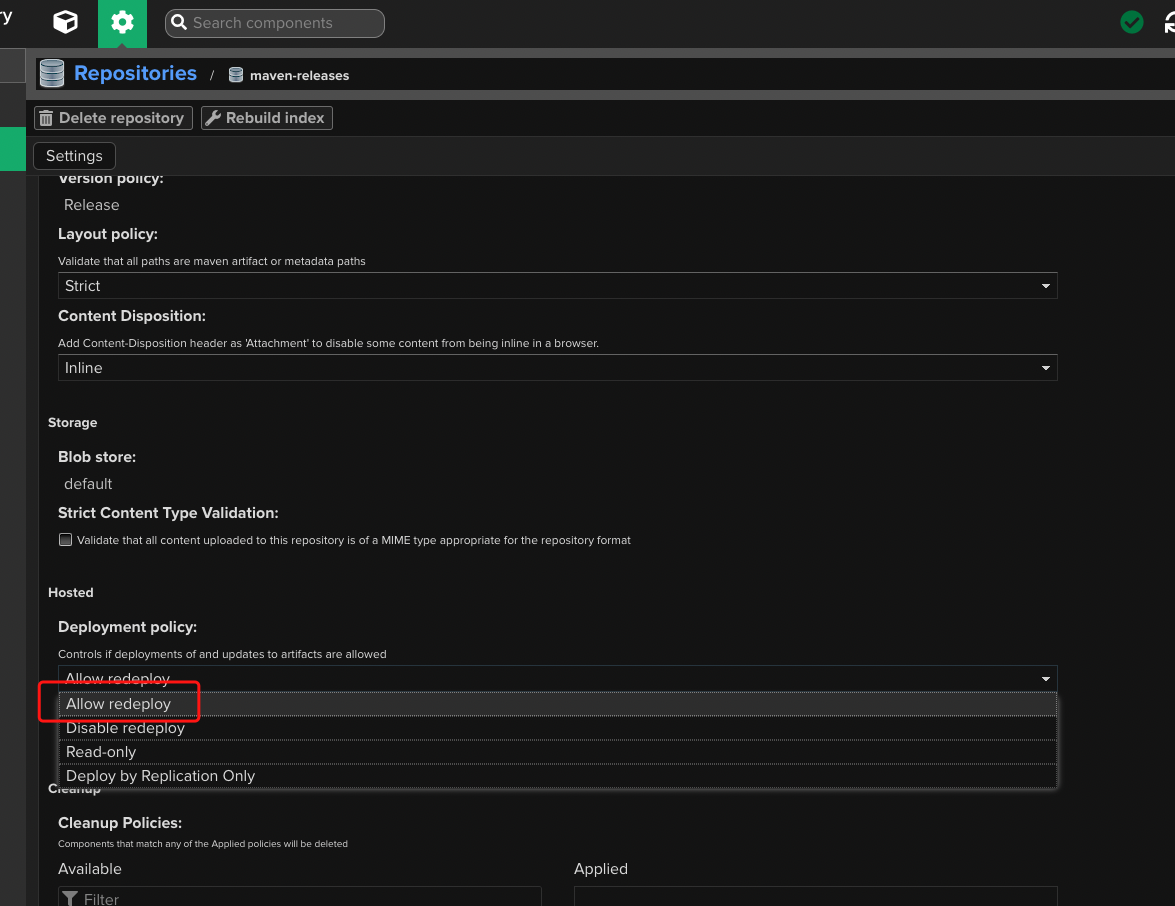
maven-releases仓库
release仓库需要把Deployment policy选项设置为Allow redeploy,表示允许我们对仓库中的依赖维护升级新版本,默认为disable redeploy这表示我们无法将升级版本上传上来。
新建仓库
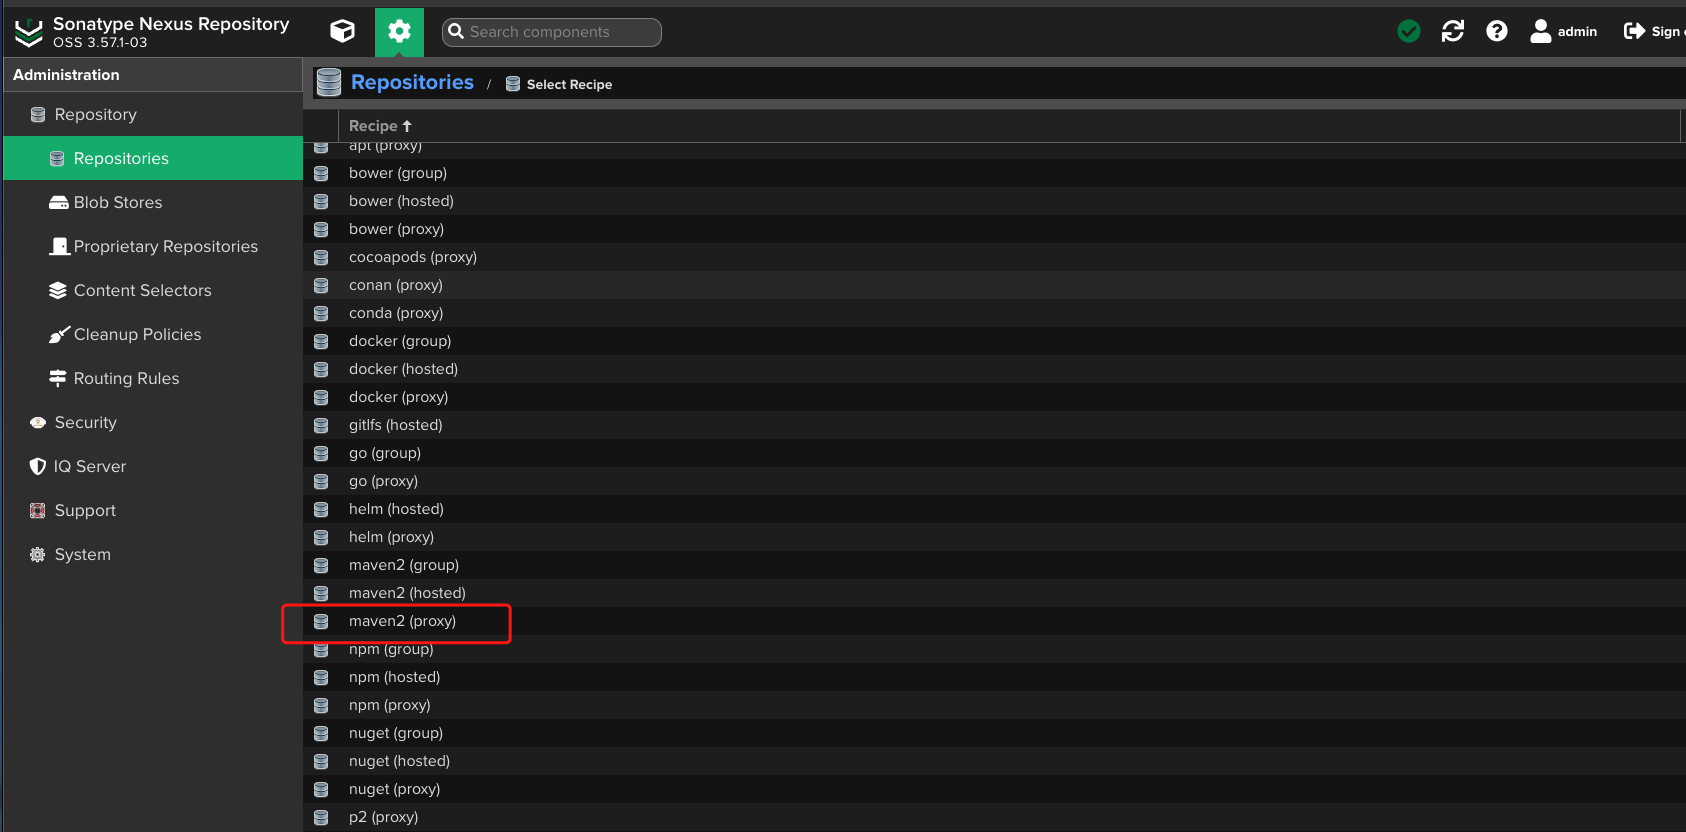
新建aliyun-proxy仓库
这里新建一个仓库代理到阿里云镜像地址
选择maven2(proxy)
填写名称和仓库镜像地址
名称:aliyun-proxy,镜像地址配置:https://maven.aliyun.com/repository/public
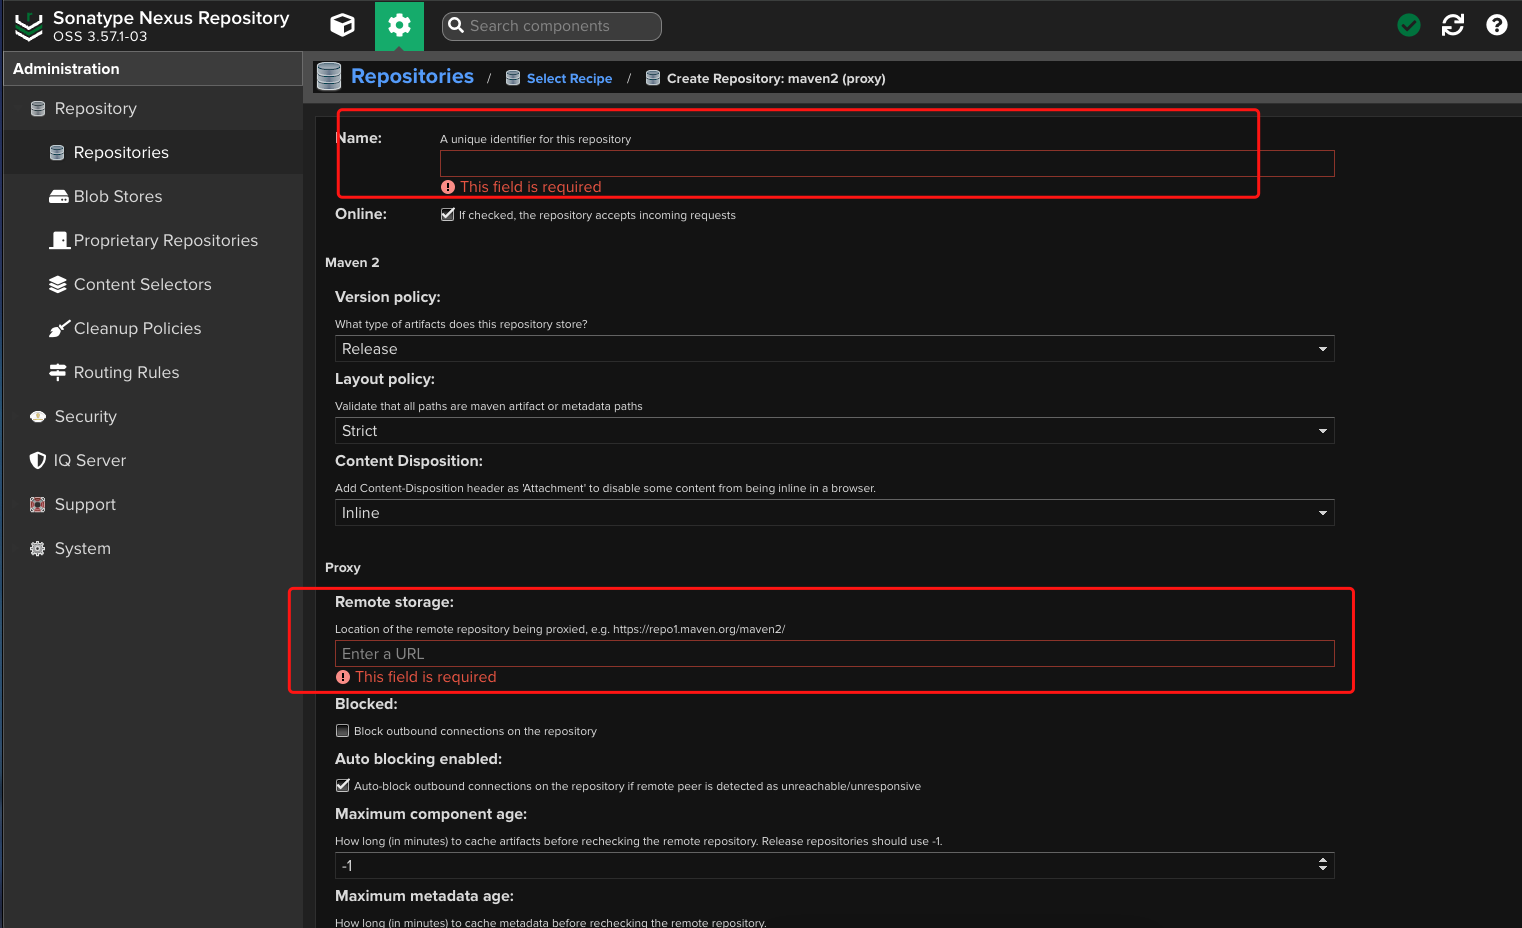
其他的不用填,点击创建就可以了
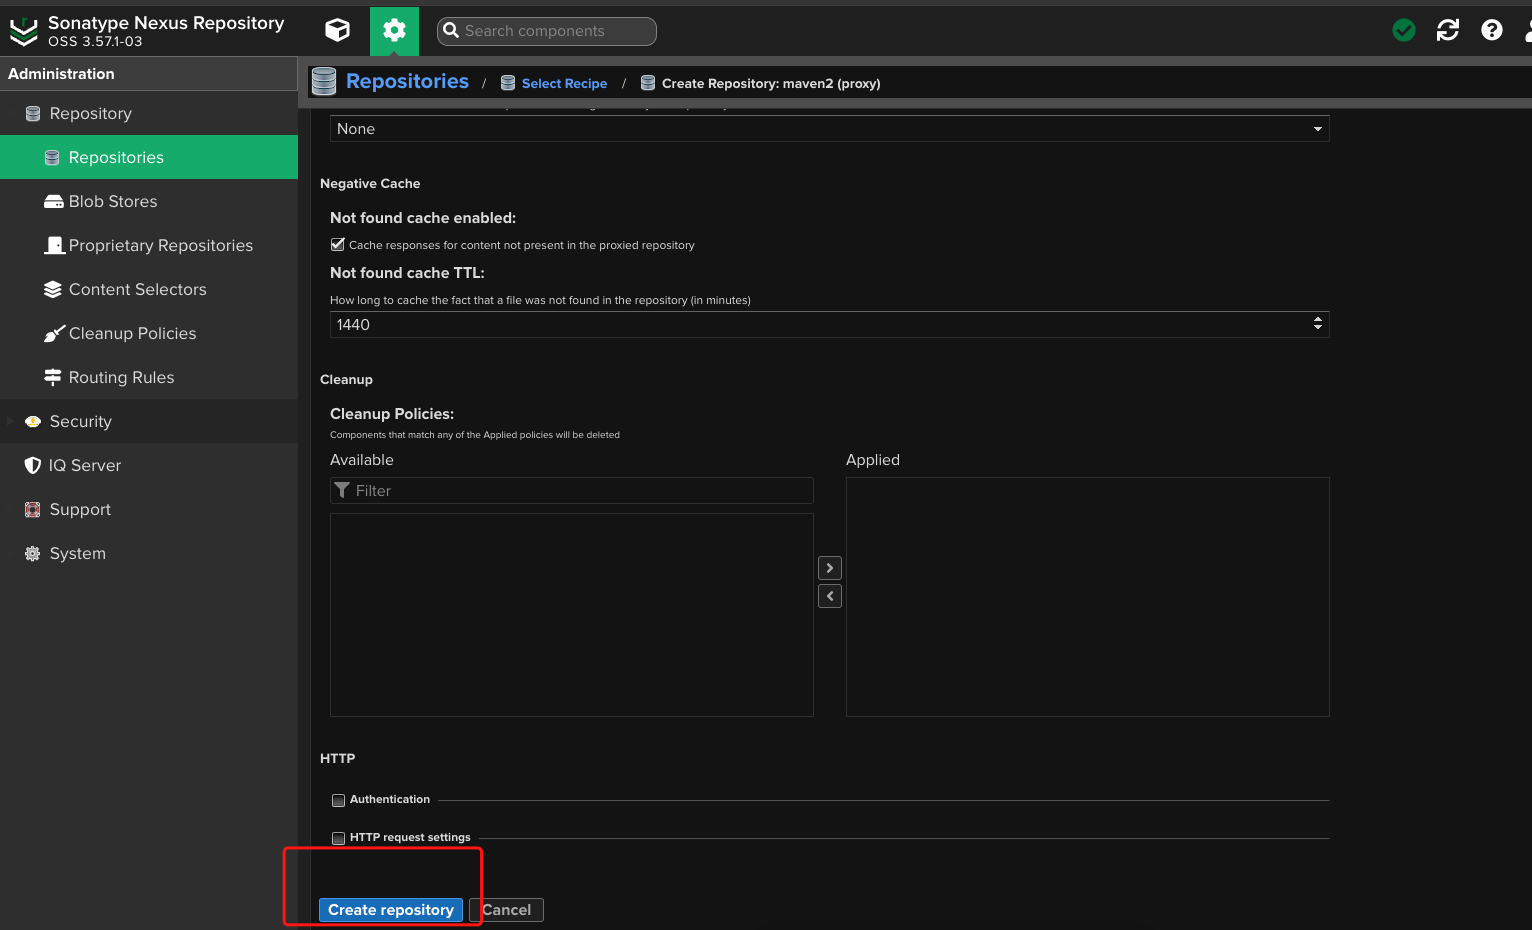
可以看到创建的仓库
maven-public配置
maven-public仓库是把其他几个仓库汇总到一起,然后项目使用nexus时只需要配置仓库组的地址即可
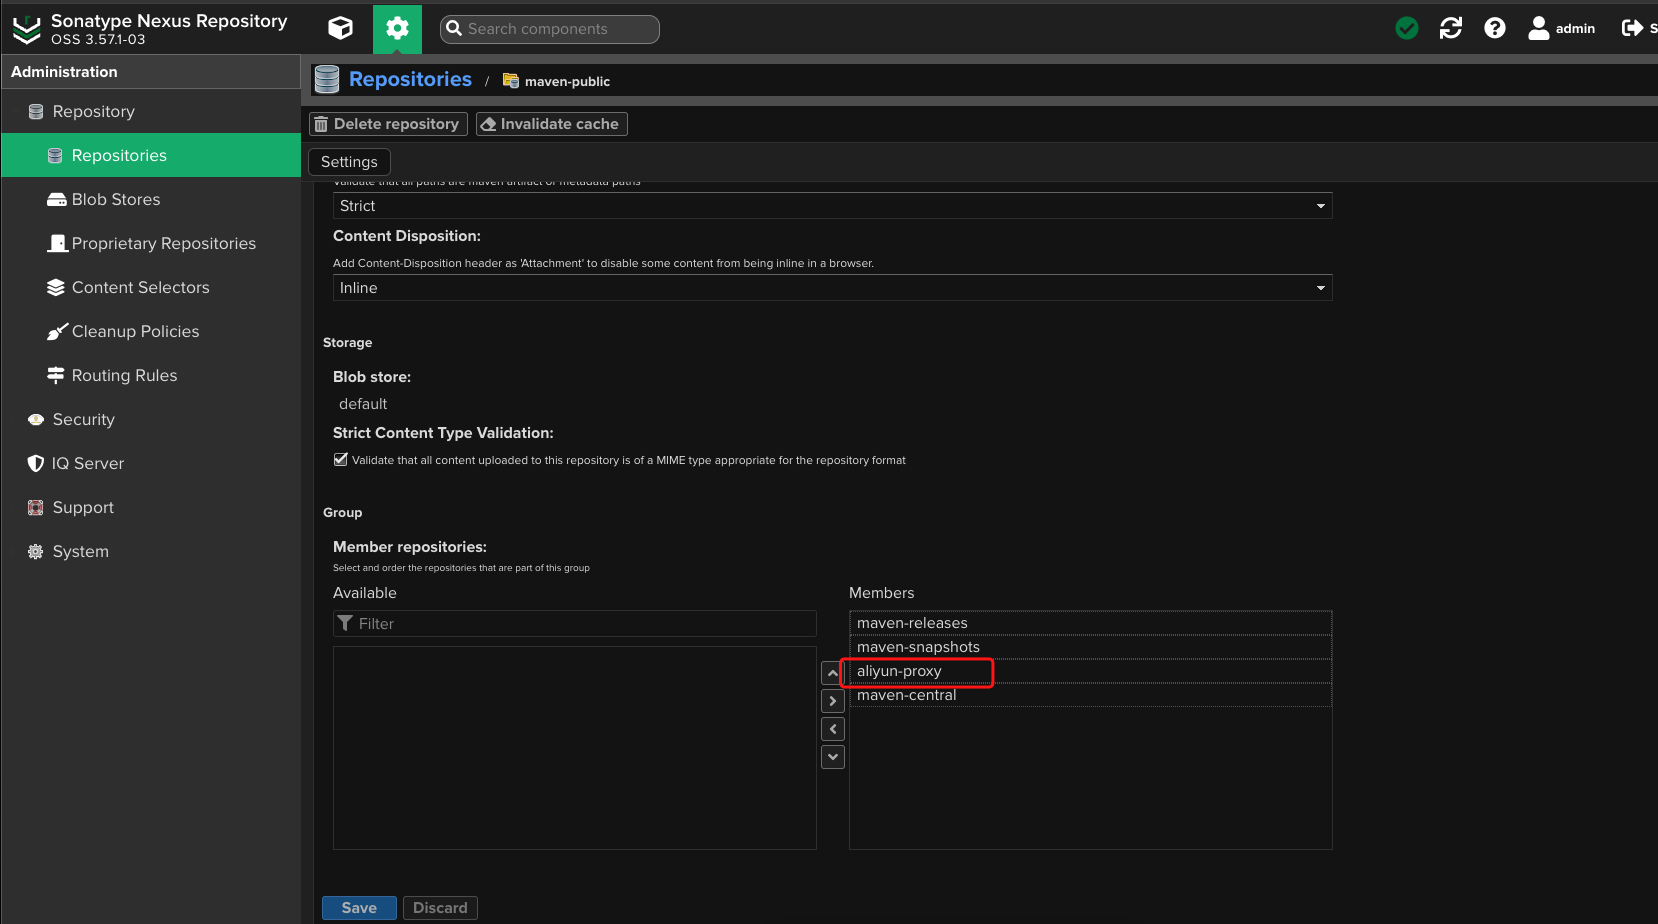
注意:这里的顺序会影响查找的顺序,所以我们吧aliyun-proxy放到maven-central上面,这样就能先从aliyun-proxy仓库中查找了
本地Maven配置私服
在本地maven的安装目录下找到conf下的setting.xml文件进行配置
servers修改配置
<servers>
  <!-- server
  | Specifies the authentication information to use when connecting to a particular server, identified by
  | a unique name within the system (referred to by the 'id' attribute below).
  |
  | NOTE: You should either specify username/password OR privateKey/passphrase, since these pairings are
  |       used together.
  |
  <server>
  <id>deploymentRepo</id>
  <username>repouser</username>
  <password>repopwd</password>
</server>
  -->

  <!-- Another sample, using keys to authenticate.
  <server>
  <id>siteServer</id>
  <privateKey>/path/to/private/key</privateKey>
  <passphrase>optional; leave empty if not used.</passphrase>
</server>
  -->

  <!-- 配置访问私服的用户名和密码 -->
  <server>
    <!-- id随便填写,唯一就好,后面配置会用到 -->
    <id>self-nuxus</id>
    <username>admin</username>
    <password>admin123</password>
  </server>

</servers>
profiles修改配置
<profiles>
  <!-- profile
  | Specifies a set of introductions to the build process, to be activated using one or more of the
  | mechanisms described above. For inheritance purposes, and to activate profiles via <activatedProfiles/>
  | or the command line, profiles have to have an ID that is unique.
  |
  | An encouraged best practice for profile identification is to use a consistent naming convention
  | for profiles, such as 'env-dev', 'env-test', 'env-production', 'user-jdcasey', 'user-brett', etc.
  | This will make it more intuitive to understand what the set of introduced profiles is attempting
  | to accomplish, particularly when you only have a list of profile id's for debug.
  |
  | This profile example uses the JDK version to trigger activation, and provides a JDK-specific repo.
  <profile>
  <id>jdk-1.4</id>

  <activation>
  <jdk>1.4</jdk>
</activation>

  <repositories>
  <repository>
  <id>jdk14</id>
  <name>Repository for JDK 1.4 builds</name>
  <url>http://www.myhost.com/maven/jdk14</url>
  <layout>default</layout>
  <snapshotPolicy>always</snapshotPolicy>
</repository>
</repositories>
</profile>
  -->

  <!--
  | Here is another profile, activated by the system property 'target-env' with a value of 'dev',
  | which provides a specific path to the Tomcat instance. To use this, your plugin configuration
  | might hypothetically look like:
  |
  | ...
  | <plugin>
  |   <groupId>org.myco.myplugins</groupId>
  |   <artifactId>myplugin</artifactId>
  |
  |   <configuration>
  |     <tomcatLocation>${tomcatPath}</tomcatLocation>
  |   </configuration>
  | </plugin>
  | ...
  |
  | NOTE: If you just wanted to inject this configuration whenever someone set 'target-env' to
  |       anything, you could just leave off the <value/> inside the activation-property.
  |
  <profile>
  <id>env-dev</id>

  <activation>
  <property>
  <name>target-env</name>
  <value>dev</value>
</property>
</activation>

  <properties>
  <tomcatPath>/path/to/tomcat/instance</tomcatPath>
</properties>
</profile>
  -->
  <profile>
    <!-- id唯一就好后面要用到 -->
    <id>my-nuxus</id>
    <!-- 远程仓库列表 -->
    <repositories>
      <repository>
        <id>self-nexus</id>
        <name>Nexus Central</name>
        <!-- 虚拟的URL形式,指向镜像的URL-->
        <url>http://127.0.0.1:8081/repository/maven-public/</url>
        <!-- 表示可以从这个仓库下载releases版本的构件-->
        <releases>
          <enabled>true</enabled>
        </releases>
        <!-- 表示可以从这个仓库下载snapshot版本的构件 -->
        <snapshots>
          <enabled>true</enabled>
        </snapshots>
      </repository>
    </repositories>

  </profile>

</profiles>

<activeProfiles>
  <!--需要激活 <profile>中的ID才生效-->
  <activeProfile>my-nuxus</activeProfile>
</activeProfiles>

<!-- activeProfiles
| List of profiles that are active for all builds.
|
<activeProfiles>
<activeProfile>alwaysActiveProfile</activeProfile>
<activeProfile>anotherAlwaysActiveProfile</activeProfile>
</activeProfiles>
-->
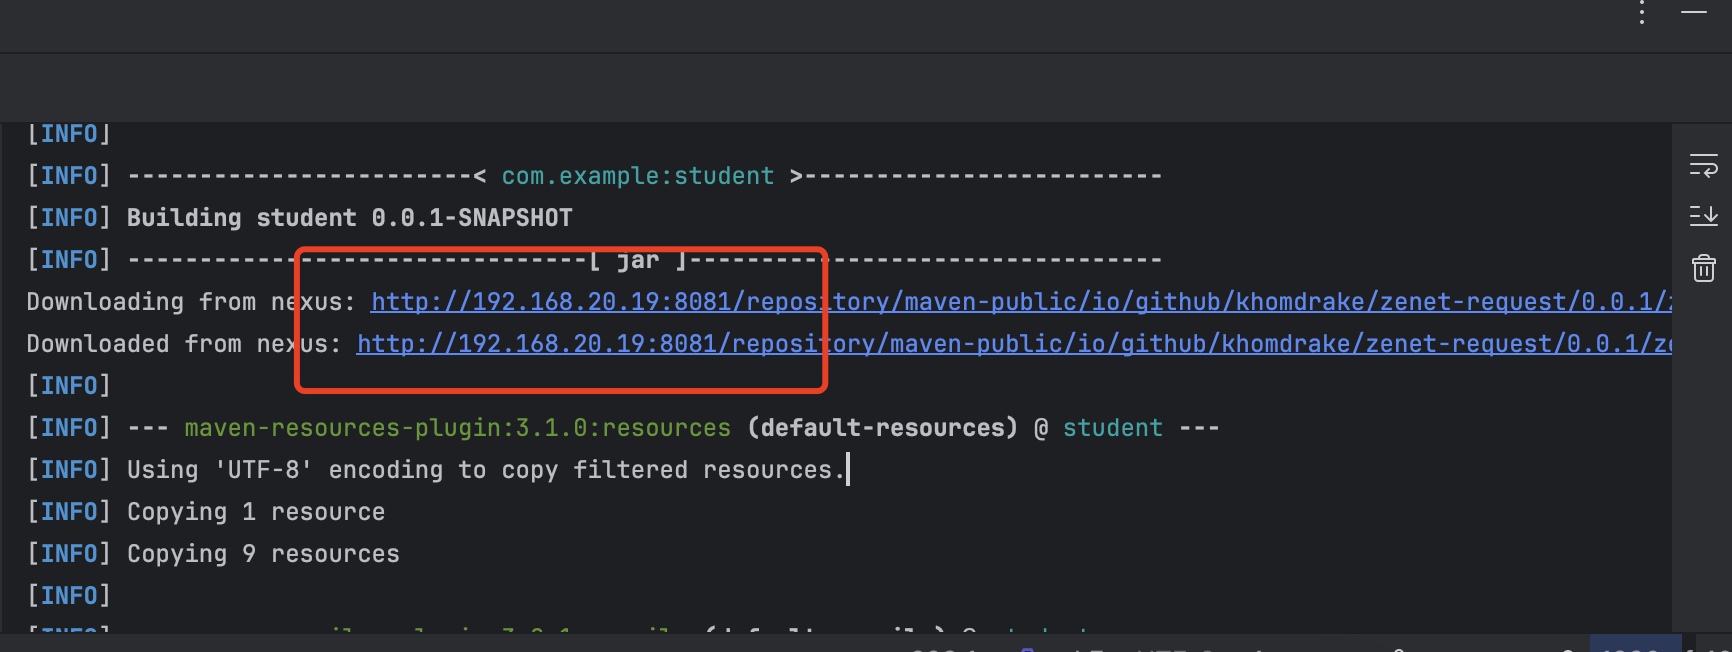
从私服中获取依赖
这样本地项目就可以从nexus私服中下载依赖
我这里配置的私服地址是192.168.20.19,大家自己是不是对应自己的私服地址就可以了
上传到依赖到私服
添加配置
需要上传的模块的pom文件中添加如下内容
<distributionManagement>
  <repository>
    <!--注意这个id一定要填写我们maven的setting.xml当中配置的id-->
    <id>self-maven</id>
    <url>http://ip:port/repository/maven-releases/</url>
  </repository>
  <snapshotRepository>
    <!--注意这个id一定要填写我们maven的setting.xml当中配置的id-->
    <id>self-maven</id>
    <url>http://ip:port/repository/maven-snapshots/</url>
  </snapshotRepository>
</distributionManagement>
标签解释
- distributionManagement:负责将指定的构件部署到 Nexus 指定的仓库中。
- repository:代表上传release版本存储的仓库地址
- snapshotRepository:代表上传snapshot版本存储的仓库地址
- 标签中的id:是上面我们配置的server id,maven会通过这个id去server中拿用户名密码去访问私服仓库
- 标签中的url:是对应仓库的地址,注意对应仓库,弄错了会传不上去
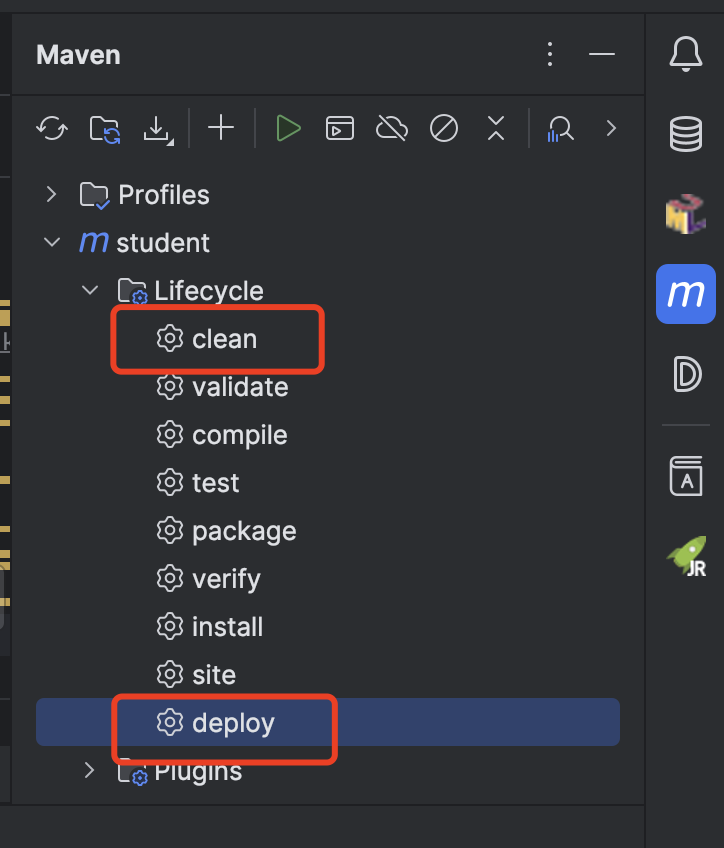
idea中执行deploy
在idea中先执行clear,然后执行deploy就可以上传到私服仓库了
nexus中查看结果


 2万+
2万+


 被折叠的 条评论
为什么被折叠?
被折叠的 条评论
为什么被折叠?
 到【灌水乐园】发言


