


前言:
最近在学校鸿蒙ark ui 框架 因为要参加一个比赛 所以就学习了一个晚上 就写了一个demo 我觉得有必要分享给各位 。废话不多说我们正式开始
推荐一款实用型免费小程序工具日常工具大全
作者:坚果派_xq9527
链接:https://juejin.cn/post/7252591697514692645
效果图


具体代码实现
底部导航
Row() {
  Column(){
    Image((this.SelectPos==0?$r('app.media.ic_main_tab_company_pre'):$r('app.media.ic_main_tab_company_nor')))
      .width(60).height(60)
    Text('职位')
      .size({ width: '100%', height: 60 }).textAlign(TextAlign.Center)
      .fontSize(20)
      .fontColor((this.SelectPos==0?Color.Green:Color.Black))
  }
  .layoutWeight(1)
  .backgroundColor(0xFFEFD5)
  .height("100%")
  .onClick(this.IndexClick.bind(this))


  Column(){
    Image((this.SelectPos==1?$r('app.media.ic_main_tab_find_pre'):$r('app.media.ic_main_tab_find_nor')))
      .width(60).height(60)
    Text('公司')
      .size({ width: '100%', height: 60 }).textAlign(TextAlign.Center)
      .fontSize(20)
      .fontColor((this.SelectPos==1?Color.Green:Color.Black))
  }
  .layoutWeight(1)
  .backgroundColor(0xFFEFD5)
  .height("100%")
  .onClick(this.messageClick.bind(this))


  Column(){
    Image((this.SelectPos==2?$r('app.media.ic_main_tab_contacts_pre'):$r('app.media.ic_main_tab_contacts_nor')))
      .width(60).height(60)
    Text('消息')
      .size({ width: '100%', height: 60 }).textAlign(TextAlign.Center)
      .fontSize(20)
      .fontColor((this.SelectPos==2?Color.Green:Color.Black))
  }
  .layoutWeight(1)
  .backgroundColor(0xFFEFD5)
  .height("100%")
  .onClick(this.myClick.bind(this))
}.alignItems(VerticalAlign.Bottom).width('100%').height(120).margin({top:0,right:0,bottom:10,left:0})
底部导航我们用row和Column 来实现即可 一个人横向线性布局然后嵌套 3 个纵向线性布局即可2.0 切换逻辑
import CompanylistComponent from '../view/CompanylistComponent';
import MessageListComponent from '../view/MessageListComponent';
import PositionListComponent from '../view/PositionListComponent';


@Entry
@Component
struct ListIndex {
  private controller: TabsController = new TabsController()
  @State SelectPos:number=0;
  public IndexClick(){
    this.SelectPos=0;
    this.controller.changeIndex(0)
  }
  public messageClick(){
    this.SelectPos=1;
    this.controller.changeIndex(1)
  }
  public myClick(){
    this.SelectPos=2;
    this.controller.changeIndex(2)
  }


  build() {
    Flex({ direction: FlexDirection.Column, alignItems: ItemAlign.Center, justifyContent: FlexAlign.Center }) {
      Tabs({ controller: this.controller }) {
        TabContent() {
          PositionListComponent()


        }.tabBar('首页')
        TabContent() {
          CompanylistComponent()


        }.tabBar('消息')
        TabContent() {
           MessageListComponent()
        }.tabBar('我的')


      }
      .scrollable(false)
      .barHeight(0)
      .animationDuration(0)


      Row() {
        Column(){
          Image((this.SelectPos==0?$r('app.media.ic_main_tab_company_pre'):$r('app.media.ic_main_tab_company_nor')))
            .width(60).height(60)
          Text('职位')
            .size({ width: '100%', height: 60 }).textAlign(TextAlign.Center)
            .fontSize(20)
            .fontColor((this.SelectPos==0?Color.Green:Color.Black))
        }
        .layoutWeight(1)
        .backgroundColor(0xFFEFD5)
        .height("100%")
        .onClick(this.IndexClick.bind(this))


        Column(){
          Image((this.SelectPos==1?$r('app.media.ic_main_tab_find_pre'):$r('app.media.ic_main_tab_find_nor')))
            .width(60).height(60)
          Text('公司')
            .size({ width: '100%', height: 60 }).textAlign(TextAlign.Center)
            .fontSize(20)
            .fontColor((this.SelectPos==1?Color.Green:Color.Black))
        }
        .layoutWeight(1)
        .backgroundColor(0xFFEFD5)
        .height("100%")
        .onClick(this.messageClick.bind(this))


        Column(){
          Image((this.SelectPos==2?$r('app.media.ic_main_tab_contacts_pre'):$r('app.media.ic_main_tab_contacts_nor')))
            .width(60).height(60)
          Text('消息')
            .size({ width: '100%', height: 60 }).textAlign(TextAlign.Center)
            .fontSize(20)
            .fontColor((this.SelectPos==2?Color.Green:Color.Black))
        }
        .layoutWeight(1)
        .backgroundColor(0xFFEFD5)
        .height("100%")
        .onClick(this.myClick.bind(this))
      }.alignItems(VerticalAlign.Bottom).width('100%').height(120).margin({top:0,right:0,bottom:10,left:0})


    }
    .width('100%')
    .height('100%')
  }
}
切换逻辑就用到tab TabContent 来实现 详细资料参考“Tabs”,“TabContent”的官方文档
2.1 Tabs和按钮联动问题实现
我们在定义一个全局变量SelectPos为当前选择的索引,当点击按钮的时候对当前索引进行赋值,并对Image和字体颜色进行改变,全部代码如下
private controller: TabsController = new TabsController()
@State SelectPos:number=0;
public IndexClick(){
this.SelectPos=0;
this.controller.changeIndex(0)
}
public messageClick(){
this.SelectPos=1;
this.controller.changeIndex(1)
}
public myClick(){
this.SelectPos=2;
this.controller.changeIndex(2)
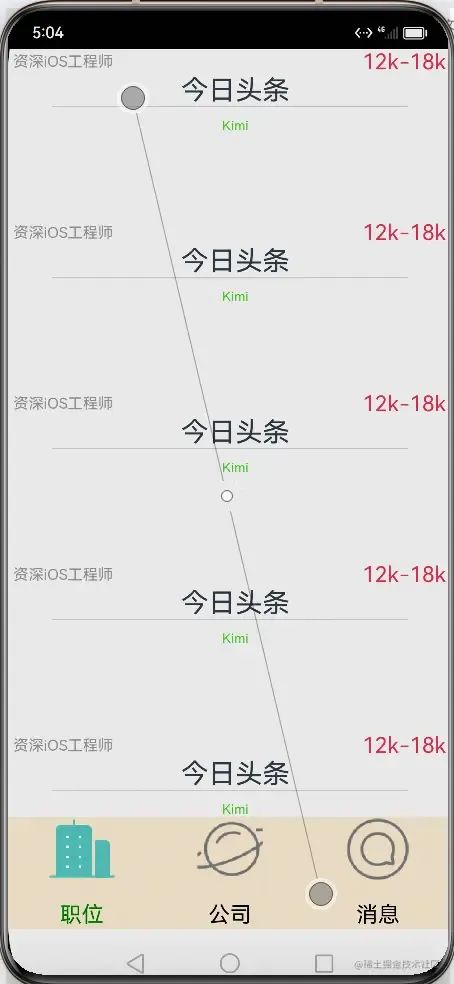
}效果如图

职位模块列表实现
这个模块我们要使用list 组件来实现 类似flutter 里面的listview 也就是滑动列表组件
list 组件布局代码
/**
 *
 * 创建人:xuqing
 * 创建时间:
 * 类说明 职位模块
 *
 */


import * as commonConst from '../common/CommonConstants';
import { PositionDataSource } from '../viewmodel/PositionDataSource';
@Component
export default struct PositionsList {
  @Provide positionListData: PositionDataSource = new PositionDataSource();
  private startTouchOffsetY: number = 0;
  private endTouchOffsetY: number = 0;
  private username:String="";
  private title:String="";


  build() {
      List({ space: commonConst.LIST_ITEM_SPACE }) {
        LazyForEach(this.positionListData , (item) => {
          ListItem() {
            Row() {
              Column() {
                Row() {
                  Text(item?.name).fontSize(14).fontColor($r('app.color.gray'))
                  Text(item?.salary).fontSize(20).fontColor($r('app.color.freshRed'))
                    .margin({left:220})
                    .align(Alignment.BottomStart)
                }.justifyContent(FlexAlign.SpaceAround)
                .width(commonConst.GOODS_LIST_WIDTH)


                Text(item?.cname)
                  .fontSize(25)
                  .margin({ left: 10 })
                Divider().width('80%')
                Text(item?.username)
                  .fontColor($r('app.color.greentext'))
                  .fontSize(12)
                  .margin({ left:10, top: 10 })
              }
              //.padding(commonConst.GOODS_LIST_PADDING)
              .width(commonConst.LAYOUT_WIDTH_OR_HEIGHT)
              .height(commonConst.LAYOUT_WIDTH_OR_HEIGHT)
              .justifyContent(FlexAlign.Start)
            }
            .justifyContent(FlexAlign.Center)
            .height(commonConst.GOODS_LIST_HEIGHT)
            .width(commonConst.LAYOUT_WIDTH_OR_HEIGHT)
          }
          .onTouch((event: TouchEvent) => {
            switch (event.type) {
              case TouchType.Down:
                this.startTouchOffsetY = event.touches[0].y;
                break;
              case TouchType.Up:
                this.startTouchOffsetY = event.touches[0].y;
                break;
              case TouchType.Move:
                if(this.startTouchOffsetY - this.endTouchOffsetY > 0) {
                  this.positionListData.pushData();
                }
                break;
            }
          })


        })
      }
      .width(commonConst.GOODS_LIST_WIDTH)
  }
}
list组件里里面的每个item的布局一样 我们这边的布局就是row嵌套 Column 和 row实现的效果
数据来源viewmodel
这里的model 类似我们flutter 里面model和Java里面bean类
export const initTabBarData = [$r('app.string.mobile_phone'),$r('app.string.clothes'),$r('app.string.wear'),$r('app.string.home_furnishing')]


export interface PositionListItemType {
  name: Resource;
  cname: Resource;
  size: Resource;
  salary: Resource;
  username: Resource;
  title: Resource;
}


/**
 *
 * 公司职位
 *
 */
export const positionInitialList: PositionListItemType[] = [
  {
    name: $r('app.string.name'),
    cname: $r('app.string.cname'),
    size: $r('app.string.size'),
    salary: $r('app.string.salary'),
    username: $r('app.string.username'),
    title: $r('app.string.title'),
  },


  {
    name: $r('app.string.name'),
    cname: $r('app.string.cname'),
    size: $r('app.string.size'),
    salary: $r('app.string.salary'),
    username: $r('app.string.username'),
    title: $r('app.string.title'),
  },


  {
    name: $r('app.string.name'),
    cname: $r('app.string.cname'),
    size: $r('app.string.size'),
    salary: $r('app.string.salary'),
    username: $r('app.string.username'),
    title: $r('app.string.title'),
  },


  {
    name: $r('app.string.name'),
    cname: $r('app.string.cname'),
    size: $r('app.string.size'),
    salary: $r('app.string.salary'),
    username: $r('app.string.username'),
    title: $r('app.string.title'),
  },

]
DataSource 为了配合list的懒加载我们需要一个PositionDataSource 来处理我们的数据model
import { positionInitialList, PositionListItemType } from './PositionData';
import { MAGNIFICATION,  MAX_DATA_LENGTH } from '../common/CommonConstants';


/**
* create a List range
*/
const createListRange = () => {
 let result = [];
 for (let i = 0; i < MAGNIFICATION; i++) {
   result = [...result, ...positionInitialList];
 }
 return result;
}


/**
* LazyLoad Class
*/
class BasicDataSource implements IDataSource {
 private listeners: DataChangeListener[] = []


 public totalCount(): number {
   return 0;
 }


 public getData(index: number): PositionListItemType {
   return undefined;
 }


 public getPositionData(index: number): PositionListItemType {
   return undefined;
 }


 registerDataChangeListener(listener: DataChangeListener): void {
   if (this.listeners.indexOf(listener) < 0) {
     this.listeners.push(listener);
   }
 }


 unregisterDataChangeListener(listener: DataChangeListener): void {
   const position = this.listeners.indexOf(listener);
   if (position >= 0) {
     this.listeners.splice(position, 1);
   }
 }


 notifyDataReload(): void {
   this.listeners.forEach(listener => {
     listener.onDataReloaded();
   })
 }


 notifyDataAdd(index: number): void {
   this.listeners.forEach(listener => {
     listener.onDataAdd(index);
   })
 }


 notifyDataChange(index: number): void {
   this.listeners.forEach(listener => {
     listener.onDataChange(index);
   })
 }


 notifyDataDelete(index: number): void {
   this.listeners.forEach(listener => {
     listener.onDataDelete(index);
   })
 }


 notifyDataMove(from: number, to: number): void {
   this.listeners.forEach(listener => {
     listener.onDataMove(from, to);
   })
 }
}


export class PositionDataSource extends BasicDataSource {
 private listData = createListRange();


 public totalCount(): number {
   return this.listData.length;
 }


 public getData(index: number): PositionListItemType {
   return this.listData[index];
 }


 public pushData(): void {
   if(this.listData.length <  MAX_DATA_LENGTH) {
     this.listData = [...this.listData, ...positionInitialList];
     this.notifyDataAdd(this.listData.length - 1);
   }
 }
}
在view层的使用
/**
*
* 创建人:xuqing
* 创建时间:
* 类说明 职位模块
*
*/
import * as commonConst from '../common/CommonConstants';
import { PositionDataSource } from '../viewmodel/PositionDataSource';
@Component
export default struct PositionsList {
@Provide positionListData: PositionDataSource = new PositionDataSource();
private startTouchOffsetY: number = 0;
private endTouchOffsetY: number = 0;
private username:String="";
private title:String="";
build() {
List({ space: commonConst.LIST_ITEM_SPACE }) {
LazyForEach(this.positionListData , (item) => {
ListItem() {
Row() {
Column() {
Row() {
Text(item?.name).fontSize(14).fontColor($r('app.color.gray'))
Text(item?.salary).fontSize(20).fontColor($r('app.color.freshRed'))
.margin({left:220})
.align(Alignment.BottomStart)
}.justifyContent(FlexAlign.SpaceAround)
.width(commonConst.GOODS_LIST_WIDTH)
Text(item?.cname)
.fontSize(25)
.margin({ left: 10 })
Divider().width('80%')
Text(item?.username)
.fontColor($r('app.color.greentext'))
.fontSize(12)
.margin({ left:10, top: 10 })
}
//.padding(commonConst.GOODS_LIST_PADDING)
.width(commonConst.LAYOUT_WIDTH_OR_HEIGHT)
.height(commonConst.LAYOUT_WIDTH_OR_HEIGHT)
.justifyContent(FlexAlign.Start)
}
.justifyContent(FlexAlign.Center)
.height(commonConst.GOODS_LIST_HEIGHT)
.width(commonConst.LAYOUT_WIDTH_OR_HEIGHT)
}
.onTouch((event: TouchEvent) => {
switch (event.type) {
case TouchType.Down:
this.startTouchOffsetY = event.touches[0].y;
break;
case TouchType.Up:
this.startTouchOffsetY = event.touches[0].y;
break;
case TouchType.Move:
if(this.startTouchOffsetY - this.endTouchOffsetY > 0) {
this.positionListData.pushData();
}
break;
}
})
})
}
.width(commonConst.GOODS_LIST_WIDTH)
}
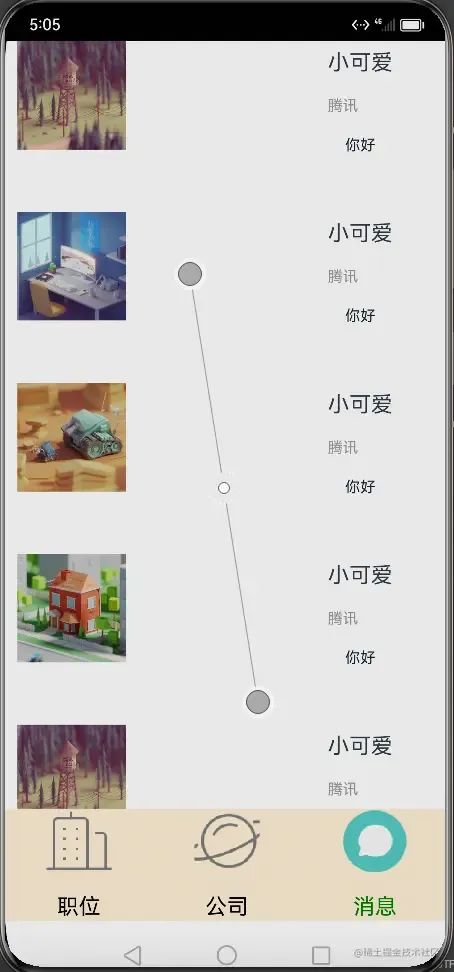
}我们职位模块就搞定了 因为剩下公司模块和消息模块都是类似的写法 我这里就不展开讲了。
最后总结:
鸿蒙的 ark ui 非常类似flutter 这种声明式ui 所有的布局都是代码编写的和传统的布局和逻辑分开有些区别 刚开始上手的时候可能不适应,慢慢就习惯了 还有一点 代码嵌套 这个其实可以把每个组件抽离出来就可以解决鸿蒙的ark ui. 也有类似swift ui 的画布 我们的布局代码 保存后可以在右边进行预览查看 效果比传统命令式编程效率也高不少。后呢 希望我都文章能帮助到各位同学工作和学习 如果你觉得文章还不错麻烦给我三连 关注点赞和转发 谢谢
关注我获取更多知识或者投稿


 7913
7913


 被折叠的 条评论
为什么被折叠?
被折叠的 条评论
为什么被折叠?
 到【灌水乐园】发言


