


先来看看一个简单的用户登录Demo:
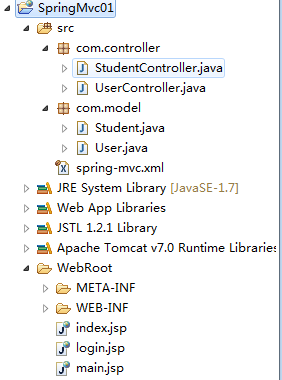
工程目录结构:
User类实体:
package com.model;

public class User {
    private int id;
    private String userName;
    private String password;

    public User() {
        super();
    }

    public User(String userName, String password) {
        super();
        this.userName = userName;
        this.password = password;
    }

    public int getId() {
        return id;
    }
    public void setId(int id) {
        this.id = id;
    }
    public String getUserName() {
        return userName;
    }
    public void setUserName(String userName) {
        this.userName = userName;
    }
    public String getPassword() {
        return password;
    }
    public void setPassword(String password) {
        this.password = password;
    }

}
web.xml配置文件:
<?xml version="1.0" encoding="UTF-8"?>
<web-app xmlns:xsi="http://www.w3.org/2001/XMLSchema-instance"
    xmlns="http://java.sun.com/xml/ns/javaee"
    xsi:schemaLocation="http://java.sun.com/xml/ns/javaee http://java.sun.com/xml/ns/javaee/web-app_3_0.xsd"
    id="WebApp_ID" version="3.0">
    <display-name>SpringMvc</display-name>
    <welcome-file-list>
        <welcome-file>index.jsp</welcome-file>
    </welcome-file-list>

    <servlet>
        <servlet-name>springMVC</servlet-name>
        <servlet-class>org.springframework.web.servlet.DispatcherServlet</servlet-class>
        <init-param>
            <param-name>contextConfigLocation</param-name>
            <param-value>classpath:spring-mvc.xml</param-value>
        </init-param>
        <load-on-startup>1</load-on-startup>
    </servlet>

    <servlet-mapping>
        <servlet-name>springMVC</servlet-name>
        <url-pattern>*.do</url-pattern>
    </servlet-mapping>

    <filter>
        <filter-name>characterEncodingFilter</filter-name>
        <filter-class>org.springframework.web.filter.CharacterEncodingFilter</filter-class>
        <init-param>
            <param-name>encoding</param-name>
            <param-value>utf-8</param-value>
        </init-param>
         <init-param>
           <param-name>forceEncoding</param-name>
           <param-value>true</param-value>
       </init-param>
    </filter>
    <filter-mapping>
        <filter-name>characterEncodingFilter</filter-name>
        <url-pattern>*.do</url-pattern>
    </filter-mapping>
</web-app>
主要是添加了一个characterEncodingFilter过滤器,对任意*.do的url资源的请求体进行utf-8编码。
Spring中的characterEncodingFilter过滤器能很好的帮我们解决项目中的中文乱码问题。使用方法同上,这里的设置只是应用于请求体中的中文乱码解决,非请求参数中的中文乱码解决。
作用是,当forceEncoding为false的前提下(默认为false),当request没有指定content-type或content-type不含编码时,该filter将会为这个request设定请求体的编码为filter的encoding值。
spring-mvc.xml配置文件:
<?xml version="1.0" encoding="UTF-8"?>
<beans xmlns="http://www.springframework.org/schema/beans"
    xmlns:xsi="http://www.w3.org/2001/XMLSchema-instance"
    xmlns:p="http://www.springframework.org/schema/p"
    xmlns:context="http://www.springframework.org/schema/context"
    xmlns:mvc="http://www.springframework.org/schema/mvc"
    xsi:schemaLocation="
        http://www.springframework.org/schema/beans
        http://www.springframework.org/schema/beans/spring-beans.xsd
        http://www.springframework.org/schema/mvc
        http://www.springframework.org/schema/mvc/spring-mvc.xsd
        http://www.springframework.org/schema/context
        http://www.springframework.org/schema/context/spring-context.xsd">
    <!-- 加载注解驱动 -->
    <mvc:annotation-driven />
    <!-- 使用注解的包,包括子集 -->
    <context:component-scan base-package="com.controller"/>
    <context:component-scan base-package="com.model"/>

    <!-- 配置视图解析器 -->
    <bean id="viewResolver" class="org.springframework.web.servlet.view.InternalResourceViewResolver">
        <property name="prefix" value="/WEB-INF/jsp/"/>
        <property name="suffix" value=".jsp"/>
    </bean>
</beans>
再来看看前台login.jsp页面,就是一个登录表单:
<%@ page language="java" import="java.util.*" pageEncoding="UTF-8"%>
<%
String path = request.getContextPath();
String basePath = request.getScheme()+"://"+request.getServerName()+":"+request.getServerPort()+path+"/";
%>

<!DOCTYPE HTML PUBLIC "-//W3C//DTD HTML 4.01 Transitional//EN">
<html>
  <head>
    <base href="<%=basePath%>">

    <title>My JSP 'login.jsp' starting page</title>

    <meta http-equiv="pragma" content="no-cache">
    <meta http-equiv="cache-control" content="no-cache">
    <meta http-equiv="expires" content="0">
    <meta http-equiv="keywords" content="keyword1,keyword2,keyword3">
    <meta http-equiv="description" content="This is my page">
    <!--
    <link rel="stylesheet" type="text/css" href="styles.css">
    -->

  </head>

  <body>
    <form action="${pageContext.request.contextPath }/user/login.do" method="post">
        <table align="center">
            <tr>
                <td>用户名:</td>
                <td><input type="text" name="userName"></td>
            </tr>
            <tr>
                <td>密码:</td>
                <td><input type="password" name="password"></td>
            </tr>
            <tr>
                <td>
                    <input type="submit" value="登录">
                </td>
            </tr>
        </table>
    </form>
  </body>
</html>
效果如下:
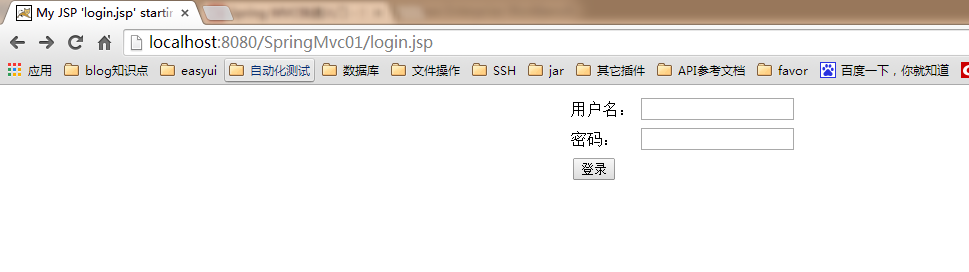
这里请求的url为项目下的/user/login.do资源,再来看看具体的url实现:
package com.controller;

import javax.servlet.http.Cookie;
import javax.servlet.http.HttpServletRequest;
import javax.servlet.http.HttpServletResponse;
import javax.servlet.http.HttpSession;

import org.springframework.stereotype.Controller;
import org.springframework.web.bind.annotation.RequestMapping;
import org.springframework.web.bind.annotation.ResponseBody;

import com.model.User;

@Controller
@RequestMapping("/user")
public class UserController {

    @RequestMapping("/login")
    public String login(HttpServletRequest request,HttpServletResponse response){
        System.out.println("---------登录验证--------");
        String userName = request.getParameter("userName");
        String password = request.getParameter("password");
        Cookie cookie = new Cookie("user", userName+"-"+password);

        User currentUser = new User(userName, password);

        cookie.setMaxAge(1*60*60*24*7);
        response.addCookie(cookie);

        HttpSession session = request.getSession();
        session.setAttribute("currentUser", currentUser);
        return "redirect:/main.jsp";
    }
}
这里使用@Controller注解声明一个控制器,使用@RequestMapping("/user")声明该控制器的url为project下的/user。在使用@RequestMapping("/login")声明类下的login方法的访问详细url为/user/login.do。
程序中主要是获取前台提交的userName、password参数值封装至cookie和session中,再通过return "redirect:/main.jsp"直接通过Spring MVC重定向到main.jsp文件。
再来看看main.jsp文件:
<%@ page language="java" import="java.util.*" pageEncoding="UTF-8"%>
<%
String path = request.getContextPath();
String basePath = request.getScheme()+"://"+request.getServerName()+":"+request.getServerPort()+path+"/";
%>

<!DOCTYPE HTML PUBLIC "-//W3C//DTD HTML 4.01 Transitional//EN">
<html>
  <head>
    <base href="<%=basePath%>">

    <title>My JSP 'login.jsp' starting page</title>

    <meta http-equiv="pragma" content="no-cache">
    <meta http-equiv="cache-control" content="no-cache">
    <meta http-equiv="expires" content="0">
    <meta http-equiv="keywords" content="keyword1,keyword2,keyword3">
    <meta http-equiv="description" content="This is my page">
    <!--
    <link rel="stylesheet" type="text/css" href="styles.css">
    -->

  </head>

  <body>
    您好,${currentUser.userName }
  </body>
</html>
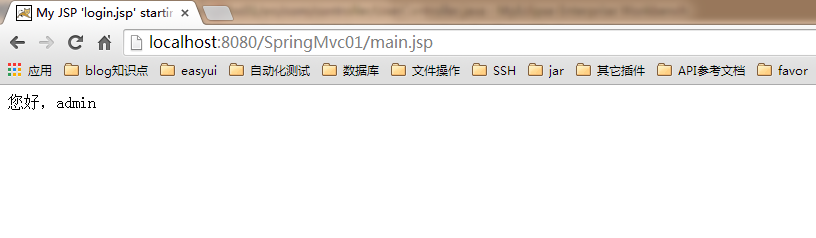
这里直接输出登录的用户名,登录成功页面如下:
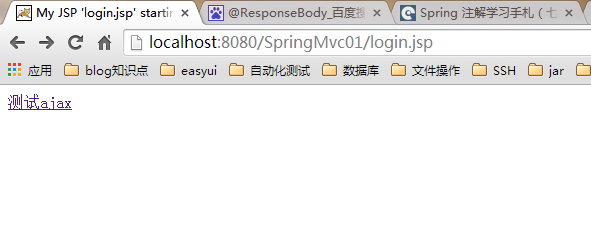
再来顺便看看Spring直接返回json数据的一个小Demo,前台界面很简单,只有一个href链接,请求路径为user/ajax.do。具体如下:
<%@ page language="java" import="java.util.*" pageEncoding="UTF-8"%>
<%
String path = request.getContextPath();
String basePath = request.getScheme()+"://"+request.getServerName()+":"+request.getServerPort()+path+"/";
%>

<!DOCTYPE HTML PUBLIC "-//W3C//DTD HTML 4.01 Transitional//EN">
<html>
  <head>
    <base href="<%=basePath%>">

    <title>My JSP 'login.jsp' starting page</title>

    <meta http-equiv="pragma" content="no-cache">
    <meta http-equiv="cache-control" content="no-cache">
    <meta http-equiv="expires" content="0">
    <meta http-equiv="keywords" content="keyword1,keyword2,keyword3">
    <meta http-equiv="description" content="This is my page">
    <!--
    <link rel="stylesheet" type="text/css" href="styles.css">
    -->

  </head>

  <body>
    <a href="user/ajax.do">测试ajax</a>

  </body>
</html>
后台具体实现:
package com.controller;

import javax.servlet.http.Cookie;
import javax.servlet.http.HttpServletRequest;
import javax.servlet.http.HttpServletResponse;
import javax.servlet.http.HttpSession;

import org.springframework.stereotype.Controller;
import org.springframework.web.bind.annotation.RequestMapping;
import org.springframework.web.bind.annotation.ResponseBody;

import com.model.User;

@Controller
@RequestMapping("/user")
public class UserController {

    @RequestMapping("/ajax")
    public @ResponseBody User ajax(){
        User user = new User("张三", "admin");
        return user;
    }
}
通过@ResponseBody注解,使得由Spring完成对象、协议的转换,可以讲指定的对象转换成指定协议的数据。加上@ResponseBody后,会直接返回json数据。效果如下:
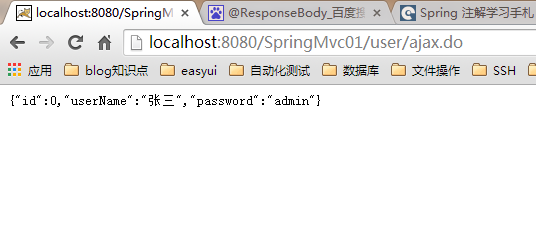
这里可以看出返回的user对象的json格式数据,完成了后台对象到json的转换。仅仅通过Spring的一句注解轻松实现。


 340
340

 被折叠的 条评论
为什么被折叠?
被折叠的 条评论
为什么被折叠?
 到【灌水乐园】发言


