


画布组件,我们可以做一些绘图和动画效果。2.9.0 起支持一套新 Canvas 2D 接口(需指定 type 属性),同时支持同层渲染,原有接口不再维护。相关api:获取 canvas 实例。
| 属性 | 类型 | 默认值 | 必填 | 说明 | 最低版本 |
|---|---|---|---|---|---|
| type | string | 否 | 指定 canvas 类型,支持 2d (2.9.0) 和 webgl (2.7.0) | 2.7.0 | |
| canvas-id | string | 否 | canvas 组件的唯一标识符,若指定了 type 则无需再指定该属性 | 1.0.0 | |
| disable-scroll | boolean | false | 否 | 当在 canvas 中移动时且有绑定手势事件时,禁止屏幕滚动以及下拉刷新 | 1.0.0 |
| bindtouchstart | eventhandle | 否 | 手指触摸动作开始 | 1.0.0 | |
| bindtouchmove | eventhandle | 否 | 手指触摸后移动 | 1.0.0 | |
| bindtouchend | eventhandle | 否 | 手指触摸动作结束 | 1.0.0 | |
| bindtouchcancel | eventhandle | 否 | 手指触摸动作被打断,如来电提醒,弹窗 | 1.0.0 | |
| bindlongtap | eventhandle | 否 | 手指长按 500ms 之后触发,触发了长按事件后进行移动不会触发屏幕的滚动 | 1.0.0 | |
| binderror | eventhandle | 否 | 当发生错误时触发 error 事件,detail = {errMsg} | 1.0.0 |
Bug & Tip
tip:canvas 标签默认宽度300px、高度150pxtip:同一页面中的 canvas-id 不可重复,如果使用一个已经出现过的 canvas-id,该 canvas 标签对应的画布将被隐藏并不再正常工作tip:请注意原生组件使用限制tip:开发者工具中默认关闭了 GPU 硬件加速,可在开发者工具的设置中开启“硬件加速”提高 WebGL 的渲染性能tip: WebGL 支持通过 getContext(‘webgl’, { alpha: true }) 获取透明背景的画布tip: Canvas 2D(新接口)需要显式设置画布宽高 (默认为 300x150)bug: 避免设置过大的宽高,在安卓下会有crash的问题
Canvas 2D 示例代码
index.wxml
<canvas
  type="2d"
  id="canvas"
  style="width: 300px; height: 300px;"
></canvas>
index.js
const app = getApp()

Page({
  data: {},

  onLoad: function () {
    this.position = {
      x: 150,
      y: 150,
      vx: 2,
      vy: 2
    }
    this.x = -100

    // 通过 SelectorQuery 获取 Canvas 节点
    wx.createSelectorQuery()
      .select('#canvas')
      .fields({
        node: true,
        size: true,
      })
      .exec(this.init.bind(this))
  },

  init(res) {
    const width = res[0].width
    const height = res[0].height

    const canvas = res[0].node
    const ctx = canvas.getContext('2d')

    const dpr = wx.getSystemInfoSync().pixelRatio
    canvas.width = width * dpr
    canvas.height = height * dpr
    ctx.scale(dpr, dpr)

    const renderLoop = () => {
      this.render(canvas, ctx)
      canvas.requestAnimationFrame(renderLoop)
    }
    canvas.requestAnimationFrame(renderLoop)

    const img = canvas.createImage()
    img.onload = () => {
      this._img = img
    }
    img.src = './car.png'
  },

  render(canvas, ctx) {
    ctx.clearRect(0, 0, 300, 300)
    this.drawBall(ctx)
    this.drawCar(ctx)
  },

  drawBall(ctx) {
    const p = this.position
    p.x += p.vx
    p.y += p.vy
    if (p.x >= 300) {
      p.vx = -2
    }
    if (p.x <= 7) {
      p.vx = 2
    }
    if (p.y >= 300) {
      p.vy = -2
    }
    if (p.y <= 7) {
      p.vy = 2
    }

    function ball(x, y) {
      ctx.beginPath()
      ctx.arc(x, y, 5, 0, Math.PI * 2)
      ctx.fillStyle = '#1aad19'
      ctx.strokeStyle = 'rgba(1,1,1,0)'
      ctx.fill()
      ctx.stroke()
    }

    ball(p.x, 150)
    ball(150, p.y)
    ball(300 - p.x, 150)
    ball(150, 300 - p.y)
    ball(p.x, p.y)
    ball(300 - p.x, 300 - p.y)
    ball(p.x, 300 - p.y)
    ball(300 - p.x, p.y)
  },

  drawCar(ctx) {
    if (!this._img) return
    if (this.x > 350) {
      this.x = -100
    }
    ctx.drawImage(this._img, this.x++, 150 - 25, 100, 50)
    ctx.restore()
  }
})
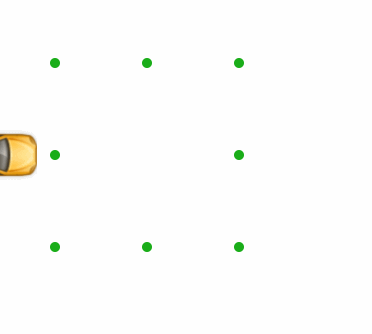
运行效果:
WebGL 示例代码
  <!-- canvas.wxml -->
  <canvas type="webgl" id="myCanvas"></canvas>
// canvas.js
Page({
  onReady() {
    const query = wx.createSelectorQuery()
    query.select('#myCanvas').node().exec((res) => {
      const canvas = res[0].node
      const gl = canvas.getContext('webgl')
      gl.clearColor(1, 0, 1, 1)
      gl.clear(gl.COLOR_BUFFER_BIT)
    })
  }
})
示例代码(旧的接口)
<!-- canvas.wxml -->
<canvas style="width: 300px; height: 200px;" canvas-id="firstCanvas"></canvas>
<!-- 当使用绝对定位时,文档流后边的 canvas 的显示层级高于前边的 canvas -->
<canvas style="width: 400px; height: 500px;" canvas-id="secondCanvas"></canvas>
<!-- 因为 canvas-id 与前一个 canvas 重复,该 canvas 不会显示,并会发送一个错误事件到 AppService -->
<canvas style="width: 400px; height: 500px;" canvas-id="secondCanvas" binderror="canvasIdErrorCallback"></canvas>
Page({
  canvasIdErrorCallback: function (e) {
    console.error(e.detail.errMsg)
  },
  onReady: function (e) {
    // 使用 wx.createContext 获取绘图上下文 context
    var context = wx.createCanvasContext('firstCanvas')

    context.setStrokeStyle("#00ff00")
    context.setLineWidth(5)
    context.rect(0, 0, 200, 200)
    context.stroke()
    context.setStrokeStyle("#ff0000")
    context.setLineWidth(2)
    context.moveTo(160, 100)
    context.arc(100, 100, 60, 0, 2 * Math.PI, true)
    context.moveTo(140, 100)
    context.arc(100, 100, 40, 0, Math.PI, false)
    context.moveTo(85, 80)
    context.arc(80, 80, 5, 0, 2 * Math.PI, true)
    context.moveTo(125, 80)
    context.arc(120, 80, 5, 0, 2 * Math.PI, true)
    context.stroke()
    context.draw()
  }
})
微信搜一搜【java1234】关注这个放荡不羁的程序员,关注后回复【资料】有我准备的一线大厂笔试面试资料以及简历模板。


 42万+
42万+


 被折叠的 条评论
为什么被折叠?
被折叠的 条评论
为什么被折叠?
 到【灌水乐园】发言


