


文章目录
0 前言
🔥 这两年开始毕业设计和毕业答辩的要求和难度不断提升,传统的毕设题目缺少创新和亮点,往往达不到毕业答辩的要求,这两年不断有学弟学妹告诉学长自己做的项目系统达不到老师的要求。
为了大家能够顺利以及最少的精力通过毕设,学长分享优质毕业设计项目,今天要分享的是
🚩 基于深度学习的植物识别算法研究与实现
🥇学长这里给一个题目综合评分(每项满分5分)
- 难度系数:4分
- 工作量:4分
- 创新点:3分
2 相关技术
2.1 VGG-Net模型
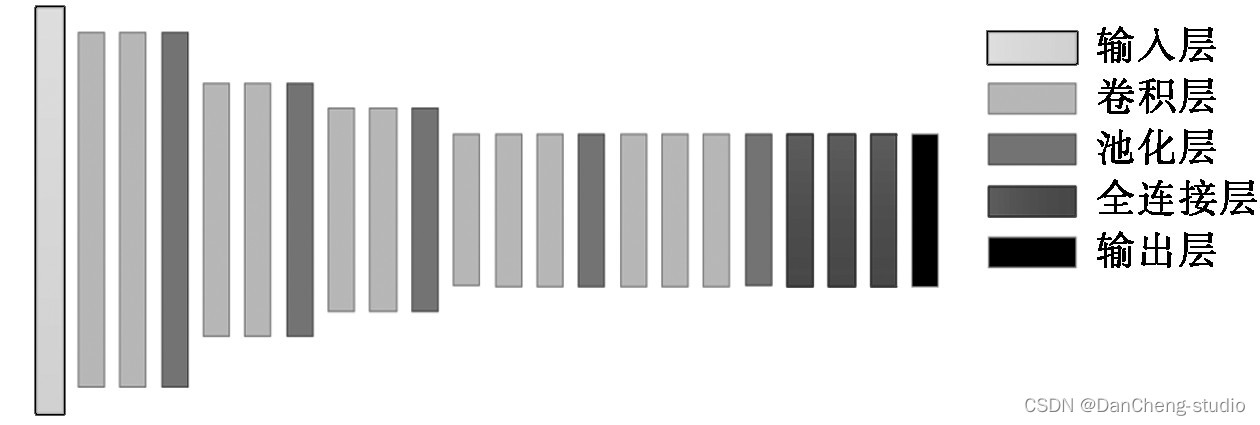
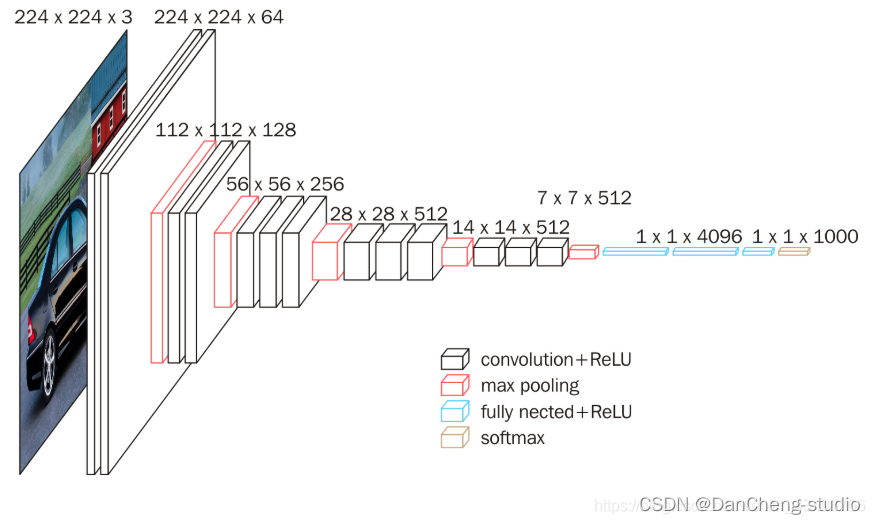
Google DeepMind公司研究员与牛津大学计算机视觉组在2014年共同研发出了一种全新的卷积神经网络–VGG-Net。在同年举办的ILSVRC比赛中,该网络结构模型在分类项目中取得了十分出色的成绩,由于其简洁性和实用性,使得其在当时迅速,飞快地成为了最受欢迎的卷积神经网络模型。VGG-Net卷积神经网络在近年来衍生出了A-E七种不同的层次结构,本次研究使用其中的D结构,也就是VGG-16Net结构,该结构中包含了13个卷积层,5个池化层和3个全连接层。针对所有的卷积层,使用相同的5x5大小的卷积核,针对所有的池化层,使用相同的3x3大小的池化核。VGG-Net结构如图所示。
2.2 VGG-Net在植物识别的优势
在针对植物识别问题上,VGG-Net有着一些相较于其他神经网络的优势,主要包括以下几点:
(1) 卷积核,池化核大小固定
网络中所有的卷积核大小固定为3x3,所有的池化核大小固定为5x5。这样在进行卷积和池化操作的时候,从数据中提取到的特征更加明显,同时在层与层的连接时,信息的丢失会更少,更加方便后续对于重要特征的提取和处理。
(2) 特征提取更全面
VGG-Net网络模型中包含了13个卷积层。卷积层数目越多,对于特征的提取更加的全面。由于需要对于植物的姿态、颜色等进行判定,植物的特征较多,需要在提取时更加的全面,细致,才有可能得到一个更加准确的判定。VGG-Net符合条件。
(3) 网络训练误差收敛速度较快
VGG-Net网络在训练时收敛速度相对较快,能够较快地得到预期的结果。具有这一特点的原因有两个,一个是网络中每一个卷积层和池化层中的卷积核大小与池化核大小固定,另一个就是对于各个隐藏层的参数初始化方法使用专门针对ReLU激活函数的Kaiming正态初始化方法。
3 VGG-Net的搭建
本次研究基于Pytorch深度学习框架进行网络的搭建,利用模块化的设计思想,构建一个类,来对于整个的网络进行结构上的封装。这样搭建的好处是可以隐藏实现的内部细节,提高代码的安全性,增强代码的复用效率,并且对于一些方法,通过在内部集成,可以方便之后对于其中方法的调用,提升代码的简洁性。 在网络搭建完成后,将数据集传入网络中进行训练,经过一段时间后即可得到植物识别的分类识别结果。
3.1 Tornado简介
Tornado全称Tornado Web Server,是一个用Python语言写成的Web服务器兼Web应用框架,由FriendFeed公司在自己的网站FriendFeed中使用,被Facebook收购以后框架在2009年9月以开源软件形式开放给大众。
(1) 优势
- 轻量级web框架
- 异步非阻塞IO处理方式
- 出色的抗负载能力
- 优异的处理性能,不依赖多进程/多线程,一定程度上解决C10K问题
- WSGI全栈替代产品,推荐同时使用其web框架和HTTP服务器
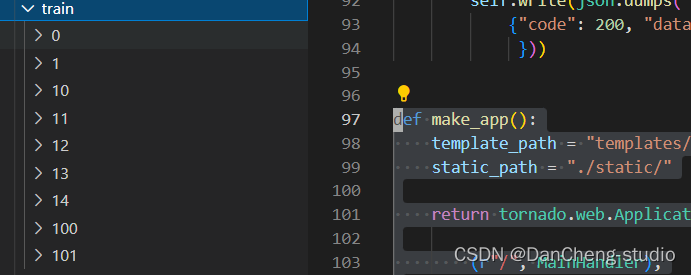
(2) 关键代码
class MainHandler(tornado.web.RequestHandler):
    def get(self):
        self.render("index.html")

    def post(self):
        keras.backend.clear_session()
        img = Image.open(BytesIO(self.request.files['image'][0]['body']))
        img = img
        b_img = Image.new('RGB', (224, 224), (255, 255, 255))
        size = img.size
        if size[0] >= size[1]:
            rate = 224 / size[0]
            new_size = (224, int(size[1] * rate))
            img = img.resize(new_size, Image.ANTIALIAS
                             ).convert("RGB")
            b_img.paste(img, (0, random.randint(0, 224 - new_size[1])))

        else:
            rate = 224 / size[1]
            new_size = (int(size[0] * rate), 224)
            img = img.resize(new_size, Image.ANTIALIAS
                             ).convert("RGB")
            b_img.paste(img, (random.randint(0, 224 - new_size[0]), 0))

        if self.get_argument("method", "mymodel") == "VGG16":
            Model = load_model("VGG16.h5")
        else:
            Model = load_model("InceptionV3.h5")

        data = orc_img(Model,b_img)
        self.write(json.dumps(
            {"code": 200, "data": data
             }))

        def make_app():
    template_path = "templates/"
    static_path = "./static/"

    return tornado.web.Application([

        (r"/", MainHandler),

    ], template_path=template_path, static_path=static_path, debug=True)


def run_server(port=8000):
    tornado.options.parse_command_line()
    app = make_app()
    app.listen(port)
    print("\n服务已启动 请打开 http://127.0.0.1:8000 ")
    tornado.ioloop.IOLoop.current().start()
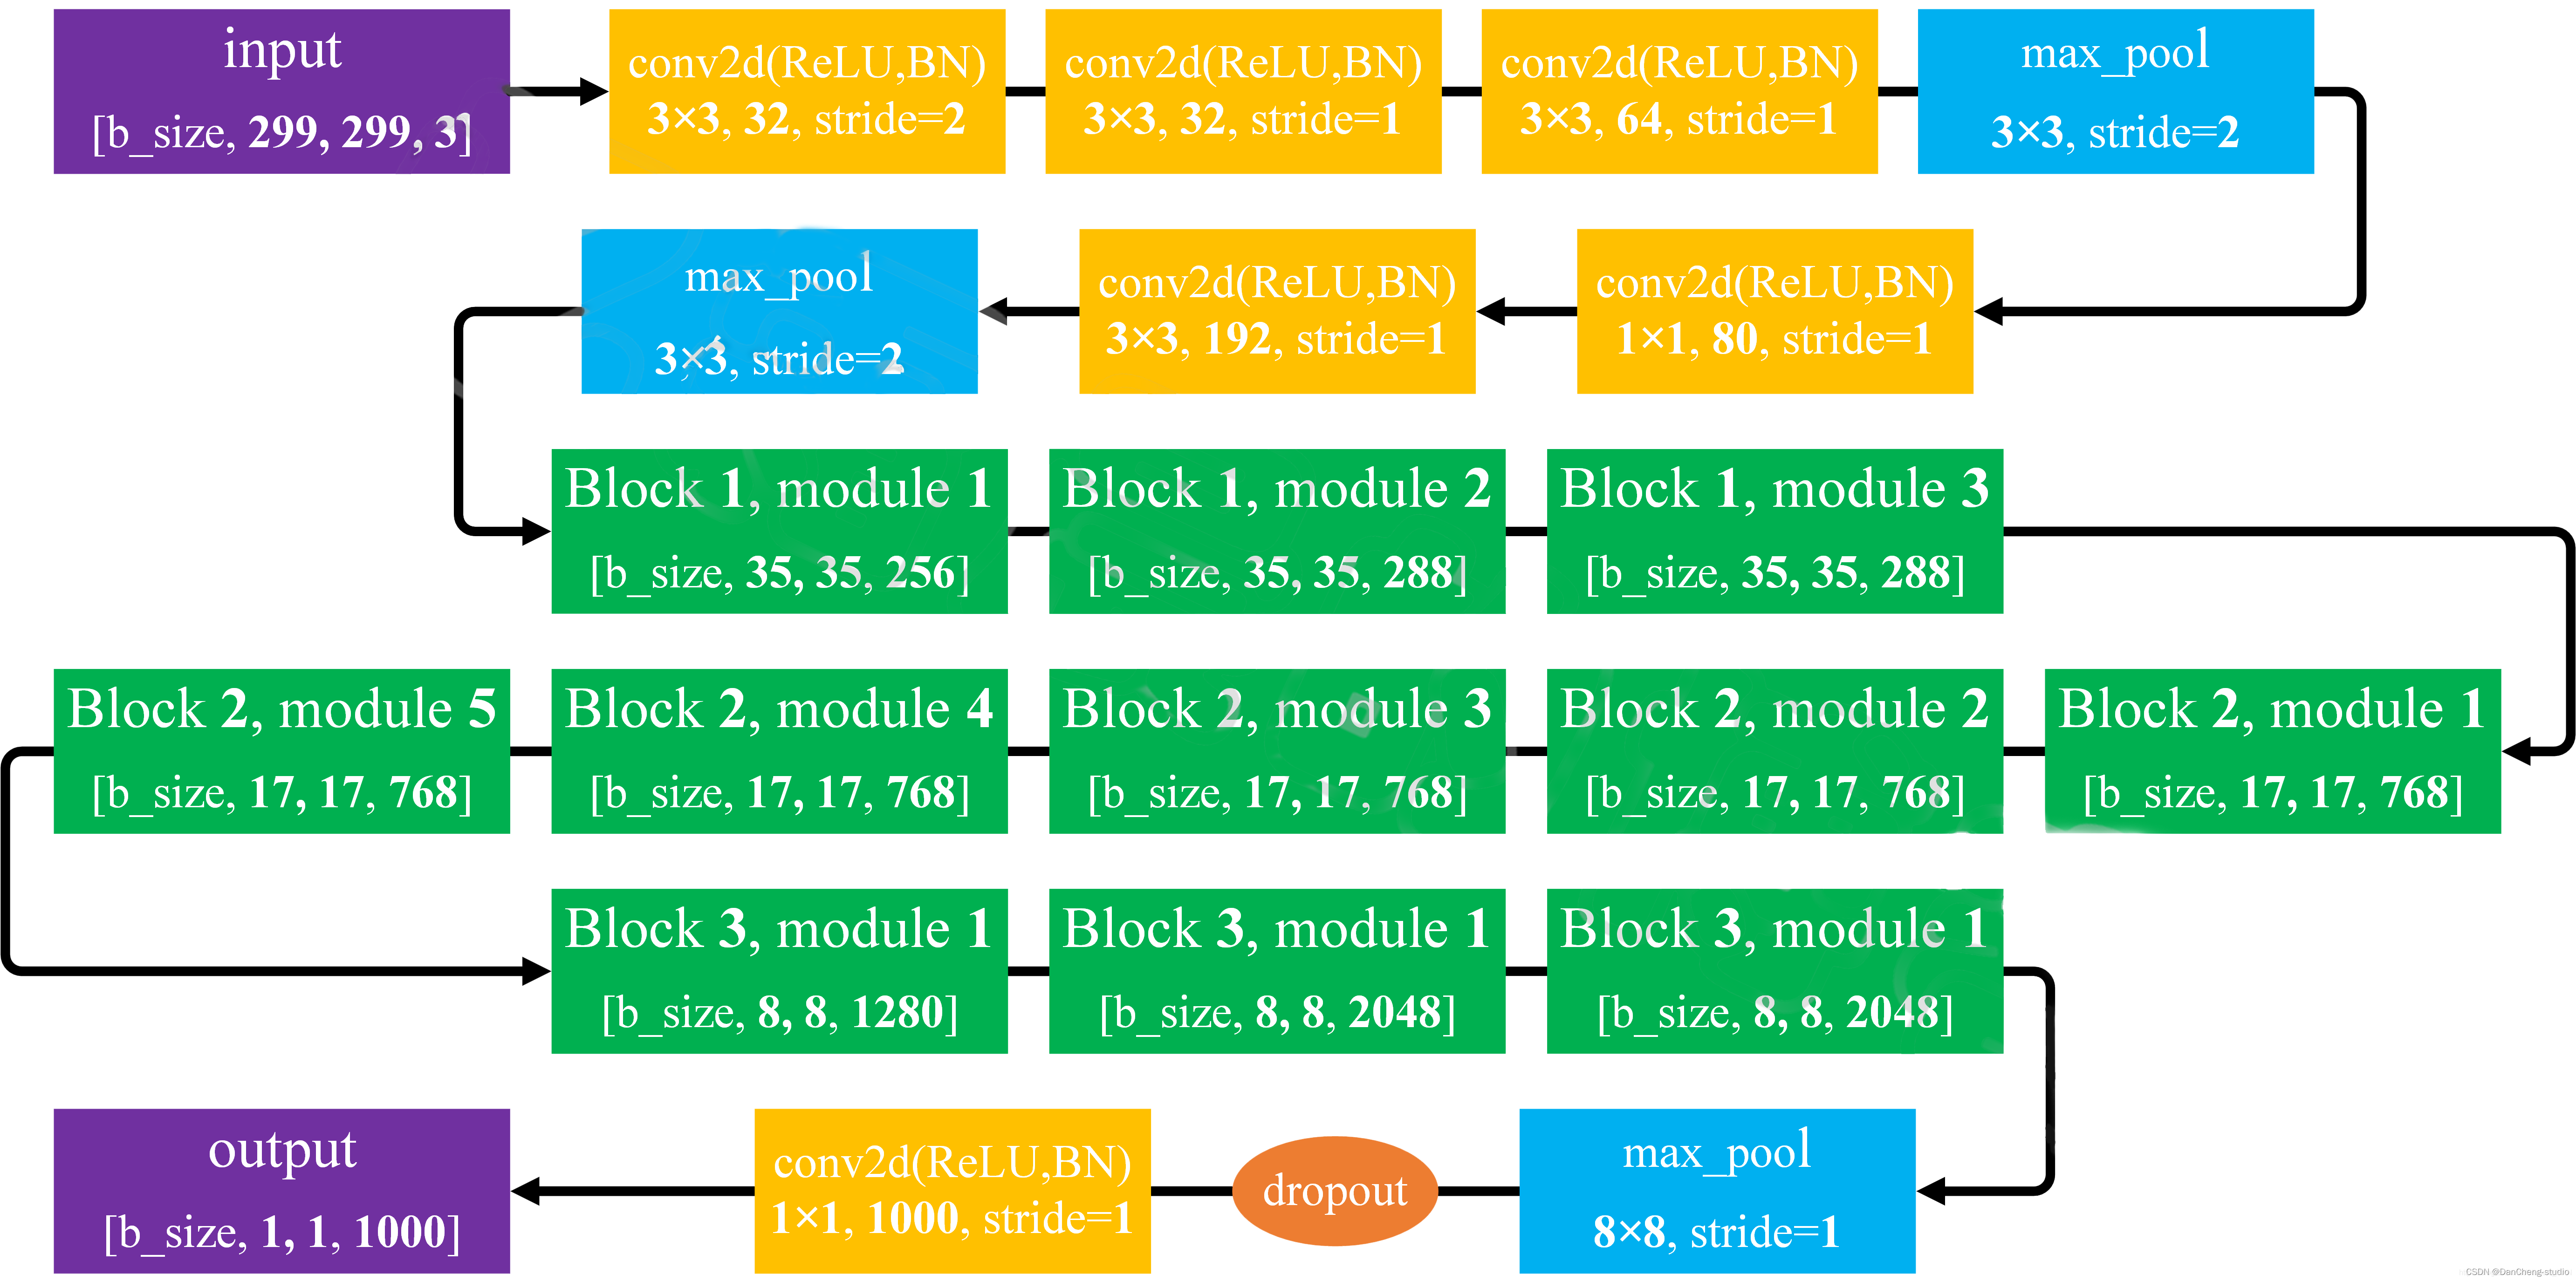
4 Inception V3 神经网络
GoogLeNet对网络中的传统卷积层进行了修改,提出了被称为 Inception 的结构,用于增加网络深度和宽度,提高深度神经网络性能。从Inception V1到Inception V4有4个更新版本,每一版的网络在原来的基础上进行改进,提高网络性能。
4.1 网络结构
inception结构的作用(inception的结构和作用)
作用:代替人工确定卷积层中过滤器的类型或者确定是否需要创建卷积层或者池化层。即:不需要人为决定使用什么过滤器,是否需要创建池化层,由网络自己学习决定这些参数,可以给网络添加所有可能值,将输入连接起来,网络自己学习需要它需要什么样的参数。
inception主要思想
用密集成分来近似最优的局部稀疏解(如上图)
- 采用不同大小的卷积核意味着有不同大小的感受野,最后的拼接意味着不同尺度特征的融合。
- 之所以卷积核大小采用1x1、3x3和5x5,主要是为了方便对齐。设定卷积步长stride=1之后,只要分别设定padding = 0、1、2,采用same卷积可以得到相同维度的特征,然后这些特征直接拼接在一起。
- 很多地方都表明pooling挺有效,所以Inception里面也嵌入了pooling。
- 网络越到后面特征越抽象,且每个特征涉及的感受野也更大,随着层数的增加,3x3和5x5卷积的比例也要增加。
- 最终版inception,加入了1x1 conv来降低feature map厚度。
5 开始训练
5.1 数据集
训练图像按照如下方式进行分类,共分为9文件夹。
5.2 关键代码
from keras.utils import Sequence
import math


class SequenceData(Sequence):
    def __init__(self, batch_size, target_size, data):
        # 初始化所需的参数

        self.batch_size = batch_size
        self.target_size = target_size
        self.x_filenames = data

    def __len__(self):
        # 让代码知道这个序列的长度
        num_imgs = len(self.x_filenames)
        return math.ceil(num_imgs / self.batch_size)

    def __getitem__(self, idx):
        # 迭代器部分
        batch_x = self.x_filenames[idx * self.batch_size: (idx + 1) * self.batch_size]
        imgs = []
        y = []
        for x in batch_x:
            img = Image.open(x)
            b_img = Image.new('RGB', self.target_size, (255, 255, 255))
            size = img.size
            if size[0] >= size[1]:
                rate = self.target_size[0] / size[0]
                new_size = (self.target_size[0], int(size[1] * rate))
                img = img.resize(new_size, Image.ANTIALIAS).convert("RGB")
                b_img.paste(img, (0, random.randint(0, self.target_size[0] - new_size[1])))

            else:
                rate = self.target_size[0] / size[1]
                new_size = (int(size[0] * rate), self.target_size[0])
                img = img.resize(new_size, Image.ANTIALIAS).convert("RGB")
                b_img.paste(img, (random.randint(0, self.target_size[0] - new_size[0]), 0))

            img = b_img
            if random.random() < 0.1:
                img = img.convert("L").convert("RGB")
            if random.random() < 0.2:
                img = img.rotate(random.randint(0, 20))  # 随机旋转一定角度
            if random.random() < 0.2:
                img = img.rotate(random.randint(340, 360))  # 随 旋转一定角度
            imgs.append(img.convert("RGB"))

        x_arrays = 1 - np.array([np.array(i)  for i in imgs]).astype(
            float) / 255  # 读取一批图片

        batch_y = to_categorical(np.array([labels.index(x.split("/")[-2]) for x in batch_x]), len(labels))

        return x_arrays, batch_y
5.3 模型预测
利用我们训练好的vgg16.h5模型进行预测,相关代码如下:
def orc_img(model,image):
    img =np.array(image)
    img = np.array([1 - img.astype(float) / 255])
    predict = model.predict(img)
    index = predict.argmax()
    print("CNN预测", index)

    target = target_name[index]
    index2 = np.argsort(predict)[0][-2]
    target2 = target_name[index2]
    index3 = np.argsort(predict)[0][-3]
    target3 = target_name[index3]

    return {"target": target,
            "predict": "%.2f" % (float(list(predict)[0][index]) * 64),

            "target2": target2,
            "predict2": "%.2f" % (float(list(predict)[0][index2]) * 64),

            }
6 效果展示
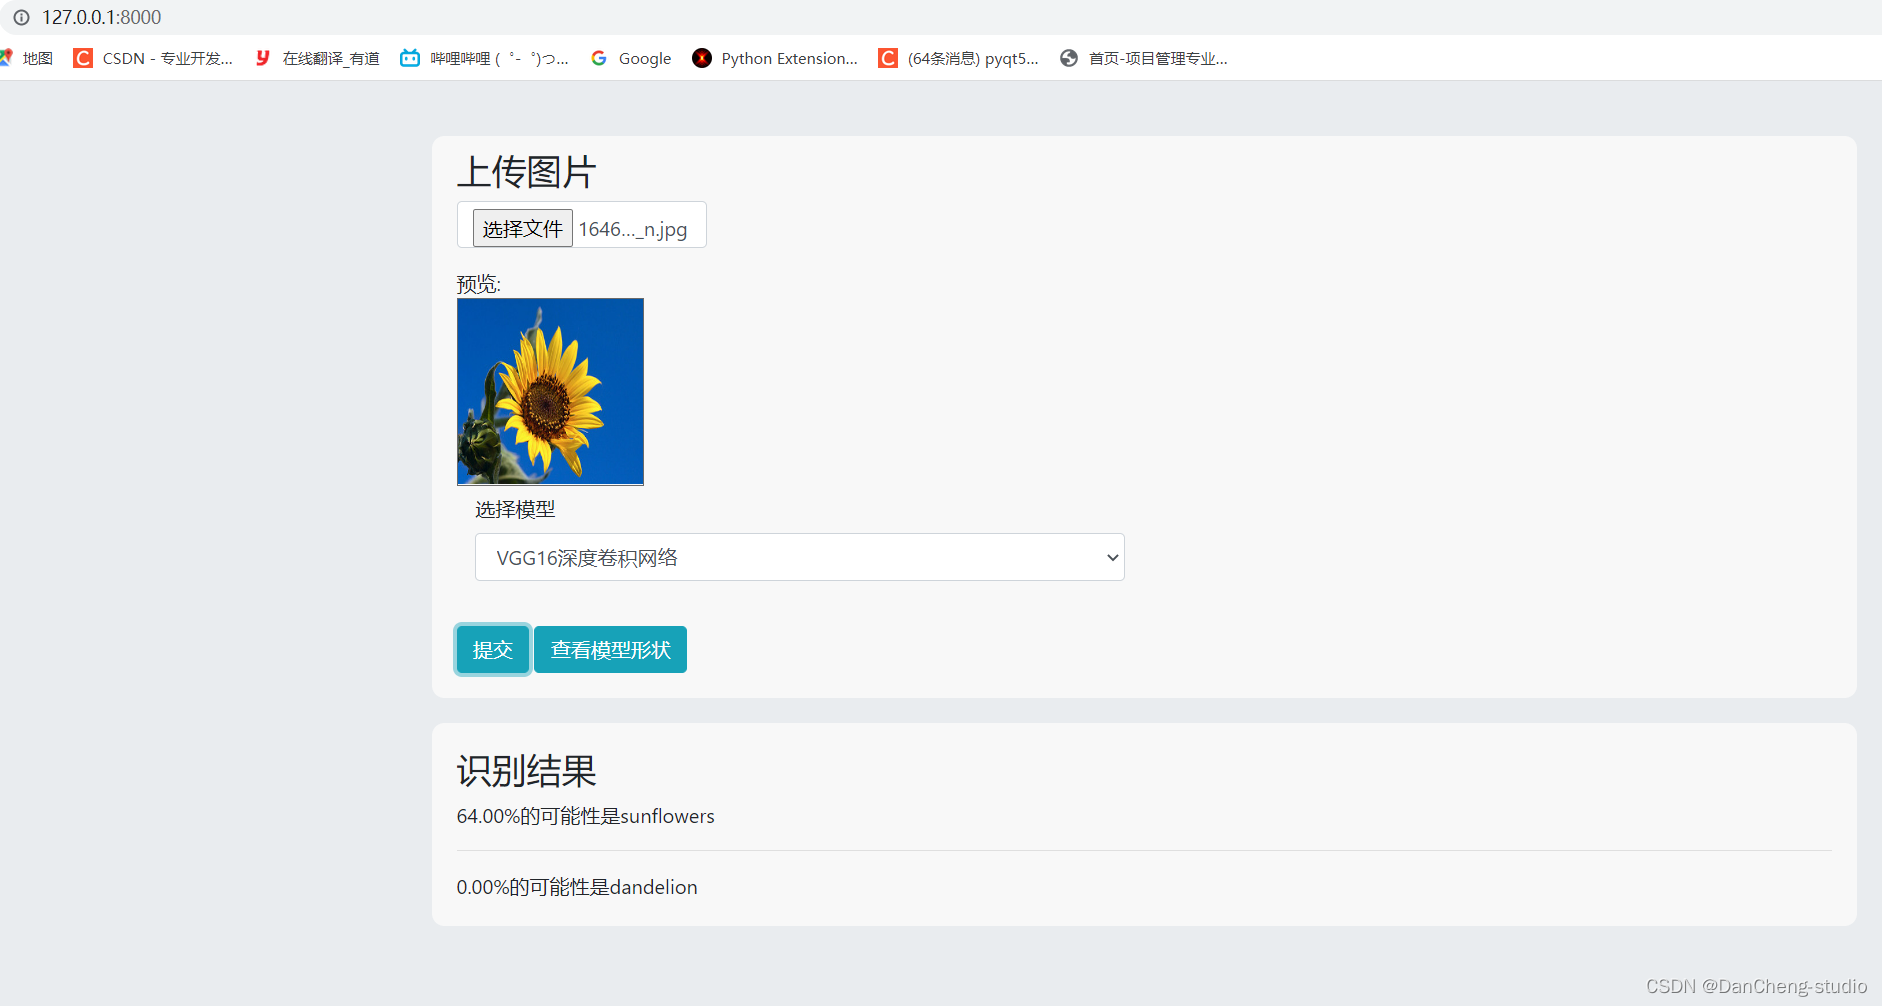
6.1 主页面展示
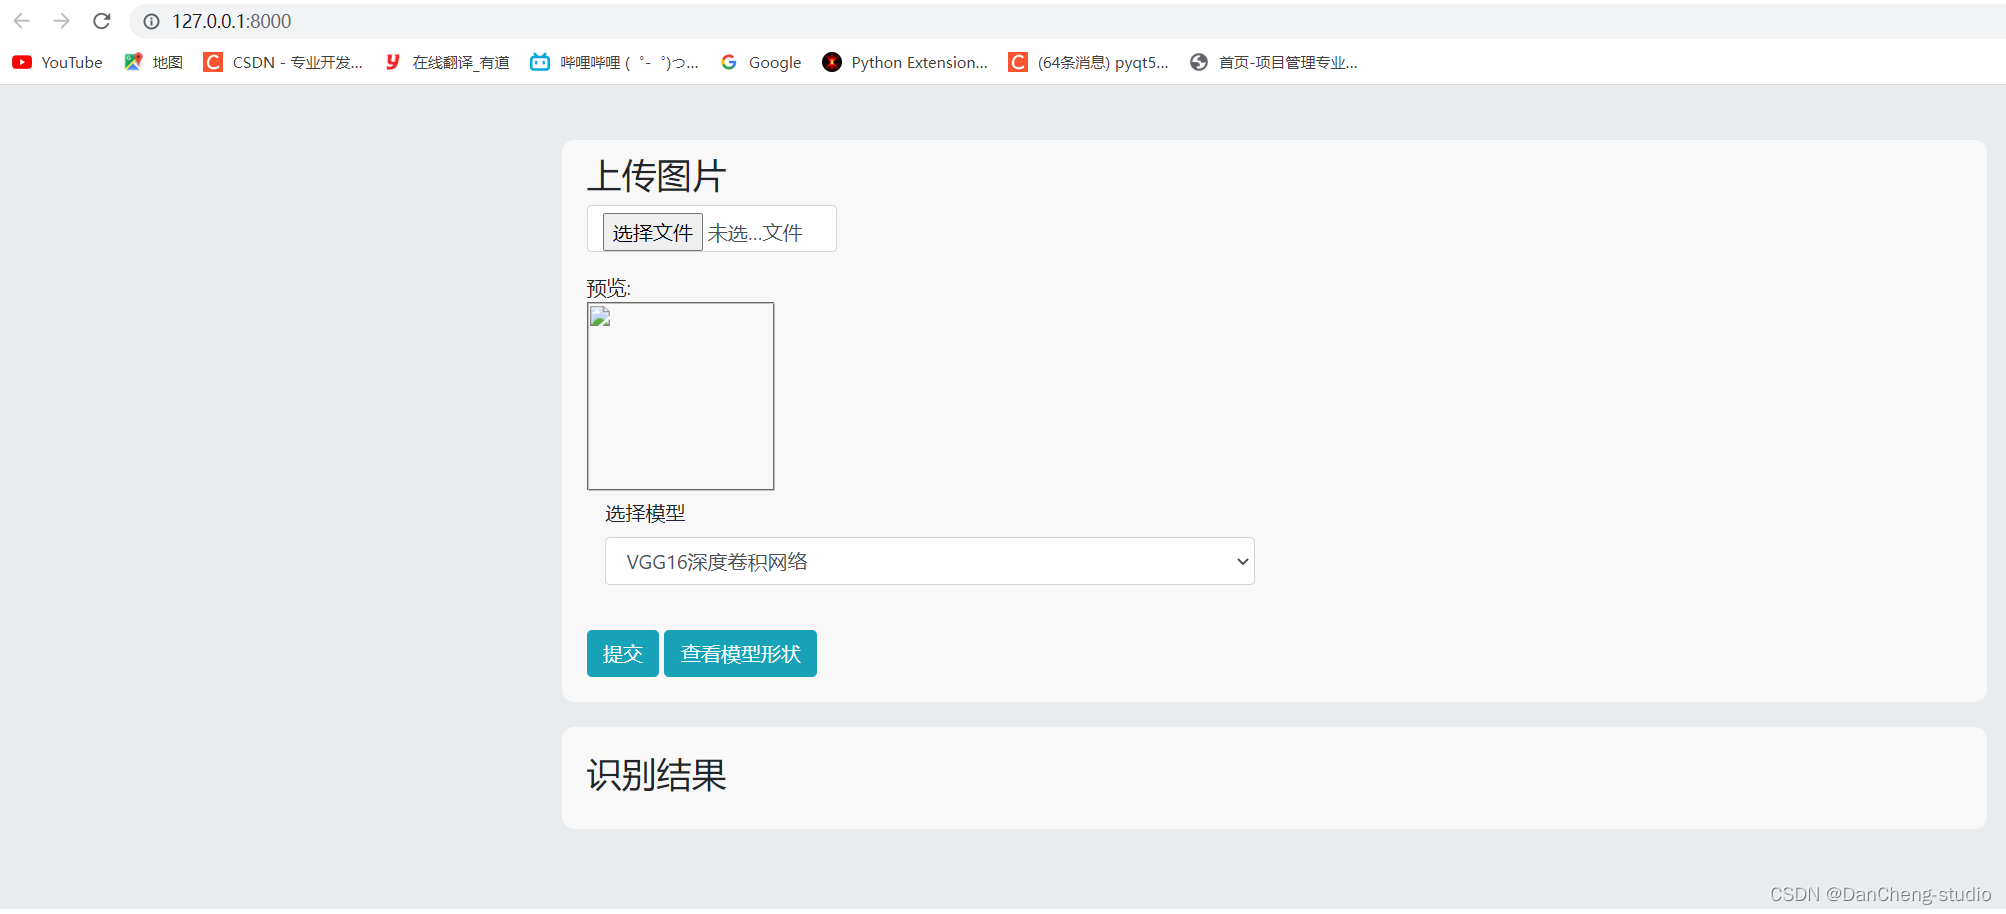
6.2 图片预测
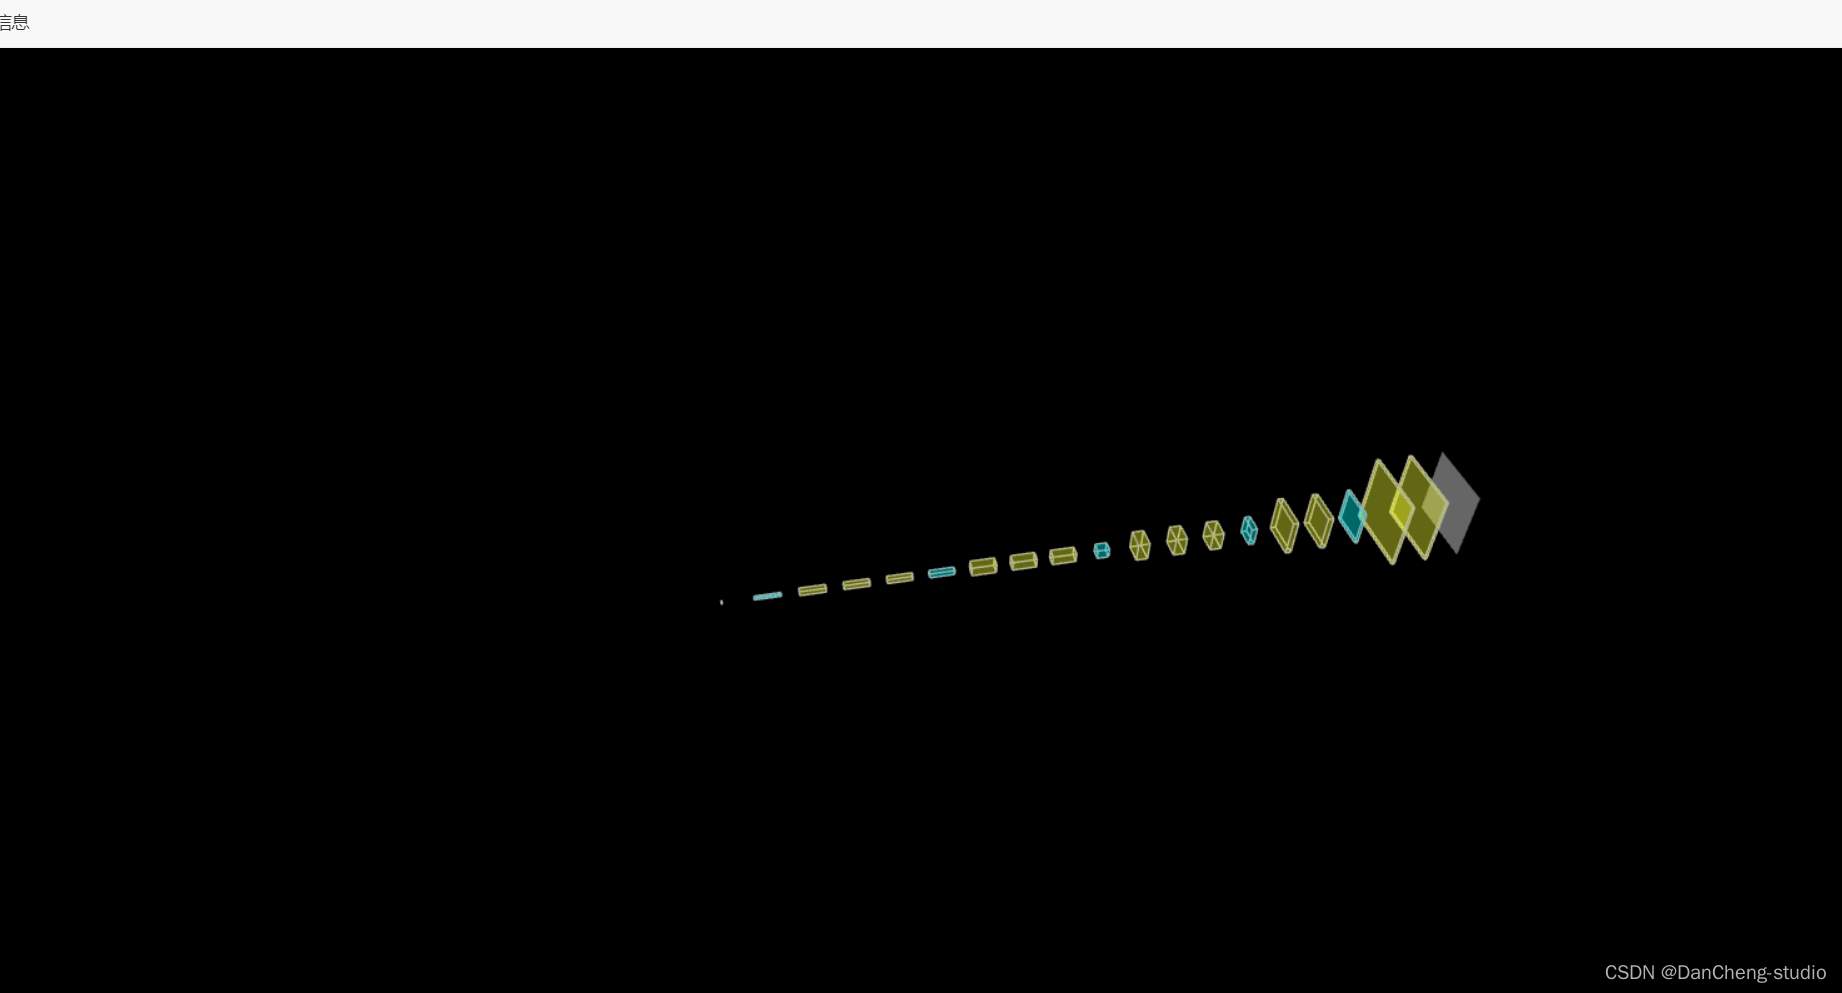
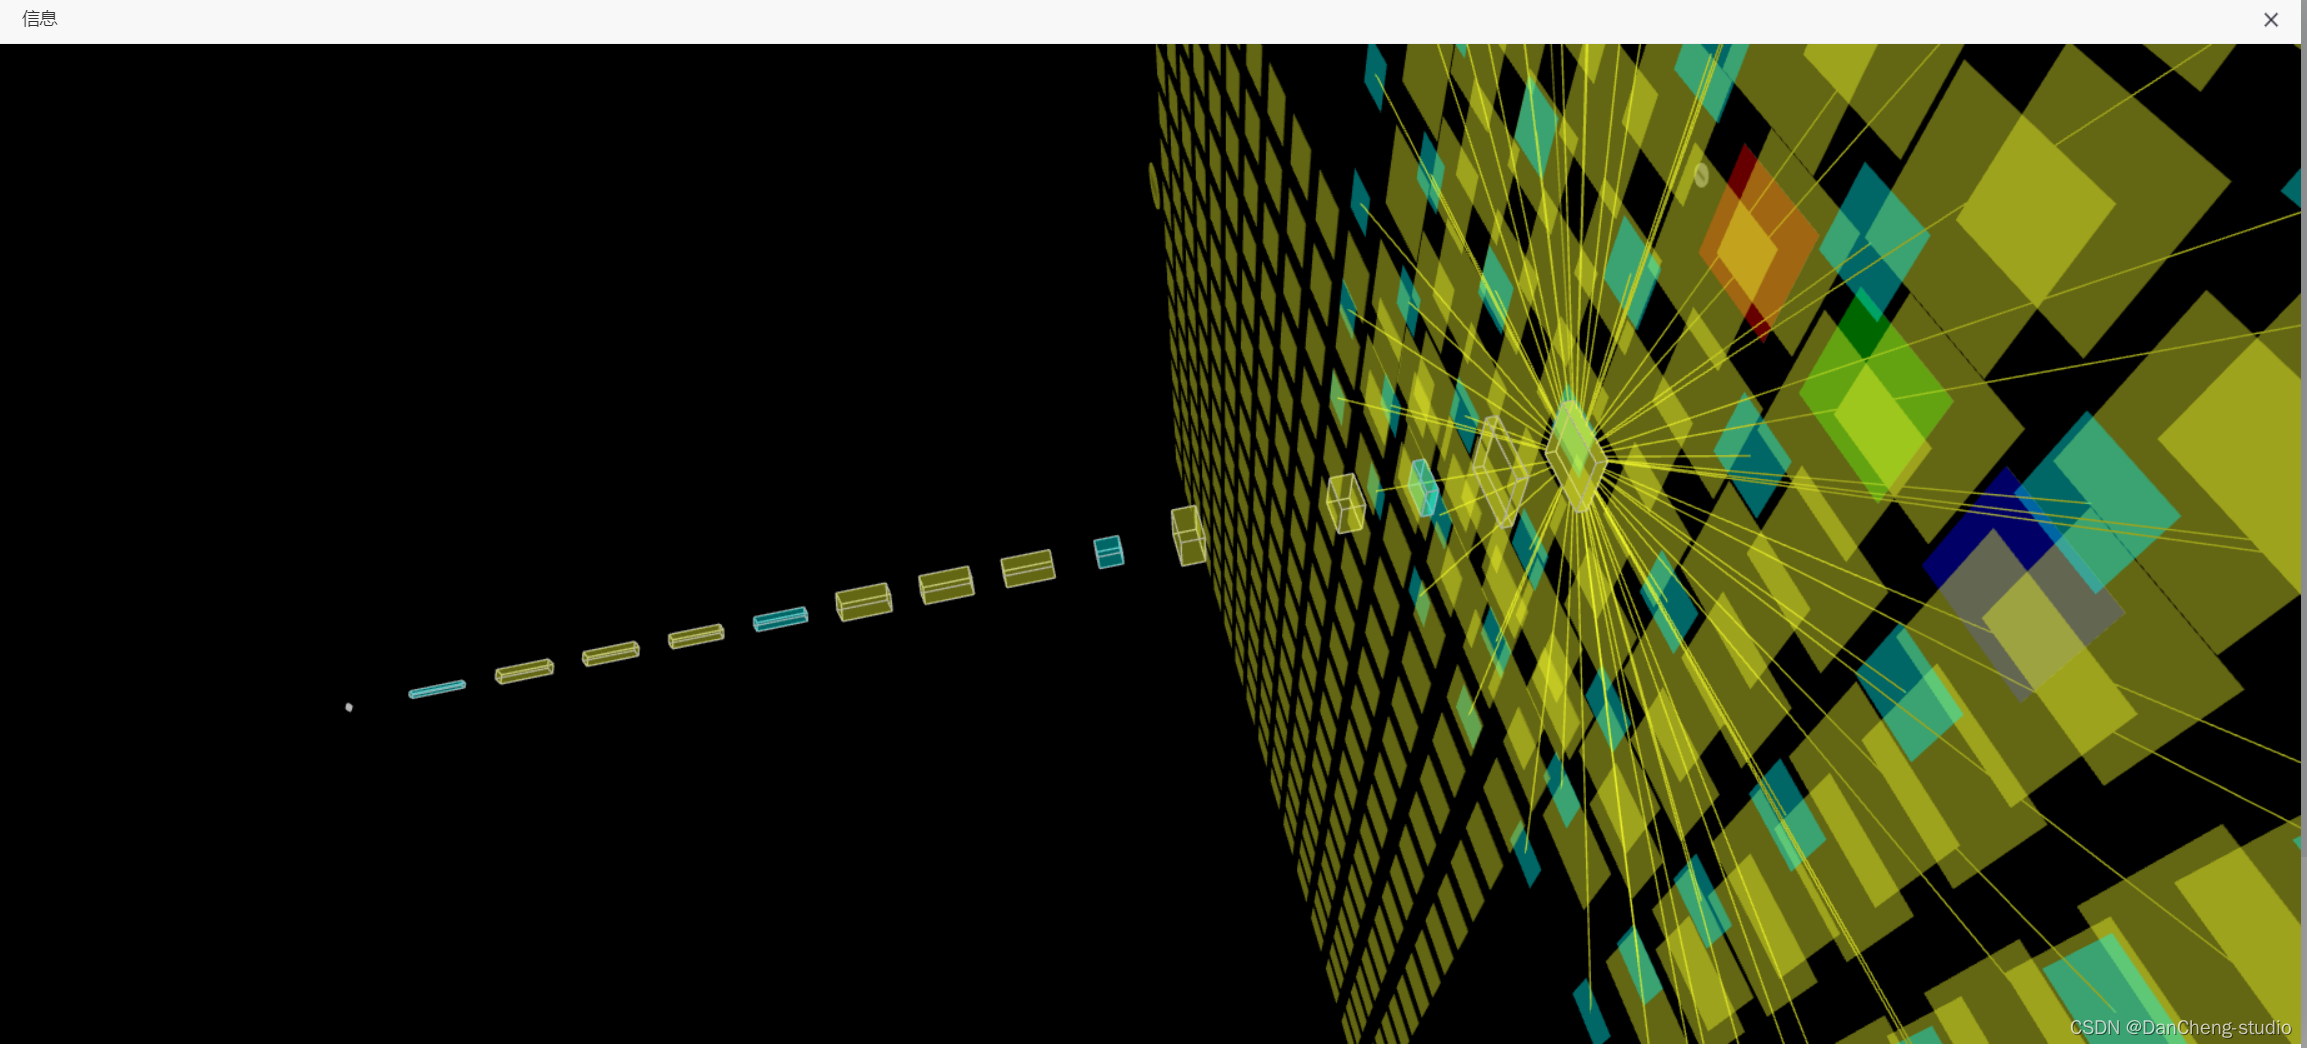
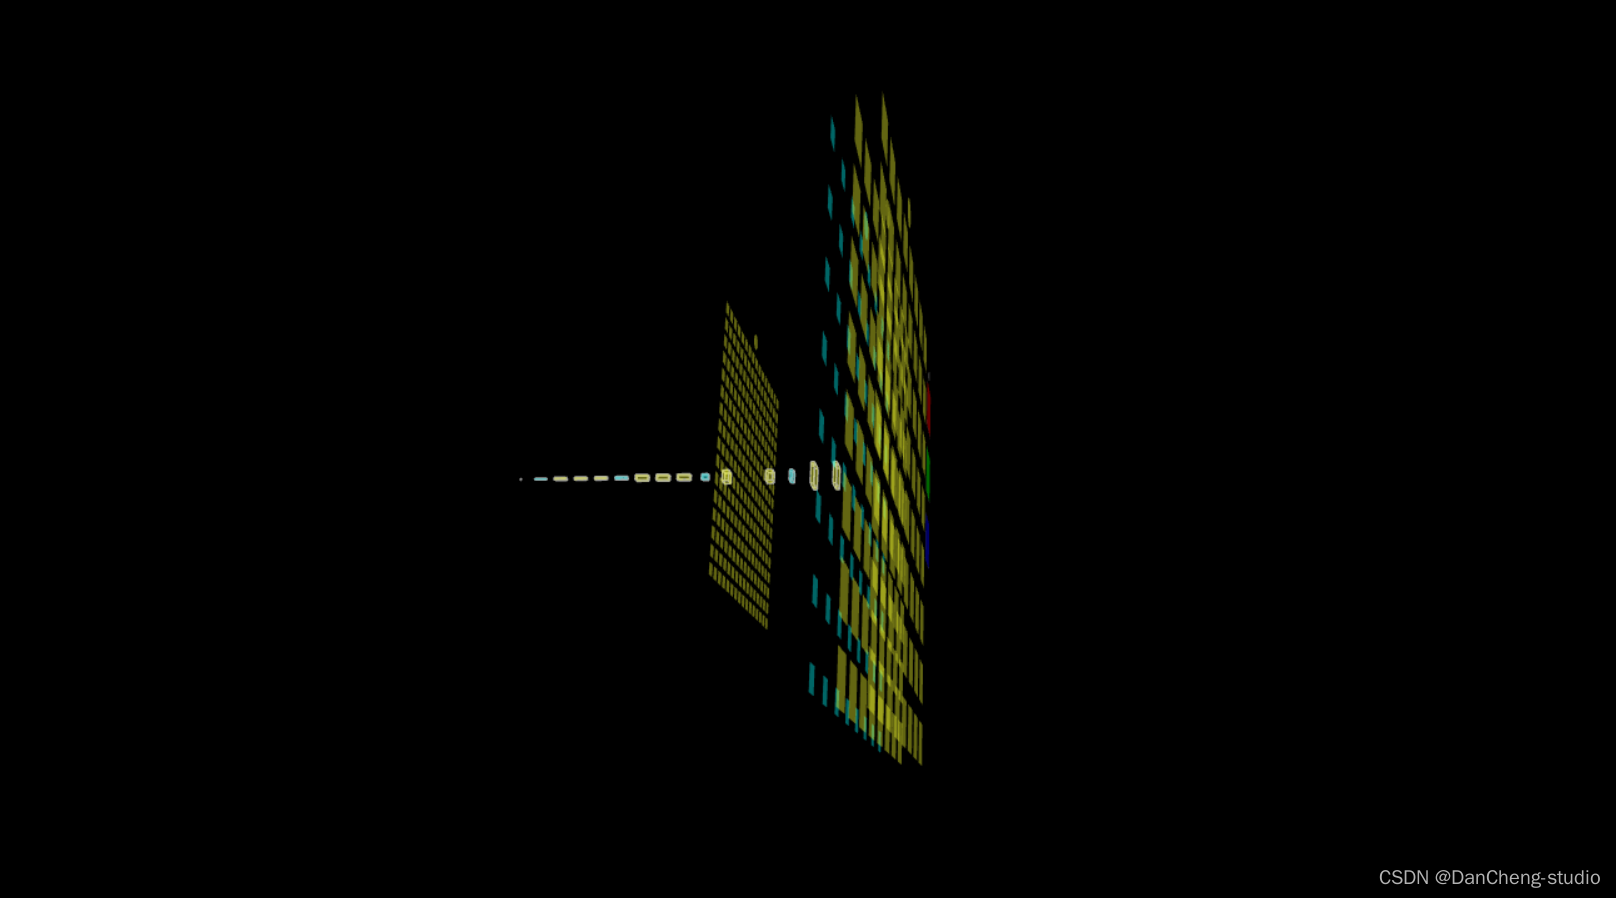
6.3 三维模型可视化
学长在web页面上做了一个三维网络结构可视化功能,可以直观的看到网络模型结构


 296
296


 被折叠的 条评论
为什么被折叠?
被折叠的 条评论
为什么被折叠?
 到【灌水乐园】发言


