


 本文介绍了如何通过CocoaPods在iOS应用中接入谷歌地图SDK,包括导入必要的库、配置API密钥、设置地图显示,并展示了如何创建地图视图、实现定位和长按标记位置功能。同时提到了长按手势监听以更新位置信息的关键代码,适合iOS开发者参考。
前段时间因为公司需要给维修人员更方便的前往店主的店面,所以增加了谷歌GPS定位获取,所以就专门去看了一下谷歌地图,花了点时间熟悉了一下,接入谷歌地图,最简单的方法就是通过CocoaPods接入,
导入"pod'GoogleMaps' 和pod'GooglePlaces'"两个SDK,然后在AppDelegate页面.m文件导入头文件(或宏文件)
//谷歌地图
#import <GoogleMaps/GoogleMaps.h>
#import <GooglePlaces/GooglePlaces.h>
#import <CoreLocation/CoreLocation.h>
然后在didFinishLaunchingWithOptions 方法中加入
[GMSServices provideAPIKey:@"贵公司在谷歌地图申请的apikey"];
[GMSPlacesClient provideAPIKey:@"贵公司在谷歌地图申请的apikey"];
一定一定要在谷歌地图启用”Maps SDK for iOS“和“Places API”,特别是Places API,如果不启用,地图就很可能不显示内容,

接着就创建一个控制器,名字看自己
直接贴代码
#import "JC_GoogleMapsViewController.h"
#import "JZLocationConverter.h"
#import <MapKit/MapKit.h>
#define SCREEN_W [UIScreen mainScreen].bounds.size.width
#define SCREEN_H [UIScreen mainScreen].bounds.size.height
/*适配全面屏*/
#define StateBar_Height [[UIApplication sharedApplication] statusBarFrame].size.height
#define UI_navBar_Height (StateBar_Height == 44 ? 88.0 : 64.0) //适配iPhone x 导航高度
#define SafeAreaBottomHeight (StateBar_Height == 44 ? 34 : 0) // 底部宏
@interface JC_GoogleMapsViewController ()<GMSMapViewDelegate,CLLocationManagerDelegate,GMSAutocompleteViewControllerDelegate>
@property (nonatomic,strong) GMSMapView *mapView ;
@property (nonatomic,strong) CLLocationManager *locationManager;
@property (nonatomic,assign) CLLocationCoordinate2D coordinate2D;
@property (nonatomic,assign) BOOL firstLocationUpdate ;
@property (nonatomic,strong) GMSMarker *marker;//大头针 可无视
@property (nonatomic,strong) GMSMarker *marker2;//大头针
@property (nonatomic,strong) GMSPlacesClient * placesClient;//可以获取某个地方的信息
@property(nonatomic,strong) JC_ReplaceNavigationBarView *headView;//作为导航栏
@property(nonatomic,assign) double oldlatitude;//存放旧的纬度
@property(nonatomic,assign) double oldlongitude;//存放旧的经度
@property (nonatomic,strong) NSArray *addressarray;//存地址
@property (nonatomic,strong) UIView *Confirm_address_view;//当前地址信息显示
@property (nonatomic,strong) UILabel *Confirm_addressinfo_label;//当前位置信息
@property (nonatomic,strong) UIButton *Confirm_addressinfo_btn;//确认按钮
@end
@implementation JC_GoogleMapsViewController
-(void)viewDidLoad {
[super viewDidLoad];
[self.view addSubview:self.headView];
[self.headView mas_makeConstraints:^(MASConstraintMaker *make) {
make.top.left.right.mas_equalTo(self.view);
make.height.mas_offset(JCNavBarHeight());
}];
UIButton *btn = [UIButton buttonWithType:UIButtonTypeCustom];
[btn setTitle:@"跳转" forState:UIControlStateNormal];
[btn setTitleColor:JCColorHex(0xffffff) forState:UIControlStateNormal];
[btn setBackgroundColor:JCColorHex(0xDC143C)];
btn.titleLabel.font = [UIFont systemFontOfSize:17 weight:UIFontWeightSemibold];
btn.contentEdgeInsets = UIEdgeInsetsMake(0, 0, 0, -5);
btn.frame = CGRectMake(10, JCNavBarHeight()+10, 80, 50);
[btn cc_addTapGesture:^{
NSLog(@"点击了");
[self navRightClick];
}];
UIButton *Hbtn = [UIButton buttonWithType:UIButtonTypeCustom];
[Hbtn setTitle:@"换定位" forState:UIControlStateNormal];
[Hbtn setTitleColor:JCColorHex(0xffffff) forState:UIControlStateNormal];
[Hbtn setBackgroundColor:JCColorHex(0xDC143C)];
Hbtn.titleLabel.font = [UIFont systemFontOfSize:17 weight:UIFontWeightSemibold];
Hbtn.contentEdgeInsets = UIEdgeInsetsMake(0, 0, 0, -5);
Hbtn.frame = CGRectMake(10, JCNavBarHeight()+10+50+10, 80, 50);
[Hbtn cc_addTapGesture:^{
NSLog(@"点击了");
[self Transfervaluepunctuationlatitude:23.125844 longitude:113.374588];
}];
// btn.layer.zPosition = MAXFLOAT;//设置管道最前面 最上层
// self.navigationItem.rightBarButtonItem = [[UIBarButtonItem alloc] initWithCustomView:btn];
//设置地图view,这里是随便初始化了一个经纬度,在获取到当前用户位置到时候会直接更新的
GMSCameraPosition *camera = [GMSCameraPosition cameraWithLatitude:0 longitude:0 zoom:0];
_mapView= [GMSMapView mapWithFrame:CGRectMake(0, JCNavBarHeight(), SCREEN_W, SCREEN_H-JCNavBarHeight()-50) camera:camera];
_mapView.delegate = self;
_mapView.settings.compassButton = YES;//显示指南针
_mapView.settings.myLocationButton = YES;//显示点击按钮回到当前位置
_mapView.myLocationEnabled = YES;//需要为YES才可以追溯回到当前位置
// _mapView.settings.allowScrollGesturesDuringRotateOrZoom = YES;//允许滚动手势拖动旋转或缩放
// settings.consumesGesturesInView//消费者手势查看 Bool
// settings.rotateGestures//旋转手势
// .myLocation//我的位置
[self.view addSubview:_mapView];
/* 开始定位*/
[self startLocation];
[self.view addSubview:btn];
[self.view addSubview:Hbtn];
[self.view addSubview:self.Confirm_address_view];
[self.Confirm_address_view mas_makeConstraints:^(MASConstraintMaker *make) {
make.bottom.left.right.mas_equalTo(self.view);
make.height.mas_offset(120);
}];
[self.Confirm_address_view addSubview:self.Confirm_addressinfo_btn];
[self.Confirm_addressinfo_btn mas_makeConstraints:^(MASConstraintMaker *make) {
make.bottom.left.right.mas_equalTo(self.Confirm_address_view);
make.height.mas_offset(50);
}];
[self.Confirm_address_view addSubview:self.Confirm_addressinfo_label];
self.Confirm_addressinfo_label.numberOfLines = 3;
self.Confirm_addressinfo_label.adjustsFontSizeToFitWidth = YES;
[self.Confirm_addressinfo_label mas_makeConstraints:^(MASConstraintMaker *make) {
make.top.left.right.mas_equalTo(self.Confirm_address_view);
make.bottom.mas_equalTo(self.Confirm_addressinfo_btn.mas_top);
// make.height.mas_offset(50);
}];
}
-(void)navRightClick{//原本这个是调搜索框的 现在我改成了我自己用到的,跳导航了
// BOOL baiduMapCanOpen=[[UIApplication sharedApplication] canOpenURL:[NSURL URLWithString:@"baidumap://"]];
// NSLog(@"是否安装了百度地图:%@",baiduMapCanOpen?@"YES":@"NO");
//
// BOOL comgooglemapsCanOpen=[[UIApplication sharedApplication] canOpenURL:[NSURL URLWithString:@"comgooglemaps://"]];
// NSLog(@"是否安装了谷歌地图:%@",comgooglemapsCanOpen?@"YES":@"NO");
// NSLog(@"96:%@",self.addressarray[0]);
// NSLog(@"97:%@",self.addressarray[1]);
NSString *appName = @"AWL";
NSString *urlScheme = @"自己的urlScheme";
if(self.addressarray.count<1){
return;
}
//
// UIAlertController * alert = [UIAlertController alertControllerWithTitle:@"选择地图" message:nil preferredStyle:UIAlertControllerStyleActionSheet];
//
//
// UIAlertAction * baiduMap = [UIAlertAction actionWithTitle:@"百度地图" style:UIAlertActionStyleDefault handler:^(UIAlertAction * action) {
// if ([[UIApplication sharedApplication]canOpenURL:[NSURL URLWithString:@"baidumap://"]])
// {
// //地理编码器
// CLGeocoder *geocoder = [[CLGeocoder alloc] init];
// [geocoder geocodeAddressString:[NSString stringWithFormat:@"%@",self.addressarray[0]] completionHandler:^(NSArray<CLPlacemark *> * _Nullable placemarks, NSError * _Nullable error) {
// for (CLPlacemark *placemark in placemarks) {
// //坐标(经纬度)
// CLLocationCoordinate2D coordinate = placemark.location.coordinate;
// NSString *urlString = [[NSString stringWithFormat:@"baidumap://map/direction?origin={{我的位置}}&destination=latlng:%f,%f|name=目的地&mode=driving&coord_type=gcj02",self.oldlatitude, self.oldlongitude] stringByAddingPercentEncodingWithAllowedCharacters:[NSCharacterSet URLQueryAllowedCharacterSet]];
// [[UIApplication sharedApplication] openURL:[NSURL URLWithString:urlString] options:@{} completionHandler:nil];
// }
// }];
// }else{
// ShowErrorStatus(@"您的手机没有安装百度地图");
// }
// }];
// UIAlertAction * gugeMap = [UIAlertAction actionWithTitle:@"谷歌地图" style:UIAlertActionStyleDefault handler:^(UIAlertAction * action) {
if ([[UIApplication sharedApplication]canOpenURL:[NSURL URLWithString:@"comgooglemaps://"]])
{
//地理编码器
CLGeocoder *geocoder = [[CLGeocoder alloc] init];
[geocoder geocodeAddressString:[NSString stringWithFormat:@"%@",self.addressarray[0]] completionHandler:^(NSArray<CLPlacemark *> * _Nullable placemarks, NSError * _Nullable error) {
for (CLPlacemark *placemark in placemarks) {
//坐标(经纬度)
CLLocationCoordinate2D coordinate = placemark.location.coordinate;
NSString *urlString = [[NSString stringWithFormat:@"comgooglemaps://?x-source=%@&x-success=%@&saddr=&daddr=%f,%f&directionsmode=driving",appName,urlScheme,self.oldlatitude, self.oldlongitude] stringByAddingPercentEncodingWithAllowedCharacters:[NSCharacterSet URLQueryAllowedCharacterSet]];
[[UIApplication sharedApplication] openURL:[NSURL URLWithString:urlString] options:@{} completionHandler:nil];
}
}];
}
// else{
// ShowErrorStatus(@"您的手机没有安装谷歌地图");
// }
// }];
// UIAlertAction * cancel = [UIAlertAction actionWithTitle:@"取消" style:UIAlertActionStyleDefault handler:^(UIAlertAction * action) {
//
// }];
//
// if(baiduMapCanOpen == YES){
// [alert addAction:baiduMap];
// }
// if(comgooglemapsCanOpen == YES){
// [alert addAction:gugeMap];
// }
//
// [alert addAction:cancel];
//
// [self presentViewController:alert animated:YES completion:^{
//
// }];
// GMSAutocompleteViewController *autocompleteViewController = [[GMSAutocompleteViewController alloc] init];
// autocompleteViewController.delegate = self;
// [self presentViewController:autocompleteViewController animated:YES completion:nil];
}
- (void)startLocation {
if ([CLLocationManager locationServicesEnabled] &&
([CLLocationManager authorizationStatus] == kCLAuthorizationStatusAuthorizedWhenInUse || [CLLocationManager authorizationStatus] == kCLAuthorizationStatusNotDetermined || [CLLocationManager authorizationStatus] == kCLAuthorizationStatusAuthorizedAlways)) {
//定位功能可用
_locationManager = [[CLLocationManager alloc]init];
_locationManager.delegate = self;
[_locationManager requestWhenInUseAuthorization];
_locationManager.desiredAccuracy = kCLLocationAccuracyBest;//设置定位精度
_locationManager.distanceFilter = 10;//设置定位频率,每隔多少米定位一次
[_locationManager startUpdatingLocation];
} else {
//定位不能用
[self locationPermissionAlert];
[SVProgressHUD dismiss];
}
}
#pragma mark - 系统自带location代理定位
-(void)locationManager:(CLLocationManager *)manager didFailWithError:(NSError *)error {
if ([error code] == kCLErrorDenied) {
NSLog(@"访问被拒绝");
[self locationPermissionAlert];
}
if ([error code] == kCLErrorLocationUnknown) {
NSLog(@"无法获取位置信息");
}
[SVProgressHUD dismiss];
}
- (void)locationManager:(CLLocationManager*)manager didUpdateLocations:(NSArray *)locations {
if(!_firstLocationUpdate){
_firstLocationUpdate = YES;//只定位一次的标记值
// 获取最新定位
CLLocation *location = locations.lastObject;
// 停止定位
[_locationManager stopUpdatingLocation];
//如果是国内,就会转化坐标系,如果是国外坐标,则不会转换。
_coordinate2D = [JZLocationConverter wgs84ToGcj02:location.coordinate];
//移动地图中心到当前位置
_mapView.camera = [GMSCameraPosition cameraWithTarget:_coordinate2D zoom:15];
// self.marker = [GMSMarker markerWithPosition:_coordinate2D];
// self.marker.map = self.mapView;
[self getPlace:_coordinate2D];
}
}
-(void)mapViewDidFinishTileRendering:(GMSMapView *)mapView{
}
//地图移动后的代理方法,我这里的需求是地图移动需要刷新网络请求,查找附近的店铺
-(void)mapView:(GMSMapView*)mapView idleAtCameraPosition:(GMSCameraPosition*)position{
// //点击一次先清除上一次的大头针
// [self.marker.map clear];
// self.marker.map = nil;
// self.marker = [GMSMarker markerWithPosition:mapView.camera.target];
// self.marker.map = self.mapView;
[self getPlace:mapView.camera.target];
}
-(void)getPlace:(CLLocationCoordinate2D)coordinate2D{
[[GMSGeocoder geocoder] reverseGeocodeCoordinate:CLLocationCoordinate2DMake(coordinate2D.latitude, coordinate2D.longitude) completionHandler:^(GMSReverseGeocodeResponse * _Nullable response, NSError * _Nullable error) {
if(!error){
GMSAddress* addressObj = response.firstResult;
// NSLog(@"coordinate.latitude=%f", addressObj.coordinate.latitude);
// NSLog(@"coordinate.longitude=%f", addressObj.coordinate.longitude);
// NSLog(@"thoroughfare=%@", addressObj.thoroughfare);
// NSLog(@"locality=%@", addressObj.locality);
// NSLog(@"subLocality=%@", addressObj.subLocality);
// NSLog(@"administrativeArea=%@", addressObj.administrativeArea);
// NSLog(@"postalCode=%@", addressObj.postalCode);
// NSLog(@"country=%@", addressObj.country);
NSLog(@"lines=%@", addressObj.lines);
self.addressarray = addressObj.lines;
self.oldlatitude = addressObj.coordinate.latitude;
self.oldlongitude = addressObj.coordinate.longitude;
//存地址
// self.addressarray = addressObj.lines;
self.Confirm_addressinfo_label.text =[NSString stringWithFormat:@"%@:%@",JCLocalizedString(@"current_location"),[addressObj.lines componentsJoinedByString:@" "]];
}else{
NSLog(@"地理反编码错误");
ShowErrorStatus(JCLocalizedString(@"Location_acquisition_failed"));
}
}];
}
//选择了位置后的回调方法
- (void)viewController:(GMSAutocompleteViewController*)viewController didAutocompleteWithPlace:(GMSPlace*)place {
//移动地图中心到选择的位置
_mapView.camera = [GMSCameraPosition cameraWithTarget:place.coordinate zoom:15];
[viewController dismissViewControllerAnimated:YES completion:nil];
}
//失败回调
- (void)viewController:(GMSAutocompleteViewController *)viewController
didFailAutocompleteWithError:(NSError *)error {
[viewController dismissViewControllerAnimated:YES completion:nil];
}
//取消回调
- (void)wasCancelled:(GMSAutocompleteViewController *)viewController {
[viewController dismissViewControllerAnimated:YES completion:nil];
}
// 获取当前位置权限提示图
- (void)locationPermissionAlert {
UIAlertController *alert = [UIAlertController alertControllerWithTitle:@"位置访问权限" message:@"请打开位置访问权限,以便于定位您的位置,添加地址信息" preferredStyle:UIAlertControllerStyleAlert];
UIAlertAction *cancle = [UIAlertAction actionWithTitle:@"取消" style:UIAlertActionStyleCancel handler:^(UIAlertAction * _Nonnull action) {
}];
UIAlertAction *confirm = [UIAlertAction actionWithTitle:@"去设置" style:UIAlertActionStyleDefault handler:^(UIAlertAction * _Nonnull action) {
NSURL *url = [NSURL URLWithString:UIApplicationOpenSettingsURLString];
if ([[UIApplication sharedApplication]canOpenURL:url]) {
[[UIApplication sharedApplication]openURL:url];
}
}];
[alert addAction:cancle];
[alert addAction:confirm];
[self presentViewController:alert animated:YES completion:nil];
}
//长按手势
- (void)mapView:(GMSMapView *)mapView
didLongPressAtCoordinate:(CLLocationCoordinate2D)coordinate{
NSLog(@"长按点击");
// GMSCameraPosition *camera = [GMSCameraPosition cameraWithLatitude:self.oldlatitude
// longitude:self.oldlongitude
// zoom:6];
// _mapView = [GMSMapView mapWithFrame:CGRectZero camera:camera];
// // ...
// [mapView clear];
[[GMSGeocoder geocoder] reverseGeocodeCoordinate:CLLocationCoordinate2DMake(coordinate.latitude, coordinate.longitude) completionHandler:^(GMSReverseGeocodeResponse * _Nullable response, NSError * _Nullable error) {
if(!error){
NSLog(@"获取地理位置123,纬度:%f,进度:%f",self.oldlatitude,self.oldlongitude);
GMSAddress* addressObj = response.firstResult;
// NSLog(@"coordinate.latitude=%f", addressObj.coordinate.latitude);
// NSLog(@"coordinate.longitude=%f", addressObj.coordinate.longitude);
// NSLog(@"thoroughfare=%@", addressObj.thoroughfare);
// NSLog(@"locality=%@", addressObj.locality);
// NSLog(@"subLocality=%@", addressObj.subLocality);
// NSLog(@"administrativeArea=%@", addressObj.administrativeArea);
// NSLog(@"postalCode=%@", addressObj.postalCode);
// NSLog(@"country=%@", addressObj.country);
NSLog(@"lines=%@", addressObj.lines);
//点击一次先清除上一次的大头针
[self.marker2.map clear];
self.marker2.map = nil;
// self.marker2 = [GMSMarker markerWithPosition:mapView.camera.target];
// self.marker2.map = self.mapView;
//大头针放在最新的长按标记位置
self.marker2 = [[GMSMarker alloc] init];
self.marker2.position = CLLocationCoordinate2DMake(addressObj.coordinate.latitude, addressObj.coordinate.longitude);
// if(addressObj.lines.count>1){
// marker.title = addressObj.lines[0];
// }else
self.marker2.title =[NSString stringWithFormat:@"%@",[addressObj.lines componentsJoinedByString:@" "]];
// self.marker2.title
self.marker2.snippet = @"";
self.marker2.map = _mapView;
self.oldlatitude = addressObj.coordinate.latitude;
self.oldlongitude = addressObj.coordinate.longitude;
//存地址
self.addressarray = addressObj.lines;
self.Confirm_addressinfo_label.text =[NSString stringWithFormat:@"%@:%@",JCLocalizedString(@"current_location"),[addressObj.lines componentsJoinedByString:@" "]];
}else{
NSLog(@"地理反编码错误");
ShowErrorStatus(JCLocalizedString(@"Location_acquisition_failed"));
}
}];
}
//由前端传过来的位置
-(void)Transfervaluepunctuationlatitude:(double)latitude longitude:(double)longitude{
[[GMSGeocoder geocoder] reverseGeocodeCoordinate:CLLocationCoordinate2DMake(latitude, longitude) completionHandler:^(GMSReverseGeocodeResponse * _Nullable response, NSError * _Nullable error) {
if(!error){
NSLog(@"获取地理位置123,纬度:%f,进度:%f",self.oldlatitude,self.oldlongitude);
GMSAddress* addressObj = response.firstResult;
// NSLog(@"coordinate.latitude=%f", addressObj.coordinate.latitude);
// NSLog(@"coordinate.longitude=%f", addressObj.coordinate.longitude);
// NSLog(@"thoroughfare=%@", addressObj.thoroughfare);
// NSLog(@"locality=%@", addressObj.locality);
// NSLog(@"subLocality=%@", addressObj.subLocality);
// NSLog(@"administrativeArea=%@", addressObj.administrativeArea);
// NSLog(@"postalCode=%@", addressObj.postalCode);
// NSLog(@"country=%@", addressObj.country);
NSLog(@"lines=%@", addressObj.lines);
//点击一次先清除上一次的大头针
[self.marker2.map clear];
self.marker2.map = nil;
// self.marker2 = [GMSMarker markerWithPosition:mapView.camera.target];
// self.marker2.map = self.mapView;
//大头针放在最新的长按标记位置
self.marker2 = [[GMSMarker alloc] init];
self.marker2.position = CLLocationCoordinate2DMake(addressObj.coordinate.latitude, addressObj.coordinate.longitude);
// if(addressObj.lines.count>1){
// marker.title = addressObj.lines[0];
// }else
self.marker2.title =[NSString stringWithFormat:@"%@",[addressObj.lines componentsJoinedByString:@" "]];
self.marker2.snippet = @"";
self.marker2.map = _mapView;
self.oldlatitude = addressObj.coordinate.latitude;
self.oldlongitude = addressObj.coordinate.longitude;
//存地址
self.addressarray = addressObj.lines;
self.Confirm_addressinfo_label.text =[NSString stringWithFormat:@"%@:%@",JCLocalizedString(@"current_location"),[addressObj.lines componentsJoinedByString:@" "]];
}else{
ShowErrorStatus(JCLocalizedString(@"Location_acquisition_failed"));
}
}];
}
#pragma mark - 标注按钮点击事件
- (void)sendClick {
NSLog(@"这里是点击所有标注都会调用的方法,,,");
}
- (JC_ReplaceNavigationBarView *)headView {
if (!_headView) {
_headView = [[JC_ReplaceNavigationBarView alloc] init];
_headView.backgroundColor = JCColorHex(0xFF4E00);
_headView.imageNamestr = @"back";
_headView.upTitle = JCLocalizedString(@"Balance_change_details");
_headView.titlecolor = JCColorHex(0xffffff);
JCWeakSelf;
_headView.right1_Btn.hidden = _headView.right2_Btn.hidden = YES;
_headView.JC_ReplaceNavigationBarViewBlock = ^{
NSLog(@"返回点击了");
[wkSelf.navigationController popViewControllerAnimated:YES];
[wkSelf dismissViewControllerAnimated:YES completion:nil];
//隐藏导航栏
[wkSelf.navigationController setNavigationBarHidden:YES animated:nil];
};
}
return _headView;
}
-(void)dealloc{
[SVProgressHUD dismiss];
[_locationManager stopUpdatingLocation];
_mapView = nil;
}
-(UIView*)Confirm_address_view{
if(!_Confirm_address_view){
_Confirm_address_view = [[UIView alloc]init];
_Confirm_address_view.backgroundColor = JCColorHex(0xffffff);
}
return _Confirm_address_view;
}
-(UILabel*)Confirm_addressinfo_label{
if(!_Confirm_addressinfo_label){
_Confirm_addressinfo_label = [[UILabel alloc]init];
_Confirm_addressinfo_label.textColor = JCColorHex(0x333333);
_Confirm_addressinfo_label.font = JCPFMediumFont(14);
_Confirm_addressinfo_label.backgroundColor = JCColorHex(0xffffff);
}
return _Confirm_addressinfo_label;
}
-(UIButton*)Confirm_addressinfo_btn{
if(!_Confirm_addressinfo_btn){
_Confirm_addressinfo_btn = [UIButton buttonWithType:UIButtonTypeCustom];
[_Confirm_addressinfo_btn setTitle:@"确认" forState:UIControlStateNormal];
[_Confirm_addressinfo_btn setTitleColor:JCColorHex(0xffffff) forState:UIControlStateNormal];
[_Confirm_addressinfo_btn setBackgroundColor:JCColorHex(0xDC143C)];
_Confirm_addressinfo_btn.titleLabel.font = [UIFont systemFontOfSize:17 weight:UIFontWeightSemibold];
_Confirm_addressinfo_btn.contentEdgeInsets = UIEdgeInsetsMake(0, 0, 0, -5);
[_Confirm_addressinfo_btn cc_addTapGesture:^{
NSLog(@"点击确认键,返回地理位置,纬度:%f,进度:%f",self.oldlatitude,self.oldlongitude);
// [self navRightClick];
}];
}
return _Confirm_addressinfo_btn;
}
@end
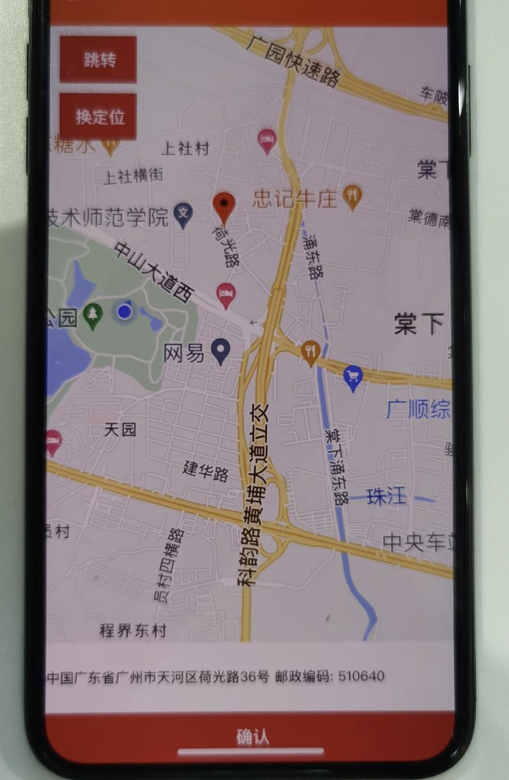
需要注意的是,代码里有一部分例如跳转按钮和换定位按钮是我自己用的需求,不是地图必须要的,到时候你们直接把代码复制进去 然后把需要的留下 不需要的删了。
里面最关键的就是实现了长按手势标记位置更新位置信息,这个我找了很久,很多文章才找到这个监听方法,谷歌地图文档很多都写着几句话我就懒得看,我都是搜索引擎找答案


 661
661

 被折叠的 条评论
为什么被折叠?
被折叠的 条评论
为什么被折叠?
 到【灌水乐园】发言


