


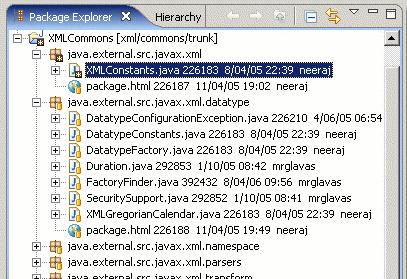
Now that your Subversion-enabled project is up and running, most of the necessary Subversion commands are accessible via the Team contextual menu (see Figure 5). You can see the status of your local files at a glance in the Package Explorer (see Figure 6), where any modified files are marked with an asterisk. Files that are stored in the repository display a small yellow barrel (representing a database); files that haven’t been added to the repository are displayed with a question mark.
(另一篇外文中的:The new file(s) or folder(s) you create during your development process must be added to Version Control, using theAdd command from the context menu in Working Copy View or Synchronize View. If you do not do this, the resource will be marked with a question mark (?), meaning that it is unversioned (unknown). After you have added it to version control, the resource will be marked as added (+) which means you first have to commit your working copy to make those resources available to other developers. Adding a resource to version control does not affect the repository.)
Figure 5 Most Subversion commands can be accessed via the Team menu.
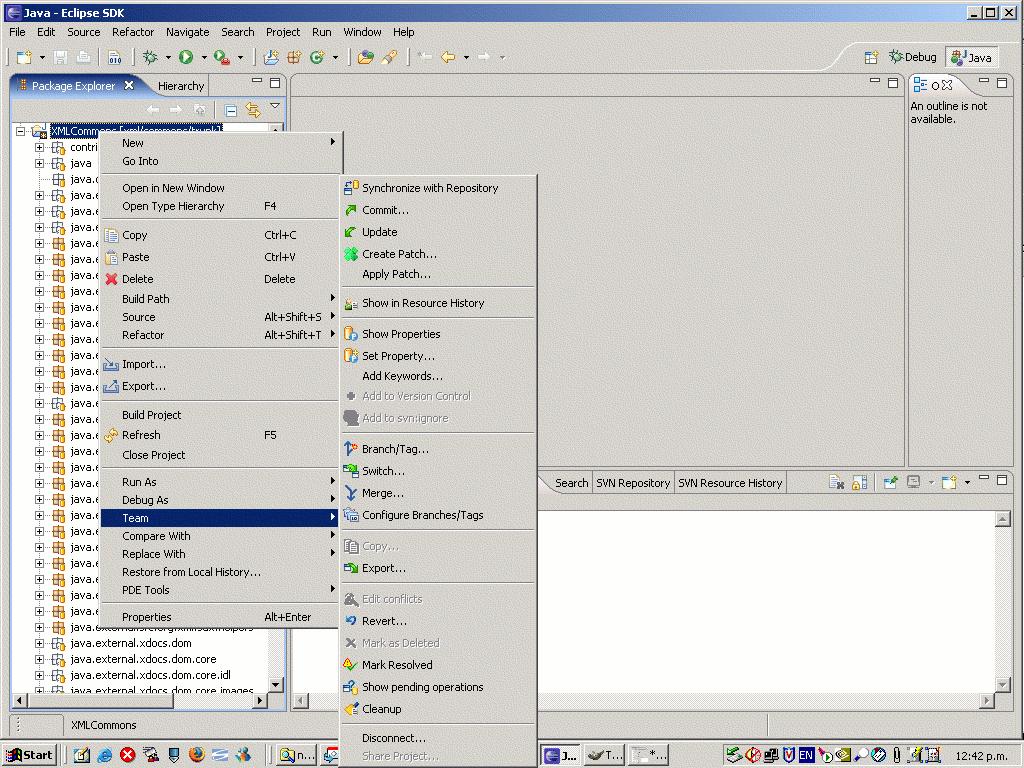
Figure 6 You can see the status of local files at a glance in the Package Explorer.
Synchronizing with the Repository
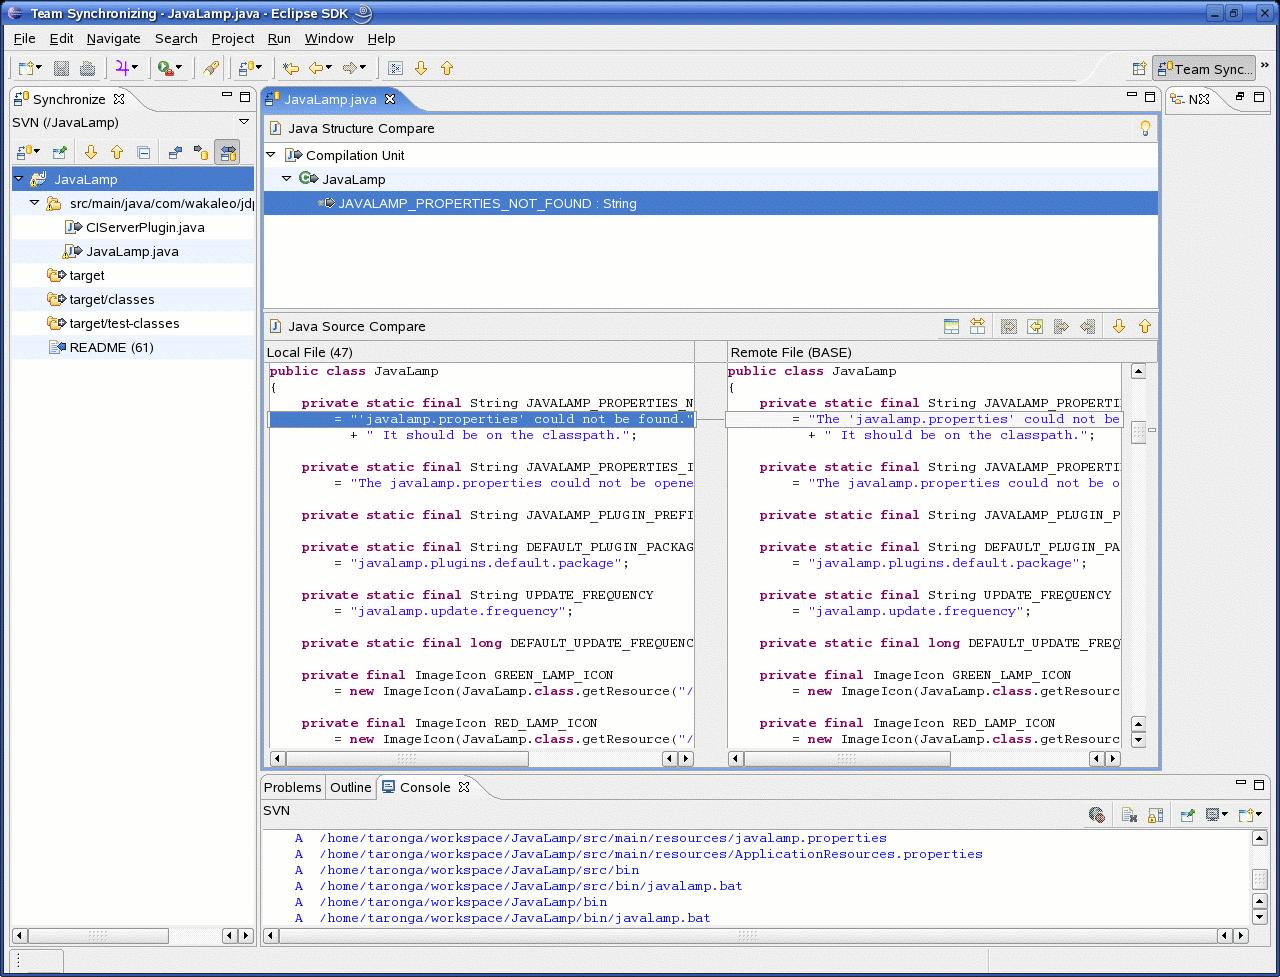
Updating your files from the repository and committing your changes to the repository are pretty straightforward processes, using the Team > Update and Team > Commit menu choices, respectively. Before you commit your changes, you may want to see whether any files were modified on the server since your last update. You can do this with Team >Synchronize with Repository. This command lets you see what has been modified locally, what has been modified on the server, and any conflicts between the two (see Figure 7). You can also visualize the differences between conflicting versions, and correct any outstanding conflicts before committing your changes.
Figure 7 Synchronizing with the repository.
Using Properties
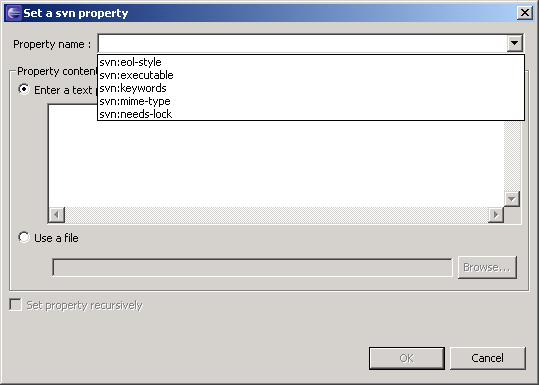
Properties are one of the more innovative features of Subversion. In Subversion, you can associate metadata ("properties") with any file or directory. You can define any properties you like, but Subversion also comes with some useful built-in properties, such as these (see Figure 8):
- svn:executable allows you to set the executable flag for a file on operating systems that support this capability.
- svn:needs-lock can be used to enforce exclusive locks on files (useful for binary files, for example). A file with the svn:needs-lock property defined can be modified by only one person at a time. When it’s checked out, the file will be read-only. If you want to modify the file, you need to use the Team > Lock menu option first. When you’re done, release the file with Team > Unlock, or just commit your changes. This action will release the lock and let other users obtain a lock on the file.
Figure 8 Adding a Subversion property to a file.
Tags and Branches
In Subversion, it’s easy to create new tags and branches. You use tags to mark a particular version with a human-readable name, such as "Release 1.0." A branch is used to do new development work without destabilizing the main source code base (known as the trunk). Development on a branch continues until the developers are ready to integrate the changes back into the main trunk.
In Subversion, branches and tags are both created by making a virtual copy of a given revision under another name and/or in another directory. By convention, branches are stored in the branches directory and tags in the tags directory, although in practice you can do whatever suits your project best.
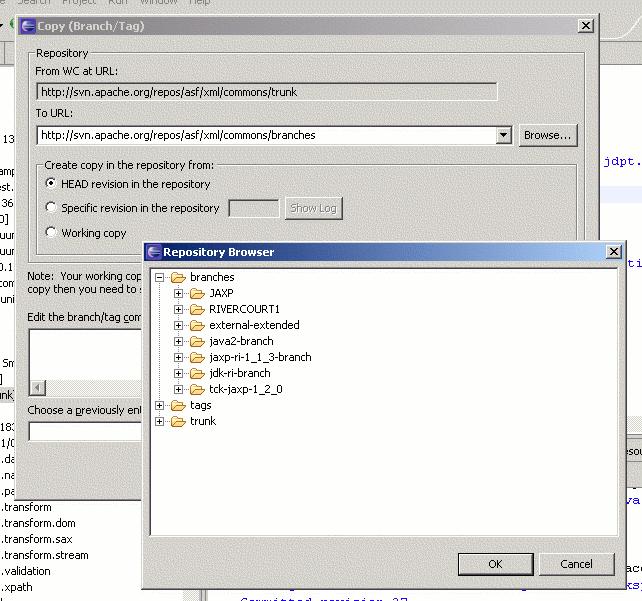
From Eclipse, the Team > Branch/Tag menu lets you create both branches and tags (see Figure 9). The Browse button provides a convenient way of seeing what branches and tags already exist in the repository.
When you’ve created a new branch or tag, you can easily switch between branches by using Team > Switch. Whenever you switch to a different branch (or back to the trunk), Subversion will update just the files it needs to synchronize your current working copy with the target branch.
Figure 9 Creating a new branch or tag.
Revision History
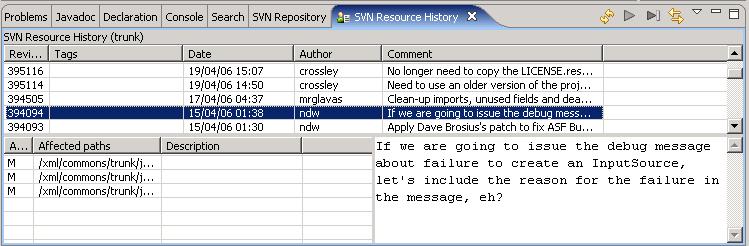
Like most SCM systems, Subversion lets you keep track of the changes that have been made to your source code. The Team > Show in Resource History menu option lets you consult the list of changes that have been made to a file, directory, or even the whole project (see Figure 10).
Remember that in Subversion, commits are atomic—a commit is made up of a set of file changes and a global comment. The SVN Resource History view gives you a succinct view of each commit, including the modified files and the associated comment.
Figure 10 Resource history.


 173
173

 被折叠的 条评论
为什么被折叠?
被折叠的 条评论
为什么被折叠?
 到【灌水乐园】发言


