


lxml 是一种使用 Python 编写的库,可以迅速、灵活地处理 XML。它支持 XML Path Language (XPath) 和 Extensible Stylesheet Language Transformation (XSLT),并且实现了常见的 ElementTree API。
(感觉博客上人烟稀少,没有人评论过我的文章,哪怕骂的人都木有,为了提高灌水率,我将在下面贴出一份绅士代码,现在先上代码的运行结果图

很绅士对吧)
Drops the element and all its children. Unlike el.getparent().remove(el) this does not remove the tail text; with drop_tree the tail text is merged with the previous element.
.drop_tag():
Drops the tag, but keeps its children and text.
.find_class(class_name):
Returns a list of all the elements with the given CSS class name. Note that class names are space separated in HTML, so doc.find_class_name('highlight') will find an element like <div class="sidebar highlight">. Class names are case sensitive.
.find_rel_links(rel):
Returns a list of all the <a rel="{rel}"> elements. E.g., doc.find_rel_links('tag') returns all the links marked as tags.
.get_element_by_id(id, default=None):
Return the element with the given id, or the default if none is found. If there are multiple elements with the same id (which there shouldn't be, but there often is), this returns only the first.
.text_content():
Returns the text content of the element, including the text content of its children, with no markup.
.cssselect(expr):
Select elements from this element and its children, using a CSS selector expression. (Note that .xpath(expr) is also available as on all lxml elements.)
.label:
Returns the corresponding <label> element for this element, if any exists (None if there is none). Label elements have a label.for_element attribute that points back to the element.
.base_url:
The base URL for this element, if one was saved from the parsing. This attribute is not settable. Is None when no base URL was saved.
cssselect类似于xpath都是很强大的选择器,不过cssselect主要通过css元素选择,而不是xpath的路径选择。
实现代码:
(感觉博客上人烟稀少,没有人评论过我的文章,哪怕骂的人都木有,为了提高灌水率,我将在下面贴出一份绅士代码,现在先上代码的运行结果图
很绅士对吧)
lxml的官方网站上有比较基础的tutorial,可以很好的认识lxml:
不过,我感觉tutorial上说的都是解析html的,不过确实html解析都那么高效简洁,xml就更加不用说了,不过我觉得xml是基础,还是有必要认真总结一下
lxml可以解析普通的xml文档。也可以解析网上的html文件,里面有html和css的选择器,反正就是很厉害的说。
1、lxml的xml操作:
对xml的操作是最基本的,跟html有类似,先掌握xml的操作时很重要的。
读入xml数据流,数据流可以是硬盘文件路径也可以是文件的数据流,还可以是http的response数据流
字符串转xml:
对xml的操作是最基本的,跟html有类似,先掌握xml的操作时很重要的。
读入xml数据流,数据流可以是硬盘文件路径也可以是文件的数据流,还可以是http的response数据流
字符串转xml:
xml = '<a xmlns="test"><b xmlns="test"/></a>'
root = etree.fromstring(xml)tree = etree.parse(StringIO(xml))
注意:python中对中文的支持不是很好,应该说python对于字符集的操作很严谨,所以在解析有中文的xml文件的时候需要使用XMLParser,设定字符集:
utf8_parser = etree.XMLParser(encoding='utf8')
etree.parse(StringIO(xml), parser=utf8_parser)
现在有这样一个xml:
<weatherinfos>
  <weatherinfo city="北京" city_en="beijing" date="" week="星期日">
    <time_range>
      <time>22</time>
      <tempCL>16℃L</tempCL>
      <tempCH>30℃H</tempCH>
      <tempFL>60.8℉L</tempFL>
      <tempFH>86℉H</tempFH>
      <weather>晴</weather>
      <wind>微风</wind>
    </time_range>
    <time_range>
      <time>02</time>
      <tempCL>17℃L</tempCL>
      <tempCH>29℃H</tempCH>
      <tempFL>62.6℉L</tempFL>
      <tempFH>84.2℉H</tempFH>
      <weather>多云</weather>
      <wind>微风</wind>
    </time_range>
    <time_range>
      <time>06</time>
      <tempCL>17℃L</tempCL>
      <tempCH>25℃H</tempCH>
      <tempFL>62.6℉L</tempFL>
      <tempFH>77℉H</tempFH>
      <weather>多云转小雨</weather>
      <wind>微风</wind>
    </time_range>
    <time_range>
      <time>10</time>
      <tempCL>15℃L</tempCL>
      <tempCH>26℃H</tempCH>
      <tempFL>59℉L</tempFL>
      <tempFH>78.8℉H</tempFH>
      <weather>小雨转阴</weather>
      <wind>微风转北风3-4级</wind>
    </time_range>
    <time_range>
      <time>14</time>
      <tempCL>15℃L</tempCL>
      <tempCH>30℃H</tempCH>
      <tempFL>59℉L</tempFL>
      <tempFH>86℉H</tempFH>
      <weather>晴</weather>
      <wind>微风</wind>
    </time_range>
  </weatherinfo>
</weatherinfos>
(1)、对于lxml来说。一个element中会有attribute,tag,text还有children等元素,例如weatherinfo 这个element,里面的’city=
"北京" city_en=
"beijing" date=
"" week=
"星期日"‘全部是attribute,tag自然是指weatherinfo ,text是指'<root>text</root>'这个节点中的text值
(2)、迭代获取一个节点中所有的元素(这个我比较喜欢)
使用 iterparse 迭代器:
def parseXML(xmlFile):
    """
    Parse the xml
    """
    f = open(xmlFile)
    xml = f.read()
    f.close()

    tree = etree.parse(StringIO(xml))
    #context = etree.iterparse(xmlFile, encoding="utf-8") )  #可以直接用文件名作为参数
    context = etree.iterparse(StringIO(xml), encoding="utf-8") #中文需要设定字符集
    for action, elem in context:
        if not elem.text:
            text = "None"
        else:
            text = elem.text
        print elem.tag + " => " + text
因为xpath真的太强大了,无论是迭代还是单独取节点都是可以轻松做到
上面两个例子都是把xml文件中所有的子节点的text输出出来
(3)、单独节点选择
对于这一节,官网的描述很详细,这里直接来个链接:
另外 find 和 findall 方法都是很常用的都是强大的选择器,跟xpath很类似
xpath的例子,输出第一个weather的值和所有weather的值:
utf8_parser = etree.XMLParser(encoding='utf8')
    f = open(xmlFile)
    xml = f.read()
    f.close()
    doc = etree.parse(StringIO(xml), parser=utf8_parser)
    weather = doc.xpath('weatherinfos/weatherinfo/time_range/weather')
    if not weather[0].text:
           text = "None"
     else:
           text = weather[0].text
    print weather[0].tag + " => " + text #输出第一个weather的text
    for sf in weather:#输出所有weather
        if not sf.text:
                text = "None"
            else:
                text = elem.text
           print elem.tag + " => " + text
2、lxml对html的操作
至于lxml对html的操作只要认真阅读官方的文档就可以很好的掌握
里面重点用到的方法是lxml.html中的
里面重点用到的方法是lxml.html中的
.drop_tree():
Drops the element and all its children. Unlike el.getparent().remove(el) this does not remove the tail text; with drop_tree the tail text is merged with the previous element.
.drop_tag():
Drops the tag, but keeps its children and text.
.find_class(class_name):
Returns a list of all the elements with the given CSS class name. Note that class names are space separated in HTML, so doc.find_class_name('highlight') will find an element like <div class="sidebar highlight">. Class names are case sensitive.
.find_rel_links(rel):
Returns a list of all the <a rel="{rel}"> elements. E.g., doc.find_rel_links('tag') returns all the links marked as tags.
.get_element_by_id(id, default=None):
Return the element with the given id, or the default if none is found. If there are multiple elements with the same id (which there shouldn't be, but there often is), this returns only the first.
.text_content():
Returns the text content of the element, including the text content of its children, with no markup.
.cssselect(expr):
Select elements from this element and its children, using a CSS selector expression. (Note that .xpath(expr) is also available as on all lxml elements.)
.label:
Returns the corresponding <label> element for this element, if any exists (None if there is none). Label elements have a label.for_element attribute that points back to the element.
.base_url:
The base URL for this element, if one was saved from the parsing. This attribute is not settable. Is None when no base URL was saved.
cssselect类似于xpath都是很强大的选择器,不过cssselect主要通过css元素选择,而不是xpath的路径选择。
经常这样子使用,首先分析页面元素的特点,然后使用cssselect选中需要提取的节点,最后用一个for 循环把里面的elem逐个取出来进行处理
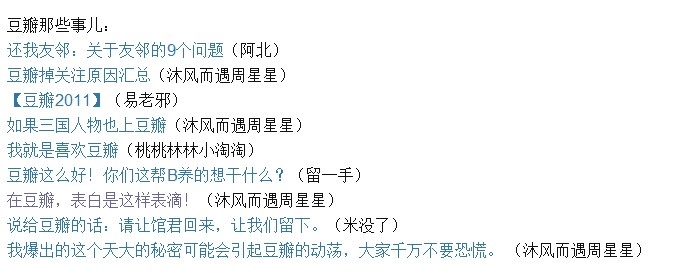
下面是把豆瓣的一个页面中所有其他文章链接提取出来的代码
页面是这个样子
实现代码:
page = urllib.urlopen('http://www.douban.com/note/153041669/')
doc = lxml.html.document_fromstring(page.read().decode('utf8','ignore'))

for idx, el in enumerate(doc.xpath(u'//a[@rel="nofollow"]')):
        print el.attrib['href']
print el.text.decode('utf8')import urllib2
import lxml.html
page = urllib2.urlopen('http://tieba.baidu.com/p/2166231880').read()
doc = lxml.html.document_fromstring(page)
for idx, el in enumerate(doc.cssselect('img.BDE_Image')):
with open('%03d.jpg' % idx, 'wb') as f:
f.write(urllib2.urlopen(el.attrib['src']).read())
上面的内容是利用lxml对xml和html的解析操作,类似于IO中的读入,那么下面就是IO中的写操作,不过因为我很少用lxml写html,不好在这里瞎说(其实一直在瞎说 - -),所以下面是xml的写操作
上面提到对于element有attractive,tag,text还有children等元素,写操作也是对这些元素的操作。
首先新建一个根节点:
root = etree.Element("weatherinfos")element = etree.Element("weatherinfo", 的’city="北京" city_en="beijing" date="")element .attrib['week']='星期日'element.text='测试'
对于lxml,有两种形式增加children节点:
面向对象式的:
time_range= etree.Element("time_range")
element.append(time_range)
time_range.text='i am children'etree.SubElement(element, "time_range").text='i am children'
两种方式实现的效果都一样
利用上面的操作基本可以完成xml的基础操作
done


 913
913

 被折叠的 条评论
为什么被折叠?
被折叠的 条评论
为什么被折叠?
 到【灌水乐园】发言


