


项目中经常是处理复合类型比如集合List、Map,下面就cxf处理复合类型进行讲解。
具体例子如下:
这里实例是客户端传一个JavaBean,服务器端返回集合类型;
一、 接口返回List处理:
在原来的项目实例(cxf开发webService服务端口)基础上,我们先创建一个实体类User:

 1 /**
 2  *
 3  */
 4 package com.hik.entity;
 5
 6 /**
 7  * @ClassName: User
 8  * @Description: 用户实体类
 9  * @author jed
10  * @date 2017年7月30日下午2:44:41
11  *
12  */
13 public class User {
14
15     private Integer id; // 编号
16     private String userName; //用户名
17     private String password; //密码
18
19     public Integer getId() {
20         return id;
21     }
22     public void setId(Integer id) {
23         this.id = id;
24     }
25     public String getUserName() {
26         return userName;
27     }
28     public void setUserName(String userName) {
29         this.userName = userName;
30     }
31     public String getPassword() {
32         return password;
33     }
34     public void setPassword(String password) {
35         this.password = password;
36     }
37
38
39 }
再创建一个Role实体类:
 1 /**
 2  *
 3  */
 4 package com.hik.entity;
 5
 6 /**
 7  * @ClassName: Role
 8  * @Description: TODO
 9  * @author jed
10  * @date 2017年7月30日下午2:46:45
11  *
12  */
13 public class Role {
14
15     private Integer id; //编号
16     private String roleName; //角色名称
17
18     public Role() {
19         super();
20     }
21
22     public Role(Integer id, String roleName) {
23         super();
24         this.id = id;
25         this.roleName = roleName;
26     }
27
28     public Integer getId() {
29         return id;
30     }
31     public void setId(Integer id) {
32         this.id = id;
33     }
34     public String getRoleName() {
35         return roleName;
36     }
37     public void setRoleName(String roleName) {
38         this.roleName = roleName;
39     }
40
41
42 }
然后HelloWorld再加一个接口方法getRoleByUser,通过用户查找角色:
 1 /**
 2  *
 3  */
 4 package com.hik.webservice;
 5
 6 import java.util.List;
 7
 8 import javax.jws.WebService;
 9
10 import com.hik.entity.Role;
11 import com.hik.entity.User;
12
13 /**
14  * @ClassName: HelloWorld
15  * @Description: TODO
16  * @author jed
17  * @date 2017年7月30日上午10:20:35
18  *
19  */
20 @WebService
21 public interface HelloWorld {
22
23     public String say(String str);
24
25     public List<Role> getRoleByUser(User user);
26 }
然后HelloWorld接口实现类 HelloWorldImpl写下新增的方法的具体实现,我们这里写死,模拟下即可:
 1 /**
 2  *
 3  */
 4 package com.hik.webservice.impl;
 5
 6 import java.util.ArrayList;
 7 import java.util.List;
 8
 9 import javax.jws.WebService;
10
11 import com.hik.entity.Role;
12 import com.hik.entity.User;
13 import com.hik.webservice.HelloWorld;
14
15 /**
16  * @ClassName: HelloWorldImpl
17  * @Description: TODO
18  * @author jed
19  * @date 2017年7月30日上午10:24:46
20  *
21  */
22 @WebService
23 public class HelloWorldImpl implements HelloWorld{
24
25     public String say(String str) {
26         return "hello "+str;
27     }
28
29     public List<Role> getRoleByUser(User user) {
30         List<Role> roleList = new ArrayList<Role>();
31         if(user!=null){
32             if(user.getUserName().equals("jack") && user.getPassword().equals("123456")){
33                 roleList.add(new Role(1, "技术总监"));
34                 roleList.add(new Role(2, "产品经理"));
35             }else if(user.getUserName().equals("lili") && user.getPassword().equals("123456")){
36                 roleList.add(new Role(3, "程序员"));
37             }
38             return roleList;
39         }else{
40             return null;
41         }
42
43     }
44
45 }
服务端其他地方不用动;再重新发布下webService接口。
下面我们来处理下客户端,和前面讲的一样。我们用wsdl2java工具重新生成代码
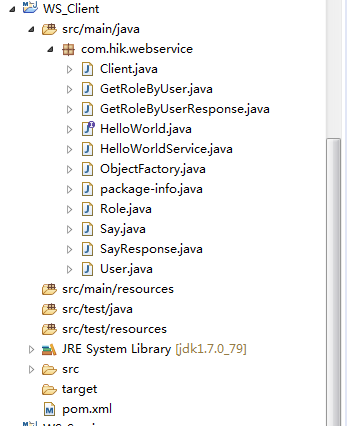
我们改下Client类:
 1 /**
 2  *
 3  */
 4 package com.hik.webservice;
 5
 6 import java.util.List;
 7
 8 /**
 9  * @ClassName: Client
10  * @Description: TODO
11  * @author jed
12  * @date 2017年7月30日下午1:58:36
13  *
14  */
15 public class Client {
16
17     public static void main(String[] args) {
18         HelloWorldService service = new HelloWorldService();
19         HelloWorld helloWorld = service.getHelloWorldPort(); //代理
20         //System.out.println(helloWorld.say("你好!"));
21         User user = new User();
22         user.setUserName("lili");
23         user.setPassword("123456");
24         List<Role> roleList = helloWorld.getRoleByUser(user);
25         for(Role role : roleList){
26             System.out.println(role.getId()+" , "+role.getRoleName());
27         }
28     }
29 }
运行截图:

二、接口返回Map处理
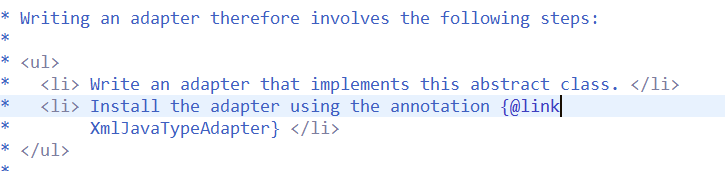
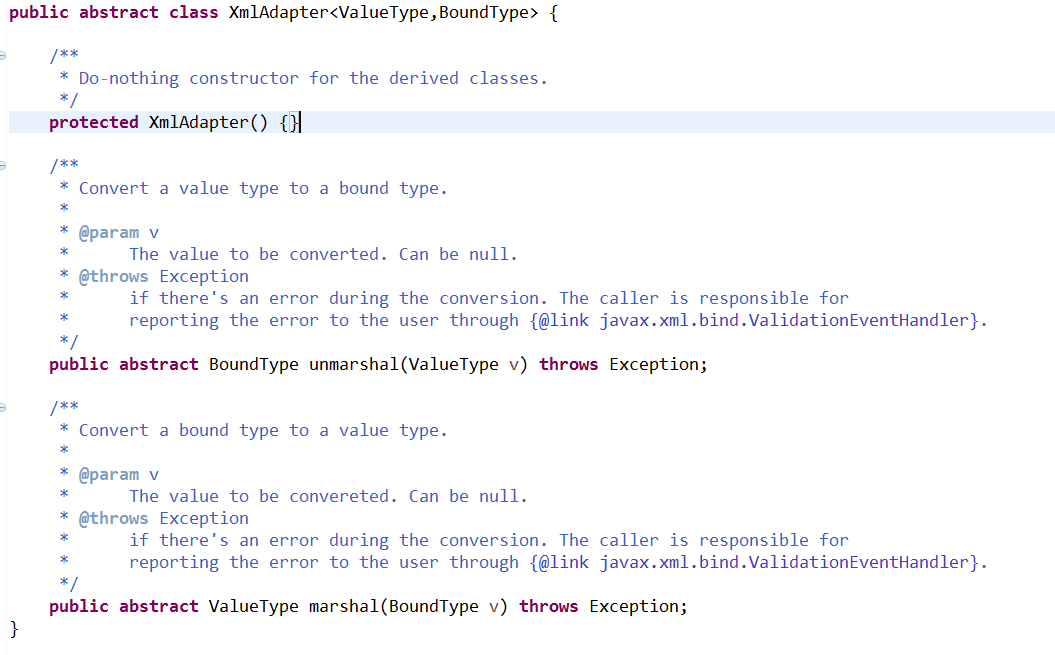
map类型比较特殊,由其数据结构而决定。XmlAdapter类源码也有说明:

因此,需要写一个适配器来做转换,使用注解annotation注解 。该适配器类需实现抽象类XmlAdapter的两个转换方法。
代码例子如下:
如增加接口:获取所有用用户以及对应的每个用户所有角色信息;
服务器端:
HelloWorld接口加方法:
 1 /**
 2      *
 3      * @MethodName: getRoles
 4      * @Description: 获取所有用户及对应角色
 5      * @author jed
 6      * @date 2017年8月4日下午10:36:59
 7      * @param @return
 8      * @return Map<String,List<Role>>    返回类型
 9      * @return
10      *
11      */
12     @XmlJavaTypeAdapter(MapAdapter.class)
13     public Map<String, List<Role>> getRoles();
HelloWorldImpl实现类加方法实现:
 1 public Map<String, List<Role>> getRoles() {
 2         Map<String, List<Role>> map = new HashMap<String, List<Role>>();
 3         List<Role> roleList1 = new ArrayList<Role>();
 4         roleList1.add(new Role(1, "技术总监"));
 5         roleList1.add(new Role(2, "产品经理"));
 6         map.put("admin", roleList1);
 7         List<Role> roleList2 = new ArrayList<Role>();
 8         roleList2.add(new Role(3, "程序员"));
 9         map.put("jack", roleList2);
10         return map;
11     }
然后我们启动Server类:发现报错:
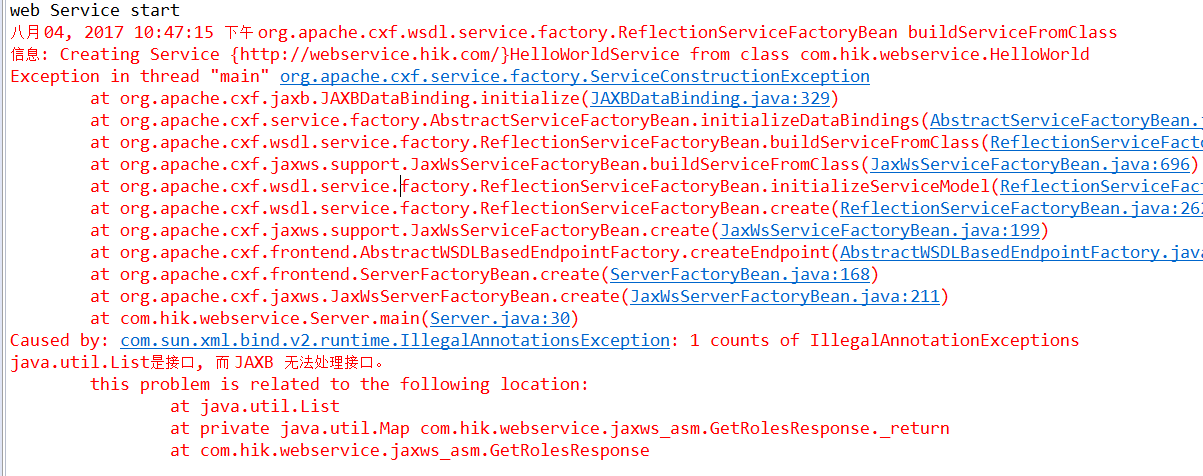
报错显示不支持该类型,解决方案,可以使用适配器,把cxf不能接受的类型通过适配器,转能接受的类型。
我们使用@XmlJavaTypeAdapter注解,加在接口定义上,完整接口代码如下:
 1 /**
 2  *
 3  */
 4 package com.hik.webservice;
 5
 6 import java.util.List;
 7 import java.util.Map;
 8
 9 import javax.jws.WebService;
10 import javax.xml.bind.annotation.adapters.XmlJavaTypeAdapter;
11
12 import com.hik.adapter.MapAdapter;
13 import com.hik.entity.Role;
14 import com.hik.entity.User;
15
16 /**
17  * @ClassName: HelloWorld
18  * @Description: TODO
19  * @author jed
20  * @date 2017年7月30日上午10:20:35
21  *
22  */
23 @WebService
24 public interface HelloWorld {
25
26     public String say(String str);
27
28     /**
29      *
30      * @MethodName: getRoleByUser
31      * @Description: 获取用户角色
32      * @author jed
33      * @date 2017年8月4日下午10:37:30
34      * @param @param user
35      * @param @return
36      * @return List<Role>    返回类型
37      * @param user
38      * @return
39      *
40      */
41     public List<Role> getRoleByUser(User user);
42
43     /**
44      *
45      * @MethodName: getRoles
46      * @Description: 获取所有用户及对应角色
47      * @author jed
48      * @date 2017年8月4日下午10:36:59
49      * @param @return
50      * @return Map<String,List<Role>>    返回类型
51      * @return
52      *
53      */
54     @XmlJavaTypeAdapter(MapAdapter.class)
55     public Map<String, List<Role>> getRoles();
56 }
这里参数需要一个实现了XmlAdapter类的适配器类;
这里的话XmlAdapter要加两个参数,XmlAdapter<ValueType,BoundType>
ValueType是cxf能接收的类型,这里我用了数组;
BoundType是cxf不能接受的类型,也就是我例子里的需求的Map类型;
 1 /**
 2  *
 3  */
 4 package com.hik.adapter;
 5
 6 import java.util.HashMap;
 7 import java.util.List;
 8 import java.util.Map;
 9
10 import javax.xml.bind.annotation.adapters.XmlAdapter;
11
12 import com.hik.entity.Role;
13
14 /**
15  * @ClassName: MapAdapter
16  * @Description: Map适配器
17  * @author jed
18  * @date 2017年8月4日下午10:56:41
19  *
20  */
21 public class MapAdapter extends XmlAdapter<MyRole[], Map<String, List<Role>>>{
22
23     /**
24      * 适配转换  MyRole[] -> Map<String, List<Role>>
25      */
26     @Override
27     public Map<String, List<Role>> unmarshal(MyRole[] v) throws Exception {
28         Map<String, List<Role>> map = new HashMap<String, List<Role>>();
29         for(int i=0;i<v.length;i++){
30             MyRole r = v[i];
31             map.put(r.getKey(), r.getValue());
32         }
33         return map;
34     }
35
36      /**
37      * 适配转换  Map<String, List<Role>> -> MyRole[]
38      */
39     @Override
40     public MyRole[] marshal(Map<String, List<Role>> v) throws Exception {
41         MyRole[] roles = new MyRole[v.size()];
42         int i=0;
43         for(String key : v.keySet()){
44             roles[i] = new MyRole();
45             roles[i].setKey(key);
46             roles[i].setValue(v.get(key));
47             i++;
48         }
49
50         return roles;
51     }
52
53 }
还有一个MyRole自定义类型,key:value。我们搞成两个属性,具体实现如下:
 1 /**
 2  *
 3  */
 4 package com.hik.adapter;
 5
 6 import java.util.List;
 7
 8 import com.hik.entity.Role;
 9
10 /**
11  * @ClassName: MyRole
12  * @Description: 自定义实体 cxf能接受
13  * @author jed
14  * @date 2017年8月4日下午11:01:23
15  *
16  */
17 public class MyRole {
18
19     private String key;
20     private List<Role> value;
21
22     public String getKey() {
23         return key;
24     }
25     public void setKey(String key) {
26         this.key = key;
27     }
28     public List<Role> getValue() {
29         return value;
30     }
31     public void setValue(List<Role> value) {
32         this.value = value;
33     }
34
35
36 }
OK 好了。我们运行Server类,发布webservice接口:

发布成功。然后就到了webservice客户端,我们用wsdl2java工具生成下最新代码
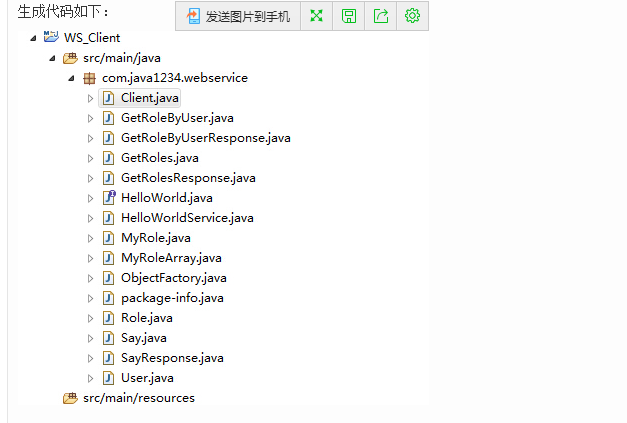
我们修改下Client类:
 1 /**
 2  *
 3  */
 4 package com.hik.webservice;
 5
 6 import java.util.List;
 7
 8 /**
 9  * @ClassName: Client
10  * @Description: TODO
11  * @author jed
12  * @date 2017年7月30日下午1:58:36
13  *
14  */
15 public class Client {
16
17     public static void main(String[] args) {
18         HelloWorldService service = new HelloWorldService();
19         HelloWorld helloWorld = service.getHelloWorldPort(); //代理
20         //System.out.println(helloWorld.say("你好!"));
21         /*User user = new User();
22         user.setUserName("lili");
23         user.setPassword("123456");
24         List<Role> roleList = helloWorld.getRoleByUser(user);
25         for(Role role : roleList){
26             System.out.println(role.getId()+" , "+role.getRoleName());
27         }*/
28         MyRoleArray array = helloWorld.getRoles();
29         List<MyRole> roleList = array.item;
30         for(int i=0;i<roleList.size();i++){
31             MyRole mr = roleList.get(i);
32             System.out.println(mr.key+":");
33             for(Role r: mr.getValue()){
34                 System.out.println(r.getId()+","+r.getRoleName()+" ");
35             }
36             System.out.println();
37         }
38     }
39 }
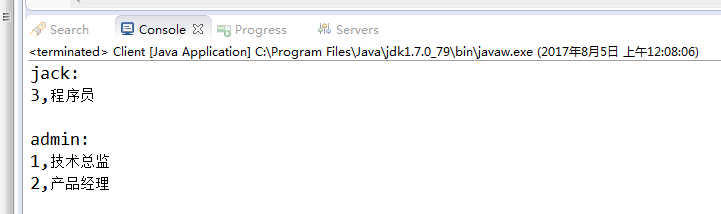
运行结果:
总结: webService处理过程如下:
1、webservice服务器端开发webservice接口,然后发布webservice;
2、通过一个Url调用webservice接口,发布的url是 http://192.168.0.102/helloWorld,则我们请求的url就是 http://192.168.0.102/helloWorld?wsdl
3、请求成功,返回一大串xml标记。这一大串xml即使wsdl。 wsdl (Web Services Description Language) 也就是Web Service描述语言,描述服务器端定义的webservice接口的相关信息。
4、wsdl描述可看到发布的方法。如:wsdl:types就是定义了一些变量,wsdl:message相当于定义方法,wsdl:portType相当与调用与返回。
5、客户端通过这个url请求,获得wsdl规范的xml文档片段信息,需用到SOAP(Simple Object Access Protocol)即简单对象访问协议,我们通过这个协议,来实现客户端,服务器端消息交互,SOAP使用XML消息调用远程方法;
当然交互的媒介就是xml,具体交互内容根据wsdl文档描述来。


 224
224


 被折叠的 条评论
为什么被折叠?
被折叠的 条评论
为什么被折叠?
 到【灌水乐园】发言


