


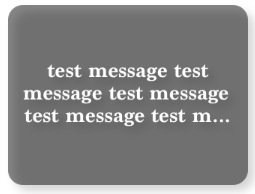
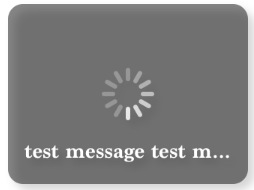
TCMessageBox toast 是一个很小的 toast 展示,主要效果有以下2种:
看了一下实现方式,也是挺简单的,不外乎就是创建一个view,中间再放一个 activityIndicator 和一个 label,最后再把整个view展示在 mianView 的中间而已。
看代码:
#import <Foundation/Foundation.h>

@interface TCMessageBox : NSObject

+(void)showMessage:(NSString *)message hideByTouch:(BOOL)hideByTouch withActivityIndicator:(BOOL)withIndicator offset:(CGSize)offset;

+(void)showMessage:(NSString *)message hideByTouch:(BOOL)hideByTouch withActivityIndicator:(BOOL)withIndicator;

+(void)showMessage:(NSString *)message hideByTouch:(BOOL)hideByTouch;

+(BOOL)presenting;
+(void)hide;
+(void)hideIn:(NSTimeInterval)delay;
@end
#import "TCMessageBox.h"
#import <QuartzCore/QuartzCore.h>

#define PADDING 10
#define DURATION 0.25

TCMessageBox *_theMsgBox;

@implementation TCMessageBox{
    UILabel *_label;
    UIView *_darkBox;
    UIActivityIndicatorView *_indicator;
    UIControl *_control;
    UIView * _backgroundView;
}


-(id)init{
    self = [super init];
    if (self) {

        _indicator = [[UIActivityIndicatorView alloc] initWithActivityIndicatorStyle:UIActivityIndicatorViewStyleWhiteLarge];

        _label = [[UILabel alloc] init];
        _label.backgroundColor = [UIColor clearColor];
        _label.textColor = [UIColor whiteColor];
        _label.font = [UIFont fontWithName:@"Marion-Bold" size:15];
        _label.textAlignment = NSTextAlignmentCenter;
        _label.numberOfLines = 3;

        _darkBox = [[UIView alloc] initWithFrame:CGRectMake(0, 0, 160, 120)];
        _darkBox.layer.backgroundColor = [UIColor colorWithWhite:0.05 alpha:0.50].CGColor;
        _darkBox.layer.cornerRadius = 10;
        _darkBox.layer.shadowColor = [UIColor colorWithWhite:0.6 alpha:0.8].CGColor;
        _darkBox.layer.shadowOffset = CGSizeMake(4, 4);
        _darkBox.layer.shadowOpacity = 1.0;

        _control = [[UIControl alloc] init];
        [_control addTarget:[TCMessageBox class] action:@selector(hide) forControlEvents:UIControlEventTouchUpInside];

        [_control addSubview:_darkBox];
        [_darkBox addSubview:_indicator];
        [_darkBox addSubview:_label];
    }
    return self;
}

-(void)layoutSubviewsWithActivityIndicator:(BOOL)withIndicator hideByTouch:(BOOL)hideByTouch offset:(CGSize)offset{
    CGRect rect, r2;
    UIWindow *window;

    if (withIndicator) {
        //cal indicator's frame
        rect = _indicator.frame;
        rect = CGRectMake((_darkBox.frame.size.width - rect.size.width) / 2, (_darkBox.frame.size.height - rect.size.height) / 2, rect.size.width, rect.size.height);
        _indicator.frame = rect;

        //cal label's frame
        rect = CGRectMake(PADDING, rect.origin.y + rect.size.height + PADDING, _darkBox.frame.size.width - PADDING * 2, 0);
        rect.size.height = _darkBox.frame.size.height - rect.origin.y - PADDING;
        _label.frame = rect;

        [_indicator startAnimating];
    }else{
        _indicator = nil;

        //cal label's frame
        rect = _darkBox.frame;
        rect = CGRectMake(PADDING, PADDING, rect.size.width - PADDING * 2, rect.size.height - PADDING * 2);
        _label.frame = rect;
    }

    window = [[UIApplication sharedApplication].windows objectAtIndex:0];

    r2 = window.rootViewController.view.bounds;

    //cal _darkBox's frame , move the _darkBox to the center(or + offset) of the mainscreen
    rect = _darkBox.frame;
    rect.origin.x = (r2.size.width - rect.size.width) / 2 + offset.width;
    rect.origin.y = (r2.size.height - rect.size.height) / 2 + offset.height;
    _darkBox.frame = rect;

    CGRect fullScreenRect = [window frame];
    _backgroundView = [[UIView alloc] initWithFrame:fullScreenRect];
    if (hideByTouch) {
        _control.frame = r2;
        [_control addSubview:_darkBox];
        [_backgroundView addSubview:_control];
    }else{
        _control = nil;
        [_backgroundView addSubview:_darkBox];
    }
    [window.rootViewController.view addSubview:_backgroundView];
}

+(void)showMessage:(NSString *)message hideByTouch:(BOOL)hideByTouch withActivityIndicator:(BOOL)withIndicator offset:(CGSize)offset{
    [_theMsgBox hide:NO];
    _theMsgBox = [[TCMessageBox alloc] init];
    [_theMsgBox layoutSubviewsWithActivityIndicator:withIndicator hideByTouch:hideByTouch offset:offset];
    _theMsgBox->_label.text = message;

    _theMsgBox->_darkBox.alpha = 0.0;
    [UIView animateWithDuration:DURATION animations:^{
        _theMsgBox->_darkBox.alpha = 1.0;
    } completion:nil];
}

+(void)showMessage:(NSString *)message hideByTouch:(BOOL)hideByTouch withActivityIndicator:(BOOL)withIndicator{
    [TCMessageBox showMessage:message hideByTouch:hideByTouch withActivityIndicator:withIndicator offset:CGSizeZero];
}

+(void)showMessage:(NSString *)message hideByTouch:(BOOL)hideByTouch{
    [TCMessageBox showMessage:message hideByTouch:hideByTouch withActivityIndicator:NO offset:CGSizeZero];
}

+(void)hide{
    [_theMsgBox hide:YES];
}

-(void)hide:(BOOL)animate{
    if (animate) {
        [UIView animateWithDuration:DURATION animations:^{
            _darkBox.alpha = 0;
        } completion:^(BOOL finished) {
            [self hide:NO];
        }];
    }else{
        [_backgroundView removeFromSuperview];
        [_control removeFromSuperview];
        [_darkBox removeFromSuperview];
    }
}


-(void)hideIn:(NSNumber *)delay{
    sleep(delay.doubleValue);
    [self performSelectorOnMainThread:@selector(hide:) withObject:@YES waitUntilDone:YES];
}

+(void)hideIn:(NSTimeInterval)delay{
    [_theMsgBox performSelectorInBackground:@selector(hideIn:) withObject:@(delay)];
}

+(BOOL)presenting{
    return (_theMsgBox->_control && _theMsgBox->_control.superview) || (!_theMsgBox->_control && _theMsgBox->_darkBox.superview);
}
@end
这样一封装好,接口使用起来还是挺方便的。当然,代码还有许多可以改进的地方,比如把 hideIn:接口功能添加到showMessage:hideByTouch:中这样就可以只调用一个接口就行了,不用这样
[TCMessageBox showMessage:@"test message" hideByTouch:NO];
[TCMessageBox hideIn:2.0f];
调用2个接口了,能简则简嘛~


 990
990

 被折叠的 条评论
为什么被折叠?
被折叠的 条评论
为什么被折叠?
 到【灌水乐园】发言


