


http://blog.csdn.net/yerenyuan_pku/article/details/52879669
版权声明:本文为博主原创文章,未经博主允许不得转载。 http://blog.csdn.net/yerenyuan_pku/article/details/52879669
前面我们已经入门使用Spring的注解方式实现AOP了,现在我们再来学习使用Spring的注解方式实现AOP的一些细节。本文是建立在使用Spring的注解方式实现AOP入门的案例的基础之上的。
本文是来讲解使用Spring的注解方式实现AOP的一些细节,其实说白了就是学习如何使用各种通知而已,例如前置通知、后置通知、异常通知、最终通知、环绕通知等,之前我们已经学习了前置通知,现在就来学习剩余的通知。
我们先来看后置通知,此时须将MyInterceptor类的代码修改为:
/**
 * 切面
 * @author li ayun
 *
 */
@Aspect
public class MyInterceptor {
    @Pointcut("execution (* cn.itcast.service.impl.PersonServiceImpl.*(..))")
    private void anyMethod() {} // 声明一个切入点,anyMethod为切入点名称

    // 声明该方法是一个前置通知:在目标方法开始之前执行
    @Before("anyMethod()")
    public void doAccessCheck() {
        System.out.println("前置通知");
    }

    @AfterReturning("anyMethod()")
    public void doAfterReturning() {
        System.out.println("后置通知");
    }

}- 1
- 2
- 3
- 4
- 5
- 6
- 7
- 8
- 9
- 10
- 11
- 12
- 13
- 14
- 15
- 16
- 17
- 18
- 19
- 20
- 21
- 22
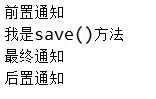
测试SpringAOPTest类的interceptorTest()方法,可以发现Eclipse控制台打印:
这说明后置通知方法是在目标方法执行之后执行的。
我们再来看最终通知,此时须将MyInterceptor类的代码修改为:

/**
 * 切面
 * @author li ayun
 *
 */
@Aspect
public class MyInterceptor {
    @Pointcut("execution (* cn.itcast.service.impl.PersonServiceImpl.*(..))")
    private void anyMethod() {} // 声明一个切入点,anyMethod为切入点名称

    // 声明该方法是一个前置通知:在目标方法开始之前执行
    @Before("anyMethod()")
    public void doAccessCheck() {
        System.out.println("前置通知");
    }

    @AfterReturning("anyMethod()")
    public void doAfterReturning() {
        System.out.println("后置通知");
    }

    @After("anyMethod()")
    public void doAfter() {
        System.out.println("最终通知");
    }
}- 1
- 2
- 3
- 4
- 5
- 6
- 7
- 8
- 9
- 10
- 11
- 12
- 13
- 14
- 15
- 16
- 17
- 18
- 19
- 20
- 21
- 22
- 23
- 24
- 25
- 26
测试SpringAOPTest类的interceptorTest()方法,可以发现Eclipse控制台打印:
再接者,我们来看一下异常通知,异常通知是在目标方法抛异常时执行的,故我们应将PersonServiceImpl类的代码改为:
public class PersonServiceImpl implements PersonService {

    @Override
    public void save(String name) {
        throw new RuntimeException("我是异常");
        // System.out.println("我是save()方法");
    }

    @Override
    public void update(String name, Integer id) {
        System.out.println("我是update()方法");
    }

    @Override
    public String getPersonName(Integer id) {
        System.out.println("我是getPersonName()方法");
        return "xxx";
    }

}- 1
- 2
- 3
- 4
- 5
- 6
- 7
- 8
- 9
- 10
- 11
- 12
- 13
- 14
- 15
- 16
- 17
- 18
- 19
- 20
然后在MyInterceptor类中声明异常通知方法:
/**
 * 切面
 * @author li ayun
 *
 */
@Aspect
public class MyInterceptor {
    @Pointcut("execution (* cn.itcast.service.impl.PersonServiceImpl.*(..))")
    private void anyMethod() {} // 声明一个切入点,anyMethod为切入点名称

    // 声明该方法是一个前置通知:在目标方法开始之前执行
    @Before("anyMethod()")
    public void doAccessCheck() {
        System.out.println("前置通知");
    }

    @AfterReturning("anyMethod()")
    public void doAfterReturning() {
        System.out.println("后置通知");
    }

    @After("anyMethod()")
    public void doAfter() {
        System.out.println("最终通知");
    }

    @AfterThrowing("anyMethod()")
    public void doAfterThrowing() {
        System.out.println("异常通知");
    }
}- 1
- 2
- 3
- 4
- 5
- 6
- 7
- 8
- 9
- 10
- 11
- 12
- 13
- 14
- 15
- 16
- 17
- 18
- 19
- 20
- 21
- 22
- 23
- 24
- 25
- 26
- 27
- 28
- 29
- 30
- 31
测试SpringAOPTest类的interceptorTest()方法,可以发现Eclipse控制台打印:
并且还抛出异常。
最后,我们来看一下环绕通知,Struts2提供的拦截器就属于环绕通知,环绕通知在我们做权限系统时将大量使用。这时,我们还是将PersonServiceImpl类的代码恢复为:

public class PersonServiceImpl implements PersonService {

    @Override
    public void save(String name) {
        // throw new RuntimeException("我是异常");
        System.out.println("我是save()方法");
    }

    @Override
    public void update(String name, Integer id) {
        System.out.println("我是update()方法");
    }

    @Override
    public String getPersonName(Integer id) {
        System.out.println("我是getPersonName()方法");
        return "xxx";
    }

}- 1
- 2
- 3
- 4
- 5
- 6
- 7
- 8
- 9
- 10
- 11
- 12
- 13
- 14
- 15
- 16
- 17
- 18
- 19
- 20
然后在MyInterceptor类中声明环绕通知方法,环绕通知方法的写法是固定的,形如:
public Object doBasicProfiling(ProceedingJoinPoint pjp) throws Throwable {
    ...
}- 1
- 2
- 3
这样,MyInterceptor类的代码应该是:
/**
 * 切面
 * @author li ayun
 *
 */
@Aspect
public class MyInterceptor {
    @Pointcut("execution (* cn.itcast.service.impl.PersonServiceImpl.*(..))")
    private void anyMethod() {} // 声明一个切入点,anyMethod为切入点名称

    // 声明该方法是一个前置通知:在目标方法开始之前执行
    @Before("anyMethod()")
    public void doAccessCheck() {
        System.out.println("前置通知");
    }

    @AfterReturning("anyMethod()")
    public void doAfterReturning() {
        System.out.println("后置通知");
    }

    @After("anyMethod()")
    public void doAfter() {
        System.out.println("最终通知");
    }

    @AfterThrowing("anyMethod()")
    public void doAfterThrowing() {
        System.out.println("异常通知");
    }

    @Around("anyMethod()")
    public Object doBasicProfiling(ProceedingJoinPoint pjp) throws Throwable {
        /**
         * 环绕通知内部一定要确保执行该方法,如果不执行该方法,业务bean中被拦截的方法就不会被执行。
         * 当执行该方法,如果后面还有切面的话,它的执行顺序应该是这样的:先执行后面的切面,如果后面没有切面了,
         * 再执行最终的目标对象的业务方法。若不执行该方法,则后面的切面,业务bean的方法都不会被执行。
         */
        // if () { // 判断用户是否有权限,
        System.out.println("进入方法");
        Object result = pjp.proceed();
        System.out.println("退出方法");
        // }
        return result;
    }
}- 1
- 2
- 3
- 4
- 5
- 6
- 7
- 8
- 9
- 10
- 11
- 12
- 13
- 14
- 15
- 16
- 17
- 18
- 19
- 20
- 21
- 22
- 23
- 24
- 25
- 26
- 27
- 28
- 29
- 30
- 31
- 32
- 33
- 34
- 35
- 36
- 37
- 38
- 39
- 40
- 41
- 42
- 43
- 44
- 45
- 46
注意:环绕通知内部一定要确保执行proceed()该方法,如果不执行该方法,业务bean中被拦截的方法就不会被执行。当执行该方法,如果后面还有切面的话,它的执行顺序应该是这样的:先执行后面的切面,如果后面没有切面了,再执行最终的目标对象的业务方法。若不执行该方法,则后面的切面,业务bean的方法都不会被执行。
其实我们仅使用环绕通知就可以实现前置通知、后置通知、异常通知、最终通知等的效果。
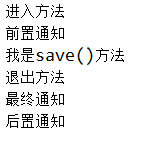
测试SpringAOPTest类的interceptorTest()方法,可以发现Eclipse控制台打印:
前面部分我们已经学会了如何使用各种通知,例如前置通知、后置通知、异常通知、最终通知、环绕通知等,现在我们再来看使用Spring的注解方式实现AOP的另一些细节。
细节一:如果我需要得到输入参数,如在前置通知里面,得到用户输入的数据。此时,须将前置通知方法修改为:
@Before("anyMethod() && args(name)")
public void doAccessCheck(String name) {
    System.out.println("前置通知:" + name);
}- 1
- 2
- 3
- 4
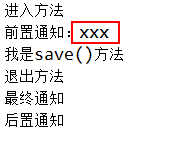
@Before("anyMethod() && args(name)")匹配的是PersonServiceImpl类中参数为String类型的方法,即save()方法。
测试SpringAOPTest类的interceptorTest()方法,可以发现Eclipse控制台打印:
细节二:如我要获得PersonServiceImpl类中的getPersonName()方法的返回参数。此时,须将后置通知方法修改为:
@AfterReturning(pointcut="anyMethod()", returning="result")
public void doAfterReturning(String result) {
    System.out.println("后置通知:" + result);
}- 1
- 2
- 3
- 4
@AfterReturning(pointcut="anyMethod()", returning="result")匹配的是PersonServiceImpl类中返回值类型为String的方法,并且returning属性能将返回值传入进后置通知方法里面。
我们还要修改SpringAOPTest类的代码为:
public class SpringAOPTest {

    @Test
    public void interceptorTest() {
        ApplicationContext cxt = new ClassPathXmlApplicationContext("beans.xml");
        PersonService personService = (PersonService) cxt.getBean("personService");
        personService.getPersonName(2);
    }

}- 1
- 2
- 3
- 4
- 5
- 6
- 7
- 8
- 9
- 10
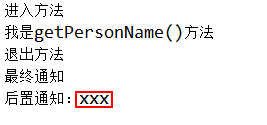
测试interceptorTest()方法,可以发现Eclipse控制台打印:
细节三:在目标方法出现异常时,得到抛出的异常。为了便于试验,我们须将PersonServiceImpl类的代码修改为:
public class PersonServiceImpl implements PersonService {

    @Override
    public void save(String name) {
        throw new RuntimeException("我是异常");
        // System.out.println("我是save()方法");
    }

    @Override
    public void update(String name, Integer id) {
        System.out.println("我是update()方法");
    }

    @Override
    public String getPersonName(Integer id) {
        System.out.println("我是getPersonName()方法");
        return "xxx";
    }

}- 1
- 2
- 3
- 4
- 5
- 6
- 7
- 8
- 9
- 10
- 11
- 12
- 13
- 14
- 15
- 16
- 17
- 18
- 19
- 20
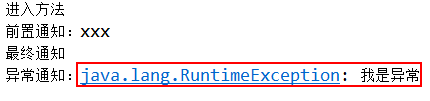
然后将异常通知方法修改为:
@AfterThrowing(pointcut="anyMethod()", throwing="e")
public void doAfterThrowing(Exception e) {
    System.out.println("异常通知:" + e);
}- 1
- 2
- 3
- 4
最后,我们还要将SpringAOPTest类的代码改为:
public class SpringAOPTest {

    @Test
    public void interceptorTest() {
        ApplicationContext cxt = new ClassPathXmlApplicationContext("beans.xml");
        PersonService personService = (PersonService) cxt.getBean("personService");
        personService.save("xxx");
    }

}- 1
- 2
- 3
- 4
- 5
- 6
- 7
- 8
- 9
- 10
测试interceptorTest()方法,可以发现Eclipse控制台打印:
基于Spring的注解方式实现AOP就学习到这里。如须查看源码,可点击使用Spring的注解方式实现AOP的细节进行下载。


 212
212


 被折叠的 条评论
为什么被折叠?
被折叠的 条评论
为什么被折叠?
 到【灌水乐园】发言


