


最近看到很多人在琢磨ios即时通讯这块,于是出去好奇,决定动手试试,今天就先从xmpp这个框架来尝试。
其实xmpp也就一个协议而已,更多人还是喜欢把它叫做Jabber
首先还是提供一下下载地址:
服务端Jabber,这里我用openfire来搭建:http://www.igniterealtime.org/
这里推荐一篇openfire配置的博文:http://www.cnblogs.com/xiaodao/archive/2013/04/05/3000554.html
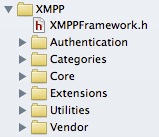
客户端就是ios的xmppFrame一些库咯,给个github方便:https://github.com/robbiehanson/XMPPFramework
xmppFrame里面有demo,在xcode文件下

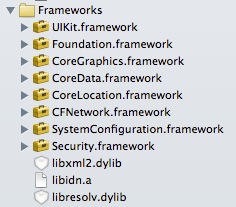
第三方类库,第一步还是惯例地导入需要的库文件
懒人喜欢直接上代码,出来吧,代码君!
- - (void)setupStream
- {
- NSAssert(xmppStream == nil, @"Method setupStream invoked multiple times");
- // 初始化XmppStream
- xmppStream = [[XMPPStream alloc] init];
- #if !TARGET_IPHONE_SIMULATOR
- {
- // 想要xampp在后台也能运行?
- //
- // P.S. - 虚拟机不支持后台
- xmppStream.enableBackgroundingOnSocket = YES;
- }
- #endif
- // 初始化 reconnect
- //
- // 这东西可以帮你把意外断开的状态连接回去...具体看它的头文件定义
- xmppReconnect = [[XMPPReconnect alloc] init];
- // 初始化 roster
- xmppRosterStorage = [[XMPPRosterCoreDataStorage alloc] init];
- // xmppRosterStorage = [[XMPPRosterCoreDataStorage alloc] initWithInMemoryStore];
- xmppRoster = [[XMPPRoster alloc] initWithRosterStorage:xmppRosterStorage];
- xmppRoster.autoFetchRoster = YES;
- xmppRoster.autoAcceptKnownPresenceSubscriptionRequests = YES;
- // 初始化 vCard support
- xmppvCardStorage = [XMPPvCardCoreDataStorage sharedInstance];
- xmppvCardTempModule = [[XMPPvCardTempModule alloc] initWithvCardStorage:xmppvCardStorage];
- xmppvCardAvatarModule = [[XMPPvCardAvatarModule alloc] initWithvCardTempModule:xmppvCardTempModule];
- // 初始化 capabilities
- xmppCapabilitiesStorage = [XMPPCapabilitiesCoreDataStorage sharedInstance];
- xmppCapabilities = [[XMPPCapabilities alloc] initWithCapabilitiesStorage:xmppCapabilitiesStorage];
- xmppCapabilities.autoFetchHashedCapabilities = YES;
- xmppCapabilities.autoFetchNonHashedCapabilities = NO;
- // 激活xmpp的模块
- [xmppReconnect activate:xmppStream];
- [xmppRoster activate:xmppStream];
- [xmppvCardTempModule activate:xmppStream];
- [xmppvCardAvatarModule activate:xmppStream];
- [xmppCapabilities activate:xmppStream];
- // 我们可以加添加委托来获取我们感兴趣的东西
- [xmppStream addDelegate:self delegateQueue:dispatch_get_main_queue()];
- [xmppRoster addDelegate:self delegateQueue:dispatch_get_main_queue()];
- // 下面可以替换成自己的域名和端口
- // 如果你没有提供一个地址,JID也是一样可以代替的,JID的格式类似这样"用户名@域名/roster",框架会自动抓取域名作为你的地址
- // 如果没有设置特殊的端口,默认为5222
- [xmppStream setHostName:@"xxxxx"];
- [xmppStream setHostPort:5222];
- //下面这两个根据你自己配置需要来设置
- allowSelfSignedCertificates = NO;
- allowSSLHostNameMismatch = NO;
- }
好了,具体要前期设置的东西都在上面,接下来就是连接上我们的服务器了
- - (BOOL)connect
- {
- if (![xmppStream isDisconnected]) {
- return YES;
- }
- <span style="white-space:pre"> </span>//这里前提你需要提供一个交互界面,可以填写jid和password的,然后把它们的值保存到NSUserDefaults
- NSString *myJID = [[NSUserDefaults standardUserDefaults] stringForKey:kXMPPmyJID];
- NSString *myPassword = [[NSUserDefaults standardUserDefaults] stringForKey:kXMPPmyPassword];
- if (myJID == nil || myPassword == nil) {
- return NO;
- }
- [xmppStream setMyJID:[XMPPJID jidWithString:myJID]];
- password = myPassword;
- NSError *error = nil;
- if (![xmppStream connectWithTimeout:XMPPStreamTimeoutNone error:&error])
- {
- UIAlertView *alertView = [[UIAlertView alloc] initWithTitle:@"Error connecting"
- message:@"See console for error details."
- delegate:nil
- cancelButtonTitle:@"Ok"
- otherButtonTitles:nil];
- [alertView show];
- DDLogError(@"Error connecting: %@", error);
- return NO;
- }
- return YES;
- }
如果一切顺利的话,执行下面的方法
- - (void)xmppStreamDidConnect:(XMPPStream *)sender
- {
- DDLogVerbose(@"%@: %@", THIS_FILE, THIS_METHOD);
- isXmppConnected = YES;
- NSError *error = nil;
- if (![[self xmppStream] authenticateWithPassword:password error:&error])
- {
- DDLogError(@"Error authenticating: %@", error);
- }
- }
- - (void)xmppStreamDidAuthenticate:(XMPPStream *)sender
- {
- DDLogVerbose(@"%@: %@", THIS_FILE, THIS_METHOD);
- [self goOnline];
- }
- - (void)goOnline
- {
- XMPPPresence *presence = [XMPPPresence presence]; // type="available" is implicit
- [[self xmppStream] sendElement:presence];
- }
如果不成功会调用
- - (void)xmppStream:(XMPPStream *)sender didNotAuthenticate:(NSXMLElement *)error
- {
- DDLogVerbose(@"%@: %@", THIS_FILE, THIS_METHOD);
- }
这种情况JID写错了,或者密码错了,好好检查一下
发个成功后的界面,普天同庆一下!

试试从服务端发一条信息给所有客户端
装载(https://i-blog.csdnimg.cn/blog_migrate/76bc9e0b672aef6049e2bd3119480035.png)


 2413
2413

 被折叠的 条评论
为什么被折叠?
被折叠的 条评论
为什么被折叠?
 到【灌水乐园】发言


