


2.3/2.4/2.5 find命令
之前有提到过,如果有不记得位置的命令可以用which命令查询,它会在PATH里寻找这个命令并返回它的路径。同样也有一个whereis命令(不常用),它是在一个文件列表中查询文件位置,不过时效性很差,只有你更新了你的列表它才能查到,否则是查不到的。
[root@lhy ~]# whereis ls
ls: /usr/bin/ls /usr/share/man/man1/ls.1.gz
[root@lhy ~]# ls
1  1_hard.anaconda-ks.cfg  2  2.txt  3  anaconda-ks.cfg  anaconda-ks.cfg1  anaconda-ks.cfg.2  openscap_data  yum.log.copy
[root@lhy ~]# whereis 2.txt
2:
还有一个命令叫做locate,它需要借助数据库/var/lib/mlocate/mlocate.db来查询,与whereis类似,更新这个.db文件可以用updatedb命令。
[root@lhy ~]# locate
locate: no pattern to search for specified
[root@lhy ~]# locate ls
locate: can not stat () `/var/lib/mlocate/mlocate.db': No such file or directory
[root@lhy ~]# updatedb
这样再去查询,它会列出路径中带你所查询字符串的文件
[root@lhy ~]# locate 2.txt
/root/2.txt
/usr/share/doc/vim-common-7.4.160/README_os2.txt
/usr/share/vim/vim74/doc/gui_w32.txt.gz
/usr/share/vim/vim74/doc/os_os2.txt.gz
/usr/share/vim/vim74/doc/os_win32.txt.gz
/usr/share/vim/vim74/doc/usr_02.txt.gz
/usr/share/vim/vim74/doc/usr_12.txt.gz
/usr/share/vim/vim74/doc/usr_22.txt.gz
/usr/share/vim/vim74/doc/usr_32.txt.gz
/usr/share/vim/vim74/doc/usr_42.txt.gz
进入正题,在linux系统下搜索文件/目录推荐使用强大的find命令。
Tips:
介绍几个bash下常用快捷键。
ctrl-l 清屏
ctrl-d;exit;logout; 退出终端
ctrl-c 中断
ctrl-u 删除光标前的输入
ctrl-k 删除光标后的输入
ctrl-e 光标移动到结尾
ctrl-a 光标移动到开始
find命令适用于很多种情况,
比如我只记得文件名“sshd_config”还有他大概的路径/etc/,就可以使用-name选项筛选出来
[root@lhy ~]# find /etc/ -name "sshd_config"
/etc/ssh/sshd_config
或者我文件名没有记得那么清楚,也可以使用正则搜索
[root@lhy ~]# find /etc/ -name "sshd_config"
/etc/ssh/sshd_config
[root@lhy ~]# find /etc/ -name "sshd*"
/etc/ssh/sshd_config
/etc/ssh/sshd_config.rpmnew
/etc/systemd/system/multi-user.target.wants/sshd.service
/etc/sysconfig/sshd
/etc/pam.d/sshd
使用-tpye指定搜索的文件的类型。
[root@lhy ~]# find /etc/ -type f -name "sshd*"
/etc/ssh/sshd_config
/etc/ssh/sshd_config.rpmnew
/etc/sysconfig/sshd
/etc/pam.d/sshd
[root@lhy ~]# find /etc/ -type l -name "sshd*"
/etc/systemd/system/multi-user.target.wants/sshd.service
[root@lhy ~]# find /dev/ -type b
/dev/sda3
/dev/sda2
/dev/sda1
/dev/sda
/dev/sr0
/dev/fd0
[root@lhy ~]# find /dev/ -type c
/dev/vsock
/dev/vcsa6
/dev/vcs6
/dev/vcsa5
/dev/vcs5
.......
还有其他选项-mtime -ctime -atime
我们使用stat命令查看一个文件的详细信息。
[root@lhy ~]# stat 2.txt
  File: ‘2.txt’
  Size: 0         	Blocks: 0          IO Block: 4096   regular empty file
Device: 803h/2051d	Inode: 67258396    Links: 1
Access: (0700/-rwx------)  Uid: (    0/    root)   Gid: (    0/    root)
Access: 2018-06-06 10:53:35.442121480 +0800
Modify: 2018-06-06 10:53:35.442121480 +0800
Change: 2018-06-06 15:40:39.480834399 +0800
 Birth: -
下面就列出了这个文件的mtime、ctime、atime
       +n     for greater than n,

       -n     for less than n,

       n      for exactly n.

       -amin n
              File was last accessed n minutes ago.

       -anewer file
              File  was last accessed more recently than file was modified.  If file is a symbolic link and the -H option or the -L option is in effect, the access
              time of the file it points to is always used.

       -atime n
              File was last accessed n*24 hours ago.  When find figures out how many 24-hour periods ago the  file  was  last  accessed,  any  fractional  part  is
              ignored, so to match -atime +1, a file has to have been accessed at least two days ago.

       -cmin n
              File's status was last changed n minutes ago.

       -cnewer file
              File's status was last changed more recently than file was modified.  If file is a symbolic link and the -H option or the -L option is in effect, the
              status-change time of the file it points to is always used.

       -ctime n
              File's status was last changed n*24 hours ago.  See the comments for -atime to understand how rounding affects  the  interpretation  of  file  status
              change times.
如果我更改文件的权限(inode相关),仅仅只有ctime会更新。
[root@lhy ~]# chmod 700 2.txt
[root@lhy ~]# stat 2.txt
  File: ‘2.txt’
  Size: 0         	Blocks: 0          IO Block: 4096   regular empty file
Device: 803h/2051d	Inode: 67258396    Links: 1
Access: (0700/-rwx------)  Uid: (    0/    root)   Gid: (    0/    root)
Access: 2018-06-06 10:53:35.442121480 +0800
Modify: 2018-06-06 10:53:35.442121480 +0800
Change: 2018-06-09 15:46:45.809168336 +0800
如果我更改了文件内容,mtime、ctime都会更新。
[root@lhy ~]# echo "asdg" >> 2.txt
[root@lhy ~]# stat 2.txt
  File: ‘2.txt’
  Size: 5         	Blocks: 8          IO Block: 4096   regular file
Device: 803h/2051d	Inode: 67258396    Links: 1
Access: (0700/-rwx------)  Uid: (    0/    root)   Gid: (    0/    root)
Access: 2018-06-06 10:53:35.442121480 +0800
Modify: 2018-06-09 15:48:53.969176514 +0800
Change: 2018-06-09 15:48:53.969176514 +0800
 Birth: -
如果我打开了这个文件,atime才会更新。
[root@lhy ~]# cat 2.txt
asdg
[root@lhy ~]# stat 2.txt
  File: ‘2.txt’
  Size: 5         	Blocks: 8          IO Block: 4096   regular file
Device: 803h/2051d	Inode: 67258396    Links: 1
Access: (0700/-rwx------)  Uid: (    0/    root)   Gid: (    0/    root)
Access: 2018-06-09 15:51:31.889186591 +0800
Modify: 2018-06-09 15:48:53.969176514 +0800
Change: 2018-06-09 15:48:53.969176514 +0800
 Birth: -
好了,这时候我想查询一下在一天以内发生更改的文件,根目录下这种文件很多,不详细列出
[root@lhy ~]# find / -type f -mtime -1
.............
/var/log/dmesg
/var/cache/yum/x86_64/7/base/mirrorlist.txt
/var/cache/yum/x86_64/7/base/cachecookie
/var/cache/yum/x86_64/7/extras/mirrorlist.txt
/var/cache/yum/x86_64/7/extras/cachecookie
/var/cache/yum/x86_64/7/updates/mirrorlist.txt
/var/cache/yum/x86_64/7/updates/cachecookie
/var/cache/yum/x86_64/7/timedhosts
/var/cache/yum/x86_64/7/timedhosts.txt
/var/spool/postfix/pid/master.pid

[root@lhy ~]# ll /var/spool/postfix/pid/master.pid
-rw------- 1 root root 33 Jun  9 15:05 /var/spool/postfix/pid/master.pid
[root@lhy ~]# date
Sat  9 Jun 15:56:49 CST 2018
find命令的参数可以使用-o(OR)来表示取或查询,不过很少有这么用的。
[root@lhy ~]# find /etc/ -type f -o -name "*.conf"
..............
/etc/.updated
/etc/aliases.db
/etc/vimrc
/etc/updatedb.conf
find可以轻易的查找到硬链接文件
[root@lhy ~]# ll
total 20
.............
-rw-------. 2 root root  1622 May 29 14:05 1_hard.anaconda-ks.cfg
..........
[root@lhy ~]# ls -i 1_hard.anaconda-ks.cfg
67145602 1_hard.anaconda-ks.cfg
[root@lhy ~]# find / -inum 67145602
/root/anaconda-ks.cfg
/root/1_hard.anaconda-ks.cfg
find还有一个强大的功能,-exec选项,它可以把find命令筛选出来的列表做进一步命令。比如我想看一看我-mtime -1的所有文件的(ls -l)。
[root@lhy ~]# find /etc/ -type f -mtime -1 -exec ls -l {} \;
-rw-r--r-- 1 root root 72 Jun  9 15:05 /etc/resolv.conf
-rw-r--r-- 1 root root 477 Jun  9 15:12 /etc/group
---------- 1 root root 377 Jun  9 15:12 /etc/gshadow
-rw-r--r-- 1 root root 14 Jun  9 15:05 /etc/tuned/active_profile
-rw-r--r-- 1 root root 7 Jun  9 15:05 /etc/tuned/profile_mode
然后我cp一份备份一下。
[root@lhy ~]# find /etc/ -type f -mtime -1 -exec cp {,.bak} \;
[root@lhy ~]# find /etc/ -type f -mtime -1 -o -name ".bak"
/etc/resolv.conf
/etc/group
/etc/gshadow
/etc/tuned/active_profile
/etc/tuned/profile_mode
/etc/tuned/active_profile.bak
/etc/tuned/profile_mode.bak
/etc/resolv.conf.bak
/etc/group.bak
/etc/gshadow.bak
或者按照文件的大小来查询,-size,单位是k、M
[root@lhy ~]# find /etc/ -type f -size +1000k -exec ls -lh {} \;
-r--r--r-- 1 root root 7.5M Jun  5 22:05 /etc/udev/hwdb.bin
-rw-r--r-- 1 root root 1.4M Jun  5 21:38 /etc/selinux/targeted/contexts/files/file_contexts.bin
-rw-r--r-- 1 root root 3.6M Jun  5 21:38 /etc/selinux/targeted/policy/policy.31
-rw------- 1 root root 3.6M Jun  5 21:38 /etc/selinux/targeted/active/policy.kern
-rw-r--r-- 1 root root 3.6M Jun  5 21:38 /etc/selinux/targeted/active/policy.linked
2.26文件名后缀
linux下命令是区分大小写的。
linux下的文件名的后缀并不代表这个文件的类型,但是习惯上我们按照文件类型取后缀名。
.txt为文本文档
.conf为配置文件
.gz是压缩文件 等等~
更改语言利用的是LANG
LANG=en   #设置英文
LANG=zh_CN.UTF-8   #设置中文
2.27 linux和windows互传文件
简单的介绍一个xshell的插件,安装lrzsz包就可以互传文件了。
安装lrzsz包之后,在xshell终端里,输入rz就可以从Windows传文件到linux了。
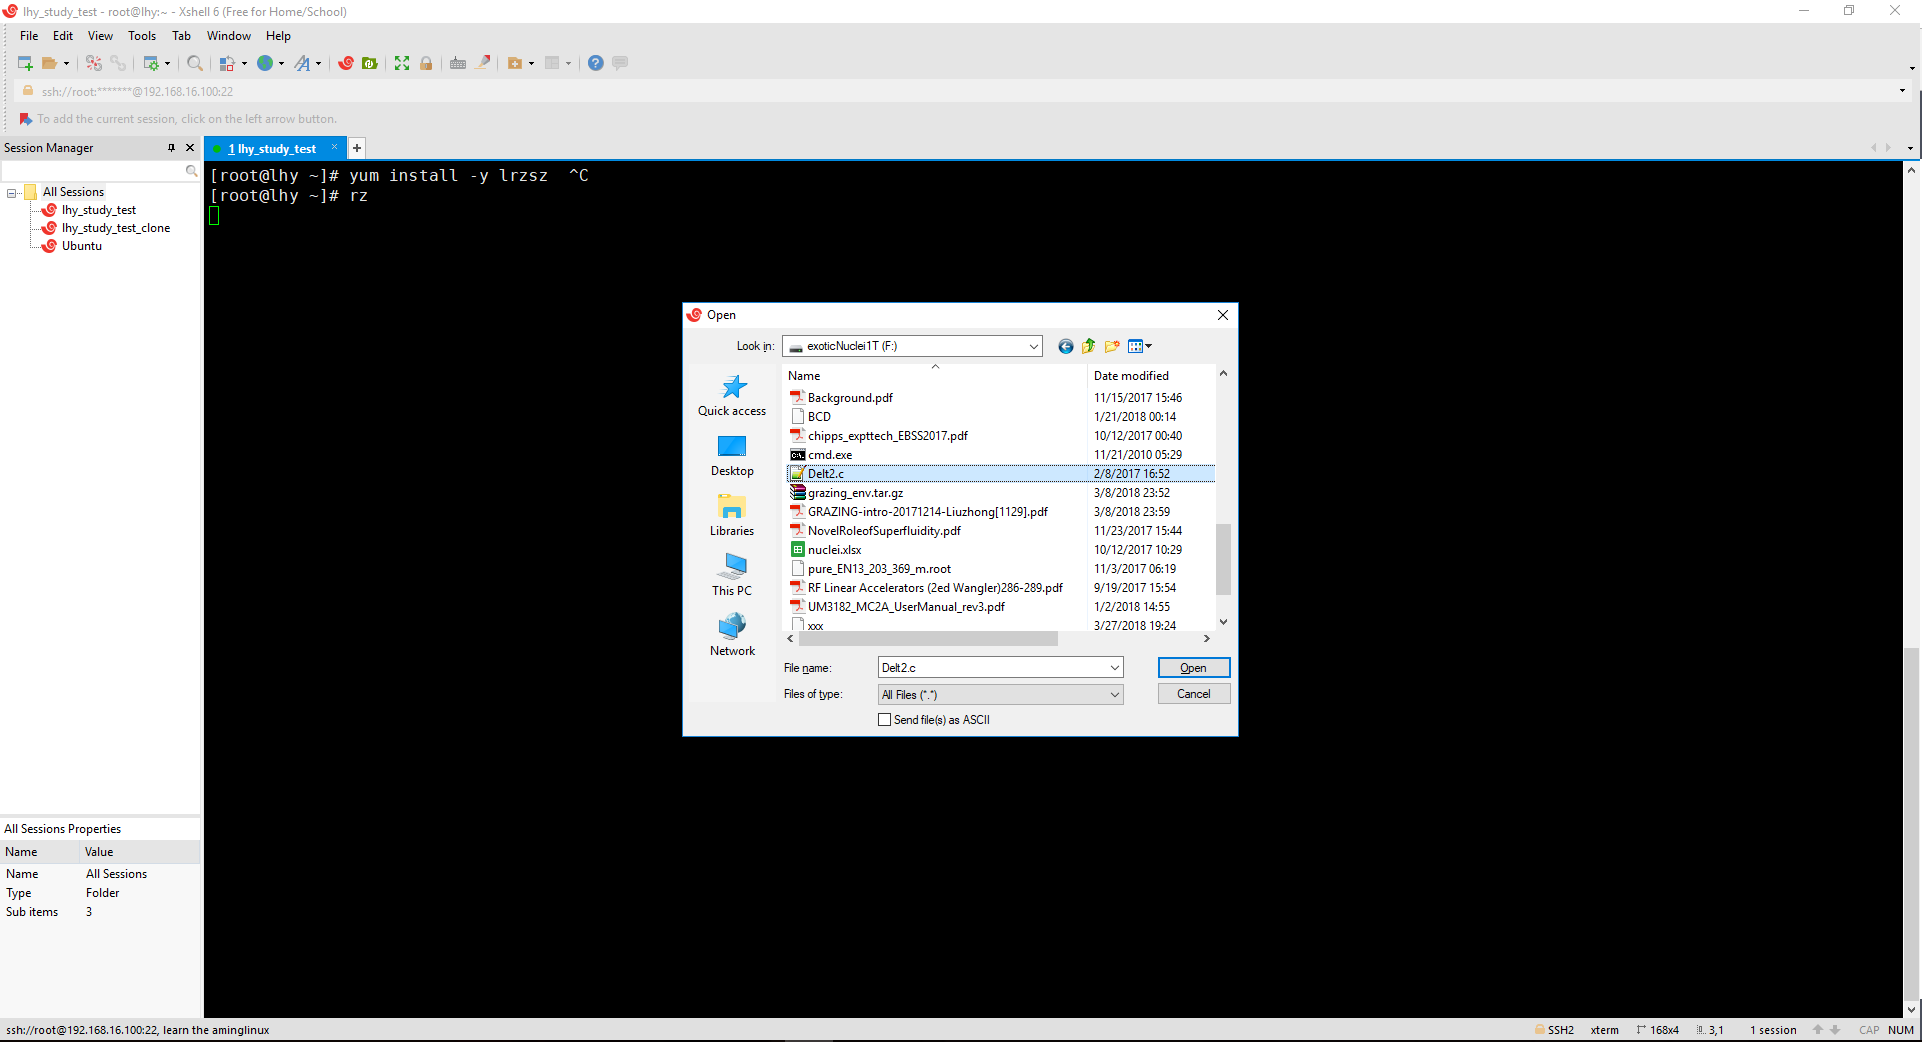

[root@lhy ~]# ll Delt2.c
-rw-r--r-- 1 root root 4507 Feb  8  2017 Delt2.c
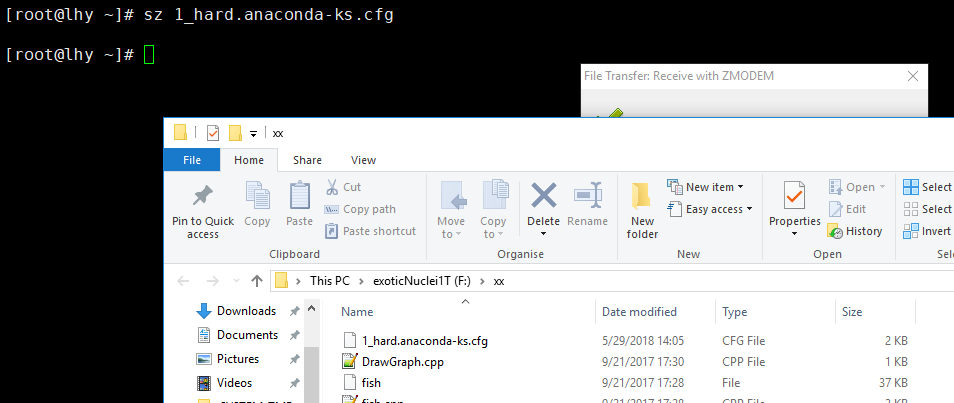
同样,可以使用sz+filename的命令把文件传到Windows


 1513
1513

 被折叠的 条评论
为什么被折叠?
被折叠的 条评论
为什么被折叠?
 到【灌水乐园】发言


