


一、创建WEB工程项目
参见之前博文,使用 IDEA GRADLE 创建一个名为 smvcdemo 的 Project。添加Web.XML,转成WEB 工程。

二、添加相关包和文件
添加如图所示的包、文件夹和文件
三、配置依赖文件和 web.xml
group 'org.happy'
version '1.0'

apply plugin: 'java'
apply plugin: 'war'
apply plugin: 'jetty'

sourceCompatibility = 1.5

repositories {
    //mavenCentral()
    maven { url 'http://maven.oschina.net/content/groups/public/' }
}

dependencies {
    runtime 'javax.servlet:jstl:1.2'
    compile 'org.slf4j:slf4j-log4j12:1.7.7'
    runtime 'mysql:mysql-connector-java:5.1.33'
    compile 'org.springframework:spring-core:4.2.5.RELEASE'
    compile 'org.springframework:spring-beans:4.2.5.RELEASE'
    compile 'org.springframework:spring-context:4.2.5.RELEASE'
    compile 'org.springframework:spring-context-support:4.2.5.RELEASE'
    compile 'org.springframework:spring-web:4.2.5.RELEASE'
    compile 'org.springframework:spring-webmvc:4.2.5.RELEASE'
    compile 'org.springframework:spring-test:4.2.5.RELEASE'
    compile 'log4j:log4j:1.2.17'

    testCompile group: 'junit', name: 'junit', version: '4.11'
}
四、修改 web.xml
<?xml version="1.0" encoding="UTF-8"?>
<web-app xmlns="http://java.sun.com/xml/ns/javaee"
           xmlns:xsi="http://www.w3.org/2001/XMLSchema-instance"
           xsi:schemaLocation="http://java.sun.com/xml/ns/javaee
        http://java.sun.com/xml/ns/javaee/web-app_3_0.xsd"
           version="3.0">

    <servlet>
        <servlet-name>smvcdemo</servlet-name>
        <servlet-class>org.springframework.web.servlet.DispatcherServlet</servlet-class>
        <load-on-startup>1</load-on-startup>
    </servlet>

    <servlet-mapping>
        <servlet-name>smvcdemo</servlet-name>
        <url-pattern>*.do</url-pattern>
    </servlet-mapping>

    <welcome-file-list>
        <welcome-file>index.jsp</welcome-file>
    </welcome-file-list>

</web-app>
说明:
1)load-on-startup:表示启动容器时初始化该Servlet;
2)url-pattern:表示哪些请求交给Spring Web MVC处理, “/” 是用来定义默认servlet映射的。也可以如“*.do”表示拦截所有以do为扩展名的请求。
3) 请求需要交给Spring Web MVC框架处理,因此要配置Spring的配置文件,默认DispatcherServlet会加载WEB-INF/[DispatcherServlet的Servlet名字]-servlet.xml配置文件。我们这里为WEB-INF/ smvcdemo-servlet.xml
五、修改 SpringMVC配置文件
<?xml version="1.0" encoding="UTF-8"?>
<beans xmlns="http://www.springframework.org/schema/beans"
       xmlns:xsi="http://www.w3.org/2001/XMLSchema-instance"
       xmlns:p="http://www.springframework.org/schema/p"
       xmlns:context="http://www.springframework.org/schema/context"
       xsi:schemaLocation=
               "http://www.springframework.org/schema/beans
                http://www.springframework.org/schema/beans/spring-beans-3.0.xsd
                http://www.springframework.org/schema/context
                http://www.springframework.org/schema/context/spring-context-3.0.xsd">

        <context:component-scan base-package="org.happy.smvcdemo.controller" />

</beans>
说明:
1) <context:componet-scan ... 表示自动 扫描 我们项目 controller 包下的所有 使用@Controller 注解的控制器
六、创建相关的Model
|
package org.happy.smvcdemo.model;

/**
 * Created by  on 16/3/22.
 */
public class User {

    private Long id;
    private String name;
    private String passwd;
    private String dept;
七、创建Service
package org.happy.smvcdemo.service;
import java.util.ArrayList;
import java.util.List;
import org.happy.smvcdemo.model.User;
import org.happy.smvcdemo.model.Customer;
public class CustomerService {
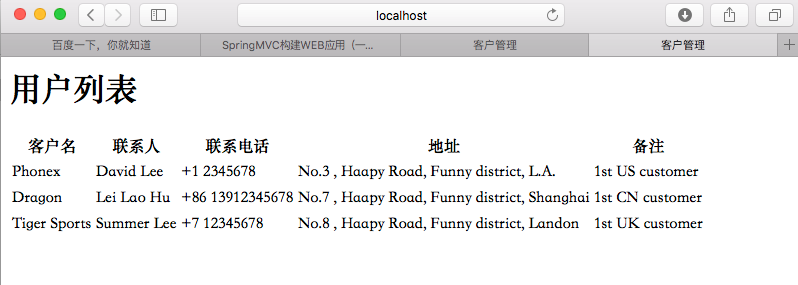
public List<Customer> getCustomerList() {
String sql = "SELECT * FROM customer";
List<Customer> cl = new ArrayList<Customer>();
Customer c1 = new Customer();
c1.setId(1L);
c1.setName("Phonex");
c1.setContact("David Lee");
c1.setAddress("No.3 , Haapy Road, Funny district, L.A.");
c1.setTelephone("+1 2345678");
c1.setRemark("1st US customer");
cl.add(c1);
Customer c2 = new Customer();
c2.setId(2L);
c2.setName("Dragon");
c2.setContact("Lei Lao Hu");
c2.setAddress("No.7 , Haapy Road, Funny district, Shanghai");
c2.setTelephone("+86 13912345678");
c2.setRemark("1st CN customer");
cl.add(c2);
Customer c3 = new Customer();
c3.setId(3L);
c3.setName("Tiger Sports");
c3.setContact("Summer Lee");
c3.setAddress("No.8 , Haapy Road, Funny district, Landon");
c3.setTelephone("+7 12345678");
c3.setRemark("1st UK customer");
cl.add(c3);
return cl;
}
}八、创建controller
大致的逻辑是:输入(演示用。这里写死的)用户名和密码,通过后,显示客户信息。
|
|
说明:
1) 使用@controller 注解表示这是一个(可以被自动扫描到)的控制器
2)通过@RequestMapping注解可以用指定的URL访问本控制器,同时可指定请求方式(GET/POST/...)
3) @RequestParam 根据参数名获取请求参数
九、前端页面
login.jsp |
customers.jsp |
error.jsp |
十、试运行
在IDEA中配置一个运行,启动后在浏览器输入 http://localhost:8080/smvcdemo/login.jsp
分别输入正确的/错误的 用户名密码,即可测试


 2815
2815

 被折叠的 条评论
为什么被折叠?
被折叠的 条评论
为什么被折叠?
 到【灌水乐园】发言


