


一、整合模板引擎
由于 jsp 不被 SpringBoot 推荐使用,所以模板引擎主要介绍 Freemarker 和 Thymeleaf。
1.1 整合 Freemarker
1.1.1 添加 Freemarker 依赖
		<!-- freemarker模板引擎 -->
		<dependency>
			<groupId>org.springframework.boot</groupId>
			<artifactId>spring-boot-starter-freemarker</artifactId>
		</dependency>
1.1.2 在 application.properties中添加
#配置FreeMarker引擎
spring.freemarker.allow-request-override=false
spring.freemarker.cache=true
spring.freemarker.check-template-location=true
spring.freemarker.charset=UTF-8
spring.freemarker.content-type=text/html
spring.freemarker.expose-request-attributes=false
spring.freemarker.expose-session-attributes=false
spring.freemarker.expose-spring-macro-helpers=false
spring.freemarker.prefix=
spring.freemarker.suffix=.ftl
1.1.3 在 controller 包中创建 FreemarkerController.java
@Controller
@RequestMapping("freemarker")
public class FreemarkerController {
	@RequestMapping("hello")
	public String hello(Map<String, Object> map) {
		map.put("msg", "Hello Freemarker!");
		return "hello";
	}
}
1.1.4 在src/main/resources新建templates文件夹,用于存放ftl模板文件。然后在templates文件夹下新建hello.ftl文件,内容如下:
<!DOCTYPE html>
<html lang="zh">
<head>
<meta charset="UTF-8">
<title>Document</title>
<link href="/css/index.css" rel="stylesheet"/>
</head>
<body>
<div class="container">
<h2>${msg}</h2>
</div>
</body>
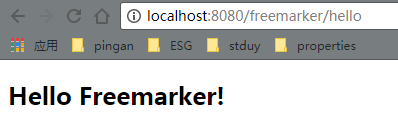
</html>运行结果如下:
1.2 整合Thymeleaf
1.2.1 添加Thymeleaf依赖
		<!-- thymeleaf -->
		<dependency>
			<groupId>org.springframework.boot</groupId>
			<artifactId>spring-boot-starter-thymeleaf</artifactId>
		</dependency>
1.2.2 添加 Thymeleaf 模板配置
在 application.properties 中添加如下内容:
spring.thymeleaf.cache=true
spring.thymeleaf.prefix=classpath:/templates/
spring.thymeleaf.suffix=.html
spring.thymeleaf.mode=HTML5
spring.thymeleaf.encoding=UTF-8
spring.thymeleaf.content-type=text/html
1.2.3 在 controller 包中创建 ThymeleafController:
@Controller
@RequestMapping("thymeleaf")
public class ThymeleafController {
	@RequestMapping("hello")
	public String hello(Map<String, Object> map) {
		map.put("msg", "Hello Thymeleaf");
		return "hello";
	}
}
1.2.4 在 template 目录下创建名为 hello.html 的文件,内容如下:
<!DOCTYPE html>
<html lang="zh">
<head>
    <meta charset="UTF-8">
    <title>Document</title>
    <link href="/css/index.css" rel="stylesheet"/>
</head>
<body>
    <div class="container">
        <h1 th:text="${msg}"></h1>
    </div>
</body>
</html>
http://localhost:8080/thymeleaf/hello 结果如下


 8万+
8万+


 被折叠的 条评论
为什么被折叠?
被折叠的 条评论
为什么被折叠?
 到【灌水乐园】发言


