


1、构建镜像
- 创建目录nginx
mkdir nginx
- 创建文件 nginx.conf
user  root;
worker_processes  auto;

error_log  /var/log/nginx/error.log notice;
pid        /var/run/nginx.pid;


events {
    worker_connections  1024;
}


http {
  server {
    listen 80;
    root /usr/share/nginx/html;
    charset utf-8;

    location / {
      autoindex on;
      autoindex_exact_size off;
      autoindex_localtime on;
    }
  }
    include       /etc/nginx/mime.types;
    default_type  application/octet-stream;

    log_format  main  '$remote_addr - $remote_user [$time_local] "$request" '
                      '$status $body_bytes_sent "$http_referer" '
                      '"$http_user_agent" "$http_x_forwarded_for"';

    access_log  /var/log/nginx/access.log  main;

    sendfile        on;
    #tcp_nopush     on;

    keepalive_timeout  65;

    #gzip  on;

    include /etc/nginx/conf.d/*.conf;
}
- 创建文件 Dockerfile
FROM nginx

MAINTAINER chenhui

# 更换nginx配置文件
COPY nginx.conf /etc/nginx/nginx.conf
- 执行命令构建镜像,在nginx目录下执行以下命令,注意:结尾的地方有一个点 .
docker build -t nginx:ftp .
2、启动服务
docker run -d -p 9999:80 -v /home/hadoop/StaticFileServer/files:/usr/share/nginx/html:ro --restart=always --name file_server nginx:ftp
参数说明:
- -d : 端口映射,将容器内部 80 端口映射到宿主机的 9999 端口上
- -v : 文件目录挂载,为了宿主机和容器数据共享
- –restart=always : 表示容器停止后始终重启
- –name : 容器名称
- nginx:ftp : 镜像名称
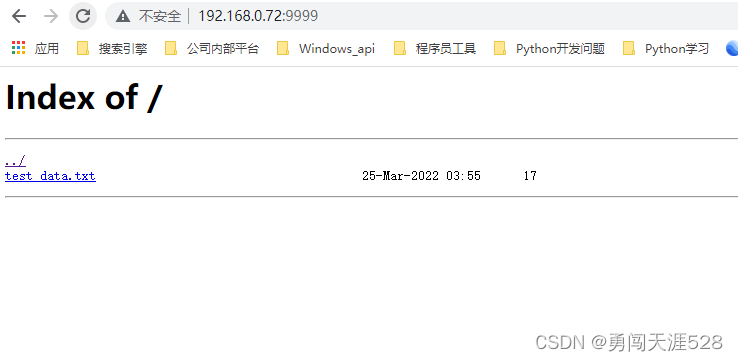
命令启动完成后,打开浏览器,输入服务器IP:9999即可访问数据


 1315
1315

 被折叠的 条评论
为什么被折叠?
被折叠的 条评论
为什么被折叠?
 到【灌水乐园】发言


