


摸索一下使用原生控件实现图文编辑,直接开搞。
首先搞个文本输入和选择图片的按钮:
@property (nonatomic, strong) UITextView * tv;
@property (nonatomic, strong) UIButton * selectImageBtn;

- (void)viewDidLoad
{
    self.tv = [[UITextView alloc]initWithFrame:CGRectMake(0, 0, [UIScreen mainScreen].bounds.size.width-20, [UIScreen mainScreen].bounds.size.height / 2)];
    self.tv.center = self.view.center;
    self.tv.layer.cornerRadius = 4;
    self.tv.layer.borderWidth = 1;
    self.tv.delegate = self;
    self.tv.layer.borderColor = [UIColor lightGrayColor].CGColor;
    self.tv.returnKeyType = UIReturnKeyDefault;
[self.view addSubview:self.tv];

    self.selectImageBtn = [UIButton buttonWithType:UIButtonTypeCustom];
    //反正位置都是写死的,也懒得接布局三方,大概就是UITextView位于屏幕中间,UIButton水平居中,在UITextView下方距20
    self.selectImageBtn.frame = CGRectMake([UIScreen mainScreen].bounds.size.width / 2 - 40, self.tv.frame.origin.y + [UIScreen mainScreen].bounds.size.height / 2 + 20, 80, 40);
    [self.selectImageBtn setTitle:@"选择图片" forState:UIControlStateNormal];
    self.selectImageBtn.layer.cornerRadius = 4;
    [self.selectImageBtn setBackgroundColor:[UIColor grayColor]];
    [self.selectImageBtn setTintColor:[UIColor whiteColor]];
    [self.selectImageBtn addTarget:self action:@selector(selectImageButtonAction) forControlEvents:UIControlEventTouchUpInside];
    self.selectImageBtn.titleLabel.font = [UIFont systemFontOfSize:14];
    [self.view addSubview:self.selectImageBtn];
}
OK,瞅一眼页面效果,应该是没错的: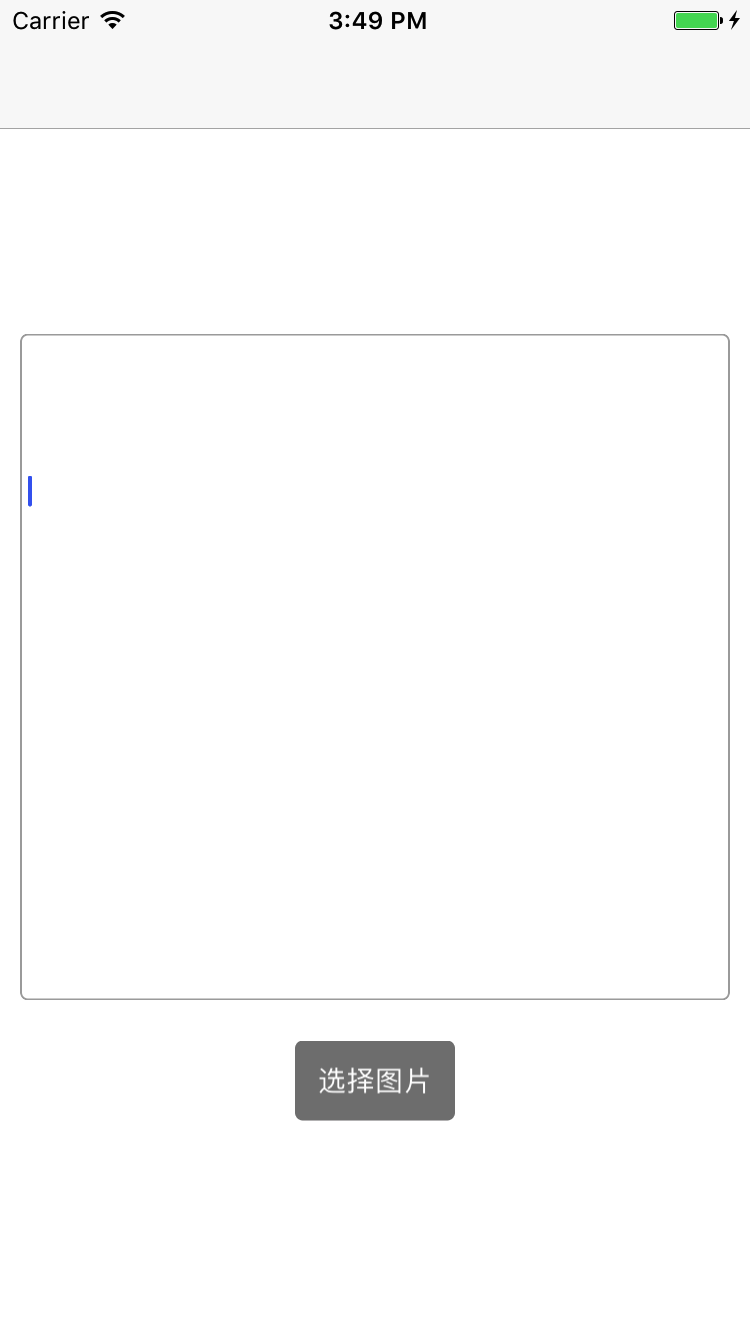 

但是发现这个光标的位置很尴尬啊~~~光标不都是在左上角么?
各种寻找解决办法,后来发现在- (void)viewDidLoad;里面加上这一句就好了:
self.automaticallyAdjustsScrollViewInsets = NO;
但是这玩意儿到底是个啥?其实不必深究,但是好奇心作祟,找了找这玩意儿: 

能看到这玩意儿的默认值是NO.
但是也没说这到底是干啥用的,看看它注释是啥: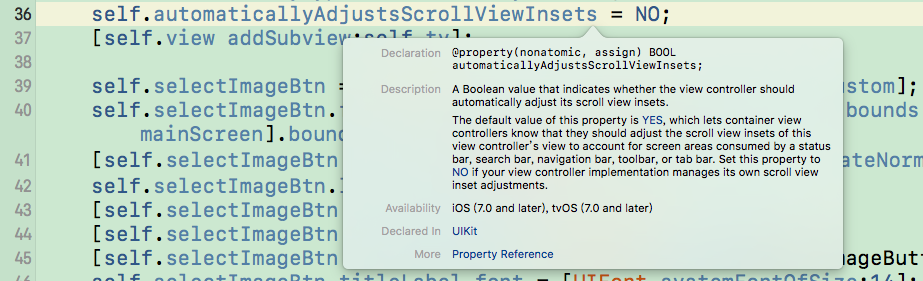 

啊哈~这回就知道了吧,就是说内部输入实际是一个scroll view,当内容填充不满控件的时候,它就给自动适配了,设置为NO,就是告诉他我自己来适配。不用你了,你就放到初始位置就行了。
纠结了好久,继续往下走~~
选择图片得用UIImagePickerController吧?OK,搞一个出来:
@property (nonatomic, strong) UIImagePickerController * imagePickerVC;
然后出于安全性考虑,在UIImagePickerController弹出来之前,得先判断一下支不支持图片选择啊,搞一个布尔值用来判断支不支持选择图片的:
@property (nonatomic, assign) BOOL isPickerCanUsed;
然后判断一下子,给isPickerCanUsed赋个值:
if ([UIImagePickerController isSourceTypeAvailable:UIImagePickerControllerSourceTypePhotoLibrary]) {
        //支持图片选择
        self.isPickerCanUsed = YES;
    }else{
        self.isPickerCanUsed = NO;
    }
完事咯,找个地方把UIImagePickerController的init方法塞进去,我是塞到了选择图片按钮的点击事件里面:
-(void)selectImageButtonAction{
    if (self.isPickerCanUsed) {
        //继续
        if (!self.imagePickerVC) {
            self.imagePickerVC = [[UIImagePickerController alloc]init];
        }
        self.imagePickerVC.sourceType = UIImagePickerControllerSourceTypePhotoLibrary;
        self.imagePickerVC.allowsEditing = YES;
        [self.imagePickerVC setDelegate:self];
        NSMutableArray * mediaTypeArr = [[NSMutableArray alloc]init];
        [mediaTypeArr addObject:(NSString *)kUTTypeImage];
        [self.imagePickerVC setMediaTypes:mediaTypeArr];
        [self.navigationController presentViewController:self.imagePickerVC animated:YES completion:nil];
    }
}
这里在对mediaTypeArr赋值的时候,kUTTypeImage会报错,Project -> Target ->Build Phases 添加 MobileCoreServices.framework,
然后引入#import <MobileCoreServices/MobileCoreServices.h>
这时候又出问题了,
[self.imagePickerVC setDelegate:self];
会抛出一个警告:
Sending 'ViewController * const__strong' to parameter of incompatible type 'id<UINavigationControllerDelegate,UIImagePickerControllerDelegate> _Nullable'
估计看见的都明白了,加代理啊!加代理啊!加代理啊!在你当前这个控制器里面遵循这两个代理:UINavigationControllerDelegate,UIImagePickerControllerDelegate,搞定。
剩下的就好搞多了,实现代理方法就OK了:
//UIImagePickerController delegate
- (void)imagePickerController:(UIImagePickerController *)picker didFinishPickingImage:(UIImage *)image editingInfo:(nullable NSDictionary<NSString *,id> *)editingInfo{
    //选中图片后添加到textView中
    [self.imagePickerVC dismissViewControllerAnimated:YES completion:nil];
}

- (void)imagePickerControllerDidCancel:(UIImagePickerController *)picker{
    //取消选择
    [self.imagePickerVC dismissViewControllerAnimated:YES completion:nil];
}
在- (void)imagePickerController:(UIImagePickerController *)picker didFinishPickingImage:(UIImage *)image editingInfo:(nullable NSDictionary<NSString *,id> *)editingInfo方法中就能获取到要添加的图片,但是加到哪里还无法确定,还需要在加一个UITextView的代理:UITextViewDelegate,然后实现代理方法中的- (void)textViewDidChangeSelection:(UITextView *)textView:
先:
@property (nonatomic, assign) int loc;//记录光标所在位置
@property (nonatomic, assign) int len;//记录选中文字长度,用来判断是否有选中状态(选中复制的操作的时候不为0)
然后:
//UITextView Delegate
- (void)textViewDidChangeSelection:(UITextView *)textView{
    _loc = (int)textView.selectedRange.location;
    _len = (int)textView.selectedRange.length;
}
这个方法在每次切换光标位置的时候都会调用。
然后在UIImagePickerController的didFinishPickingImage代理方法中:
//选中图片后添加到textView中
NSMutableAttributedString *string = [[NSMutableAttributedString alloc] initWithAttributedString:self.tv.attributedText];

NSTextAttachment *textAttachment = [[NSTextAttachment alloc] initWithData:nil ofType:nil] ;
textAttachment.image = image; //要添加的图片

NSAttributedString *textAttachmentString = [NSAttributedString attributedStringWithAttachment:textAttachment] ;

[string insertAttributedString:textAttachmentString atIndex:self.loc];//index为用户指定要插入图片的位置
self.tv.attributedText = string;

[self.imagePickerVC dismissViewControllerAnimated:YES completion:nil];
到这基本就完事了,UIImagePickerController的页面中,取消和选择的按钮是英文,在Info.plist中设置Localization native development region为中文就OK了。
顺便提一下,如果想自定义UIImagePickerController页面里面的NavigationItem的按钮功能,可以实现UINavigationControllerDelegate中的方法:
//UINavigationController Delegate
- (void)navigationController:(UINavigationController *)navigationController willShowViewController:(UIViewController *)viewController animated:(BOOL)animated

{

    UIButton *cancelBtn = [[UIButton alloc]initWithFrame:CGRectMake(0,0,50,30)];

    [cancelBtn setTitle:@"取消" forState:(UIControlStateNormal)];

    cancelBtn.backgroundColor = [UIColor clearColor];

    [cancelBtn addTarget:self action:@selector(click) forControlEvents:(UIControlEventTouchUpInside)];

    UIBarButtonItem *btn = [[UIBarButtonItem alloc] initWithCustomView:cancelBtn];

    [viewController.navigationItem setRightBarButtonItem:btn animated:NO];

}
- (void)click{
    [self imagePickerControllerDidCancel:self.imagePickerVC];
}
如果想设置键盘弹出时视图上移,在- (void)viewDidLoad中设置监听:
[[NSNotificationCenter defaultCenter] addObserver:self selector:@selector(keyBoardShowOrDissmiss:) name:UIKeyboardWillChangeFrameNotification object:nil];
然后实现keyBoardShowOrDissmiss:方法:
-(void)keyBoardShowOrDissmiss:(NSNotification *)note{
    NSLog(@"走你");
    NSDictionary * info = note.userInfo;

    //获取键盘弹出时的动画时间
    CGFloat viewDuration = [info[@"UIKeyboardAnimationDurationUserInfoKey"] doubleValue];

    //实时获取键盘的frame
    CGRect keyFrame = [info[@"UIKeyboardFrameEndUserInfoKey"] CGRectValue];
    //offsetY 是你需要调整的高度偏差,懒得计算啦
    CGFloat moveY = offsetY;
    NSLog(@"%.2f",moveY);

    [UIView animateWithDuration:viewDuration animations:^{
        self.view.transform = CGAffineTransformMakeTranslation(0, moveY);
    }];
}
也算是没事写写笔记,若有能改进的地方,请指正。万分感谢~


 3365
3365

 被折叠的 条评论
为什么被折叠?
被折叠的 条评论
为什么被折叠?
 到【灌水乐园】发言


