


目录
3.2、启动类添加@EnableOpenApi或@EnableSwagger2
一、介绍及优点
- swagger是一个生成在线文档的API框架。
- 可以使用生产的在线文档实时测试新增的接口。
- 便于维护和前后端联调。
二、项目中使用swagger
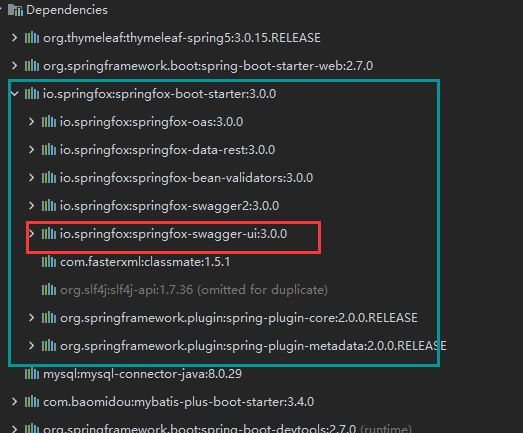
需要两个组件的依赖:
- swagger
- swagger-ui
2.1 环境准备
springboot 2.7.0
swagger 3.0
1、新建: springboot-web项目
2、导入springboot整合swagger的依赖
     <!--swagger2-->
        <dependency>
            <groupId>io.springfox</groupId>
            <artifactId>springfox-boot-starter</artifactId>
            <version>3.0.0</version>
        </dependency>
3、配置swagger
3.1配置application.yml、编写SwaggerConfiguration配置类、开注解。
3.1、配置application.yml
spring:
  mvc:
    pathmatch:
      matching-strategy: ant_path_matcher
3.2、启动类添加@EnableOpenApi或@EnableSwagger2
@SpringBootApplication @EnableOpenApi //@EnableSwagger2 public class DemoApplication { public static void main(String[] args) { SpringApplication.run(DemoApplication.class, args); } }随后启动项目访问:http://localhost:8080/swagger-ui/index.html
在线文档大概可以分为以上四个部分;若不想使用默认的信息,则需要编写SwaggerConfiguration配置类进行个性化设置。
3.3、自定义文档信息
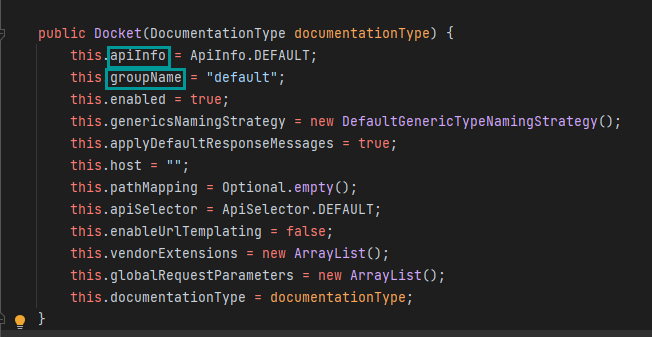
新建SwaggerConfiguration配置类,注册下Docket实例,使用源码里提供有参构造器来对文档页面自定义:
提供了以上可配置项、例如、SwaggerConfiguration配置类如下:
/**
 * @author Alex
 * @EnableSwagger2 开启swagger2
 */

@Configuration
@EnableSwagger2
public class SwaggerConfiguration {

    /**
     * 配置Docket实例
     * @return
     */
    @Bean
    public Docket getDocket(){
        return new Docket(DocumentationType.SWAGGER_2)
                .apiInfo(
                new ApiInfoBuilder()
                        .contact(new Contact("听钱塘信来","https://blog.csdn.net/chenyunjiangNN","123@qq.com"))
                        .title("Swagger在线文档")
                        .build()
                )
                .groupName("demo-project-123");
    }


}
效果:
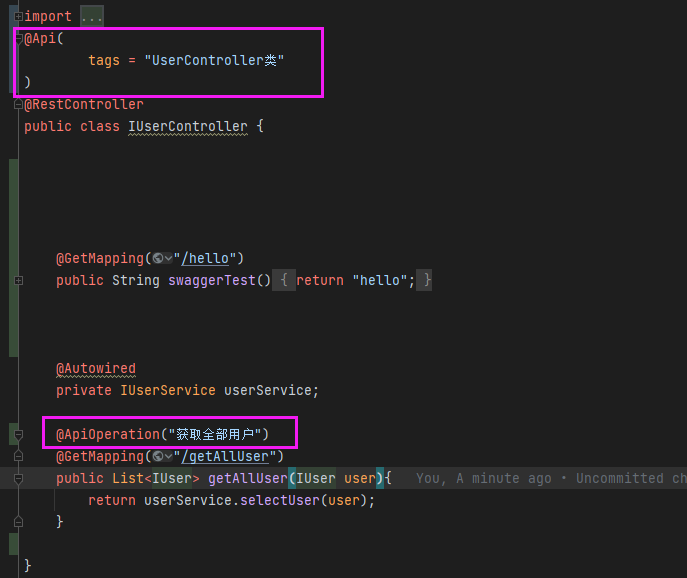
3.4、给实体类、字段、前端控制器、Api接口添加文档注解
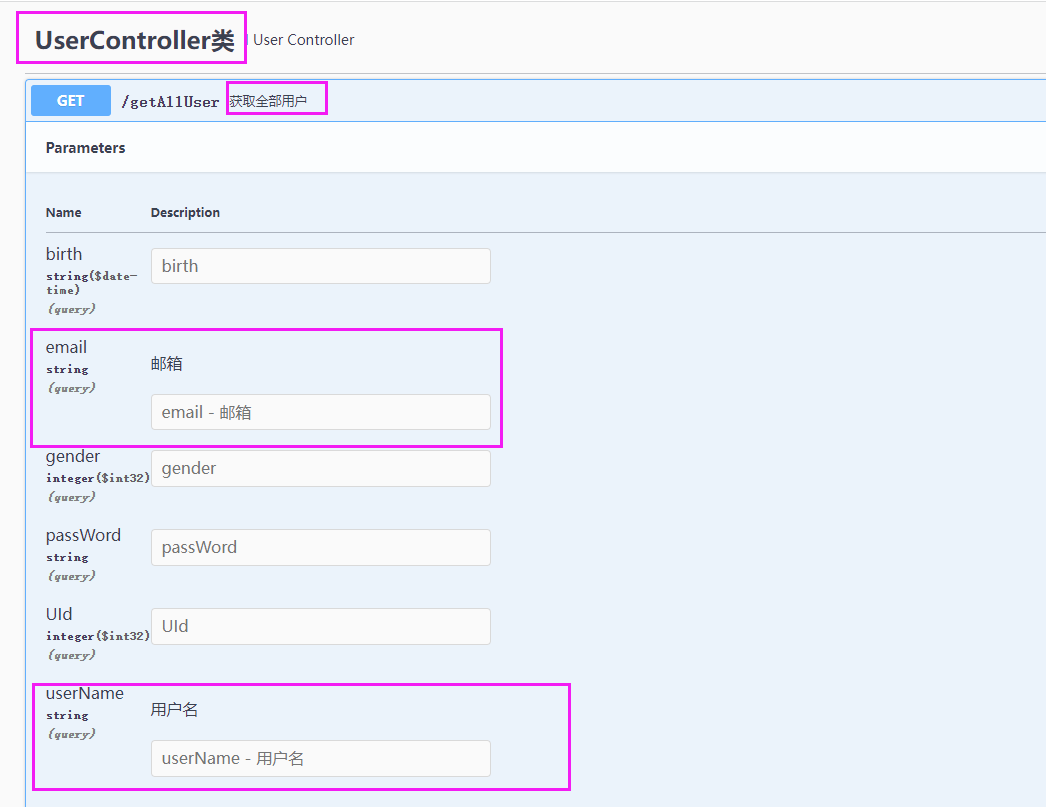
效果:
效果:
等等、总之对对于实体、字段、接口、查询参数添加描述、让前后端联调更方便。
3.5、注解使用场景:
@Api 对请求Controller的说明
@ApiOperation 方法的说明
@ApiImplicitParams 方法参数的说明;
@ApiImplicitParam 用于指定单个参数的说明。
@ApiResponses 方法返回值的说明 ;
@ApiResponse 用于指定单个参数的说明。
@ApiModel 用在JavaBean类进行说明
@ApiModelProperty 用在JavaBean类的属性进行说明


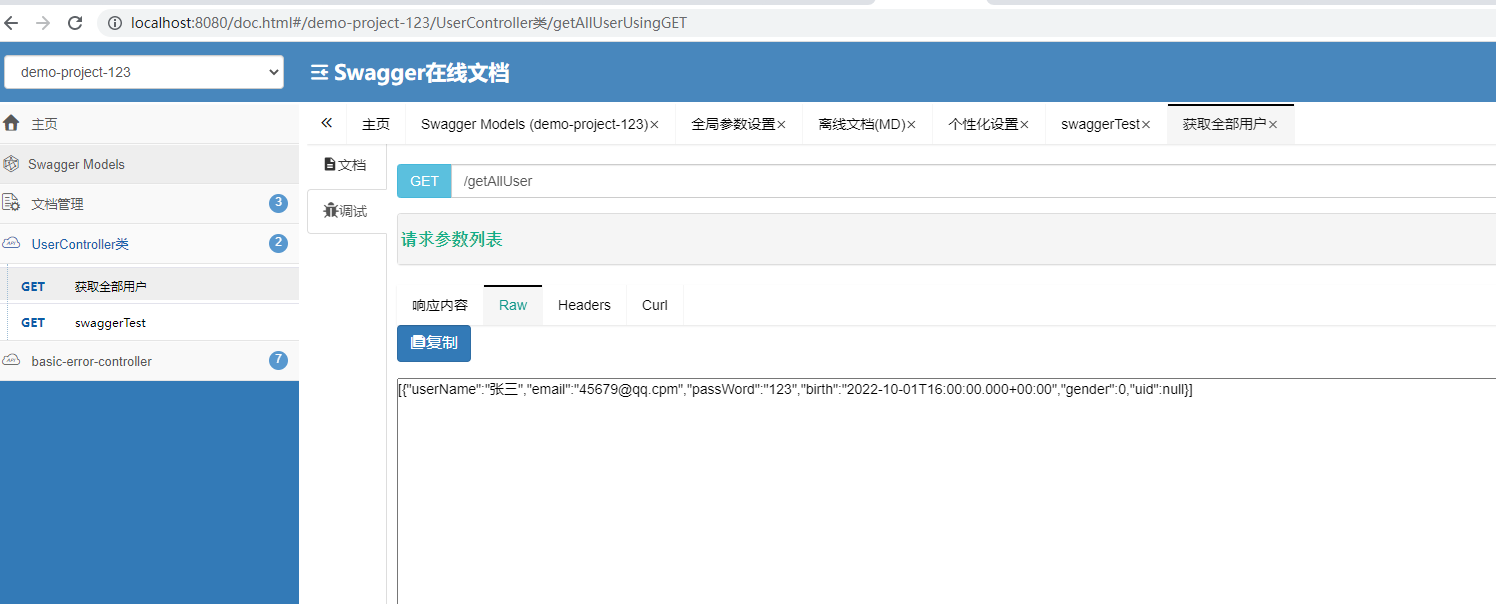
三、使用
根据接口信息给对应的参数值、执行后查看相应内容和状态码;比如下图的根据条件查询用户
此文中获取全部用户的接口是基于mybatis作为持久层实现的、此处就不一一说明了;
mybatis相关传送门:
springboot整合mybatis、springboot整合mybatis-plus
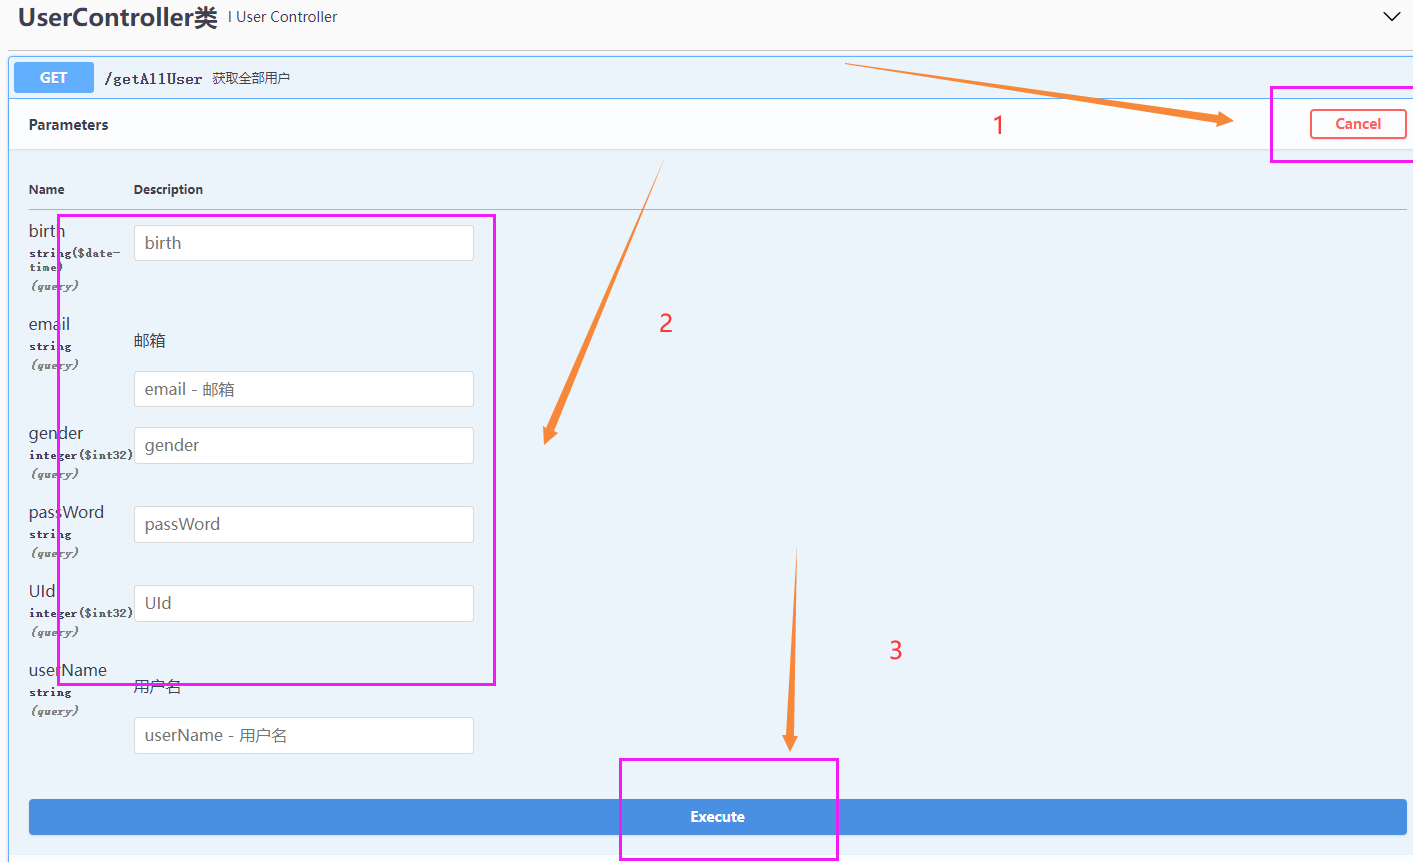
填写对应参数后执行:

过程中报的一个异常:
Cannot invoke "org.springframework.web.servlet.mvc.condition.PatternsRequestCondition.toString()" because the return value of "springfox.documentation.spi.service.contexts.Orderings.patternsCondition(springfox.documentation.RequestHandler)" is null解决:
spring:
  mvc:
    pathmatch:
      matching-strategy: ant_path_matcher
写在最后【以下内容与正文关系不大】:
问: 为什么访问:http://localhost:8080/swagger-ui/index.html会进入在线文档的页面?
答:我们进入springboot整合swagger的依赖看一下,已经包括了swagger-ui 3.0,无需单独引入swagger -ui 3.0的依赖;
在看一下swagger-ui3.0的依赖,就会找到index.html页面
问:前后端分离项目中、使用swagger在线文档有需要注意的地方吗?
答:有时会因为缓存导致文档不能实时更新、会导致配置、字段、Api接口之类的会有差别。说到底swagger在线文档只是提供测试接口和前后端协作的一个方案而已。不用过于依赖。
问:除了swagger-ui,还有其他第三方实现的在线文档吗?
        <!--   swagger-bootstrap-ui -->
        <dependency>
            <groupId>com.github.xiaoymin</groupId>
            <artifactId>swagger-bootstrap-ui</artifactId>
            <version>1.9.6</version>
        </dependency>
页面:访问http://localhost:8080/doc.html
问:我想通过其他请求访问到swagger的首页可以吗?
答:将swagger页面所需的静态资源导入项目中,再随便写个请求访问到index.html就可以了。若是静态资源404,将静态资源放行、且要保证引用路径正确。
问:可以动态选取swagger文档在指定环境才能生效吗?
答:在Docket实例中、读取指定配置文件、拿到环境信息、注入enable(false) 即可关闭;


 1614
1614


 被折叠的 条评论
为什么被折叠?
被折叠的 条评论
为什么被折叠?
 到【灌水乐园】发言


