


1.新建web project

2.右键项目,给项目添加spring框架如图,不需要勾选任何一个选项。


3.在WebRoot/WEB-INF目录下添加web.xml内容如下:
<?xml version="1.0" encoding="UTF-8"?>
<web-app version="3.0" xmlns="http://java.sun.com/xml/ns/javaee"
	xmlns:xsi="http://www.w3.org/2001/XMLSchema-instance"
	xsi:schemaLocation="http://java.sun.com/xml/ns/javaee
    http://java.sun.com/xml/ns/javaee/web-app_3_0.xsd">
	<!--configure the setting of springmvcDispatcherServlet and configure the
		mapping -->
	<servlet>
		<servlet-name>springmvc</servlet-name>
		<servlet-class>org.springframework.web.servlet.DispatcherServlet</servlet-class>
		<init-param>
			<param-name>contextConfigLocation</param-name>
			<param-value>classpath:springmvc-servlet.xml</param-value>
		</init-param>
		<!-- <load-on-startup>1</load-on-startup> -->
	</servlet>
	<servlet-mapping>
		<servlet-name>springmvc</servlet-name>
		<url-pattern>/</url-pattern>
	</servlet-mapping>
</web-app>
4.在src目录下添加springmvc-servlet.xml
<?xml version="1.0" encoding="UTF-8"?>
<beans xmlns="http://www.springframework.org/schema/beans"
	xmlns:xsi="http://www.w3.org/2001/XMLSchema-instance" xmlns:context="http://www.springframework.org/schema/context"
	xmlns:mvc="http://www.springframework.org/schema/mvc"
	xsi:schemaLocation="http://www.springframework.org/schema/beans http://www.springframework.org/schema/beans/spring-beans.xsd
        http://www.springframework.org/schema/context http://www.springframework.org/schema/context/spring-context-4.1.xsd
        http://www.springframework.org/schema/mvc http://www.springframework.org/schema/mvc/spring-mvc-4.1.xsd">
	<!-- scan the package and the sub package -->
	<context:component-scan base-package="com.czl.controller" />
	<!-- don't handle the static resource -->
	<mvc:default-servlet-handler />
	<!-- if you use annotation you must configure following setting -->
	<mvc:annotation-driven />
	<!-- configure the InternalResourceViewResolver -->
	<bean
		class="org.springframework.web.servlet.view.InternalResourceViewResolver"
		id="internalResourceViewResolver">
		<!-- 前缀 -->
		<property name="prefix" value="/WEB-INF/pages/" />
		<!-- 后缀 -->
		<property name="suffix" value=".jsp" />
	</bean>
</beans>
package com.czl.controller;

import org.springframework.stereotype.Controller;
import org.springframework.ui.Model;
import org.springframework.web.bind.annotation.RequestMapping;

@Controller
@RequestMapping("/HelloWorld")
public class HelloWorldController {
	@RequestMapping("/hello")
	public String hello(Model model) {
		model.addAttribute("greeting", "Hello Spring MVC");
		return "helloworld";
	}
}
<%@ page language="java" contentType="text/html; charset=UTF-8"
	pageEncoding="UTF-8"%>

<!DOCTYPE HTML PUBLIC "-//W3C//DTD HTML 4.01 Transitional//EN">
<html>
<head>
<meta http-equiv="Content-Type" content="text/html; charset=UTF-8">
<title>Spring4 MVC -HelloWorld</title>
</head>

<body>
	<h1>${greeting }</h1>
</body>
</html>
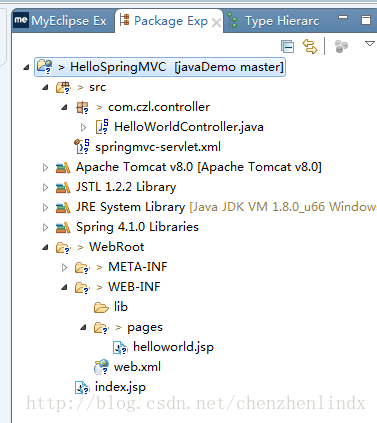
完成后的目录结构:
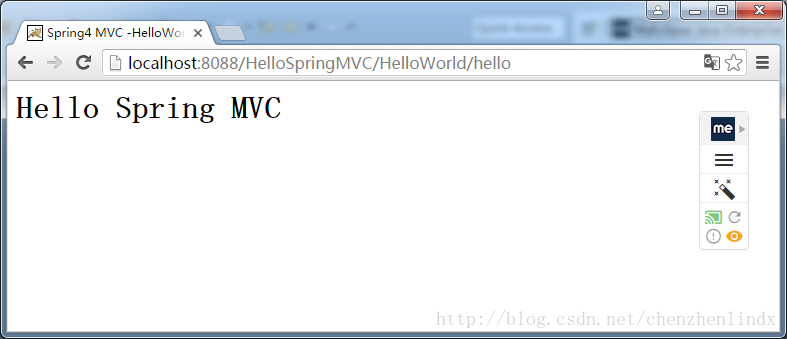
完成后运行,在浏览器输入:http://localhost:8088/HelloSpringMVC/HelloWorld/hello


 4990
4990


 被折叠的 条评论
为什么被折叠?
被折叠的 条评论
为什么被折叠?
 到【灌水乐园】发言


