


Demo演示
前言
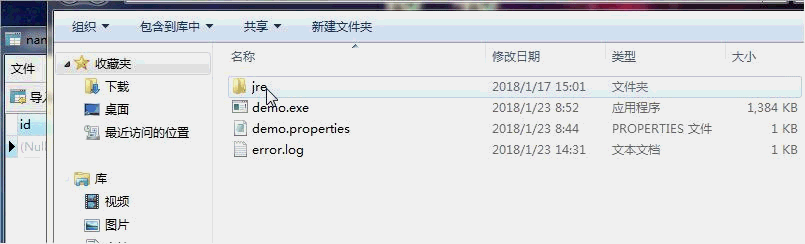
简单的效果图如上,这个Demo中我用的是数据库的控制,另外做了一个简单的后端实现在
http://blog.csdn.net/chijiandi/article/details/79128103
水印的大小角度数量等属性都封装进了配置文件,也算能相对较方便的修改。
这里我使用了exe4j打包成exe文件,并通过inno生成安装文件,个人使用了数据库,所以在链接这块直接采用的jdbc,如果是简单的水印Demo(打包案例)是不需要的数据库的
水印一般是用在一些防盗窃的技术产品或者安全较高的机构需要使用,本案例所使用的水印为个人初期学习随手而做,在界面穿透点击的设置上存在缺陷,仅适用于Windows版本,仅供参考。
实现过程
罗列一下水印的实现过程:
- 窗口透明 AWTUtilities.setWindowOpaque(this, false);
- 窗口无边框 this.setUndecorated(true);
- 窗口置顶 this.setAlwaysOnTop(true);
- 任务栏不显示图标 this.setType(Type.UTILITY);
- 画出水印的内容 重写paint方法
- 鼠标穿透窗口点击 这一块的内容我纠结了很久,最后只能取巧通过鼠标事件的一些处理来模拟完成,此处存在缺陷
- 封装有可能会需要改变的数据到配置文件,使客户可以自定义水印的样式
- 用exe4j封装成exe文件
- 用inno打包成安装包给公司使用
其中数据库方面和后端控制的页面实现我就省略了。
代码方面如下,做的比较早了,后面看了一下代码规范问题还是有的,也算是自己的一个成长就不改了。
import com.sun.awt.AWTUtilities;

import java.awt.*;
import java.awt.event.InputEvent;
import java.awt.event.MouseEvent;
import java.awt.event.MouseListener;
import java.io.*;
import java.text.SimpleDateFormat;
import java.util.Date;
import java.util.Properties;
import javax.swing.*;

/**
 * @author cjd
 */
public class Main extends JFrame implements MouseListener {
    private static Integer count = 4;
    private static Double x = 0.3;
    private static Double y = -0.1;
    private static Double xIncrease = 0.1;
    private static Double yIncrease = 0.1;
    private static Integer fontSize = 12;
    private static Float alpha = .2f;
    private static int colorR = 77;
    private static int colorG = 78;
    private static int colorB = 114;
    private static int angle = 50;
    private static Color color;
    private static Font font;
    private static String data = "请联系管理员处理";
    private int width = (int) Toolkit.getDefaultToolkit().getScreenSize().getWidth();
    private int height = (int) Toolkit.getDefaultToolkit().getScreenSize().getHeight();
    private int runTime = 0;

    private Main() {
        setFrame(width, height);
    }

    public static void main(String[] args) {
        try {
	        //从配置文件中获取数据并设置基本数据
            setThings();
        } catch (Exception e) {
            e.printStackTrace();
        }
        new Main();
    }

    /**
     * @return :void
     * @Author : cjd
     * @Description :设置基本数据
     * @params :[]
     * @Date : 11:08 2018/1/22
     */
    private static void setThings() {
        count = Integer.valueOf(getProperties("count"));
        xIncrease = Double.valueOf(getProperties("xIncrease"));
        yIncrease = Double.valueOf(getProperties("yIncrease"));
        fontSize = Integer.valueOf(getProperties("fontSize"));
        alpha = Float.valueOf(getProperties("alpha"));
        colorR = Integer.valueOf(getProperties("colorR"));
        colorG = Integer.valueOf(getProperties("colorG"));
        colorB = Integer.valueOf(getProperties("colorB"));
        angle = Integer.valueOf(getProperties("angle"));
        data = getProperties("data");
        color = new Color(colorR, colorG, colorB);
        font = new Font("宋体", Font.ITALIC, fontSize);
    }

    /**
     * @return :java.lang.String
     * @Author : cjd
     * @Description : 从配置文件中获取置顶数据
     * @params :[property]
     * @Date : 14:38 2018/1/19
     */
    private static String getProperties(String property) {
        String result = "";
        InputStream in = null;
        try {
            Properties prop = new Properties();
            //获取当前目录下的配置文件 idea测试时用下面两个都可以 打包jar要用上面的才能找到properties
             /* in = new BufferedInputStream(new FileInputStream(System.getProperty("user.dir") + "/demo.properties"));*/
            in = new BufferedInputStream(new FileInputStream(System.getProperty("user.dir") + "/src/demo.properties"));
            /*in = new BufferedInputStream(new FileInputStream((this.getClass().getResource("/").getPath()+"demo.properties")));*/
            prop.load(new InputStreamReader(in, "UTF-8"));
            result = prop.get(property).toString();
            in.close();
        } catch (Exception e) {
            e.printStackTrace();
        } finally {
            try {
                if (in != null) {
                    in.close();
                }
            } catch (IOException e) {
                e.printStackTrace();
            }
        }
        return result;
    }

    /**
     * @return :void
     * @Author : cjd
     * @Description : 设置主界面属性
     * @params :[width, height]
     * @Date : 8:42 2018/1/22
     */
    private void setFrame(int width, int height) {
        this.addMouseListener(this);
        this.setLayout(null);
        this.setSize(width, height);
        //禁用装饰
        this.setUndecorated(true);
        //完全透明
        AWTUtilities.setWindowOpaque(this, false);
        //置顶
        this.setAlwaysOnTop(true);
        //隐藏任务栏
        this.setType(Type.UTILITY);
        this.setLocationRelativeTo(null);
        this.setDefaultCloseOperation(WindowConstants.EXIT_ON_CLOSE);
        this.setVisible(true);
    }

    /**
     * @return :void
     * @Author : cjd
     * @Description : 模拟鼠标点击
     * @params :[e]
     * @Date : 14:25 2018/1/19
     */
    private void clickMouse(MouseEvent e) {
        try {
            Robot robot = new Robot();
            if (e.getButton() == MouseEvent.BUTTON3) {
                robot.mousePress(InputEvent.BUTTON3_MASK);
                robot.mouseRelease(InputEvent.BUTTON3_MASK);
            } else if (e.getButton() == MouseEvent.BUTTON1) {
                robot.mousePress(InputEvent.BUTTON1_MASK);
                robot.mouseRelease(InputEvent.BUTTON1_MASK);
            }
        } catch (AWTException e1) {
            e1.printStackTrace();
        }
    }

    @Override
    public void paint(Graphics g) {
        super.paint(g);
        g.setColor(color);
        g.setFont(font);
        //得到设置好属性的2D画笔
        Graphics2D g2d = getGraphics2D(g);
        //画出数据
        drawData(g2d);
    }

    /**
     * @Author : cjd
     * @Description : 画出要写的文字
     * @params :[g2d]
     * @return :void
     * @Date : 15:02 2018/1/23
     */
    private void drawData(Graphics2D g2d) {
        try {
            x = Double.valueOf(getProperties("x"));
            y = Double.valueOf(getProperties("y"));
        } catch (Exception e) {
            e.printStackTrace();
        }
        for (int i = 0; i < count; i++) {
            g2d.drawString(data, (int) (x * width), (int) (y * height));
            x += xIncrease;
            y += yIncrease;
        }
    }

    /**
     * @Author : cjd
     * @Description : 得到2D画笔 并设置
     * @params :[g]
     * @return :java.awt.Graphics2D
     * @Date : 15:03 2018/1/23
     */
    private Graphics2D getGraphics2D(Graphics g) {
        Graphics2D g2d = (Graphics2D)g;
        //置顶 透明度
        AlphaComposite newComposite = AlphaComposite.getInstance(12, alpha);
        g2d.setComposite(newComposite);
        //旋转角度和原点
        g2d.rotate(-Math.PI / 180 * angle, width / 2, height / 2);
        return g2d;
    }

    @Override
    public void mouseClicked(MouseEvent e) {
    }

    @Override
    public void mousePressed(MouseEvent e) {

    }

    @Override
    public void mouseReleased(MouseEvent e) {
        //鼠标在字体上松开就会重绘直到离开字体,记下执行次数time,在鼠标离开事件中把字挪回原位置
        width = width - 1;
        repaint();
        clickMouse(e);
        runTime++;
    }

    @Override
    public void mouseEntered(MouseEvent e) {
    }

    @Override
    public void mouseExited(MouseEvent e) {
        if (runTime != 0) {
            width = width + runTime;
            repaint();
            runTime = 0;
        }
    }
}
代码的实现都很简单,主要在鼠标船头上,通过将水印左移X坐标一直模拟鼠标点击事件并记下移动的坐标总数,当鼠标终于离开了水印,恢复坐标。
配置文件demo.properties如下:
#左上角第一个水印位置
x=0.3
y=-0.1
#水印数量 坐标增量
count=4
xIncrease=0.08
yIncrease=0.4
#字体大小 颜色 旋转角度
fontSize=33
colorR=77
colorG=78
colorB=114
angle = 50
data = 天下无敌超级大帅逼
#透明度 1f为不透明
alpha=.2f
exe4j打包的过程自行百度,OVER~


 970
970

 被折叠的 条评论
为什么被折叠?
被折叠的 条评论
为什么被折叠?
 到【灌水乐园】发言


