


1、下载安装包
进入mysql官网,Download MySQL Community Server 安装系统为centos6.5_64位 选择 Linux - Generic (glibc 2.5) (x86, 64-bit), Compressed TAR Archive 进行下载。
2. 解压Tar包,更改所属的组和用户
[root@iZ23tp~]# cd /usr/local/
[root@iZ23tp local]# tar -xvf mysql-5.7.14-linux-glibc2.5-x86_64.tar.gz
[root@iZ23tp local]# mv /usr/local/mysql-5.7.14-linux-glibc2.5-x86_64 /usr/local/mysql
[root@iZ23tp local]chown -R mysql:mysql mysql
3. 安装和初始化数据库
修改vi /etc/my.cnf 文件 [mysqld] basedir=/usr/local/mysql/ datadir=/usr/local/mysql/data
[root@iZ23tp mysql]# bin/mysql_install_db --user=mysql --basedir=/usr/local/mysql/ --datadir=/usr/local/mysql/data/
添加开机启动:执行命令cp support-files/mysql.server /etc/init.d/mysql
4. 启动mysql服务
service mysql start
[root@iZ23tp bin]# ./mysql -u root -p
Enter password:
ERROR 2002 (HY000): Can't connect to local MySQL server through socket '/tmp/mysql.sock' (2)
修改 /etc/my.cnf 文件 socket = /tmp/mysql.sock
重启mysql服务 service mysql restart
注:mysql5.7开始,会生成一个初始化密码。
[root@iZ23tp bin]# cat /root/.mysql_secret
# Password set for user 'root@localhost' at 2016-08-14 20:46:13
JDGRwL?s/r4v
重新登录
[root@iZ23tp bin]# ./mysql -u root -p
Enter password:
Welcome to the MySQL monitor. Commands end with ; or \g.
Your MySQL connection id is 2
Server version: 5.7.14
Copyright (c) 2000, 2016, Oracle and/or its affiliates. All rights reserved.
Oracle is a registered trademark of Oracle Corporation and/or its
affiliates. Other names may be trademarks of their respective
owners.
Type 'help;' or '\h' for help. Type '\c' to clear the current input statement.
mysql> show databases
-> ;
ERROR 1820 (HY000): You must reset your password using ALTER USER statement before executing this statement.
mysql> set password = password("123456");
4. 远程连接
为了安全,默认是不允许mysql本机以外的机器访问mysql数据库服务,因此需要重新授权root
mysql> GRANT ALL PRIVILEGES ON *.* TO root@'%' identified by '123456';
Query OK, 0 rows affected, 1 warning (0.00 sec)
mysql> flush privileges;
Query OK, 0 rows affected (0.00 sec)
至此mysql5.7 安装成功
Ubuntu 16.04 安装mysql并设置远程访问
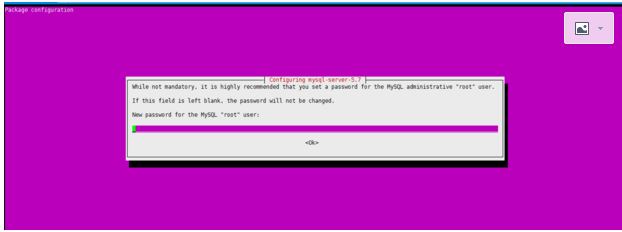
step1、安装mysql并设置root帐号密码
apt-get install mysql-server mysql-client libmysqlclient-dev
备注:可能出现无法安装情况,可尝试apt-get update
step2、查看安装完成情况
netstat -tap | grep mysql
step3、设置mysql远程访问
vi /etc/mysql/mysql.conf.d/mysqld.cnf 注释bind-address = 127.0.0.1
mysql -uroot -proot 使用root帐号登录mysql给test用户设置权限
grant all on *.* to test@'%' identified by 'ts123' with grant option;
flush privileges;
step4、重启mysql
/etc/init.d/mysql restart 或 service mysql restart


 75
75

 被折叠的 条评论
为什么被折叠?
被折叠的 条评论
为什么被折叠?
 到【灌水乐园】发言


