


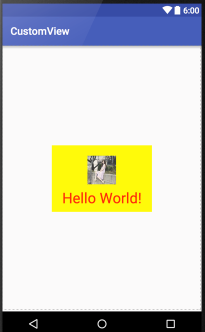
效果图,图片+Text文本
1.创建attr属性文件(详情请看上一节http://my.oschina.net/august1996/blog/655391)
<?xml version="1.0" encoding="utf-8"?>
<resources>
    <attr name="mImageText" format="string" />
    <attr name="mImageTextSize" format="dimension" />
    <attr name="mImageTextColor" format="color" />
    <attr name="mImageRes" format="reference" />
    <declare-styleable name="ImageTextView">
        <attr name="mImageText" />
        <attr name="mImageTextSize" />
        <attr name="mImageTextColor" />
        <attr name="mImageRes" />
        <attr name="mImageScaleType" />
    </declare-styleable>
</resources>
2.View代码,还是三个构造器+onMeasure()+onDraw()方法
View
public class ImageTextView extends View {
    private String mImageText;
    private int mImageTextSize;
    private int mImageTextColor;
    private int mImageRes;
    /**
     * 接收对应的属性
     */
    private Paint mPaint;
    private int imgHeight;
    private int imgWidth;
    /**
     * 测量出的图像宽高
     */
    private int textWidth;
    private int textHeight;
    /**
     * 测量出的文本宽高
     */
}
两个简单构造器
    public ImageTextView(Context context) {
        this(context, null);
    }
    public ImageTextView(Context context, AttributeSet attrs) {
        this(context, attrs, 0);
    }
主角构造器
  public ImageTextView(Context context, AttributeSet attrs, int defStyleAttr) {
        super(context, attrs, defStyleAttr);
        TypedArray ta = context.getTheme().obtainStyledAttributes(attrs, R.styleable.ImageTextView, defStyleAttr, 0);
        int n = ta.getIndexCount();
        for (int i = 0; i < n; i++) {
            int attr = ta.getIndex(i);
            switch (attr) {
                case R.styleable.ImageTextView_mImageText:
                    mImageText = ta.getString(attr);
                    break;
                case R.styleable.ImageTextView_mImageTextSize:
                    mImageTextSize = ta.getDimensionPixelSize(attr,
                            (int) TypedValue.applyDimension(TypedValue.COMPLEX_UNIT_SP, 16,
                                    getResources().getDisplayMetrics()));
                    break;
                case R.styleable.ImageTextView_mImageTextColor:
                    mImageTextColor = ta.getColor(attr, 0);
                    break;
                case R.styleable.ImageTextView_mImageRes:
                    mImageRes = ta.getResourceId(attr, -1); //获取资源的ID,就是图片啦
                    break;
            }
        }
        ta.recycle();
        mPaint = new Paint();
} 3.onMeasure()方法,参考下面图片
 @Override
    protected void onMeasure(int widthMeasureSpec, int heightMeasureSpec) {
        int widthMode = MeasureSpec.getMode(widthMeasureSpec);
        int widthSize = MeasureSpec.getSize(widthMeasureSpec);
        int heightMode = MeasureSpec.getMode(heightMeasureSpec);
        int heightSize = MeasureSpec.getSize(heightMeasureSpec);
        int width;
        int height;
        mPaint.setTextSize(mImageTextSize);
        textWidth = (int) mPaint.measureText(mImageText, 0, mImageText.length());
        imgWidth = BitmapFactory.decodeResource(getResources(), mImageRes).getWidth();  //获取图片宽度...
        textHeight = getFontHeight(mPaint);
        imgHeight = BitmapFactory.decodeResource(getResources(), mImageRes).getHeight();
        if (widthMode == MeasureSpec.EXACTLY) {
            width = widthSize;
        } else {
            width = Math.max(imgWidth, textWidth) + getPaddingLeft() + getPaddingRight();   //宽度选择图片宽度跟文本宽度的较大者
        }
        if (heightMode == MeasureSpec.EXACTLY) {
            height = heightSize;
        } else {
            height = imgHeight + textHeight + getPaddingTop() + getPaddingBottom();    //高度就是整体区域加起来啦
        }
        setMeasuredDimension(width, height);
    }
4.onDraw()方法,参考下图
    @Override
    protected void onDraw(Canvas canvas) {
        super.onDraw(canvas);
        mPaint.setColor(Color.YELLOW);
        canvas.drawRect(new Rect(0, 0, getWidth(), getHeight()), mPaint);
        canvas.drawBitmap(BitmapFactory.decodeResource(getResources(), mImageRes),
                getWidth() / 2 - imgWidth / 2, getHeight() / 2 - imgHeight / 2 - textHeight / 2, mPaint);
        mPaint.setTextSize(mImageTextSize);
        mPaint.setColor(mImageTextColor);
        canvas.drawText(mImageText, getWidth() / 2 - textWidth / 2,
                getHeight() / 2 + imgHeight / 2 + (getPaddingTop() + getPaddingBottom()) / 2, mPaint);
    }
5.布局文件
<?xml version="1.0" encoding="utf-8"?>
<RelativeLayout xmlns:android="http://schemas.android.com/apk/res/android"
    xmlns:app="http://schemas.android.com/apk/res-auto"
    android:layout_width="match_parent"
    android:layout_height="match_parent">
    <com.example.august.customview.ImageTextView
        android:layout_width="wrap_content"
        android:layout_height="wrap_content"
        android:layout_centerInParent="true"
        android:padding="20dp"
        app:mImageRes="@drawable/pic"
        app:mImageScaleType="center"
        app:mImageText="Hello World!"
        app:mImageTextColor="#FF0000"
        app:mImageTextSize="28sp" />
</RelativeLayout>


 3549
3549

 被折叠的 条评论
为什么被折叠?
被折叠的 条评论
为什么被折叠?
 到【灌水乐园】发言


