


一、SpringBoot集成
1.发布配置信息
- 设置本机为DEV环境:Linux在/opt/settings/server.properties增加配置env=DEV,windows在c:\opt\settings\server.properties
<div align=center>
 图1
图1
<div align=left>
- 在apollo portal上新建项目后,默认就有了application命名空间。在DEV环境下新建一个名为test_namespace的命名空间。
- 在application上发布:spring.applicaton.name=apollo_demo,server.port=9000。
- 在test_name上发布:name=name1, value=value2。
2.引入依赖
<dependency>
       <groupId>org.springframework.boot</groupId>
        <artifactId>spring-boot-stater</artifactId>
</dependency>

<dependency>
        <groupId>org.springframework.boot</groupId>
        <artifactId>spring-boot-starter-web</artifactId>
</dependency>

<dependency>
        <groupId>org.projectlombok</groupId>
        <artifactId>lombok</artifactId>
        <version>${lombok.version}</version>
        <scope>provided</scope>
</dependency>

<!-- apollo客户端 -->
<dependency>
        <groupId>com.ctrip.framework.apollo</groupId>
        <artifactId>apollo-client</artifactId>
        <version>${apollo.version}</version>
</dependency>
3.项目配置
- 在项目的application.properties(applicaiton.yml)或者/META-INF/app.properties填入app.id=appId(在apollo-portal上新建项目时填写的appId,表示获取的是那个配置项目的配置信息)。
- resources目录下新建apollo-env.properties,填写各个环境的meta server地址:
<div align=center>
 图2
图2
<div align=left> 3) 或者不在项目配置apollo-env.properties,而是直接在application.properties指定apollo.meta=ip:port的方式来执行需要读取配置的的服务
- 使用application命名空间的配置信息来启动SpringBoot应用 入口方法增加
@EnableApolloConfig注解
@SpringBootApplication
@EnableApolloConfig
public class Application {

    public static void main(String[] args) {
        SpringApplication.run(Application.class, args);
    }
}
如果不使用@EnableApolloConfig注解,可以在application.properties里面配置apollo.bootstrap.enabled=true,效果一样。 使用apollo.bootstrap.namespaces = application,test_namespace可以指定命名空间。
启动项目:
<div align=center>
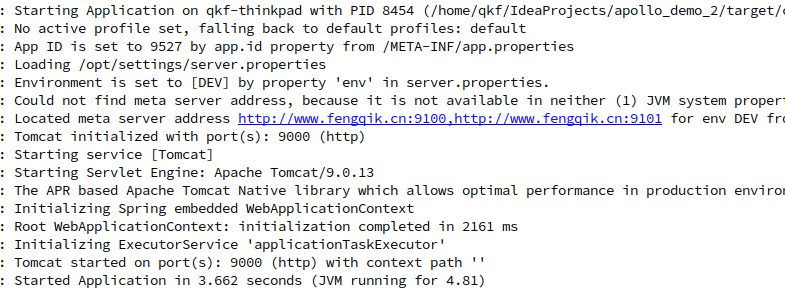 图3
图3
<div align=left> 可以看到应用在启动前从配置中心获取配置信息来启动应用。 `@EnableApolloConfig`默认是从application命名空间获取配置的,相当于`@EnableApolloConfig("application")`.。
4.获取配置
application命名空间配置信息 java bean:
@Component
@EnableApolloConfig
@Getter
@Setter
@ToString
public class AppNamespace {

    @Value("${spring.application.name:}")
    private String name;

    @Value("${server.port:}")
    private String value;
}
java bean:
@Component
@EnableApolloConfig("CASE.test_namespace")
@Getter
@Setter
@ToString
public class TestNamespace {

    @Value("${name}")
    private String name;

    @Value("${value}")
    private String value;
}
使用:
@RestController
public class DemoController {

    @Autowired
    private TestNamespace demo;

    @Autowired
    private AppNamespace application;

    @ApolloConfig
    private Config appConfig;

    @ApolloConfig("CASE.test_namespace")
    private Config testConfig1;

    private Config testConfig2 = ConfigService.getConfig("CASE.test_namespace");
}
以上两种方式获取配置信息的值,会跟配置中心的更改同步(1秒内);还可以使用@ConfigurationProperties来获取配置信息,但这种方式不会同步更新,需要额外的编码配置才能实现,具体查看官方文档。
5.其他
@ApolloJsonValue注解,作用相当于@Value,将JSON字符串转成对象。
@ApolloConfigChangeListener注解::
@ApolloConfigChangeListener
private void someOnChange(ConfigChangeEvent changeEvent) {
        //update injected value of batch if it is changed in Apollo
        if (changeEvent.isChanged("key")) {
                System.out.println(config.getIntProperty("key", ""));
        }
}
@ApolloConfigChangeListener相当于@ApolloConfigChangeListener("application")
相当于:
Config config = ConfigService.getAppConfig();
config.addChangeListener(new ConfigChangeListener() {
    @Override
    public void onChange(ConfigChangeEvent changeEvent) {
        System.out.println("Changes for namespace " + changeEvent.getNamespace());
        for (String key : changeEvent.changedKeys()) {
            ConfigChange change = changeEvent.getChange(key);
            System.out.println(String.format("Found change - key: %s, oldValue: %s, newValue: %s, changeType: %s", change.getPropertyName(), change.getOldValue(), change.getNewValue(), change.getChangeType()));
        }
    }
});
如果同时以两种方式绑定changeListener的方式,只有ConfigService实例的监听器会生效。


 400
400


 被折叠的 条评论
为什么被折叠?
被折叠的 条评论
为什么被折叠?
 到【灌水乐园】发言


