


1.通过传统配置文件(xml)的方式来实现Spring容器中的组件注册
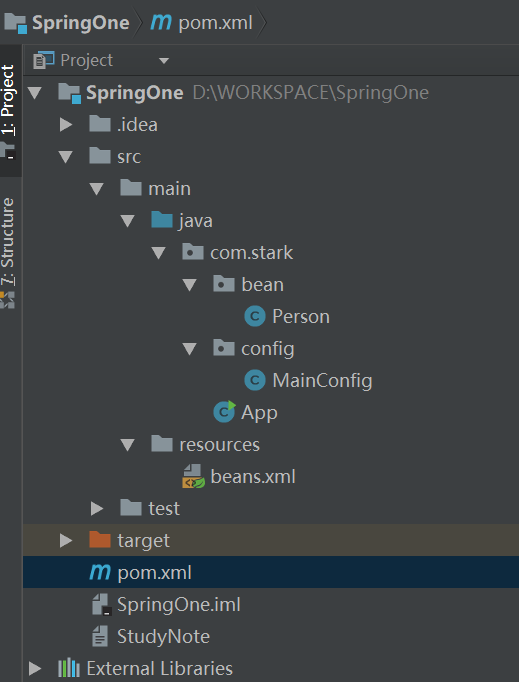
项目工程目录结构:
1.1 创建maven工程,pom文件导入spring-context(核心组件包)
<project xmlns="http://maven.apache.org/POM/4.0.0" xmlns:xsi="http://www.w3.org/2001/XMLSchema-instance"
  xsi:schemaLocation="http://maven.apache.org/POM/4.0.0 http://maven.apache.org/xsd/maven-4.0.0.xsd">
  <modelVersion>4.0.0</modelVersion>

  <groupId>com.stark</groupId>
  <artifactId>SpringOne</artifactId>
  <version>1.0-SNAPSHOT</version>
  <packaging>jar</packaging>

  <name>SpringOne</name>
  <url>http://maven.apache.org</url>

  <properties>
    <project.build.sourceEncoding>UTF-8</project.build.sourceEncoding>
  </properties>

  <dependencies>
    <dependency>
      <groupId>junit</groupId>
      <artifactId>junit</artifactId>
      <version>3.8.1</version>
      <scope>test</scope>
    </dependency>
    <!-- https://mvnrepository.com/artifact/org.springframework/spring-context -->
    <dependency>
      <groupId>org.springframework</groupId>
      <artifactId>spring-context</artifactId>
      <version>5.0.4.RELEASE</version>
    </dependency>


  </dependencies>
</project>
1.2 在com/stark/bean下创建Person类
package com.stark.bean;

public class Person {

    private Integer id;

    private String name;

    private Integer age;

    public Integer getId() {
        return id;
    }

    public void setId(Integer id) {
        this.id = id;
    }

    public String getName() {
        return name;
    }

    public void setName(String name) {
        this.name = name;
    }

    public Integer getAge() {
        return age;
    }

    public void setAge(Integer age) {
        this.age = age;
    }

    @Override
    public String toString() {
        return "Person{" +
                "id=" + id +
                ", name='" + name + '\'' +
                ", age=" + age +
                '}';
    }

    public Person(Integer id, String name, Integer age) {
        this.id = id;
        this.name = name;
        this.age = age;
    }

    public Person() {

    }
}
1.3 在src下创建spring的配置文件beans.xml,将person类注册到容器中
<?xml version="1.0" encoding="UTF-8"?>
<beans xmlns="http://www.springframework.org/schema/beans"
       xmlns:xsi="http://www.w3.org/2001/XMLSchema-instance"
       xsi:schemaLocation="http://www.springframework.org/schema/beans http://www.springframework.org/schema/beans/spring-beans.xsd">
   <!--配置方式 注册一个bean组件-->
    <bean id="person" class="com.stark.bean.Person">
        <property name="id" value="1"/>
        <property name="name" value="张三"/>
        <property name="age" value="20"/>
    </bean>
</beans>
1.4通过配置文件方式读取bean测试
package com.stark;
import com.stark.bean.Person;
import com.stark.config.MainConfig;
import org.springframework.context.ApplicationContext;
import org.springframework.context.annotation.AnnotationConfigApplicationContext;
import org.springframework.context.support.ClassPathXmlApplicationContext;
public class MainTest {
public static void main(String args[]){
//实例化容器
ApplicationContext context=new ClassPathXmlApplicationContext("beans.xml");
//获取组件
Person person=(Person)context.getBean("person");
System.out.println(person);
}
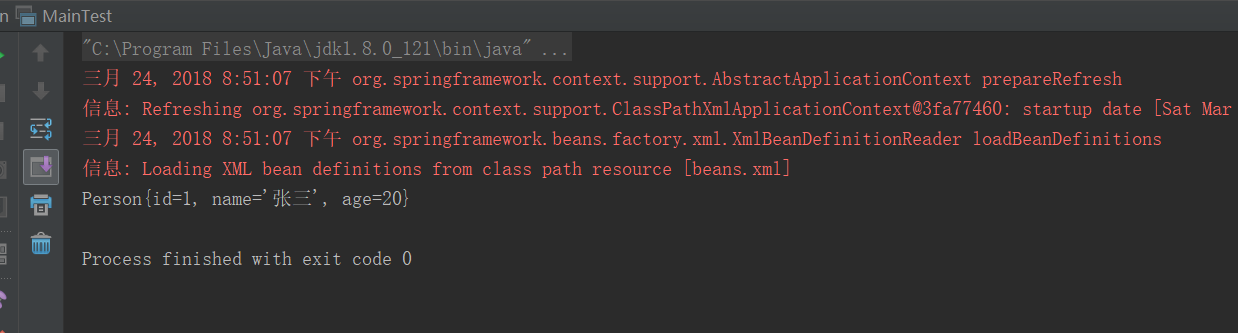
}1.5 可以看下面获取bean组件的打印信息
2 通过注解方式来实现Spring容器中的组件注册
2.1 在com/stark/config下创建一个配置类MainConfig
package com.stark.config;
import com.stark.bean.Person;
import org.springframework.context.annotation.Bean;
import org.springframework.context.annotation.Configuration;

@Configuration //告诉Spring 这是一个注解类
public class MainConfig {
    @Bean(value = "persion1") //告诉Spring这是一个bean组件,类型为返回值的类型,id默认为方法名
    public Person person(){
        return new Person(1,"张三",20);
    }
}
2.2通过注解方式读取bean测试
package com.stark;
import com.stark.bean.Person;
import com.stark.config.MainConfig;
import org.springframework.context.ApplicationContext;
import org.springframework.context.annotation.AnnotationConfigApplicationContext;
import org.springframework.context.support.ClassPathXmlApplicationContext;

public class MainTest {

    public static void main(String args[]){

        //注解方式 获取
        //实例化容器
        ApplicationContext contexts=new AnnotationConfigApplicationContext(MainConfig.class);
        //获取组卷
        Person person1=contexts.getBean(Person.class);

        System.out.println(person1);

    }
}
总结:通过注解方式实现的bean注册,远远要比传统配置 文件方式方便的多,主要用到了@Configuration和@Bean
带有@Configuration注解的MainConfig类 代替了 Beans.xml配置文件,会被AnnotationConfigApplicationContext或AnnotationConfigWebApplicationContext类进行扫描,并用于构建bean定义,初始化Spring容器.
@Configuration会被AnnotationConfigApplicationContext或AnnotationConfigWebApplicationContext类进行扫描,
并用于构建bean定义,初始化Spring容器
带有@Bean注解的方法代替了配置方式<bean id="" class=""></bean>,
@Bean是一个方法级别上的注解,主要用在@Configuration注解的类里,也可以用在@Component注解的类里。
Spring注解驱动系列持续更新中


 422
422

 被折叠的 条评论
为什么被折叠?
被折叠的 条评论
为什么被折叠?
 到【灌水乐园】发言


