


我之前写了一篇文章讲了itext的基础操作常用方法(https://my.oschina.net/itazi/blog/1812042),但是有时涉及到比较复杂的PDF生成,手工操作就很复杂,可以使用模板生成方式。有时还要涉及合并等,于是将用到的略作记载。 首先要用到的依赖:
<dependency>
  <groupId>com.itextpdf</groupId>
  <artifactId>itextpdf</artifactId>
  <version>5.5.10</version>
</dependency>
    <dependency>
  <groupId>com.itextpdf</groupId>
  <artifactId>itext-asian</artifactId>
  <version>5.2.0</version>
</dependency>
    <dependency>
  <groupId>org.bouncycastle</groupId>
  <artifactId>bcprov-jdk15on</artifactId>
  <version>1.54</version>
</dependency>
    <!-- https://mvnrepository.com/artifact/com.lowagie/itext -->
<dependency>
  <groupId>com.lowagie</groupId>
  <artifactId>itext</artifactId>
  <version>2.1.7</version>
</dependency>首先我们来讲讲制作模板,可以查考这个https://www.cnblogs.com/LUA123/p/5108007.html,这里面感觉很详细了,另外特别提到一点,由于要用Adobe制作的话需要购买,所以作为代替方案,你还可以使用福晰PDF软件制作,也可以实现相同效果,亲测可用。制作好模板之后接下来就是根据模板生成PDF,代码如下:
/**
 * 根据模版生成pdf
 *
 * @param templateFile 模板路径
 * @param targetFile 将要生成的pdf路径
 * @param fieldMap 填充字段
 */
public static Boolean createPdfFromTemplate(String templateFile, String targetFile, Map<String, String> fieldMap) {
    Boolean retValue = false;
    try {
        /* 打开已经定义好字段以后的pdf模板 */
        com.itextpdf.text.pdf.PdfReader reader = new com.itextpdf.text.pdf.PdfReader(templateFile);
         /* 将要生成的目标PDF文件名称 */
        PdfStamper stamp = new PdfStamper(reader, new FileOutputStream(targetFile));
         PdfContentByte under = stamp.getUnderContent(1);
         /* 使用中文字体 */
        BaseFont bf = BaseFont.createFont("STSong-Light", "UniGB-UCS2-H",BaseFont.NOT_EMBEDDED);
        Font fontChinese = new Font(bf, 12, Font.NORMAL);
         /* 取出报表模板中的所有字段 */
        AcroFields form = stamp.getAcroFields();
        form.addSubstitutionFont(bf);//这行必须添加否则中文不显示
         /* 为字段赋值,注意字段名称是区分大小写的 */
        for (String key : fieldMap.keySet()) {
            form.setField(key, fieldMap.get(key));
        }
         stamp.setFormFlattening(true);
        /* 必须要调用这个,否则文档不会生成的 */
        stamp.close();
        reader.close();
        retValue = true;
    } catch (DocumentException de) {
        System.err.println(de.getMessage());
    } catch (IOException ioe) {
        System.err.println(ioe.getMessage());
    } finally {
        return retValue;
    }

}
测试代码如下(注意:关于路径你要改成你自己本地的路径,要正确,特别是你制作模板的路径,要填写正确,要不然模板都找不到,谈何制作pdf呢):
Map<String, String> map = new HashMap<String, String>();
    map.put("projectname", "map填充");//这里的projectname是你制作PDF时填入的字段
    map.put("applyname", "shishui??");//同上
    System.out.println(PdfUtils.createPdfFromTemplate("/Users/hxm/Documents/pdf/project_detail_model_wrapper_2.pdf",
            "/Users/hxm/Documents/pdf/tempalte.pdf", map));
结果: 填充成功。 接下来我们来谈谈合并PDF,有时候你有多个PDF,正好需要合并成一个,你可能就需要这个方法了(部分内容参考:https://www.cnblogs.com/pocketbook/p/6427579.html)。代码如下:
/**
 * 合并pdf
 * @param files 要合并的pdf文件
 * @param newfile 生成的文件名
 * @return
 */
public static Boolean mergePdfFiles(String[] files, String newfile) {
    Boolean retValue = false;
    Document document = null;
   try {
       document = new Document(new PdfReader(files[0]).getPageSize(1));
       PdfCopy copy = new PdfCopy(document, new FileOutputStream(newfile));
       document.open();
       for (int i = 0; i < files.length; i++) {
           PdfReader reader = new PdfReader(files[i]);
           int n = reader.getNumberOfPages();
           for (int j = 1; j <= n; j++) {
               document.newPage();
               PdfImportedPage page = copy.getImportedPage(reader, j);
               copy.addPage(page);
           }
       }
       retValue = true;
   } catch (Exception e) {
       e.printStackTrace();
   } finally {
       document.close();
   }
   return retValue;
}
测试代码(路径要能和你自己的pdf地址对上):
String[] files = { "/Users/hxm/Documents/pdf/audit.pdf", "/Users/hxm/Documents/pdf/template.pdf"};
    String savepath = "/Users/hxm/Documents/pdf/newmerge"+ System.currentTimeMillis() +".pdf";
    PdfTemplateUtil.mergePdfFiles(files, savepath);
结果: 合并成功。 如果已经存在一个PDF,你想添加某些属性再生成一个新的PDF文件,如增加水印,加密,设置权限等,这时你就又需要一个方法了,代码如下(其中部分参考一个外国小哥的代码):
public static Boolean addAttributeToPdfFile(String strFileLocation, String strFileLocationOut) {
    Boolean isSuccess = false;
    try {
        // read existing pdf
        com.itextpdf.text.pdf.PdfReader reader = new com.itextpdf.text.pdf.PdfReader(strFileLocation);
        PdfStamper stamper = new PdfStamper(reader, new FileOutputStream(strFileLocationOut));
         stamper.setEncryption(null, null, PdfWriter.ALLOW_PRINTING, PdfWriter.ENCRYPTION_AES_128);
        // text watermark
        Font FONT = new Font(Font.FontFamily.HELVETICA, 34, Font.BOLD, new GrayColor(0.5f));
//            Phrase p = new Phrase("Memorynotfound (watermark)", FONT);
        BaseFont bfChinese = BaseFont.createFont("STSongStd-Light", "UniGB-UCS2-H", BaseFont.NOT_EMBEDDED);
        Font font = new Font(bfChinese, 30, Font.BOLD, new GrayColor(0.90f));
        Phrase p = new Phrase("(watermark)", font);
         // image watermark
//            Image img = Image.getInstance(imgUrl);
//            float w = img.getScaledWidth();
//            float h = img.getScaledHeight();
         // properties
        PdfContentByte over;
        Rectangle pagesize;
        float x, y;
         // loop over every page
        int n = reader.getNumberOfPages();
        for (int i = 1; i <= n; i++) {
            // get page size and position
//                pagesize = reader.getPageSizeWithRotation(i);
//                x = (pagesize.getLeft() + pagesize.getRight()) / 2;
//                y = (pagesize.getTop() + pagesize.getBottom()) / 2;
            over = stamper.getUnderContent(i);
            over.saveState();
             // set transparency
            PdfGState state = new PdfGState();
            state.setFillOpacity(0.2f);
            over.setGState(state);
//                ColumnText.showTextAligned(over, Element.ALIGN_CENTER, p, x, y, 0);
            //控制水印的显示效果,可以自己调整看看
            float beginPositionX = 10, beginPositionY = 70, distance = 175;
            for (int i2 = 0; i2 < 4; i2++) {
                for (int j = 0; j < 4; j++) {
                    ColumnText.showTextAligned(over, Element.ALIGN_LEFT,
                            p, beginPositionX + distance*i2, beginPositionY + distance*j, 25);

                }
            }
            // add watermark text and image
//                if (i % 2 == 1) {
//                    ColumnText.showTextAligned(over, Element.ALIGN_CENTER, p, x, y, 0);
//                } else {
//                    over.addImage(img, w, 0, 0, h, x - (w / 2), y - (h / 2));
//                }
             over.restoreState();
        }
        stamper.close();
        reader.close();
        isSuccess = true;
    } catch (DocumentException e) {
        // TODO Auto-generated catch block
        e.printStackTrace();
    } catch (IOException e) {
        // TODO Auto-generated catch block
        e.printStackTrace();
    } finally {
        return isSuccess;
    }
}
测试代码:
PdfUtils.addAttributeToPdfFile("/Users/hxm/Documents/pdf/newmerge1527731906780.pdf",
            "/Users/hxm/Documents/pdf/mytemplate.pdf");
效果如下: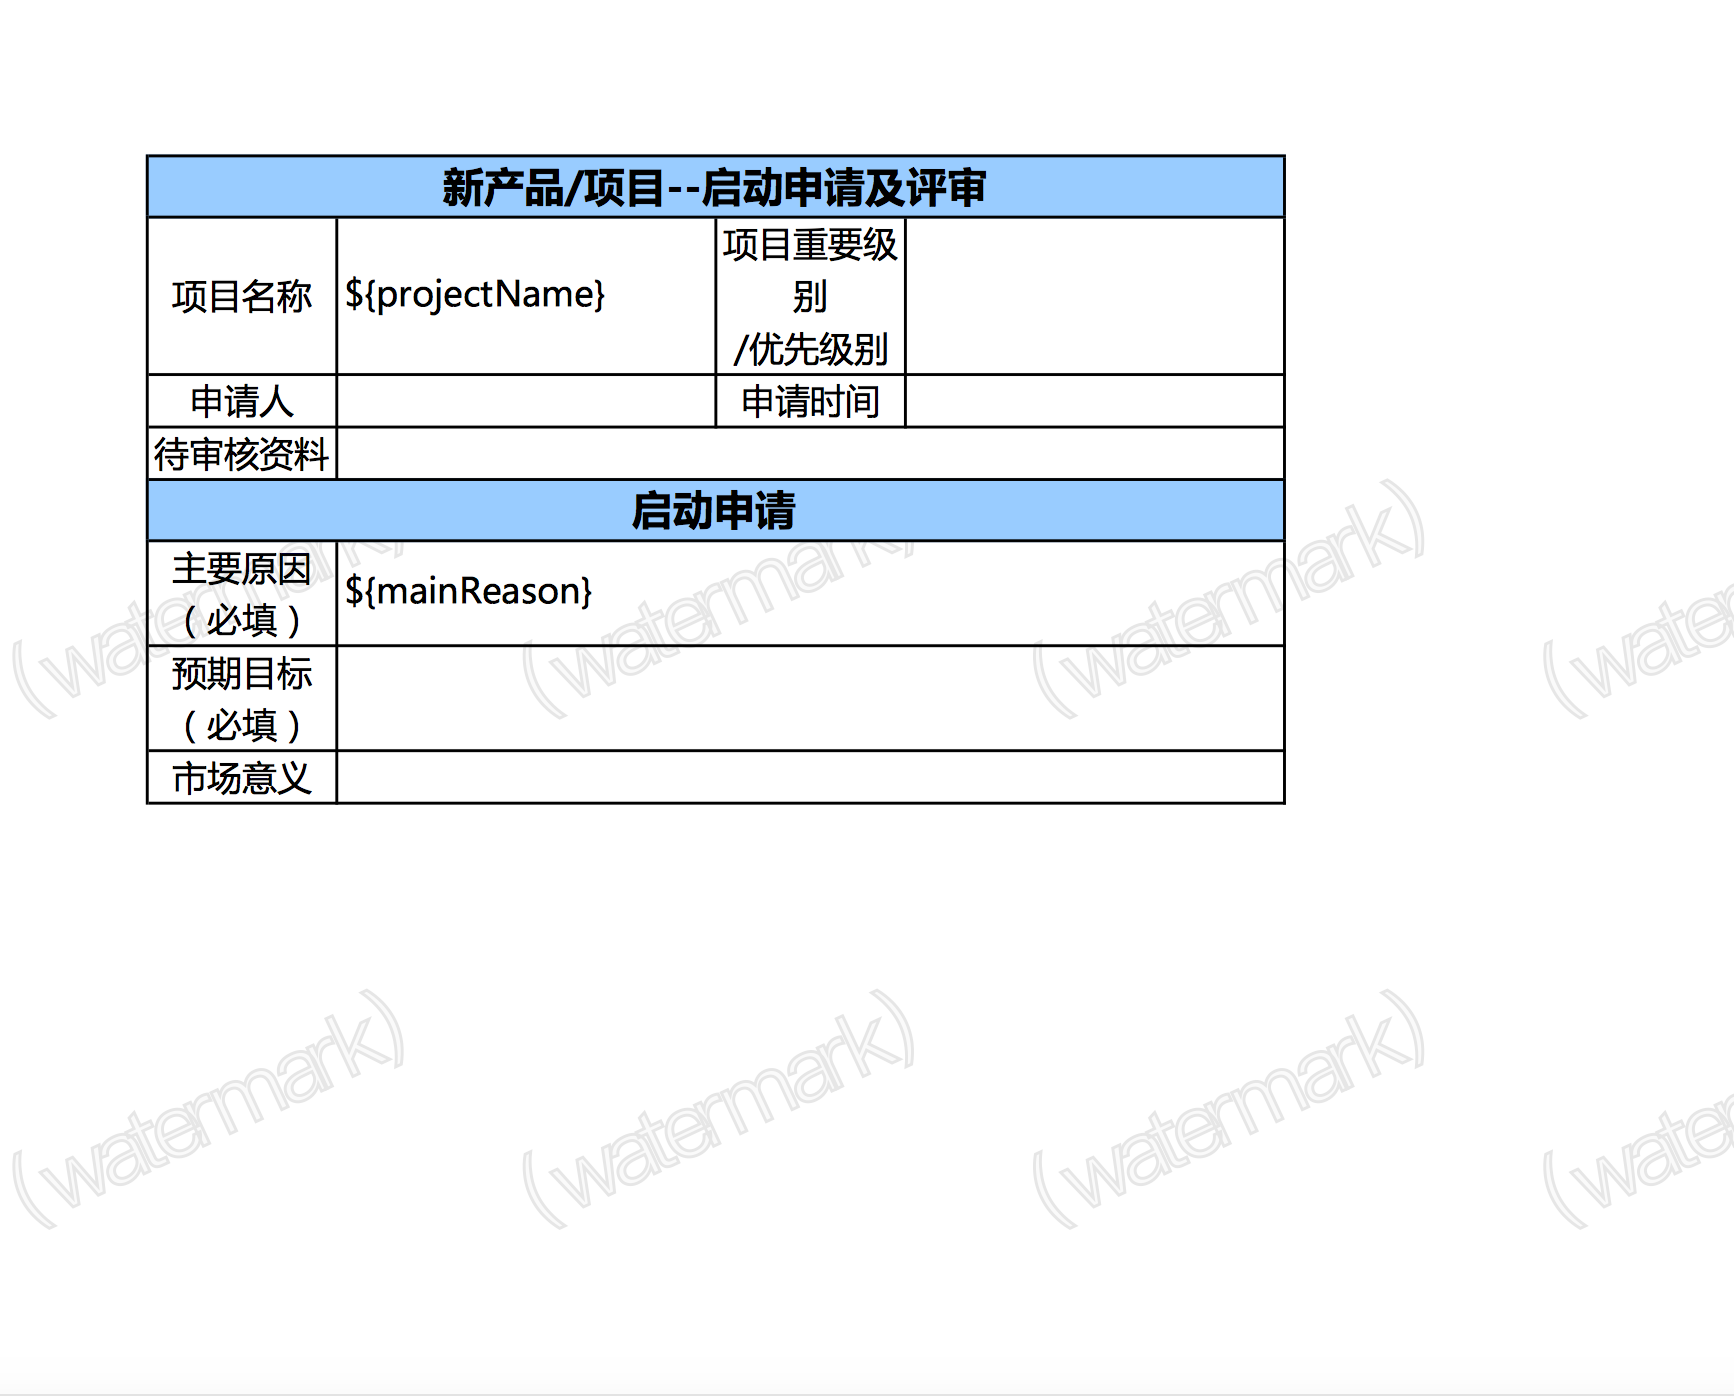 另外注意点是我上面的几个方法都放在一个叫PdfUtils的类中。大概结构如下:
package pdf;
import java.io.File;
import java.io.FileOutputStream;
import java.io.IOException;
import java.util.List;
import java.util.Map;
import com.itextpdf.text.DocumentException;
import com.itextpdf.text.Element;
import com.itextpdf.text.Font;
import com.itextpdf.text.Phrase;
import com.itextpdf.text.Rectangle;
import com.itextpdf.text.pdf.AcroFields;
import com.itextpdf.text.pdf.BaseFont;
import com.itextpdf.text.pdf.ColumnText;
import com.itextpdf.text.pdf.GrayColor;
import com.itextpdf.text.pdf.PdfContentByte;
import com.itextpdf.text.pdf.PdfGState;
import com.itextpdf.text.pdf.PdfStamper;
import com.itextpdf.text.pdf.PdfWriter;
import com.lowagie.text.Document;
import com.lowagie.text.pdf.PdfCopy;
import com.lowagie.text.pdf.PdfImportedPage;
import com.lowagie.text.pdf.PdfReader;
/**
* pdf工具类
*
* @author hxm
*/
public class PdfUtils {
}
上面就是这些常用方法了,因为要用到本人也网上搜索了很多资料,看了很多,最后特地整理一下,也以备自己以后查询之用处。


 466
466

 被折叠的 条评论
为什么被折叠?
被折叠的 条评论
为什么被折叠?
 到【灌水乐园】发言


