


1.1 镜像信息

1.2 Virtio驱动信息 
下载地址 :https://fedorapeople.org/groups/virt/virtio-win/direct-downloads/stable-virtio/virtio-win.iso
1.3 Cloudbase-init
windows
版本信息:
下载地址:https://cloudbase.it/downloads/CloudbaseInitSetup_Stable_x64.msi
2. KVM环境准备
2.1 制作镜像的物理机上面安装虚拟化软件
yum group install "Virtualization Host" qemu-kvm virt-install libvirt virt-manager libguestfs-tools -y
2.3 创建一个空的镜像文件
qemu-img create -f qcow2 centos-7.6.qcow2 5G
2.4 创建虚拟机 virt-install --name centos-7.6 --ram 1024 --cdrom=/home/用户名/CentOS-7.6-x86_64-bin-DVD1.iso --disk path=/home/用户名/centos-7.6.qcow2 --noautoconsole --os-type=linux
2.5 调出qemu控制台
virt-manager
3. 创建Linux(CentOS7.6)镜像模板 3.1 设置首次登陆修改密码
passwd -e root
3.2 禁用SELINUX
sed -i '/^SELINUX/s/enforcing/permissive/g' /etc/selinux/config
3.3 关闭Firewall
systemctl disable firewall
3.4 GRUB 配置
**[root@localhost ~]#** cat /etc/default/grub | tail -n 1
**[root@localhost ~]#** GRUB_CMDLINE_LINUX_DEFAULT =“console=tty0 console=ttyS0,115200n8”
grub2-mkconfig -o /boot/grub2/grub.cfg
Centos7.6中qemu-guest-agent cloudbase-init 已默认安装并开机启动
3.5 编辑/etc/cloud/cloud.cfg配置文件和cloud_init_modules添加:
… - resolv-conf …
并且由于需求为允许root用户远程ssh虚机,应该在/etc/cloud/cloud.cfg文件中修改配置为以下项:
disable_root: 0 ssh_pwauth: 1
添加以下行以/etc/sysconfig/network避免访问EC2元数据服务时出现问题:
NOZEROCONF=yes
3.6 时间服务器

3.7 关闭虚拟机
poweroff
3.8 压缩并重置镜像
virt-sysprep -d centos-7.6
virt-sparsify --compress centos-7.6.qcow2 centos-7.6-cloud.qcow2
3.9 上传到云平台 (需要登陆到有相应权限的Openstack用户)
openstack image create --disk-format qcow2 --public --file Centos_7.6.qcow2 Centos_7.6 --property hw_qemu_guest_agent=yes
4. 创建Windows Server(2K16Std)镜像模板
4.1 创建虚拟机 创建空的qcow2文件
qemu-img create -f qcow2 win_2016.qcow2 15g
virt-install --name win2k16 --vcpus 2 --ram 2048 --cdrom=/windows/win/cn_windows_server_2016_x64_dvd_9718765.iso --disk path=win_2016.qcow2 --channel unix,path=/var/lib/libvirt/qemu/channel/target/win2k16.agent,mode=bind,target_type=virtio,name=org.qemu.guest_agent.0
4.2 Virtio-win驱动安装 软件获取
wget https://fedorapeople.org/groups/virt/virtio-win/direct-downloads/latest-virtio/virtio-win.iso
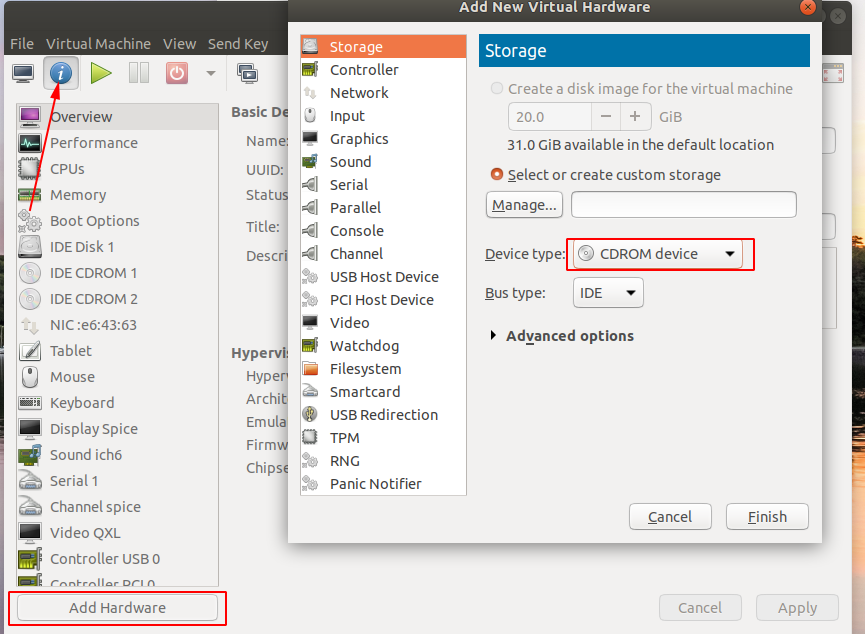
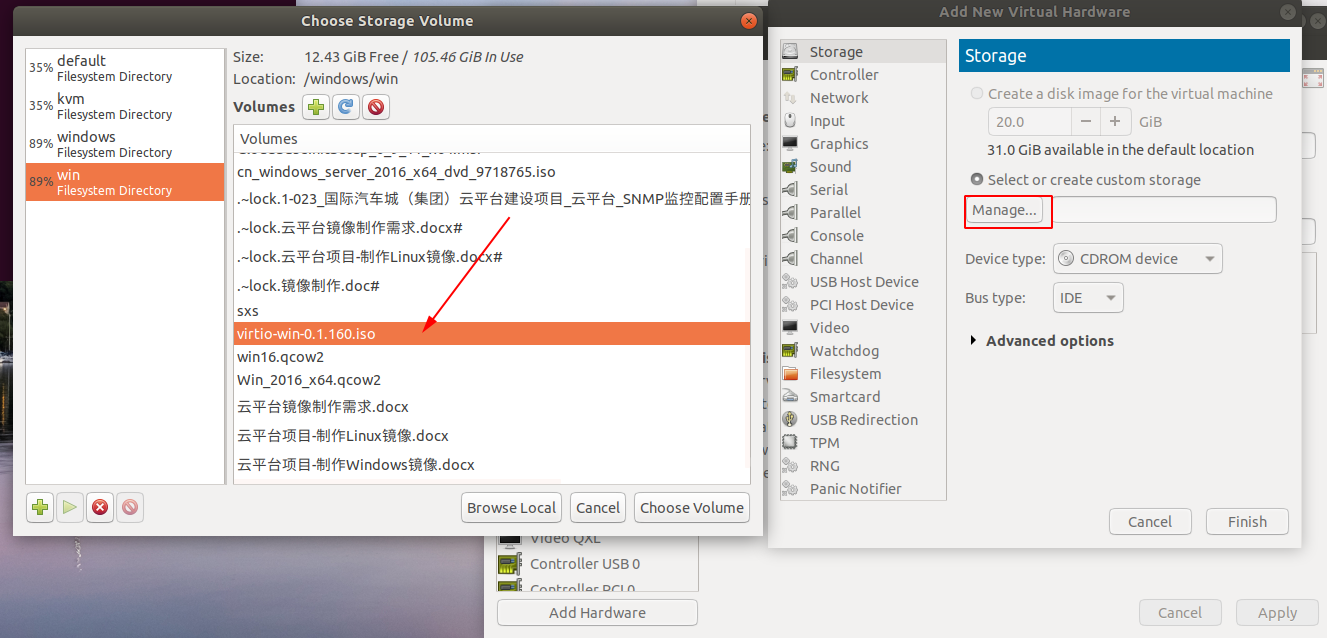
将镜像添加到虚拟机的镜像中
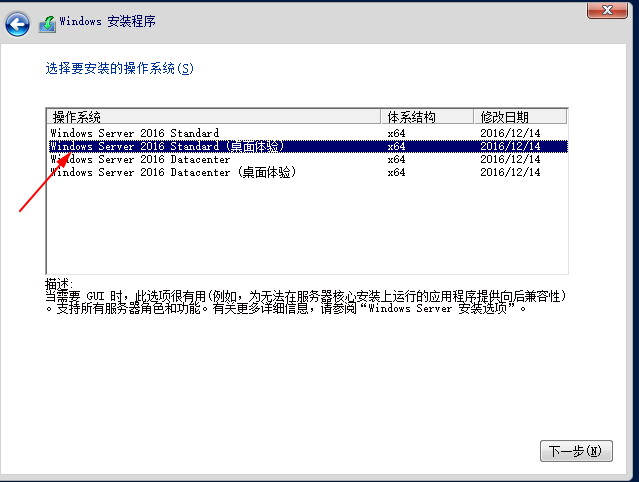
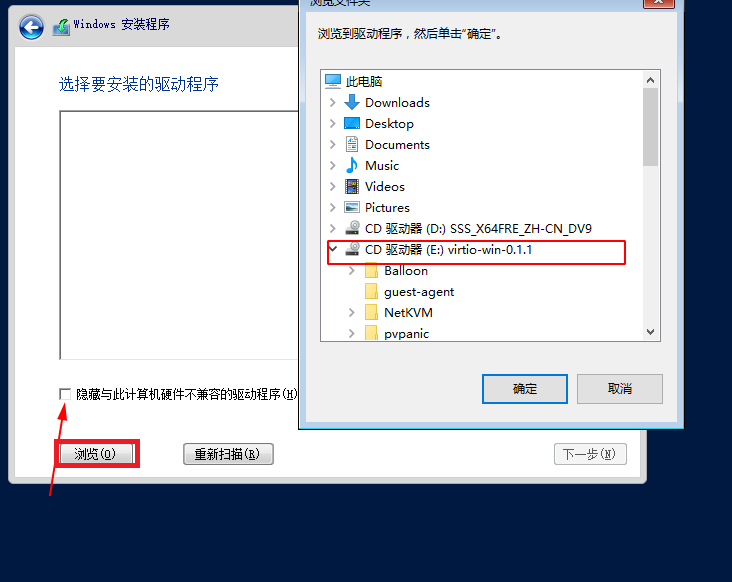
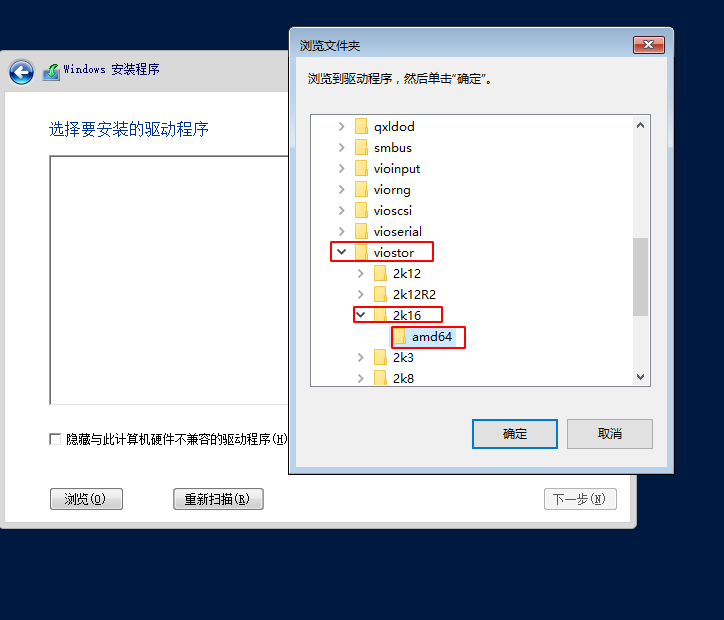
开始安装时安装驱动
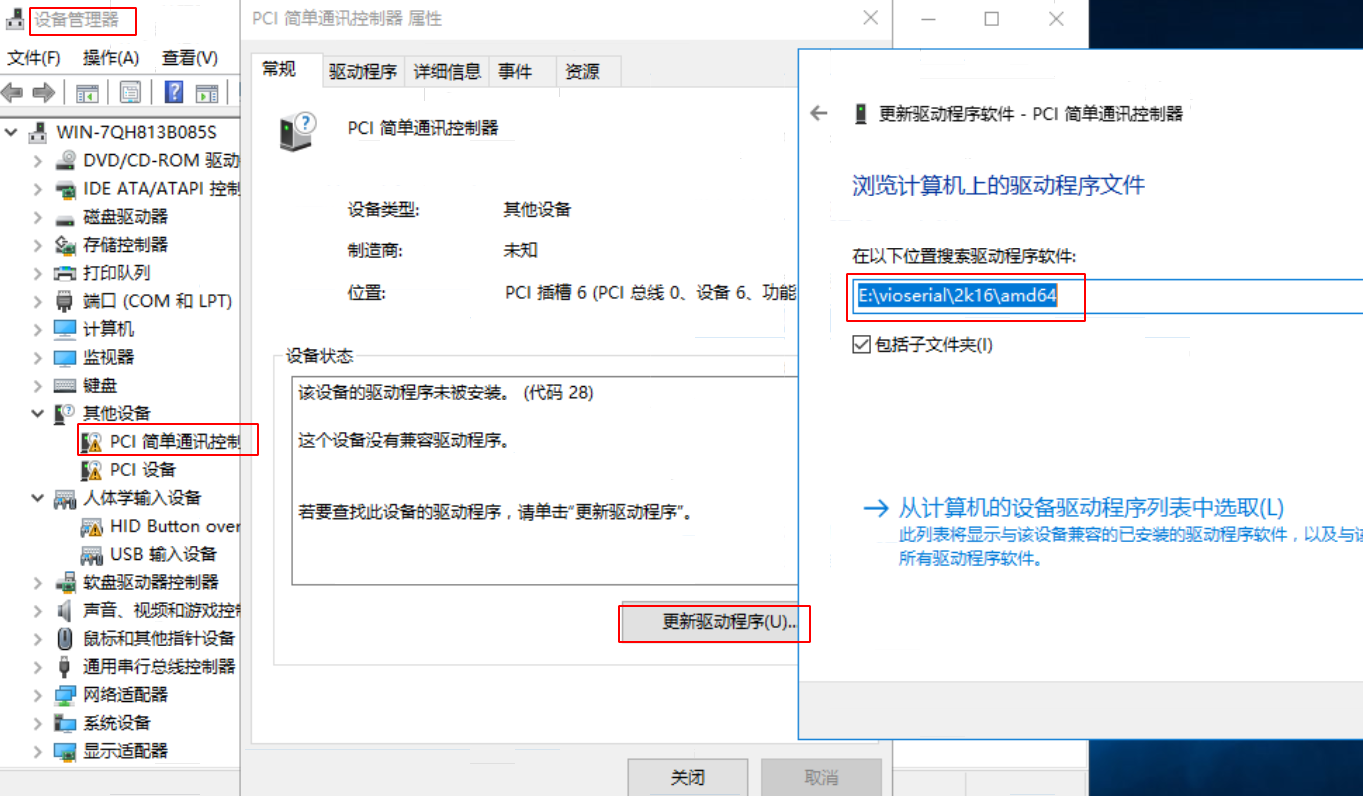
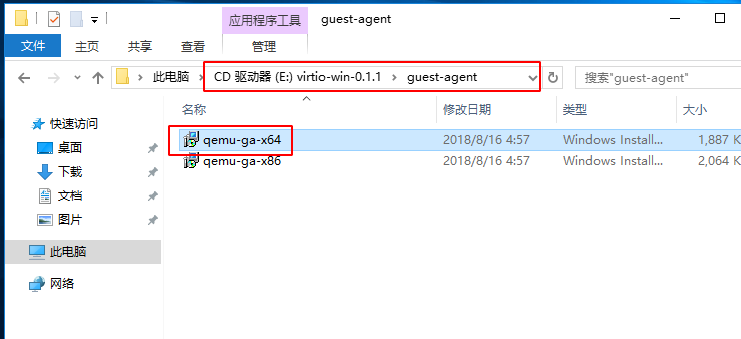
 安装guets-agent
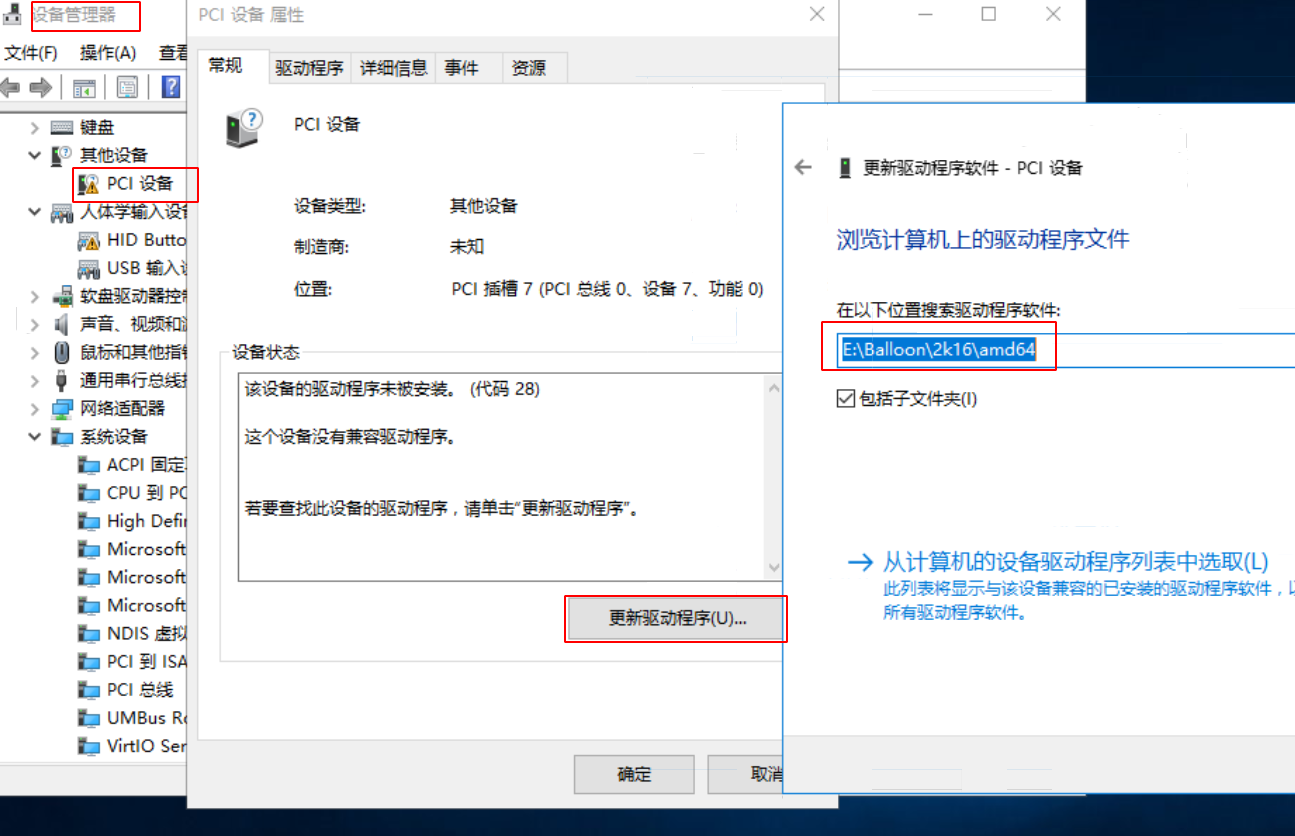
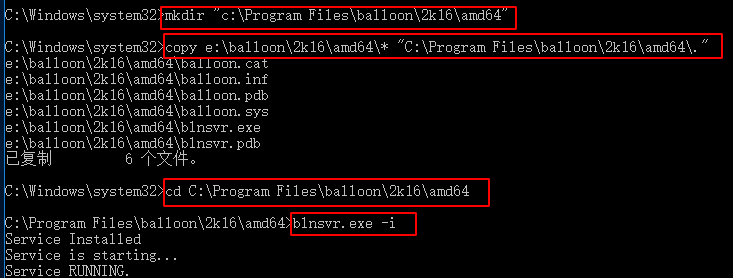
注册balloon服务
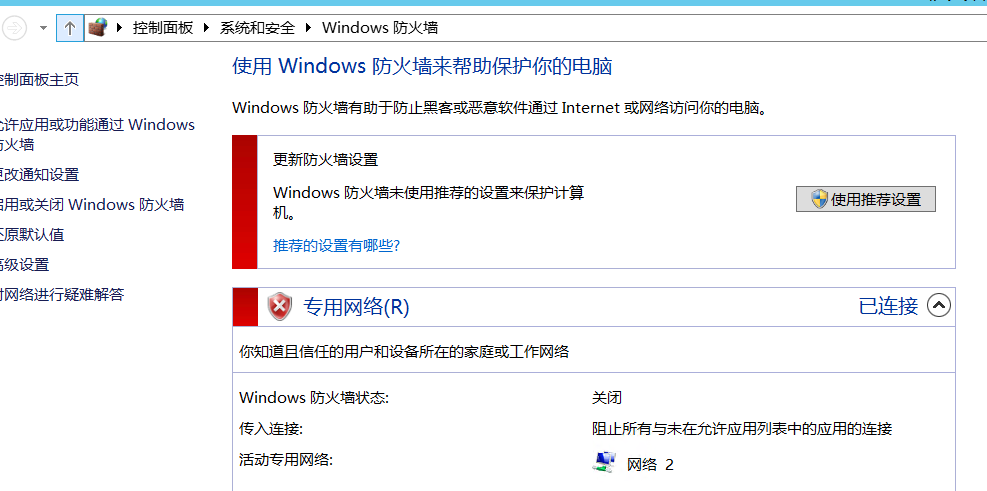
4.3 关闭防火墙
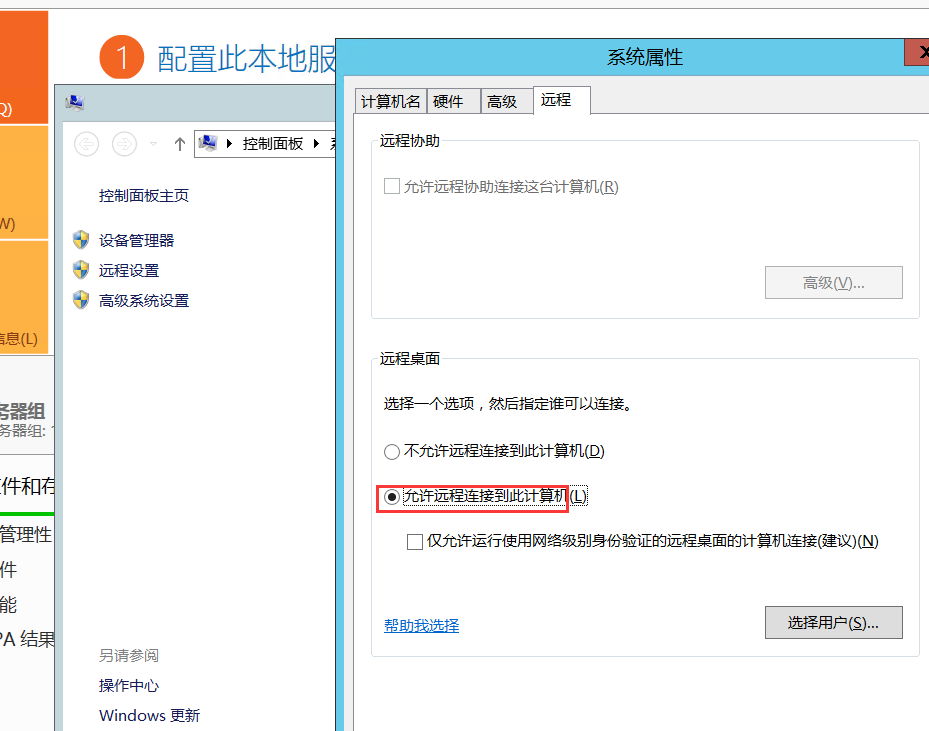
4.4 开启远程连接
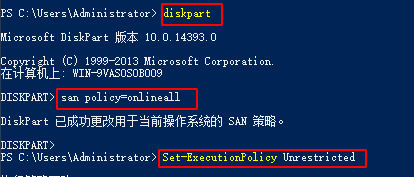
4.5 磁盘策略配置
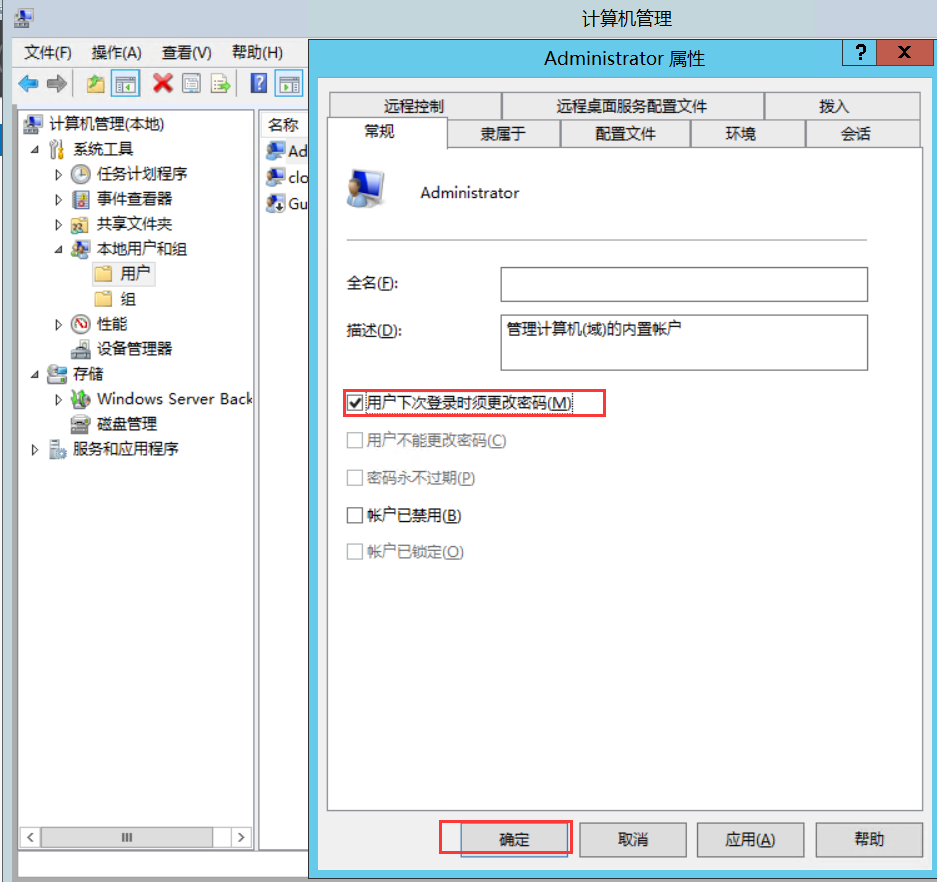
4.6 首次登陆修改密码
4.7 时间服务器

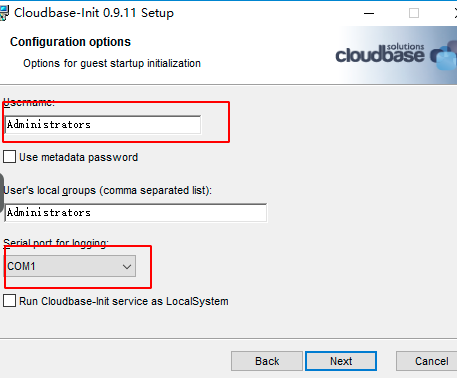
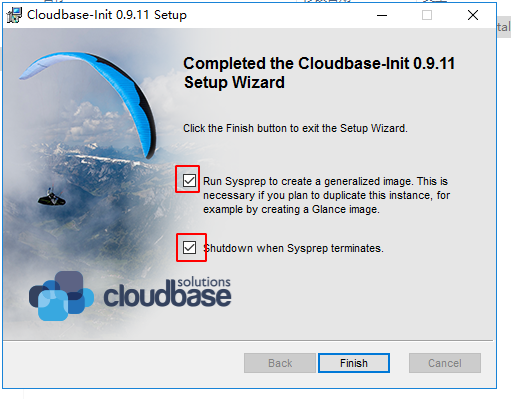
4.8 CloudBase-init
下载地址 https://cloudbase.it/downloads/CloudbaseInitSetup_Stable_x64.msi
压缩镜像
virt-sparsify --compress win16.qcow2 win_16.qcow2
上传到云平台
openstack image create --disk-format qcow2 --public --file win_16.qcow2 win_16.qcow2 --property hw_qemu_guest_agent=yes –property os_admin_user=administrator


 487
487

 被折叠的 条评论
为什么被折叠?
被折叠的 条评论
为什么被折叠?
 到【灌水乐园】发言


