


项目源码库:https://git.oschina.net/thorqq/RaidenFree
绝大多数游戏在启动后首先出现的是一个“载入中”的场景,此场景的用处是将游戏所需的图片、音乐、数据等资源从存储卡(或磁盘、闪存)读入内存,这样,后面需要用到这些资源时,可以直接从内存读取,以加快游戏的运行,提高流畅性。下面,就对资源的预加载机制做一个介绍。
资源的类型
预加载的目的是为了后续读取的快捷,所以,一般会预加载那些较大较复杂的文件,例如以下这些:
- 单张大图:背景大图
- 合成图:可多幅图片合成的大图,这里我们使用TexturePacker合成plist+png文件
- 骨骼动画:使用Cocos Skeletal Animation Editor创建的骨骼动画文件,ExportJson+plist+png文件
- 场景:使用Cocos Studio创建的csd文件
- 声音:ogg音乐文件
- 本地数据:游戏存档数据(格式为json文件)、游戏配置数据(例如关卡、飞机属性、子弹属性等固定的数据,格式为sqlite数据库文件)
- 远程数据:由于本游戏是弱联网游戏,所以保存在服务器上的数据不多。这里仅仅实现了用户登录、获取时间的功能
下面,我们将逐一介绍不同资源载入的方法。
加载方法
单张大图
- 定义std::vector<std::string> m_imageArray,将需要加载的图片路径放到容器中
- 对每个图片逐个调用Director::getInstance()->getTextureCache()->addImageAsync()函数进行加载,注意他的第二个参数CC_CALLBACK_1(Preload::asynLoadingImageDone, this, m_imageArray[i]),当一张图片加载结束后,系统就会调用Preload::asynLoadingImageDone函数,同时传入图片的路径作为输入参数。
- 在回调函数asynLoadingImageDone中,首先要通知界面加载进度,然后根据图片的总数和待加载数判断是否已经全部记载完成,若全部加载成功,则通知loadingDone(PreloadType::Image)
详细的代码如下所示:
//1、需要加载的png或jpg
    m_imageArray.push_back("BigImg/Bag_Bg.png");
    m_imageArray.push_back("BigImg/BigScreen_Bg.png");
    m_imageArray.push_back("BigImg/Daily_Bg.png");
    m_imageArray.push_back("BigImg/MainUI_Bg.jpg");


void Preload::asynLoadingImage()
{
    //2、将图片加入全局cache中
    m_iImageCnt = m_imageArray.size();
    for (unsigned i = 0; i < m_imageArray.size(); i++)
    {
        Director::getInstance()->getTextureCache()->addImageAsync(
            m_imageArray[i],
            CC_CALLBACK_1(Preload::asynLoadingImageDone, this, m_imageArray[i]));
    }
}

//3、单张图片加载成功后的回调函数
void Preload::asynLoadingImageDone(Texture2D* texture, const std::string& filename)
{
    //通知观察者加载进度
    this->notifyProgress(++m_iTmpProgress);
    m_iImageCnt--;
    //全部加载完成
    if (0 == m_iImageCnt)
    {
        m_bImageLoaded = true;
        this->loadingDone(PreloadType::Image);
    }
}
合成图
合成图的加载与单张图片的加载类似,不同之处在于在回调函数中多了一步加载plist文件:
SpriteFrameCache::getInstance()->addSpriteFramesWithFile(file.append(".plist"), texture);
//plist图片
    std::vector<std::string> m_plistArray;

    //1、需要加载的图片,不包含后缀名
    m_plistArray.push_back("Bag");
    m_plistArray.push_back("Common");
    m_plistArray.push_back("Daily");

void Preload::asynLoadingPlist()
{
    //2、加载图片文件
    m_iImagePlistCnt = m_plistArray.size();
    for (unsigned i = 0; i < m_plistArray.size(); i++)
    {
        Director::getInstance()->getTextureCache()->addImageAsync(
            std::string(m_plistArray[i]).append(".png"),
            CC_CALLBACK_1(Preload::asynLoadingPlistDone, this, m_plistArray[i]));
    }
}

void Preload::asynLoadingPlistDone(Texture2D* texture, const std::string& filename)
{
    this->notifyProgress(++m_iTmpProgress);

    //3、加载plist文件
    std::string file = filename;
    SpriteFrameCache::getInstance()->addSpriteFramesWithFile(file.append(".plist"), texture);
    m_iImagePlistCnt--;

    if (0 == m_iImagePlistCnt)
    {
        //全部加载完成
        m_bImagePlistLoaded = true;
        this->loadingDone(PreloadType::Plist);
    }
}
骨骼动画
骨骼动画也是类似的加载方法,先使用addArmatureFileInfoAsync()函数加载骨骼动画的图片、合图信息(plist文件)、动画信息(ExportJson文件),然后回调函数asynLoadingArmatureDone()。
std::vector<std::string> m_armatureArray;
    m_armatureArray.push_back("Anim/Anim_Plane_01");
    m_armatureArray.push_back("Anim/Anim_Plane_02");
    m_armatureArray.push_back("Anim/Anim_Plane_03");

void Preload::asynLoadingArmature()
{
    auto p = m_armatureArray[m_iArmatureCnt];
    DEBUG_LOG("Preload::asynLoadingArmature: %s", p.c_str());
    ArmatureDataManager::getInstance()->addArmatureFileInfoAsync(
        std::string(p).append("0.png"),
        std::string(p).append("0.plist"),
        std::string(p).append(".ExportJson"),
        this,
        CC_SCHEDULE_SELECTOR(Preload::asynLoadingArmatureDone));
}

void Preload::asynLoadingArmatureDone(float dt)
{
    this->notifyProgress(++m_iTmpProgress);

    m_iArmatureCnt++;
    if (m_armatureArray.size() == m_iArmatureCnt)
    {
        m_bArmatureLoaded = true;
        this->loadingDone(PreloadType::Armature);
    }
    else
    {
        asynLoadingArmature();
    }
}
场景
场景并没有特殊的异步加载函数,只能通过CSLoader::createNode()和CSLoader::createTimeline()根据csd文件生成node,然后保存到自定义的map中,以后要使用场景数据时,从map中获取。
注意,此加载方法在cocos2dx-3.4中可以正常运行,在3.8中会出现错误,原因未知。不过加载单个场景文件的时间很短,一般并不会影响游戏的体验,所以本游戏的最新版本中并没有预加载场景文件。
std::vector<std::string> m_uiArray;
    std::map<std::string, Node*> m_uiMap;

    //菜单
    m_uiArray.push_back("Bag.csb");
    m_uiArray.push_back("Daily.csb");
    m_uiArray.push_back("Instruction.csb");

void Preload::syncLoadingUI()
{
    //不能在非主线程中调用CSLoader::createNode,否则会导致OpenGL异常
    for (auto file : m_uiArray)
    {
        auto node = Preload::getUI(file);
        node->retain();
        m_uiMap.insert(std::map<std::string, Node*>::value_type(file, node));

        auto timeLine = CSLoader::createTimeline(file);
        timeLine->retain();
        m_actionMap.insert(std::map<std::string, cocostudio::timeline::ActionTimeline*>::value_type(file, timeLine));

        DEBUG_LOG("Preload::syncLoadingUI: %s", file.c_str());
        this->notifyProgress(++m_iTmpProgress);
    }

    m_bUILoaded = true;
    this->loadingDone(PreloadType::Ui);
}

Node* Preload::getUI(const std::string& filename)
{
    DEBUG_LOG("Preload::getUI: %s", filename.c_str());
    return CSLoader::createNode(filename);;

    //cocos2dx-3.8 不支持以下操作。3.4支持
    //auto ui = m_uiMap.find(filename);
    //if (ui != m_uiMap.end())
    //{
    //    return ui->second;
    //}
    //else
    //{
    //    auto csb = CSLoader::createNode(filename);
    //    csb->retain();
    //    m_uiMap.insert(std::map<std::string, Node*>::value_type(filename, csb));

    //    return csb;
    //}
}
声音
由于cocos提供了新老两种音频接口,所以声音文件的预加载也分成两种。
对于老的接口,需区分音乐和音效文件,并且函数没有返回值;
对于新的接口,不区分音乐和音效文件,通过回调来判断加载的结果。
//老的音频接口
CocosDenshion::SimpleAudioEngine::getInstance()->preloadBackgroundMusic(filename);
CocosDenshion::SimpleAudioEngine::getInstance()->preloadEffect(filename);

//新的音频接口
AudioEngine::preload(filename, [filename](bool isSuccess){
    if (!isSuccess)
    {
        DEBUG_LOG("Load fail: %s", path.c_str());
    }
});
本地数据
本地数据包括了:存档数据、游戏配置数据,及其他一些定制化的数据。这里我们可以使用cocos提供的异步任务接口+回调加载结果来进行预加载。
void Preload::asynLoadingDatabase()
{
    auto loadEnd = [this](void*)
    {
        DEBUG_LOG("asynLoadingDatabase OK");

        m_bOtherLoaded = true;
        this->loadingDone(PreloadType::Other);
    };

    AsyncTaskPool::getInstance()->enqueue(AsyncTaskPool::TaskType::TASK_IO, loadEnd, (void*)NULL, [this]()
    {
        if (!GlobalData::getInstance()->initialize(this))
        {
            CCLOG("Initialize globla data failed");
            this->notifyError("Initialize globla data failed");
            return;
        }

        m_iTmpProgress += PreloadProgress::GlobalData;
        this->notifyProgress(m_iTmpProgress);

        if (!GameData::getInstance()->loadData())
        {
            CCLOG("Initialize game data failed");
            this->notifyError("Initialize game data failed");
            return;
        }

        m_iTmpProgress += PreloadProgress::GameData;
        this->notifyProgress(m_iTmpProgress);

        if (!AchievementMgr::getInstance()->init())
        {
            CCLOG("Initialize achievement data failed");
            this->notifyError("Initialize achievement data failed");
            return;
        }

        m_iTmpProgress += PreloadProgress::AchievementMgr;
        this->notifyProgress(m_iTmpProgress);

        Sound::preload(this);

        m_iTmpProgress += PreloadProgress::Sound;
        this->notifyProgress(m_iTmpProgress);
    });
}
远程数据
远程数据一般是通过发送异步http或者其他tcp请求来实现数据的加载,根据网络协议的不同,相关的接口也各不相同,这里不再详述。
加载界面
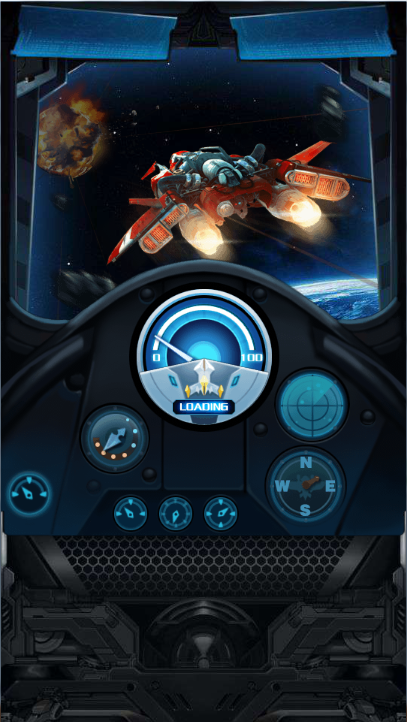
在此加载界面中,我们使用一个仪表盘和转动的指针来告诉用户当前的加载进度。那么,后台加载任务与前台的指针转动是如何关联起来的呢?我们使用了观察者模式。下面上一张百度找出的观察者模式的图:
Observer模式的角色:
Subject(被观察者)
被观察的对象。当需要被观察的状态发生变化时,需要通知队列中所有观察者对象。Subject需要维持(添加,删除,通知)一个观察者对象的队列列表。
ConcreteSubject
被观察者的具体实现。包含一些基本的属性状态及其他操作。
Observer(观察者)
接口或抽象类。当Subject的状态发生变化时,Observer对象将通过一个callback函数得到通知。
ConcreteObserver
观察者的具体实现。得到通知后将完成一些具体的业务逻辑处理。
在本游戏中实现了一个简化版的观察者模式:
1、首先,我们定义一个被观察者抽象类。其中定义了开始、进度、错误、警告、结束等接口。
class PreloadListener
{
public:
    virtual void onStart() = 0;
    virtual void onProgress(int percent) = 0;
    virtual void onError(const char* info) = 0;
    virtual void onWarning(const char* info) = 0;
    virtual void onEnd(PreloadError errorCode) = 0;
};
2、定义载入界面场景,继承自PreloadListener,并实现onXXX接口。
class LoadingLayer :
    public Layer, public PreloadListener
{
public:
    static Scene* scene();

    LoadingLayer();
    virtual ~LoadingLayer();

    virtual bool init();
    virtual void update(float dt) override;

    CREATE_FUNC(LoadingLayer);

    void initUI();
    void ToMainMenu();

    virtual void onStart() override;
    virtual void onProgress(int percent) override;
    virtual void onError(const char* info) override;
    virtual void onWarning(const char* info) override;
    virtual void onEnd(PreloadError errorCode) override;

private:
    Node* m_pRootNode;

    Sprite* m_pNeedle;
    ui::LoadingBar* m_pLoadingBar;
    ui::Text* m_pTxtErrorInfo;

    long m_iBeginTime;
    long m_iEndTime;

    int m_iStart;
};
特别注意一下onProgress接口,这里需要实现指针转动的逻辑:
void LoadingLayer::onProgress(int percent)
{
    float degree = LoadingLayerConstant::NeedleMinDegree +
        (LoadingLayerConstant::NeedleMaxDegree - LoadingLayerConstant::NeedleMinDegree) * percent / 100;
    m_pNeedle->setRotation(degree);
}
3、在加载任务中添加上报载入进度的函数。这样,每当载入一张图片或者任意一个资源文件的时候,就可以调用notifyProgress函数以使得界面上的指针转动了。
void Preload::notifyProgress(int progress)
{
    //这里的m_pListener其实就是LoadingLayer的实例
    if (m_pListener)
    {
        m_pListener->onProgress((int)(progress * 100.f / m_iAllProgress));
    }
}


 850
850

 被折叠的 条评论
为什么被折叠?
被折叠的 条评论
为什么被折叠?
 到【灌水乐园】发言


