


server.port=1111
eureka.client.register-with-eureka=false
eureka.client.fetch-registry=false
eureka.client.serviceUrl.defaultZone=http://localhost:${server.port}/eureka/
【引用翟永超个人博客对Feign定义】Spring Cloud Netflix子项目中,Feign是一个声明式的Web Service客户端,它使得编写Web Serivce客户端变得更加简单。我们只需要使用Feign来创建一个接口并用注解来配置它既可完成。它具备可插拔的注解支持,包括Feign注解和JAX-RS注解。Feign也支持可插拔的编码器和解码器。Spring Cloud为Feign增加了对Spring MVC注解的支持,还整合了Ribbon和Eureka来提供均衡负载的HTTP客户端实现。
Eureka模块主要是服务发现模块,提供了一个服务注册中心,注册者在Eureka上发布接口,消费者在Eureka上进行接口调用消费,和dubbo的思路很像。Feign调用起来更为方便,可以很轻便的通过SpringMVC的方式调用restful的接口。并且结合了Ribbon和Eureka,做到了客户端的负载均衡,假如有两个端口不同的服务启动,接口同时注册在Spring Eureka上,并起同样的名字服务,客户端调用服务时两次,该服务下两个端口下的接口会分别被调用一次,客户端自动去做了负载均衡这件事。
该案例实现,可以建立三个工程,三个工程分别是eureka-feign(客户端)、Register-service(服务注册中心)、compute-service(服务发布),其中compute-service可以用两个端口分别启动一次,测试负载均衡效果。
端口:
Register-service:1111
compute-service:2222/2223
eureka-feign:3333
Register-service工程
该工程需要的依赖主要是
        <dependency>
            <groupId>org.springframework.boot</groupId>
            <artifactId>spring-boot-starter-test</artifactId>
            <scope>test</scope>
        </dependency>

        <dependency>
            <groupId>org.springframework.cloud</groupId>
            <artifactId>spring-cloud-starter-eureka-server</artifactId>
        </dependency>
application.properites配置文件配置:
server.port=1111
eureka.client.register-with-eureka=false
eureka.client.fetch-registry=false
eureka.client.serviceUrl.defaultZone=http://localhost:${server.port}/eureka/
声明了端口,以及注册中心的端口和位置。
启动类:
/**
 * @author zhangtuo
 * @Date 2017/2/17
 */
@EnableEurekaServer//启动一个服务注册中心提供给其他应用进行对话
@SpringBootApplication
public class Application {
    public static void main(String[] args) {
        new SpringApplicationBuilder(Application.class).web(true).run(args);
    }
}
compute-service工程
pom依赖:
        <dependency>
            <groupId>org.springframework.cloud</groupId>
            <artifactId>spring-cloud-starter-eureka</artifactId>
        </dependency>

        <dependency>
            <groupId>org.springframework.boot</groupId>
            <artifactId>spring-boot-starter-test</artifactId>
            <scope>test</scope>
        </dependency>

        <dependency>
            <groupId>org.springframework.boot</groupId>
            <artifactId>spring-boot-starter-data-jpa</artifactId>
        </dependency>

        <dependency>
            <groupId>mysql</groupId>
            <artifactId>mysql-connector-java</artifactId>
            <version>5.1.39</version>
        </dependency>
        <dependency>
            <groupId>com.alibaba</groupId>
            <artifactId>druid</artifactId>
            <version>0.2.26</version>
        </dependency>

        <dependency>
            <groupId>net.sf.json-lib</groupId>
            <artifactId>json-lib</artifactId>
            <version>2.4</version>
            <classifier>jdk15</classifier>
        </dependency>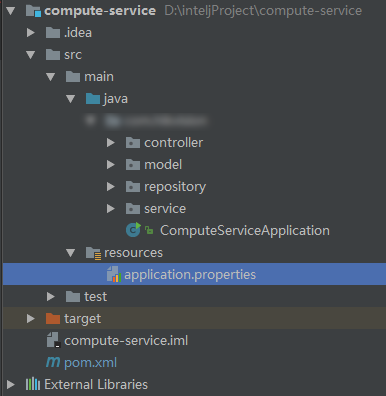
controller层用来提供外部接口。application.properties配置文件配置,指定了刚才启动的注册中心位置。和注册的服务名字为compute-service。
spring.application.name=compute-service

server.port=2222
# 指定注册服务中心
eureka.client.serviceUrl.defaultZone=http://localhost:1111/eureka/
启动类实现:
/**
 * @author zhangtuo
 * @Date 2017/2/17
 */
@EnableDiscoveryClient
@SpringBootApplication
public class ComputeServiceApplication {

    public static void main(String[] args) {
        new SpringApplicationBuilder(ComputeServiceApplication.class).web(true).run(args);
    }

}在主类中通过加上@EnableDiscoveryClient注解,该注解能激活Eureka中的DiscoveryClient实现,才能实现Controller中对服务信息的输出。
控制层提供的接口CameraInfoController:
/**
 * @author zhangtuo
 * @Date 2017/2/17
 */
@RestController
@RequestMapping("cameraInfo")
public class CameraInfoController {

    private final Logger LOGGER = Logger.getLogger(getClass());

    @Autowired
    private DiscoveryClient discoveryClient;//激活Eureka中的DiscoveryClient实现

    @Autowired
    private CameraService cameraService;

    /**
     * 注册服务返回的数据以String字符串的json返回
     * @return
     */
    @RequestMapping(method = RequestMethod.GET)
    public String findCameraInfos() {
        ServiceInstance serviceInstance = discoveryClient.getLocalServiceInstance();//获取Discoveryclient,打印注册中心的log
        if (LOGGER.isInfoEnabled()) {
            LOGGER.info("host:" + serviceInstance.getHost() + ", service id" + serviceInstance.getServiceId());
        }
        List<CameraInfo> cameraInfos = cameraService.findCameraInfos();
        /**
         * 转换json字符串
         */
        JSONArray listArray = JSONArray.fromObject(cameraInfos);
        String result = listArray.toString();
        return result;
    }
}
Eureka-feign工程
pom依赖:
		<dependency>
			<groupId>org.springframework.cloud</groupId>
			<artifactId>spring-cloud-starter-feign</artifactId>
		</dependency>
		<dependency>
			<groupId>org.springframework.cloud</groupId>
			<artifactId>spring-cloud-starter-eureka</artifactId>
		</dependency>
		<dependency>
			<groupId>org.springframework.boot</groupId>
			<artifactId>spring-boot-starter-web</artifactId>
		</dependency>

		<dependency>
			<groupId>org.springframework.boot</groupId>
			<artifactId>spring-boot-starter-test</artifactId>
			<scope>test</scope>
		</dependency>

		<dependency>
			<groupId>net.sf.json-lib</groupId>
			<artifactId>json-lib</artifactId>
			<version>2.4</version>
			<classifier>jdk15</classifier>
		</dependency>

		<dependency>
			<groupId>io.springfox</groupId>
			<artifactId>springfox-swagger2</artifactId>
			<version>2.2.2</version>
		</dependency>
		<dependency>
			<groupId>io.springfox</groupId>
			<artifactId>springfox-swagger-ui</artifactId>
			<version>2.2.2</version>
		</dependency>
启动类:
@SpringBootApplication
@EnableDiscoveryClient
@EnableFeignClients//启动Feign客户端注解
public class FeignApplication {

	public static void main(String[] args) {
		SpringApplication.run(FeignApplication.class, args);
	}

}
声明要调用的接口interface:
/**
 * @author zhangtuo
 * @Date 2017/2/17
 */
@FeignClient("compute-service")
public interface CameraInfoClient {

    @RequestMapping(value = "cameraInfo", method = RequestMethod.GET)
    public String findCameraInfos();

}
Feign用Swagger2来测试Restful接口调用,因此在控制层对Controller进行了api注解:
/**
 * @author zhangtuo
 * @Date 2017/2/17
 */
@RestController
@RequestMapping("cameraInfo")
public class CameraInfoController {

    private static final Logger LOGGER = Logger.getLogger(CameraInfoController.class);

    @Autowired
    private CameraInfoClient cameraInfoClient;

    @ApiOperation(value="获取摄像机节点列表", notes="")
    @RequestMapping(method = RequestMethod.GET)
    public ResponseEntity<String> findCameraInfos() {
        try {
            if (LOGGER.isDebugEnabled()) {
                LOGGER.info("find CameraInfo");
            }
            String result = cameraInfoClient.findCameraInfos();
            if (result != null) {
                return ResponseEntity.ok(result);
            } else {
                return ResponseEntity.status(HttpStatus.INTERNAL_SERVER_ERROR).body(null);
            }
        } catch (Exception e) {
            LOGGER.error("get CameraInfo is failed!" + e);
        }
        return ResponseEntity.status(HttpStatus.INTERNAL_SERVER_ERROR).body(null);
    }

}
启动后,会在localhost:1111上看到注册的服务方和消费方

这里只启动了一个端口的服务接口,同理,可以启动几个端口的服务,客户端调用做到负载均衡。
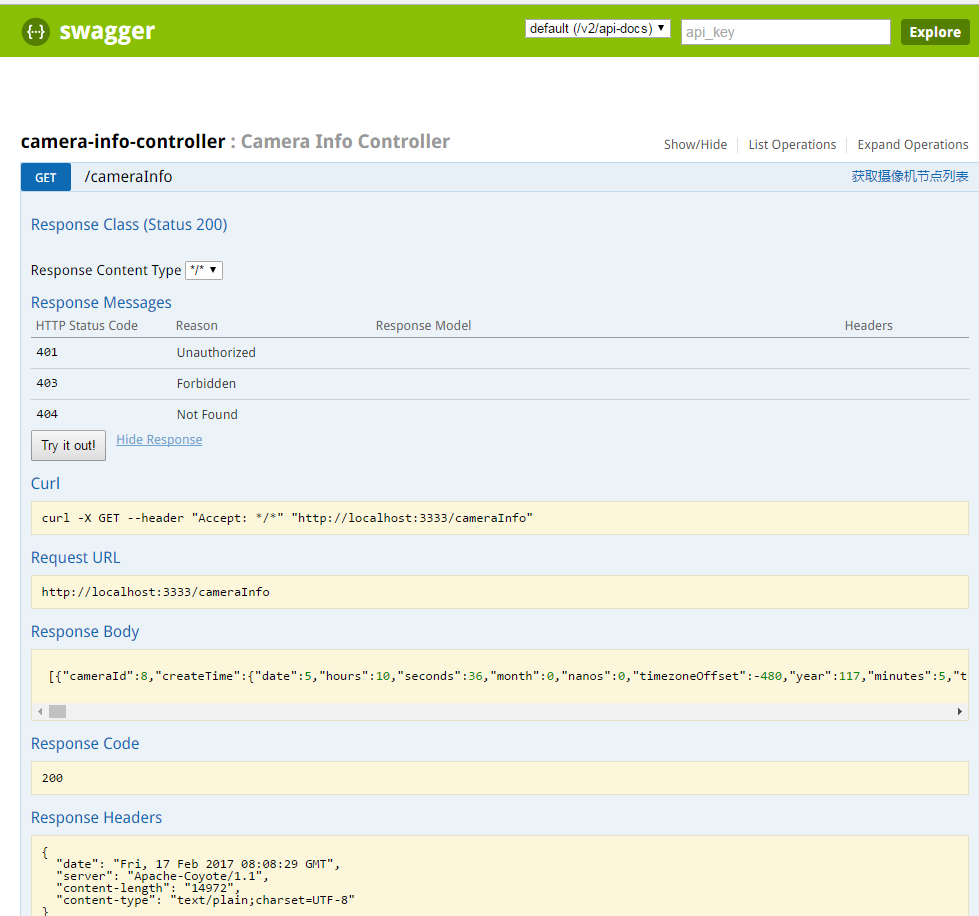
通过测试发现成功调用接口。
在compute-service的控制台上log也打印了调用情况:
![]()


 105
105

 被折叠的 条评论
为什么被折叠?
被折叠的 条评论
为什么被折叠?
 到【灌水乐园】发言


