气泡型弹出菜单

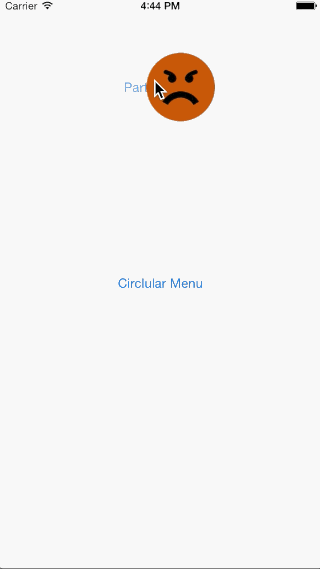
该源码项目是一个气泡型弹出菜单案例,源码LIVBubbleMenu-iOS,LIVBubbleMenu-iOS是一个能够高度自定义的气泡型弹出菜单。能够自定义其中的图片,半径,数量,甚至是动画速度,回弹程度,透明度等等多达十多种的属性。支持点击的delegate方法。效果图:

  • 164911x7pucvnx9lzc7npx.jpg 


使用方法:


支持CocoaPods: 
pod 'LIVBubbleMenu' 
或者复制LIVBubbleMenu文件夹到项目中使用。 
#import "LIVBubbleMenu.h" 
示例代码: 
- (IBAction)moodButtonTapped { 
    _bubbleMenu = [[LIVBubbleMenu alloc] initWithPoint:self.moodButton.center radius:150 menuItems:_images inView:self.view]; 
    _bubbleMenu.delegate = self; 
    _bubbleMenu.easyButtons = NO; 
    [_bubbleMenu show]; 


- (IBAction)partialButtonTapped:(id)sender { 
    NSRange range; 
    range.location = 0; 
    range.length = 4; 
    _bubbleMenu = [[LIVBubbleMenu alloc] initWithPoint:self.partialButton.center radius:150 menuItems:[_images subarrayWithRange:range] inView:self.view]; 
    _bubbleMenu.delegate = self; 
    _bubbleMenu.easyButtons = NO; 
    _bubbleMenu.bubbleStartAngle = 0.0f; 
    _bubbleMenu.bubbleTotalAngle = 180.0f; 
    [_bubbleMenu show]; 

Delegate方法: 
-(void)livBubbleMenu:(LIVBubbleMenu *)bubbleMenu tappedBubbleWithIndex:(NSUInteger)index { 
    NSLog(@"User has selected bubble index: %tu", index); 


-(void)livBubbleMenuDidHide:(LIVBubbleMenu *)bubbleMenu { 
    NSLog(@"LIVBubbleMenu has been hidden"); 


其他初始化方法: 
在某个点弹出: 
[[LIVBubbleMenu alloc] initWithPoint:CGPointMake(100,100) radius:150 menuItems:array inView:self.view]; 
在view中间: 
LIVBubbleMenu *bubbleMenu = [[LIVBubbleMenu alloc] initCenteredInWindowWithRadius:150 menuItems:images]; 
温馨提醒:如果想要用回Demo中那些表情的话记得去Images.xcassets文件夹中去拿哦! 
详情请参考Demo或者gitHub上的文档。

源码下载:
http://code.662p.com/view/10082.html


转载于:https://my.oschina.net/u/2311975/blog/372543

在微信聊天气泡弹出菜单的位置,通常是相对于气泡的位置进行定位的。 在uniapp中,你可以通过计算气泡元素的位置,来确定弹出菜单的位置。具体步骤如下: 1. 在气泡元素上添加一个ref属性,以便在JavaScript代码中获取气泡元素。 ```html <template> <view> <view ref="bubble">气泡内容</view> <view ref="menu">弹出菜单内容</view> </view> </template> ``` 2. 在JavaScript代码中,使用uniapp提供的 `uni.createSelectorQuery` API 来获取气泡元素的位置信息。 ```js onReady() { // 创建选择器对象 const selector = uni.createSelectorQuery(); // 选择气泡元素 selector.select('#bubble').boundingClientRect(); // 执行查询,并在回调函数中获取位置信息 selector.exec(res => { const bubbleRect = res[0]; console.log(bubbleRect.top, bubbleRect.left, bubbleRect.width, bubbleRect.height); }); } ``` 3. 计算弹出菜单的位置。通常可以将菜单放置在气泡的下方,或者右侧。 ```js onReady() { // 创建选择器对象 const selector = uni.createSelectorQuery(); // 选择气泡元素 selector.select('#bubble').boundingClientRect(); // 执行查询,并在回调函数中获取位置信息 selector.exec(res => { const bubbleRect = res[0]; console.log(bubbleRect.top, bubbleRect.left, bubbleRect.width, bubbleRect.height); // 计算菜单的位置 const menuTop = bubbleRect.top + bubbleRect.height; const menuLeft = bubbleRect.left + bubbleRect.width; console.log(menuTop, menuLeft); }); } ``` 4. 使用 `uni.createSelectorQuery` API 来设置弹出菜单的位置。 ```js onReady() { // 创建选择器对象 const selector = uni.createSelectorQuery(); // 选择气泡元素和菜单元素 selector.select('#bubble').boundingClientRect(); selector.select('#menu').boundingClientRect(); // 执行查询,并在回调函数中设置菜单的位置 selector.exec(res => { const bubbleRect = res[0]; const menuRect = res[1]; // 计算菜单的位置 const menuTop = bubbleRect.top + bubbleRect.height; const menuLeft = bubbleRect.left + bubbleRect.width; // 设置菜单的位置 this.$refs.menu.style.top = menuTop + 'px'; this.$refs.menu.style.left = menuLeft + 'px'; }); } ``` 在上面的示例中,我们使用 `uni.createSelectorQuery` API 来获取气泡元素和菜单元素的位置信息,并计算菜单的位置。最后,我们使用 `this.$refs.menu.style.top` 和 `this.$refs.menu.style.left` 来设置菜单的位置。 注意,上面的示例中假设菜单是绝对定位的,如果你的菜单使用其他布局方式,需要根据实际情况进行调整。
评论
添加红包

请填写红包祝福语或标题

红包个数最小为10个

红包金额最低5元

当前余额3.43前往充值 >
需支付:10.00
成就一亿技术人!
领取后你会自动成为博主和红包主的粉丝 规则
hope_wisdom
发出的红包
实付
使用余额支付
点击重新获取
扫码支付
钱包余额 0

抵扣说明:

1.余额是钱包充值的虚拟货币,按照1:1的比例进行支付金额的抵扣。
2.余额无法直接购买下载,可以购买VIP、付费专栏及课程。

余额充值