这里只想简单带大家Windows版绕坑。
首先,你得有个人的github账号,这个申请不难。这里要注意的是,你的用户名之后与你的个人博客地址相挂钩。所以尽量起好满意名字。
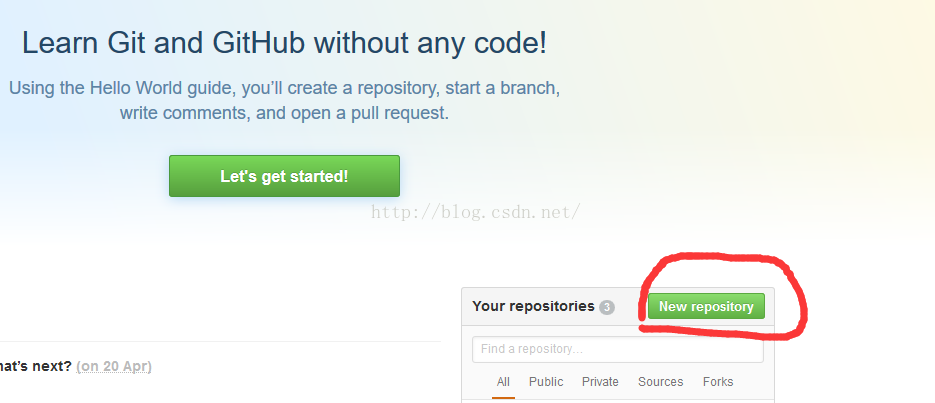
 接下来,登录进去创建github仓库。
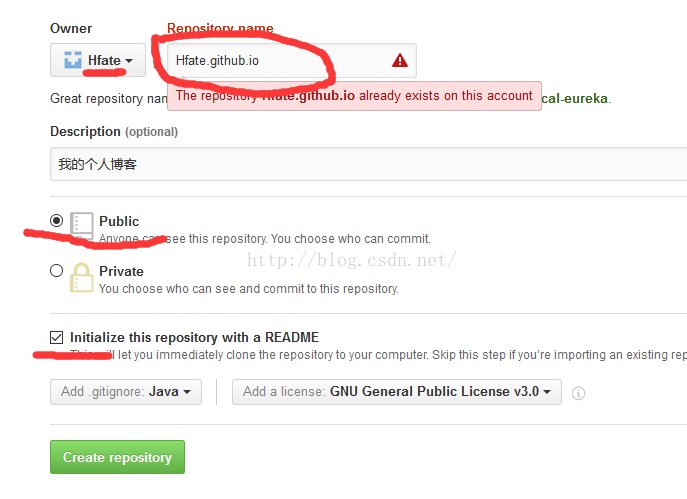
 下面要注意的是红线部分,选择public,还有勾上初始化readme文件,特别要注意的是,你的博客地址与Owner一栏显示的名字必须相挂钩。且必须是xxx.github.io形式。xxx是指你的owner一栏显示的文字。
 个人站点配置ok,过个几分钟输入https://hfate.github.io/, 也能看到个人博客的初始状态,只是暂时没有内容。
so,开始玩Hexo
打开cmd。 安装Hexo [code lang="linux"] npm install hexo -g [/code] 安装成功后,初始化个人博客,启动服务器 [code lang="linux"] hexo init blog cd blog npm install hexo server [/code]这时候,访问 主页 就可以看到,本地化个人博客主页了。 也许页面会打不开,因为里面加载了些外网js,css文件,如果你的电脑需要翻墙,或者找到blog下themes/landscape/layout/_partial 的after-footer.ejs 把 [code lang="html"] <script src="//ajax.googleapis.com/ajax/libs/jquery/2.0.3/jquery.min.js"> </script> [/code] 替换成 [code lang="html"] <script src="http://cdn.bootcss.com/jquery/2.1.1/jquery.min.js“ > </script> [/code] 然后再删掉 header.ejs中的 [code lang="html"] <link href="//fonts.googleapis.com/css?family=Source+Code+Pro" rel=”stylesheet” type=”text/css”> [/code] 到此,Ok了,建议使用翻墙host,并同时操作删改js,css
新建文章
在blog根目录下 [code lang="linux"] hexo new hehe [/code] hexo会在 source/_posts/ 下新建hehe.md 文件。 接下来,你就可以编写你的博客内容咯,具体语法参考 markdown语法. [code lang="xml"] title: 搭建免费博客 date: 2016-10-19 12:56:58 tags: 标签一 categories: 目录一 // 你的内容 <!--more--> // 以上为摘要 [/ode] <h3>将本地的文章发布到网上个人主页,首先需要将页面静态化</h3> 在blog根目录下, [code lang="linux"] hexo g [/code] 此后blog根目录下会生成public文件夹-里面就是刚才生成的静态文件。 然后部署到github,在blog目录下找到 _config.yml文件的如下配置. [code lang="xml"] deploy: type: git repo: https://github.com/Hfate/Hfate.github.io.git [/code]repo填写自己的github个人主页仓库地址


 1185
1185

 被折叠的 条评论
为什么被折叠?


