


一. 简介
Docker一个开源的应用容器引擎,让开发者可以打包他们的应用以及依赖包到一个可移植的容器中,然后发布到任何流行的 Linux 机器上,也可以实现虚拟化。容器是完全使用沙箱机制,相互之间不会有任何接口为。
什么要使用Docker?作为一种新兴的虚拟化方式,Docker跟传统的虚拟化方式相比具有众多的优势。
- 更高效的利用系统资源
- 更快速的启动时间
- 一致的运行环境
- 持续交付和部署
- 更轻松的迁移
- 更轻松的维护和扩展
Docker 包括三个基本概念
镜像(Image)
容器(Container)
仓库(Repository)
理解了这三个概念,就理解了 Docker 的整个生命周期。
镜像Image
docker 镜像就是一个只读的模板。
例如:一个镜像可以包含一个完整的 ubuntu 操作系统环境,里面仅安装了 Apache 或用户需要的其它应用程序。
镜像可以用来创建 Docker 容器。
Docker 提供了一个很简单的机制来创建镜像或者更新现有的镜像,用户甚至可以直接从其他人那里下载一个已经做好的镜像来直接使用。
容器Container
Docker 利用容器来运行应用。
容器是从镜像创建的运行实例。它可以被启动、开始、停止、删除。每个容器都是相互隔离的、保证安全的平台。
可以把容器看做是一个简易版的 Linux 环境(包括root用户权限、进程空间、用户空间和网络空间等)和运行在其中的应用程序。
*注:镜像是只读的,容器在启动的时候创建一层可写层作为最上层。
仓库Repository
仓库是集中存放镜像文件的场所。有时候会把仓库和仓库注册服务器(Registry)混为一谈,并不严格区分。实际上,仓库注册服务器上往往存放着多个仓库,每个仓库中又包含了多个镜像,每个镜像有不同的标签(tag)。
仓库分为公开仓库(Public)和私有仓库(Private)两种形式。
最大的公开仓库是 Docker Hub,存放了数量庞大的镜像供用户下载。 国内的公开仓库包括 Docker Pool等,可以提供大陆用户更稳定快速的访问。
当然,用户也可以在本地网络内创建一个私有仓库。
当用户创建了自己的镜像之后就可以使用 push 命令将它上传到公有或者私有仓库,这样下次在另外一台机器上使用这个镜像时候,只需要从仓库上 pull 下来就可以了。
*注:Docker 仓库的概念跟 Git 类似,注册服务器可以理解为 GitHub 这样的托管服务。
二. 安装
环境设定: Centos7
1. 在线安装(阿里云脚本)
最为简单的方法是执行阿里云提供的运行脚本,命令如下:
$ sudo curl -sSL http://acs-public-mirror.oss-cn-hangzhou.aliyuncs.com/docker-engine/internet | sh -安装之后,查看docker版本,验证是否成功
$ sudo systemctl start docker
$ sudo docker version
Client:
 Version:      17.05.0-ce
 API version:  1.29
 Go version:   go1.7.5
 Git commit:   89658be
 Built:        Thu May  4 22:06:25 2017
 OS/Arch:      linux/amd64

Server:
 Version:      17.05.0-ce
 API version:  1.29 (minimum version 1.12)
 Go version:   go1.7.5
 Git commit:   89658be
 Built:        Thu May  4 22:06:25 2017
 OS/Arch:      linux/amd64
 Experimental: false
可以看见当前最新版本为17.05.0-ce,ce表示社区版,ee表示企业版,企业版功能更强大,需要支付一定费用。对于普通用户,社区版已经能满足大部分应用场景。
2. 在线安装(官方)
官网安装文档地址:
https://docs.docker.com/engine/installation/linux/docker-ce/centos/#install-docker-ce-1
官方步骤说明如下:
系统要求:
安装Docker CE需要Centos7及以上正式版。
centos-extras存储库必须可用。默认情况下,此库已启用。
推荐使用overlay2作为存储驱动。
卸载旧版本:
如果安装过旧版本的docker和docker-engine,请先行卸载它们以及相关的依赖。
$ sudo yum remove docker \
                  docker-client \
                  docker-client-latest \
                  docker-common \
                  docker-latest \
                  docker-latest-logrotate \
                  docker-logrotate \
                  docker-selinux \
                  docker-engine-selinux \
                  docker-engine
使用存储库安装:
设置存储库
1). 安装需要的软件包。yum-utils提供实用工具yum-config-manager,device-mapper-persistent-data和lvm2是devicemapper存储驱动所必须的依赖。
$ sudo yum install -y yum-utils \
  device-mapper-persistent-data \
  lvm2
2). 使用以下命令设置稳定可用的存储库。
注:在天朝有一堵神奇的墙,所以你懂的。
$ sudo yum-config-manager \
    --add-repo \
    https://download.docker.com/linux/centos/docker-ce.repo
或使用阿里云镜像源。(推荐)
$ sudo yum-config-manager --add-repo http://mirrors.aliyun.com/docker-ce/linux/centos/docker-ce.repo或使用清华镜像源
$ sudo yum-config-manager --add-repo https://mirrors.tuna.tsinghua.edu.cn/docker-ce/linux/centos/docker-ce.repo3). 更新软件缓存
$ sudo yum makecache fast4). 可选项:启用edge和test存储库。这些存储库包含在docker.repo文件中,但默认情况下是禁用的。
注:生产环境中尽量使用稳定发布版,不建议启动。
$ sudo yum-config-manager --enable docker-ce-edge
$ sudo yum-config-manager --enable docker-ce-test
可以通过使用--disable标志来运行yum-config-manager命令来禁用edge或test存储库。若要重新启用它,请使用--enable标志。下面的命令禁用edge存储库。
$ sudo yum-config-manager --disable docker-ce-edge注意:从Docker 17.06开始,稳定发行版也被推送到edge和test存储库。
安装Docker CE:
1). 安装最新版本的Docker CE,或者进入下一步安装一个特定版本:
$ sudo yum install docker-ce -y如果提示接受GPG密钥,则验证指纹与060A 61C5 1B55 8A7F 742B 77AA C52F EB6B 621E 9F35匹配,如果是,则接受该指纹。
2). 启动Docker
$ sudo systemctl start docker3). 通过运行hello-world镜像来验证是否正确安装了docker。
$ sudo docker run hello-world此命令下载测试镜像并在容器中运行它。当容器运行时,它打印信息消息并退出。
4). 设置开机自启动
$ sudo chkconfig docker on5). 查看docker版本信息
$ docker info
升级Docker CE
要升级Docker CE,请按照以上安装说明,安装最新版本。
卸载Docker CE
1). 卸载docker软件包
$ sudo yum remove docker-ce2). 主机上的图像、容器、数据卷或自定义配置文件不会自动删除。删除所有图像、容器和卷:
$ sudo rm -rf /var/lib/docker
3. 离线安装
比较麻烦,不推荐。
特殊网络环境(如无法连接互联网),可借鉴以下方式。
下载 docker-ce-17.09.1.ce-1.el7.centos.x86_64.rpm,地址如下:
https://download.docker.com/linux/centos/7/x86_64/stable/Packages/docker-ce-17.09.1.ce-1.el7.centos.x86_64.rpm
$ sudo rpm -ivh docker-ce-17.09.1.ce-1.el7.centos.x86_64.rpm若出现以下错误,请先安装所需依赖包。
error: Failed dependencies:
	container-selinux >= 2.9 is needed by docker-ce-17.09.0.ce-1.el7.centos.x86_64
	libcgroup is needed by docker-ce-17.09.0.ce-1.el7.centos.x86_64
	libltdl.so.7()(64bit) is needed by docker-ce-17.09.0.ce-1.el7.centos.x86_64
依赖包docker-ce-selinux,下载地址:
https://download.docker.com/linux/centos/7/x86_64/stable/Packages/docker-ce-selinux-17.03.2.ce-1.el7.centos.noarch.rpm
三. 配置加速器
由于默认官方仓库在国外服务器,国内访问存在被墙的问题,使用Docker加速器改善访问速度。
针对Docker客户端版本大于1.10的用户
通过修改daemon配置文件/etc/docker/daemon.json来使用加速器:
$ mkdir -p /etc/docker
$ sudo tee /etc/docker/daemon.json <<-'EOF'
{
  "registry-mirrors": ["https://cgdwt44q.mirror.aliyuncs.com"]
}
EOF
systemctl daemon-reload
systemctl restart docker
四. docker的hello world
第一步:下载hello world的docker img
$ docker pull hello-world
Using default tag: latest
latest: Pulling from library/hello-world
b04784fba78d: Pull complete
Digest: sha256:f3b3b28a45160805bb16542c9531888519430e9e6d6ffc09d72261b0d26ff74f
Status: Downloaded newer image for hello-world:latest
docker有一个公共的img仓库,执行docker pull默认会在这个公共库里去下载对应的img,类似maven一样,maven的respository里有很多jar包。
第二步:运行下载到本地的hello world docker img
$ docker run hello-world

Hello from Docker!
This message shows that your installation appears to be working correctly.

To generate this message, Docker took the following steps:
 1. The Docker client contacted the Docker daemon.
 2. The Docker daemon pulled the "hello-world" image from the Docker Hub.
 3. The Docker daemon created a new container from that image which runs the
    executable that produces the output you are currently reading.
 4. The Docker daemon streamed that output to the Docker client, which sent it
    to your terminal.

To try something more ambitious, you can run an Ubuntu container with:
 $ docker run -it ubuntu bash

Share images, automate workflows, and more with a free Docker ID:
 https://cloud.docker.com/

For more examples and ideas, visit:
 https://docs.docker.com/engine/userguide/
五. Docker常用命令
1. 查看docker信息(version、info)
# 查看docker版本
$docker version
# 显示docker系统的信息
$docker info
2. 对image的操作(search、pull、images、rmi、history)
# 检索image
$docker search image_name
# 下载image
$docker pull image_name
# 列出镜像列表; -a, --all=false Show all images; --no-trunc=false Don't truncate output; -q, --quiet=false Only show numeric IDs
$docker images
# 删除一个或者多个镜像; -f, --force=false Force; --no-prune=false Do not delete untagged parents
$docker rmi image_name
# 显示一个镜像的历史; --no-trunc=false Don't truncate output; -q, --quiet=false Only show numeric IDs
$docker history image_name
3. 启动容器(run)
docker容器可以理解为在沙盒中运行的进程。这个沙盒包含了该进程运行所必须的资源,包括文件系统、系统类库、shell 环境等等。但这个沙盒默认是不会运行任何程序的。你需要在沙盒中运行一个进程来启动某一个容器。这个进程是该容器的唯一进程,所以当该进程结束的时候,容器也会完全的停止。
# 交互式进入容器中
$docker run -i -t image_name /bin/bash
4. 查看容器(ps)
# 列出当前所有正在运行的container
$docker ps
# 列出所有的container
$docker ps -a
# 列出最近一次启动的container
$docker ps -l
5. 保存对容器的修改(commit)
当你对某一个容器做了修改之后(通过在容器中运行某一个命令),可以把对容器的修改保存下来,这样下次可以从保存后的最新状态运行该容器。
# 保存对容器的修改; -a, --author="" Author; -m, --message="" Commit message
$docker commit ID new_image_name
Note: image相当于类,container相当于实例,不过可以动态给实例安装新软件,然后把这个container用commit命令固化成一个image。
6. 对容器的操作(rm、stop、start、kill、logs、diff、top、cp、restart、attach)
# 删除所有容器
$docker rm `docker ps -a -q`
# 删除单个容器; -f, --force=false; -l, --link=false Remove the specified link and not the underlying container; -v, --volumes=false Remove the volumes associated to the container
$docker rm Name/ID
# 停止、启动、杀死一个容器
$docker stop Name/ID
$docker start Name/ID
$docker kill Name/ID
# 从一个容器中取日志; -f, --follow=false Follow log output; -t, --timestamps=false Show timestamps
$docker logs Name/ID
# 列出一个容器里面被改变的文件或者目录,list列表会显示出三种事件,A 增加的,D 删除的,C 被改变的 $docker diff Name/ID
# 显示一个运行的容器里面的进程信息
$docker top Name/ID
# 从容器里面拷贝文件/目录到本地一个路径
$docker cp Name:/container_path to_path
$docker cp ID:/container_path to_path
# 重启一个正在运行的容器; -t, --time=10 Number of seconds to try to stop for before killing the container, Default=10
$docker restart Name/ID
# 附加到一个运行的容器上面; --no-stdin=false Do not attach stdin; --sig-proxy=true Proxify all received signal to the process
$docker attach ID
Note: attach命令允许你查看或者影响一个运行的容器。你可以在同一时间attach同一个容器。你也可以从一个容器中脱离出来,是从CTRL-C。
7. 保存和加载镜像(save、load)
当需要把一台机器上的镜像迁移到另一台机器的时候,需要保存镜像与加载镜像。
# 保存镜像到一个tar包; -o, --output="" Write to an file
$docker save image_name -o file_path
# 加载一个tar包格式的镜像; -i, --input="" Read from a tar archive file
$docker load -i file_path
# 机器a
$docker save image_name > /home/save.tar
# 使用scp将save.tar拷到机器b上,然后:
$docker load < /home/save.tar
8、 登录registry server(login)
# 登陆registry server; -e, --email="" Email; -p, --password="" Password; -u, --username="" Username
$docker login
9. 发布image(push)
# 发布docker镜像
$docker push new_image_name
10. 根据Dockerfile 构建出一个容器
#build
--no-cache=false Do not use cache when building the image
-q, --quiet=false Suppress the verbose output generated by the containers
--rm=true Remove intermediate containers after a successful build
-t, --tag="" Repository name (and optionally a tag) to be applied to the resulting image in case of success
$docker build -t image_name Dockerfile_path
六. 创建java应用镜像
1. 下载centos镜像
$ docker pull centos:6.9
6.9: Pulling from library/centos
02901d68ac03: Pull complete
Digest: sha256:a23bced61701af9a0a758e94229676d9f09996a3ff0f3d26955b06bac8c282e0
Status: Downloaded newer image for centos:6.9
2. 启动并进入容器
$ docker run -dit --name javaweb centos:6.9
e33c5bcc9e3bd97cdbdd30b7bd98630d9e994765a131532aab84968cdb046b4b
$ docker exec -it javaweb /bin/bash
3. 安装lrzsz,unzip
$ sudo yum -y install lrzsz unzip4. 创建目录,上传,解压qhello-1.0.0-bin.zip,注:qhello一个内嵌jetty的简单web应用
$ mkdir /api
$ cd /api
$ mkdir qhello
$ cd qhello
$ rz

$ ls
qhello-1.0.0-bin.zip
$ unzip qhello-1.0.0-bin.zip
$ rm qhello-1.0.0-bin.zip
rm: remove regular file `qhello-1.0.0-bin.zip'? y
$ ls
lib  qhello-1.0.0.jar
5. 上传并设置JRE环境
$ mkdir /jre
$ cd /jre
$ rz

$ ls
server-jre-8u131-linux-x64.tar.gz
$ tar -zxvf server-jre-8u131-linux-x64.tar.gz
$ rm server-jre-8u131-linux-x64.tar.gz
rm: remove regular file 'server-jre-8u131-linux-x64.tar.gz'? y
$ ls
jdk1.8.0_131
$ export JRE_HOME=/jre
$ export PATH=$PATH:$JRE_HOME/jdk1.8.0_131/bin
$ java -version
java version "1.8.0_131"
Java(TM) SE Runtime Environment (build 1.8.0_131-b11)
Java HotSpot(TM) 64-Bit Server VM (build 25.131-b11, mixed mode)
6. 启动javaweb应用
[root@e33c5bcc9e3b jre]# nohup java -jar /api/qhello/qhello-1.0.0.jar &
[1] 72
[root@e33c5bcc9e3b jre]# nohup: ignoring input and appending output to `nohup.out'

[root@e33c5bcc9e3b jre]# ps -ef|grep java
root        72    23 21 03:47 ?        00:00:02 java -jar /api/qhello/qhello-1.0.0.jar
root        95    23  0 03:48 ?        00:00:00 grep java
[root@e33c5bcc9e3b jre]# netstat -unltp
Active Internet connections (only servers)
Proto Recv-Q Send-Q Local Address               Foreign Address             State       PID/Program name
tcp        0      0 0.0.0.0:80                  0.0.0.0:*                   LISTEN      72/java
[root@e33c5bcc9e3b jre]# curl http://localhost
hello world!
[root@e33c5bcc9e3b jre]#
7. 编写javaweb应用启动脚本
[root@e33c5bcc9e3b /]# vi /start.sh
[root@e33c5bcc9e3b /]# cat /start.sh
#! /bin/bash

export JRE_HOME=/jre
export PATH=$PATH:$JRE_HOME/jdk1.8.0_131/bin

nohup java -jar /api/qhello/qhello-1.0.0.jar &
8. 退出容器,commit提交镜像,查看镜像列表
[root@e33c5bcc9e3b /]# exit
exit
[root@localhost tmp]# docker stop javaweb
javaweb
[root@localhost tmp]# docker ps -a
CONTAINER ID        IMAGE               COMMAND             CREATED             STATUS                            PORTS               NAMES
e33c5bcc9e3b        centos:6.9          "/bin/bash"         3 hours ago         Exited (137) About a minute ago                       javaweb
[root@localhost tmp]# docker commit \
>   --author "liuxb" \
>   --message "hello world" \
>   javaweb \
>   qhello
sha256:b747a8ba044cdf1a2954ab72e895c146fdf00b8a95ac38469abab94364c4a32e
[root@localhost tmp]# docker images
REPOSITORY          TAG                 IMAGE ID            CREATED             SIZE
qhello              latest              b747a8ba044c        6 seconds ago       443MB
centos              latest              36540f359ca3        8 days ago          193MB
centos              6.9                 573de66f263e        3 months ago        195MB
9. 根据qhello镜像启动容器
[root@localhost tmp]# docker run -dit -p 80:80 --name qhello qhello /bin/bash
d6d2a9a518501b5eda8dd9d60271dc59edaa62b52e91705b8d3c891e06e9a504
[root@localhost tmp]# docker ps
CONTAINER ID        IMAGE               COMMAND             CREATED             STATUS              PORTS                NAMES
d6d2a9a51850        qhello              "/bin/bash"         3 seconds ago       Up 3 seconds        0.0.0.0:80->80/tcp   qhello
[root@localhost tmp]# docker exec -it qhello /bin/bash
[root@d6d2a9a51850 /]# sh /start.sh
[root@d6d2a9a51850 /]# nohup: appending output to `nohup.out'

[root@d6d2a9a51850 /]# exit
exit
10. 通过宿主机IP访问javaweb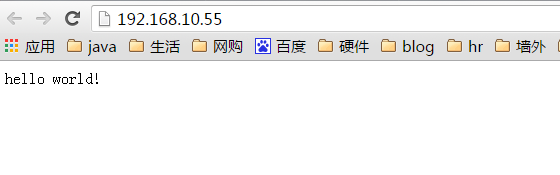


 4555
4555


 被折叠的 条评论
为什么被折叠?
被折叠的 条评论
为什么被折叠?
 到【灌水乐园】发言


