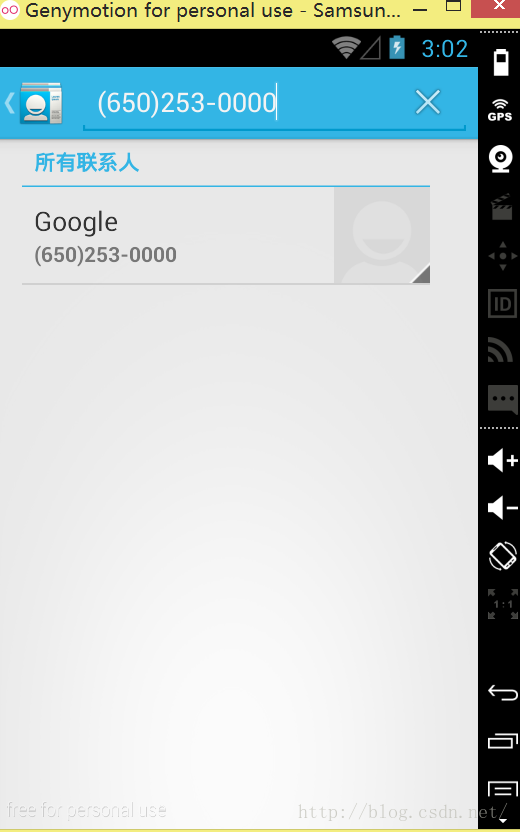
Android向所有被赋予READ_CONTACTS权限的应用程序提供了联系人信息数据库的完全访问权限。Contacts Contract使用3层数据模型去存储数据,下面介绍Contacts Contract的子类:
1.Data 表中的每行都定义了个人的数据集(电话号码,email地址,等等),用MIME类型区分开。尽管有为每个个人数据的类型预定义可用的列名(ContactsContract.CommonDataKinds里装有合适的MIME类型),此表能被用来存储任何值。
当向Data表中加入数据的时候,你需要指定与数据集相关的Raw Contact。
2.RawContacts 从Android 2.0(API 5)向前,用户可以增加多个联系人账户的Provider。RawContacts表中的每行定义了一个与数据集相关的账户。说白了就是账户信息。
3.Contacts Contacts表的行聚合了RawContacts中的数据,每行代表了不同的人信息。

读取联系人详情:
首先在庆典文件中添加权限:<uses-permission android:name=”android.permission.READ_CONTACTS”/>
然后是访问Contacts Contract Content Provider:
private String[] getNames() {
    /**
     * Listing 8-36: Accessing the Contacts Contract Contact Content Provider
     */
    // Create a projection that limits the result Cursor
    // to the required columns.
    String[] projection = {
      ContactsContract.Contacts._ID,
      ContactsContract.Contacts.DISPLAY_NAME
    };

   // Get a Cursor over the Contacts Provider.
    Cursor cursor =
      getContentResolver().query(ContactsContract.Contacts.CONTENT_URI,
                                 projection, null, null, null);

    // Get the index of the columns.
    int nameIdx =
      cursor.getColumnIndexOrThrow(ContactsContract.Contacts.DISPLAY_NAME);
    int idIdx =
      cursor.getColumnIndexOrThrow(ContactsContract.Contacts._ID);

    // Initialize the result set.
    String[] result = new String[cursor.getCount()];

    // Iterate over the result Cursor.
    while(cursor.moveToNext()) {
      // Extract the name.
      String name = cursor.getString(nameIdx);
      // Extract the unique ID.
      String id = cursor.getString(idIdx);

      result[cursor.getPosition()] = name + " (" + id + ")";
    }

    // Close the Cursor.
    cursor.close();

    //
    return result;
  }
找到联系人姓名的联系信息:
private String[] getNameAndNumber() {
    /**
     * Listing 8-37: Finding contact details for a contact name
     */
    ContentResolver cr = getContentResolver();
    String[] result = null;

    // Find a contact using a partial name match
    String searchName = "andy";
    Uri lookupUri =
      Uri.withAppendedPath(ContactsContract.Contacts.CONTENT_FILTER_URI,
                           searchName);

    // Create a projection of the required column names.
    String[] projection = new String[] {
      ContactsContract.Contacts._ID
    };

    // Get a Cursor that will return the ID(s) of the matched name.
    Cursor idCursor = cr.query(lookupUri,
      projection, null, null, null);

    // Extract the first matching ID if it exists.
    String id = null;
    if (idCursor.moveToFirst()) {
      int idIdx =
        idCursor.getColumnIndexOrThrow(ContactsContract.Contacts._ID);
      id = idCursor.getString(idIdx);
    }

    // Close that Cursor.
    idCursor.close();

    // Create a new Cursor searching for the data associated with the returned Contact ID.
    if (id != null) {
      // Return all the PHONE data for the contact.
      String where = ContactsContract.Data.CONTACT_ID +
        " = " + id + " AND " +
        ContactsContract.Data.MIMETYPE + " = '" +
        ContactsContract.CommonDataKinds.Phone.CONTENT_ITEM_TYPE +
        "'";

      projection = new String[] {
        ContactsContract.Data.DISPLAY_NAME,
        ContactsContract.CommonDataKinds.Phone.NUMBER
      };

      Cursor dataCursor =
        getContentResolver().query(ContactsContract.Data.CONTENT_URI,
          projection, where, null, null);

      // Get the indexes of the required columns.
      int nameIdx =
        dataCursor.getColumnIndexOrThrow(ContactsContract.Data.DISPLAY_NAME);
      int phoneIdx =
        dataCursor.getColumnIndexOrThrow(
          ContactsContract.CommonDataKinds.Phone.NUMBER);

      result = new String[dataCursor.getCount()];

      while(dataCursor.moveToNext()) {
        // Extract the name.
        String name = dataCursor.getString(nameIdx);
        // Extract the phone number.
        String number = dataCursor.getString(phoneIdx);

        result[dataCursor.getPosition()] = name + " (" + number + ")";
      }

      dataCursor.close();
    }

    return result;
  }
Contacts子类还提供了电话号码查找URI,用来帮助找到与特定电话号码相关的联系人,执行呼叫者ID查找:
private String performCallerId() {
    /**
     * Listing 8-38: Performing a caller-ID lookup
     */
    String incomingNumber = "(650)253-0000";
    String result = "Not Found";

    Uri lookupUri =
      Uri.withAppendedPath(ContactsContract.PhoneLookup.CONTENT_FILTER_URI,
                           incomingNumber);

    String[] projection = new String[] {
      ContactsContract.Contacts.DISPLAY_NAME
    };

    Cursor cursor = getContentResolver().query(lookupUri,
      projection, null, null, null);

    if (cursor.moveToFirst()) {
      int nameIdx =
        cursor.getColumnIndexOrThrow(ContactsContract.Contacts.DISPLAY_NAME);

      result = cursor.getString(nameIdx);
    }

    cursor.close();


    return result;
  }
使用Intent创建和选择联系人,这是一种最佳的实践做法,其优势在于用户在执行相同任务的时候看到的一致的界面,这可以避免用户感到混淆,并且改善用户体验,下面是悬着一个联系人:
private static int PICK_CONTACT = 0;

  private void pickContact() {
    Intent intent = new Intent(Intent.ACTION_PICK,
                               ContactsContract.Contacts.CONTENT_URI);
    startActivityForResult(intent, PICK_CONTACT);
  }
当选择好之后,作为返回Intent的data属性内的URI返回:
@Override
  protected void onActivityResult(int requestCode, int resultCode, Intent data) {
    super.onActivityResult(requestCode, resultCode, data);
    if ((requestCode == PICK_CONTACT) && (resultCode == RESULT_OK)) {
      resultTextView.setText(data.getData().toString());
    }
  }
插入新联系人:,当然这需要一个权限:
<uses-permission android:name="android.permission.WRITE_CONTACTS"/>
之后就可以插入联系人啦!
Intent intent =
      new Intent(ContactsContract.Intents.SHOW_OR_CREATE_CONTACT,
                 ContactsContract.Contacts.CONTENT_URI);
    intent.setData(Uri.parse("tel:(650)253-0000"));

    intent.putExtra(ContactsContract.Intents.Insert.COMPANY, "Google");
    intent.putExtra(ContactsContract.Intents.Insert.POSTAL,
      "1600 Amphitheatre Parkway, Mountain View, California");

    startActivity(intent);


 473
473

 被折叠的 条评论
为什么被折叠?


