最近因为项目需要,需要研究下推送和webView,因为原来的工程是2012年写的,代码编写规范以及API的使用都已经老掉牙地要入土了。举个栗子:列表不用tableview写,而是for循环创建了一堆button,难道是那时候还没有tableview么...所以这样的代码,除了重构,我想不到其他办法。
###我感觉我是幸运的,因为当我准备调研推送和webview的时候,苹果爸爸已经对他们进行触及灵魂的改造了,我自然可以靠着大树乘凉,直接入手iOS新版本的推送和iOS8出道的WKWebview。扯皮了这么多,是时候展现真正的技术了! --------------------------前方兰博红温预警------------------------ ###本文是iOS推送系列的第一篇,主要讲一下实现推送功能之前的准备工作,以及前期的推送注册,后续将会更新更多关于iOS10推送的新鲜内容。
iOS10的推送相比较之前的来说,真的可以用脱胎换骨来形容,新增了UserNotifications Framework,但使用起来其实很简单。
##一、战前准备 1.你必须要有1个development证书,如果要发布当然还要有一个distribution证书;
2.你必须要打开工程里的推送开关,不打开则一切皆为虚空。。。 
3.你可能还需要打开Background Modes里的Romote notification,虽然作者现在还有搞清这东西有软用,还忘知道的同志留言分享。 
4.阅读苹果爸爸给孩子们写的信---官方文档,既能提升文档阅读能力,还能加深对框架的理解,顺便把英语给学了,稳赚不赔的买卖。其实看文档,写文档是一个开发人员行走江湖的必备技能。
##二、iOS10前后的推送注册 ####(附赠两个三方推送注册)
#import <UserNotifications/UserNotifications.h>

/* 判断机型 */
// 建议宏和一些常用参数都添加到项目的config文件中
#define isiOS10                       ([[[UIDevice currentDevice]systemVersion]floatValue] >=  10.0)
#define isiOS7                          ([[[UIDevice currentDevice]systemVersion]floatValue] >= 7.0)
#define isiOS8                          ([[[UIDevice currentDevice]systemVersion]floatValue] >= 8.0)
#define isiOS7_1                        ([[[UIDevice currentDevice]systemVersion]floatValue] >  7.0)

- (BOOL)application:(UIApplication *)application didFinishLaunchingWithOptions:(NSDictionary *)launchOptions {
    // 1.系统通知
    // (1)推送注册,分为iOS10之后和之前
    if (isiOS10) {
        // iOS10使用以下方法注册,才能得到授权
        UNUserNotificationCenter *center = [UNUserNotificationCenter currentNotificationCenter];
        center.delegate = self;
        UNAuthorizationOptions types10 = UNAuthorizationOptionBadge | UNAuthorizationOptionAlert | UNAuthorizationOptionSound;
        [center requestAuthorizationWithOptions:types10 completionHandler:^(BOOL granted, NSError * _Nullable error) {
            if (!error) { // 获取通知授权成功
                NSLog(@"Request UNUserNofication authorization succeeded.");
                if (granted) { // 点击允许,这里可以添加一些自己的逻辑
                    NSLog(@"用户允许通知");
                } else { // 点击不允许,这里可以添加一些自己的逻辑
                    NSLog(@"用户不允许通知");
                }

                // (2)获取当前通知,  UNNotificationSetting只是读对象,不能修改,只能通过以下方法获取
                [center getNotificationSettingsWithCompletionHandler:^(UNNotificationSettings * _Nonnull settings) {
                    // 此处查看并设置通知相关信息
                }];

                [center addNotificationRequest:request withCompletionHandler:^(NSError * _Nullable error) {
                    if (error) {
                        NSLog(@"Add request of more settings for UNUserNotification error:%@", error);
                    }
                }];
            } else {
                NSLog(@"Request UNUserNofication authorization failed.");
            }
        }];

    // 2.UMPush
    // (1)UM推送初始化
    [UMessage startWithAppkey:UMAppKey launchOptions:launchOptions];

    // (2)UM通知注册
    [UMessage registerForRemoteNotifications];

    // (3)UM日志
    [UMessage setLogEnabled:YES];

    // 3.用友有信
    // (1)有信IM相关设置
    [[YYIMChat sharedInstance] application:application didFinishLaunchingWithOptions:launchOptions];

    // (2)注册app
    [[YYIMChat sharedInstance] registerApp:YYAPPIDNew etpKey:@"cidtech"];

    // (3)注册多方通话
    [[YYIMChat sharedInstance].chatManager registerDuduWithAccountIdentify:@"" appkeyTemp:@""];

    // (4)添加代理
    [[YYIMChat sharedInstance].chatManager addDelegate:self];

    // (5)注册token代理
    [[YYIMChat sharedInstance].chatManager registerTokenDelegate:self];

    // (6)设置日志级别
    [[YYIMChat sharedInstance] setLogLevel:YYIM_LOG_LEVEL_VERBOSE];

    // (7)本地推送
    [[YYIMChat sharedInstance].chatManager setEnableLocalNotification:YES];

    // (8)注册推送证书
#if defined(DEBUG) && DEBUG
    [[YYIMChat sharedInstance] registerApnsCerName:@"你的开发push证书"];
#else
    [[YYIMChat sharedInstance] registerApnsCerName:@"你的生产push证书"];
#endif

    // (9)设置高德地图key,参见高德地图官网(有信IM内置的发送位置功能需要集成高德地图API)
    [MAMapServices sharedServices].apiKey = kYYMapKey;
    }

/** 获取deviceToken 存储本地以及相关注册 */
- (void)application:(UIApplication*)application didRegisterForRemoteNotificationsWithDeviceToken:(NSData*)deviceToken {
    // 1.有信IM推送注册
    [[YYIMChat sharedInstance] application:application didRegisterForRemoteNotificationsWithDeviceToken:deviceToken];

    // 2.有盟U-Push推送注册
    [UMessage registerDeviceToken:deviceToken];

    // 3.deviceToken存储
    NSString *deviceTokenAppend = [[[[deviceToken description] stringByReplacingOccurrencesOfString: @"<" withString: @""]
                                    stringByReplacingOccurrencesOfString: @">" withString: @""]
                                   stringByReplacingOccurrencesOfString: @" " withString: @""];
    [[NSUserDefaults standardUserDefaults] setObject:deviceTokenAppend forKey:DEVICETOKEN];
    [[NSUserDefaults standardUserDefaults] synchronize];
    NSLog(@"deviceToken-------%@",deviceTokenAppend);
}

 // iOS10以下系统
    else {
        UIUserNotificationSettings *settings = [UIUserNotificationSettings settingsForTypes:UIUserNotificationTypeAlert | UIUserNotificationTypeBadge | UIUserNotificationTypeSound categories:nil];
        [application registerUserNotificationSettings:settings];
    }
}
    // 远程推送注册-必须加的一个方法!
    [[UIApplication sharedApplication] registerForRemoteNotifications];

/** iOS10以下-接收到远程通知 */
- (void)application:(UIApplication *)application didReceiveRemoteNotification:(NSDictionary *)userInfo fetchCompletionHandler:(void (^)(UIBackgroundFetchResult))completionHandler {
    [self.rootVC.tabBarView selectWithIndex:0];
    [self.rootVC selectViewControllerWithIndex:0];
    [[YYIMChat sharedInstance] application:application didReceiveRemoteNotification:userInfo fetchCompletionHandler:completionHandler];
    [[NSNotificationCenter defaultCenter] postNotificationName:VERIFYNOTIFICATION_REMOTE object:userInfo];
}


/** iOS10以下-接收到本地通知 */
- (void)application:(UIApplication *)application didReceiveLocalNotification:(UILocalNotification *)notification {
    [[YYIMChat sharedInstance] application:application didReceiveLocalNotification:notification];
}

// iOS10新增:处理前台收到通知的代理方法
- (void)userNotificationCenter:(UNUserNotificationCenter *)center willPresentNotification:(UNNotification *)notification withCompletionHandler:(void (^)(UNNotificationPresentationOptions))completionHandler{
    NSDictionary * userInfo = notification.request.content.userInfo;
    if([notification.request.trigger isKindOfClass:[UNPushNotificationTrigger class]]) {
        //应用处于前台时的远程推送接受
        //关闭友盟自带的弹出框
        [UMessage setAutoAlert:NO];
        //必须加这句代码
        [UMessage didReceiveRemoteNotification:userInfo];

    } else {
        //应用处于前台时的本地推送接受
    }
    //当应用处于前台时提示设置,需要哪个可以设置哪一个
    completionHandler(UNNotificationPresentationOptionSound | UNNotificationPresentationOptionBadge | UNNotificationPresentationOptionAlert);
}

// iOS10新增:处理后台点击通知的代理方法
- (void)userNotificationCenter:(UNUserNotificationCenter *)center didReceiveNotificationResponse:(UNNotificationResponse *)response withCompletionHandler:(void (^)())completionHandler{
    NSDictionary * userInfo = response.notification.request.content.userInfo;
    if([response.notification.request.trigger isKindOfClass:[UNPushNotificationTrigger class]]) {
        // 必须加这句代码
        [UMessage didReceiveRemoteNotification:userInfo];

        // 应用处于后台时的远程推送接受

    } else {
        // 应用处于后台时的本地推送接受
    }
}
###以上是iOS10以及之前版本推送和三方推送有盟推送、用友推送的注册,下面我们就来看看iOS10推送真正令人惊艳的地方
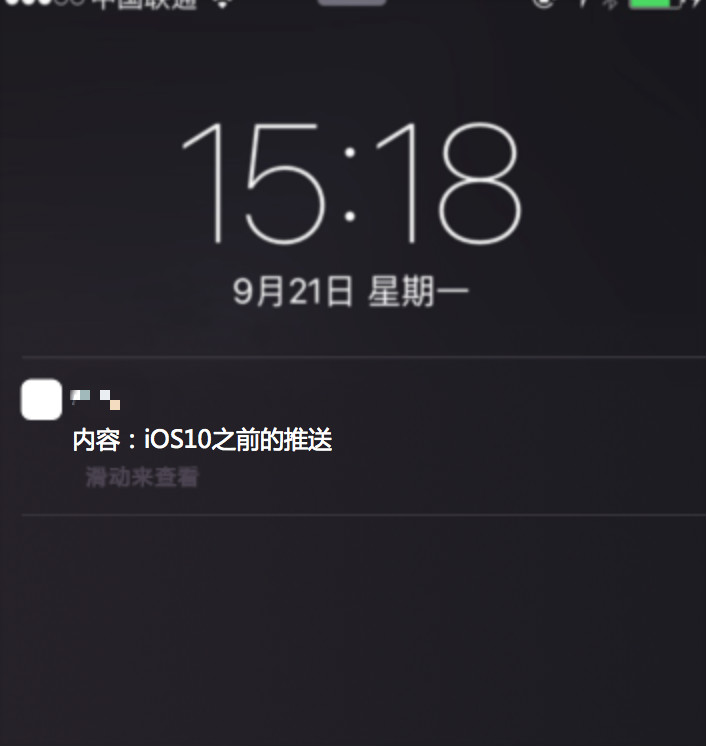
##三、真正令人激动的功能 iOS10之前的推送是这样的
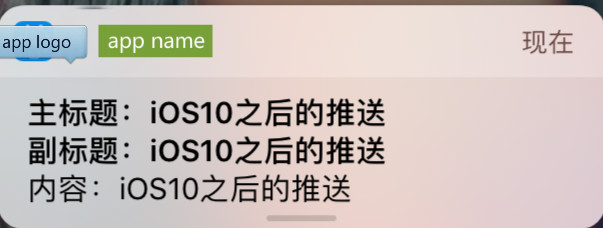
iOS10之后的推送是这样的
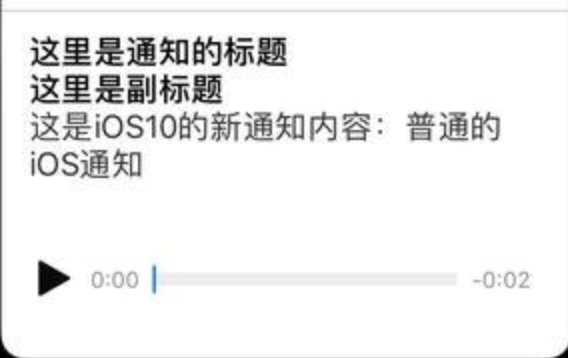
还可以是这样的
#戛然而止。。。 ###作者会在后面继续更新新的博客和大家分享、交流,初来乍到,希望得到大家的批评和指正!


 538
538

 被折叠的 条评论
为什么被折叠?


