


1 准备
1.1 配置springmvc的文件上传解析器
在web.xml中加载springmvc.xml,然后在springmvc.xml的基础上加上文件上传解析器:
	<!-- 文件上传解析器 -->
	<bean id="multipartResolver" class="org.springframework.web.multipart.commons.CommonsMultipartResolver">
		<!-- 10M  -->
		<property name="maxUploadSize" value="10240000"></property>
		<property name="defaultEncoding" value="UTF-8"></property>
	</bean>
maxUploadSize : 最大文件上传大小 这里为10M
defaultEncoding : 默认编码 这里为utf-8
1.2 导入jar
需要导入commons-fileupload.jar 和 commons-io.jar
下载的话在Apache官网上可以下载
这里我们用的是maven项目,在pom.xml中加上这两句话从中心仓库下载:
	<!-- https://mvnrepository.com/artifact/commons-fileupload/commons-fileupload -->
	<dependency>
		<groupId>commons-fileupload</groupId>
		<artifactId>commons-fileupload</artifactId>
		<version>1.3.1</version>
	</dependency>
	<!-- https://mvnrepository.com/artifact/commons-io/commons-io -->
	<dependency>
		<groupId>commons-io</groupId>
		<artifactId>commons-io</artifactId>
		<version>2.4</version>
	</dependency>
在下面我们要使用两台服务器跨服务器上传图片, 如果在有这种需求的情况下,还要导入这两个jar:jersey-core.jar 和 jersey-client.jar
	<!-- 跨服务器 -->
	<dependency>
		<groupId>com.sun.jersey</groupId>
		<artifactId>jersey-client</artifactId>
		<version>1.19</version>
	</dependency>
	<!-- https://mvnrepository.com/artifact/com.sun.jersey/jersey-core -->
	<dependency>
		<groupId>com.sun.jersey</groupId>
		<artifactId>jersey-core</artifactId>
		<version>1.17.1</version>
	</dependency>
2 上传
2.1 用流的方式上传
这种最普通的方式写起来很简单,但是存在着效率严重低下的问题。
前台:
	<form action="${pageContext.request.contextPath}/upload/simpleUpload.do" method="post" enctype="multipart/form-data" >

		<img alt="" src="${fileUrl}" height="100" width="100" >
		<input type="file" name="file" />

		<input type="submit" value="上传图片" />
	</form>
记得一定要写 : enctype="multipart/form-data"
后台:
	/**
	 * 通过流的方式上传文件
	 *
	 * @param file
	 *            将name是file得到的文件封装成CommonsMultipartFile对象
	 * @param
	 * @return
	 */
	@RequestMapping("simpleUpload")
	public String simpleUpload(@RequestParam(required=false) CommonsMultipartFile file, HttpServletRequest request , Model model) {
		try {
			String path = request.getSession().getServletContext().getRealPath("upload");
			// 获得扩展名
			String fileName = file.getOriginalFilename();
			// 组成一个新的实例 完整的目标文件
			File targetFile = new File(path, fileName);
			if (!targetFile.exists()) {
				targetFile.mkdirs();
			}
			// 获取输出流
			FileOutputStream os = new FileOutputStream(targetFile);
			// 获取输入流
			// CommonsMultipartFile 中可以直接得到文件的流
			FileInputStream is = (FileInputStream) file.getInputStream();
			int len;
			// 一个一个字节的读取并写入
			while ((len = is.read()) != (-1)) {
				os.write(len);
			}
			os.flush();
			os.close();
			is.close();
			//向页面返回
			model.addAttribute("fileUrl", targetFile);
		} catch (Exception e) {
			e.printStackTrace();
		}
		return "fileUpload";
	}
2.2 采用file.Transto来保存上传的文件
前台:
	<form action="${pageContext.request.contextPath}/upload/transtoUpload.do" method="post" enctype="multipart/form-data" >
		<img alt="" src="${fileUrl}" height="100" width="100" >
		<input type="file" name="file" />
		<input type="submit" value="上传图片" />
	</form>
后台:
	@RequestMapping("transtoUpload")
	public String upload(MultipartFile file, HttpServletRequest request, ModelMap model) {
		// 获得图片存储路径
		String path = request.getSession().getServletContext().getRealPath("upload");
		// 获得扩展名
		String fileName = file.getOriginalFilename();
		// 组成一个新的实例 完整的目标文件
		File targetFile = new File(path, fileName);
		if (!targetFile.exists()) {
			targetFile.mkdirs();
		}
		// 保存
		try {
			file.transferTo(targetFile);
		} catch (Exception e) {
			e.printStackTrace();
			System.out.println("文件保存失败!");
		}

		model.addAttribute("fileUrl", request.getContextPath() + "/upload/" + fileName);

		return "fileUpload";
	}
2.3 采用spring提供的方法 (使用jersy服务器进行跨服务器上传)
2.3.1 需求
使用ajax异步上传,在图片更改后,异步上传到图片服务器中。
2.3.2 准备
导入jersey-core.jar 和 jersey-client.jar 两个jar包,在上面已经导入了
导入 jquery.js
导入 jquery.form.js , 因为ajax无法提交表单,这个插件是为了ajax 异步能提交表单
2.3.3 配置服务器
首先,我们上传的图片一般都是由另外一个单独的图片服务器来存储图片的,所以我们开启两个tomcat服务器来模拟两个服务器来实现跨服务器上传。
我们创建另外一个web项目叫做imgClient,部署到另外一台tomcat服务器上来专门接受图片。
另外这一台服务器的端口号已经要和我们运行程序的服务器不一致,默认的tomcat服务器端口为8080,我们把这台服务器的端口号设置为8087。
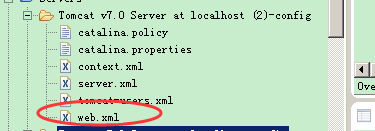
![]()

现在我们的服务器已经搭建完毕,现在设置服务器的只读属性为false,否则无法上传:在tomcat服务器的web.xml中设置
添加readonly , 并设置为false,这样就不是只读的了
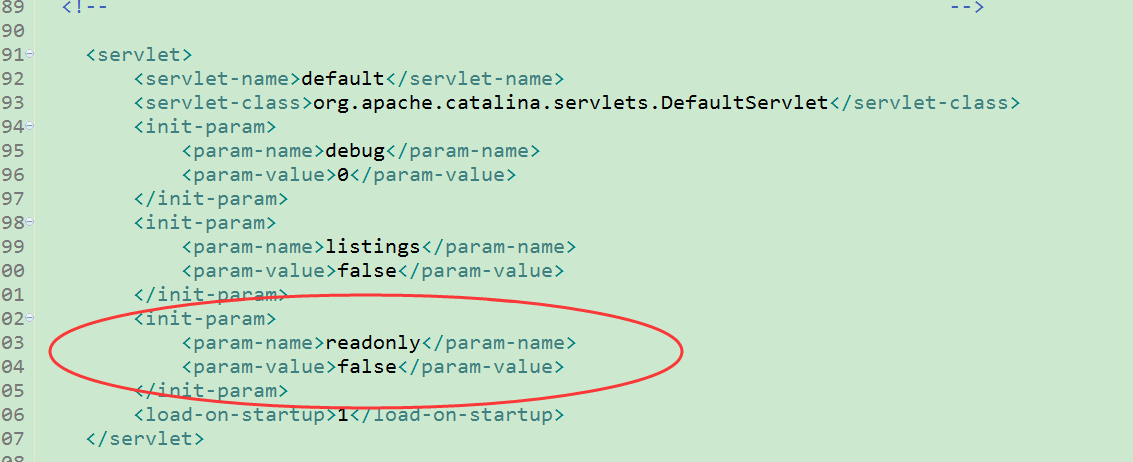
全部设置完成
2.3.4 前台代码(表单+ajax)
这里就不需要写 enctype="multipart/form-data" 了, 因为不依靠submit 将图片信息提交到后台
	<!-- 采用ajax 异步上传到图片服务器 -->
	<form id="imgForm" action="${pageContext.request.contextPath}/user/upload.do" method="post" >
		<label>上传图片</label> <br>

		<img id='imgSrc' src='' height="100" width="100" />

		<input type='file' id='imgFile' name='imgFileName' class="file" />
		<br>
		<span id="imgSpan">上传图片的大小不超过10MB</span>
		<br>

		<!-- 向数据库提供图片的相对路径 -->
		<input type='hidden' id='relativePathForDb'  />
		<!-- 提交按钮只负责将隐藏域数据提交到后台处理 不参与上传 -->
		<input type="submit" value="提交" />
	</form>

	<script type="text/javascript" src="../js/jquery-3.1.1.min.js"></script>
	<script type="text/javascript" src="../js/jquery.form.js"></script>
在图片内容改变的情况下,触发ajax提交图片数据到服务器
	<script type="text/javascript">
		//在图片里面的内容发生改变的时候触发
		$("#imgFile").change(function(){
			//用到jquery.from.js
			var option = {
				type : "POST",
				url : "${pageContext.request.contextPath}/upload/fileUpload.do",
				dataType : "text",  //返回值为json格式的text文本
				data : {
					//传递type为file的name值到后台 , 便于后台通过名字接收这个图片
					fileName : "imgFileName"
				},
				success : function(data){
					//传回来的是文本对象  但是是符合json格式的 {"" : "" , "" : ""}
					//处理一下
					var jsonObj = $.parseJSON(data);
					//返回服务器图片路径 : 把图片设置进img 的src属性
					$("#imgSrc").attr("src",jsonObj.fullPath);
					//设置隐藏域中的数据库保存相对路径
					$("#relativePathForDb").val(jsonObj.relativePath);
				}
			 }
			 //提交表单  用到jquery.from.js
			 $("#imgForm").ajaxSubmit(option);
		})
	</script>
2.3.5 后台代码
因为我们要关联远程服务器, 也就是图片服务器的完整路径。我们来写一个Commons 类,里面是一个常量,存放远程服务器的根路径
public class Commons {
	public static final String PIC_HOST = "http://127.0.0.1:8087/imgClient";
}
待会可以在后台代码中存放文件的时候调用:
@Controller
@RequestMapping("upload")
public class FileUploadController {

	/**
	 * 对应前台ajax更换图片

	 * @param request 封装在请求中的图片对象
	 * @param fileName 图片的名称
	 * @param out 要向前台传输json数据
	 */
	@RequestMapping("fileUpload")
	public void fileUpload(HttpServletRequest request, String fileName, PrintWriter out) {
		// 把request强转为多部件请求对象
		MultipartHttpServletRequest mh = (MultipartHttpServletRequest) request;
		// 根据文件名称获取获取对象
		CommonsMultipartFile cm = (CommonsMultipartFile) mh.getFile(fileName);
		// 获取文件上传流
		byte[] fBytes = cm.getBytes();
		// 解决文件名称重复 用当前时间 精确到毫秒
		String newFilenames = "";
		SimpleDateFormat sdf = new SimpleDateFormat("yyyyMMddHHmmssSSS");
		newFilenames = sdf.format(new Date());
		// 获取文件扩展名
		String originalFilename = cm.getOriginalFilename();
		String suffix = originalFilename.substring(originalFilename.lastIndexOf("."));
		// 创建jesy 跨服务器上传
		Client client = Client.create();
		// 把文件关联远程服务器完整的路径
		//这个Commons.PIC_HOST就是那个我们定义的远程服务器根路径
		WebResource resource = client.resource(Commons.PIC_HOST + "/upload/" + newFilenames + suffix);
		// 上传图像
		resource.put(String.class, fBytes);
		// ajax success回调函数
		// 图片的完整路径
		String fullPath = Commons.PIC_HOST + "/upload/" + newFilenames + suffix;
		// 数据库保存图片的相对路径
		String relativePath = "/upload/" + newFilenames + suffix;
		// 拼接json的串 {"" : "", "" : ""}
		String result = "{\"fullPath\"  : \"" + fullPath + "\" , \"relativePath\"  : \"" + relativePath + "\" }";
		// 向前台传回json格式的字符串
		out.print(result);
	}
}
效果:
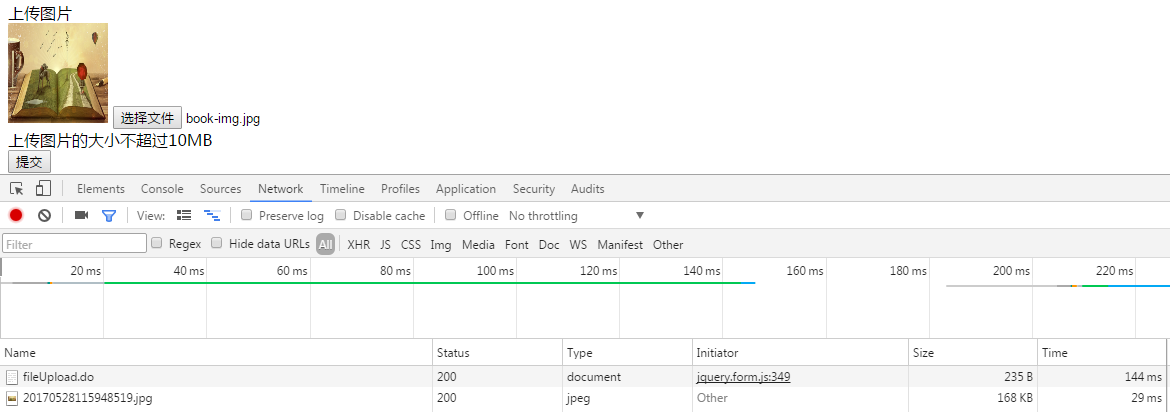
当选择文件确定以后:
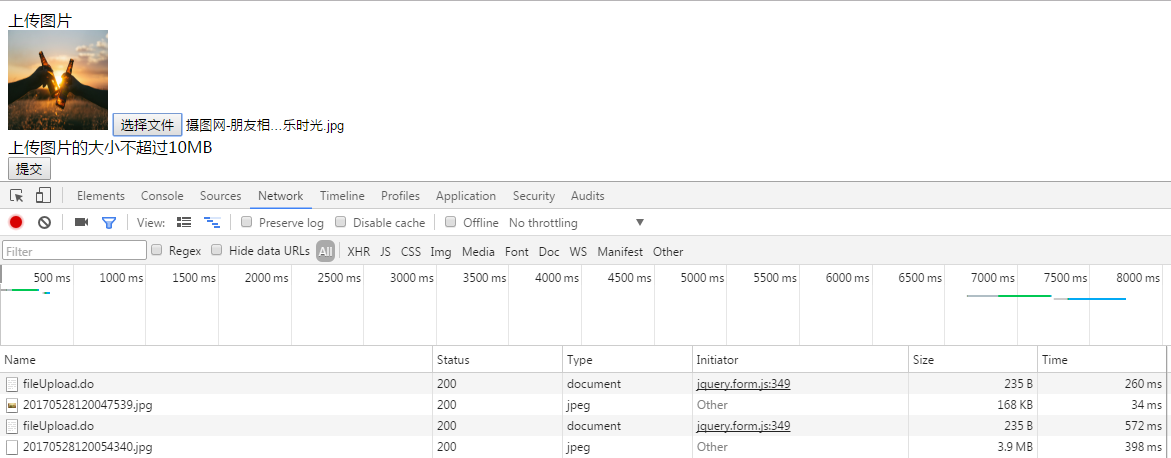
不需要提交
上传的图片:

上传完毕!


 171
171


 被折叠的 条评论
为什么被折叠?
被折叠的 条评论
为什么被折叠?
 到【灌水乐园】发言


