


20.27 分发系统介绍
- 分发系统就是一个主要用来上线代码或同步文件的脚本。
如今一些比较大的企业,大都使用了负载均衡,而有时因为一些程序要更改,或者有些bug要修改,快速更新代码等,如果仅是几台server的话,很简单,把已经改好的程序拷过去,或者rsync远程推送,再或者网上NFS共享一下就可以了。但如果有几十台几百台,那样的方法会太繁琐,此时就可以用expect来批量实现分发任务。
20.28 expect脚本远程登录
-
expect的安装:yum install -y expect
-
下面来进行expect脚本的远程登录:
本机IP为120,远程IP为124
进入/usr/local/sbin目录下(expect脚本一般放在此目录中),新建一个名称为test.expect的脚本文件,内容如下:
#! /usr/bin/expect
set host "192.168.6.124"
set passwd "123456"
spawn ssh root@$host
expect {
"yes/no" { send "yes\r"; exp_continue}
"assword:" { send "$passwd\r" }
}
interact
然后更改权限:chmod a+x test.expect,此时就可以远程连接124了。 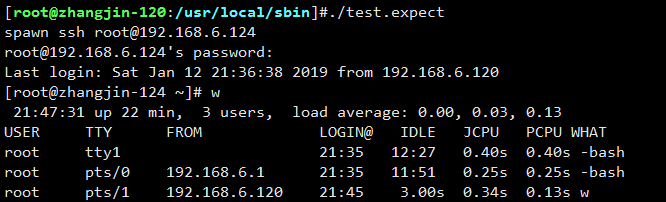
20.29 expect脚本远程执行命令
再在/usr/local/sbin/目录下新建一个test2.expect的脚本,内容如下:
#!/usr/bin/expect
set user "root"
set passwd "123456"
spawn ssh $user@192.168.6.124

expect {
"yes/no" { send "yes\r"; exp_continue}
"password:" { send "$passwd\r" }
}
expect "]*"
send "touch /tmp/test.txt\r"
expect "]*"
send "echo hello world! > /tmp/test.txt\r"
expect "]*"
send "exit\r"
给test2.expect脚本赋予x权限:chmod a+x test2.expect,然后执行: 
在124上查看/tmp/目录下是否有test.txt: 
20.30 expect脚本传递参数
- expect脚本可以接受从bash传递过来的参数.可以使用[lindex $argv n]获得,n从0开始,分别表示第1个,第2个,第3个,第n个参数。
新建名为test3.expect的脚本文件,内容如下:
#!/usr/bin/expect
set user [lindex $argv 0]
set host [lindex $argv 1]
set passwd "123456"
set cm [lindex $argv 2]
spawn ssh $user@$host

expect {
"yes/no" { send "yes\r"}
"password:" { send "$passwd\r" }
}
expect "]*"
send "$cm\r"
expect "]*"
send "exit\r"
增加x权限后执行: 
20.31 expect脚本同步文件
新建名为test4.expect的脚本文件,内容如下:
#!/usr/bin/expect
set passwd "123456"
spawn rsync -av root@192.168.6.124:/tmp/test.txt /tmp/
expect {
"yes/no" { send "yes\r"}
"password:" { send "$passwd\r" }
}
expect eof
增加x权限后执行: 
20.32 expect脚本指定host和要同步的文件
新建名为test5.expect的脚本文件,内容如下:
#!/usr/bin/expect
set passwd "123456"
set host [lindex $argv 0]
set file [lindex $argv 1]
spawn rsync -av $file root@$host:$file
expect {
"yes/no" { send "yes\r"}
"password:" { send "$passwd\r" }
}
expect eof
增加x权限后执行: 
20.33 构建文件分发系统
-
需求背景:
对于大公司而言,肯定时不时会有网站或者配置文件更新,而且使用的机器肯定 也是好多台,少则几台,多则几十甚至上百台。所以,自动同步文件是至关重要的。
-
实现思路:
首先要有一台模板机器,把要分发的文件准备好,然后只要使用expect脚本批量把 需要同步的文件分发到目标机器即可。
-
核心命令:
rsync -av --files-from=list.txt / root@host:/ 注意:这里的都是根目录
使用rsync 的 --files参数,可以实现调用文件里面的列表,进行多个文件远程传输,从而实现文件分发文件分发系统的实现。
新建名为rsync.expect的脚本文件,内容如下:
#!/usr/bin/expect
set passwd "123456"
set host [lindex $argv 0]
set file [lindex $argv 1]
spawn rsync -av --files-from=$file / root@$host:/
expect {
"yes/no" { send "yes\r"}
"password:" { send "$passwd\r" }
}
expect eof
然后在/tmp/目录下新建文件ip.list
[root@zhangjin-120:/usr/local/sbin]#vim /tmp/ip.list

192.168.6.123
192.168.6.124
创建需要同步文件的列表文件file.list
[root@zhangjin-120:/usr/local/sbin]#vim /tmp/file.list

/tmp/test.txt
/tmp/test2.txt
/root/123.sh
再创建一个名为rsync的shell脚本,内容如下:
#!/bin/bash
for ip in `cat /tmp/ip.list`
do
    echo $ip
    ./rsync.expect $ip /tmp/file.list
done
增加x权限后执行:
20.34 批量远程执行命令
-
当同步完代码后有可能需要批量地重启服务,因此还需要批量远程执行命令,类似于自动化。 这里是用expect编写执行命令的脚本并用shell脚本来批量调用它。
创建名为exe.expect的脚本,内容如下:
#!/usr/bin/expect
set host [lindex $argv 0]
set passwd "123456"
set cm [lindex $argv 1]
spawn ssh root@$host
expect {
"yes/no" { send "yes\r"}
"password:" { send "$passwd\r" }
}
expect "]*"
send "$cm\r"
expect "]*"
send "exit\r"
赋予x权限。
再创建exe.sh的shell脚本,内容如下:
#!/bin/bash
for ip in `cat ip.list`
do
    echo $ip
    ./exe.expect $ip "w;free -m;ls /tmp"
done


 253
253


 被折叠的 条评论
为什么被折叠?
被折叠的 条评论
为什么被折叠?
 到【灌水乐园】发言


