


本教程结合CUHKSZcsc3150课程提供的配置教程进行补充,有一些省略但是笔者遇到并浪费了很多时间的问题在这里写出,希望能给mac玩家一些帮助。
注意:英文部分为原版手册内容,笔者不再加以翻译,中文部分为笔者添加的注意事项和补充。
MacOS (ARM64/M1/M2)
Warning: CSC3150 VM Configurations on ARM64 arch is still experimental. You may or may not encounter unknown problems in the projects. Take your own risk.
** IMPORTANT UPDATE FOR FALL 2023 FROM THE AUTHOR **
I was informed of the usage of this manual for fall 2023. Last year, I made a mistake in not allocating enough storage space for the VM on arm64 arch (e.g. apple silicon M1/M2) so that in project 1 the kernel build may crash when running out of disk space. To avoid bringing nightmare to students this year, I built a new version of system archive and please make sure you download and configure with the new version. (if you have already set up, please delete it and do it with the new archive). This new version already has build-essential installed as well.
New link: download from cuhko365-sharepoint
Heads-up for students who has configured with the outdated archive and need to redo it
When redoing the configuration and try to ssh into the new VM, you may find error of "Host Key Verification Failed" (a bit of simple security bs that you can ignore: this is because ssh client adopts a "leap of faith" model in verifying the authenticity of the server and marks down in ~/.ssh/known_hosts file the host key fingerprint calculated with cryptographic hash functions like sha-256 at the very first connection which is compared against at each subsequent connection to avoid man-in-the middle-attck aka MITM).
Simple (yet brute-force) solution:
rm ~/.ssh/known_hostat your host system (i.e. terminal at Mac OS)
Set up VM
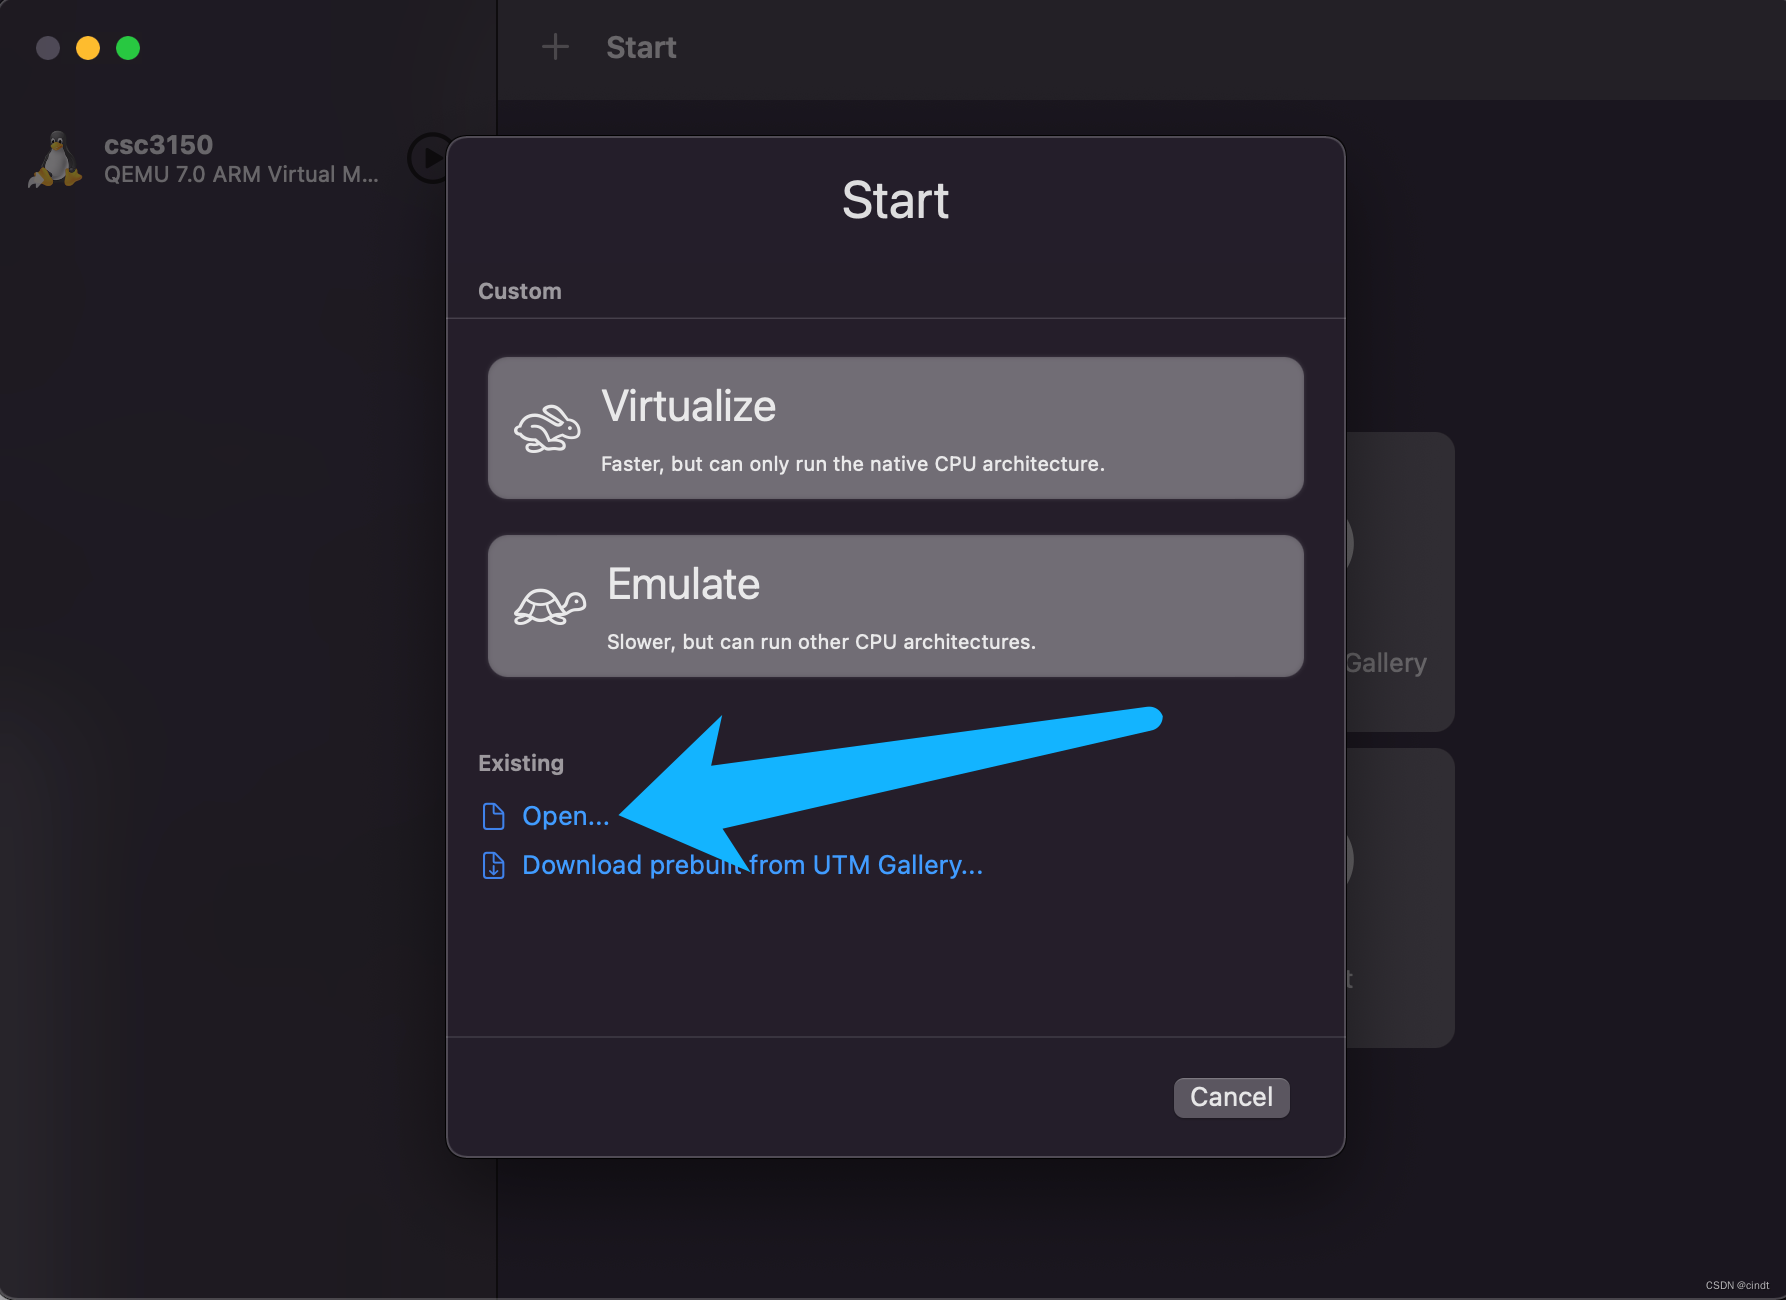
Download and install UTM (link) and download the system archive (2.24 GB, link updated).
(此处与原版手册不同的是UTM下载第一个link的并安装,system archive下载“IMPORTANT UPDATE FOR FALL 2023 FROM THE AUTHOR”处的链接。)
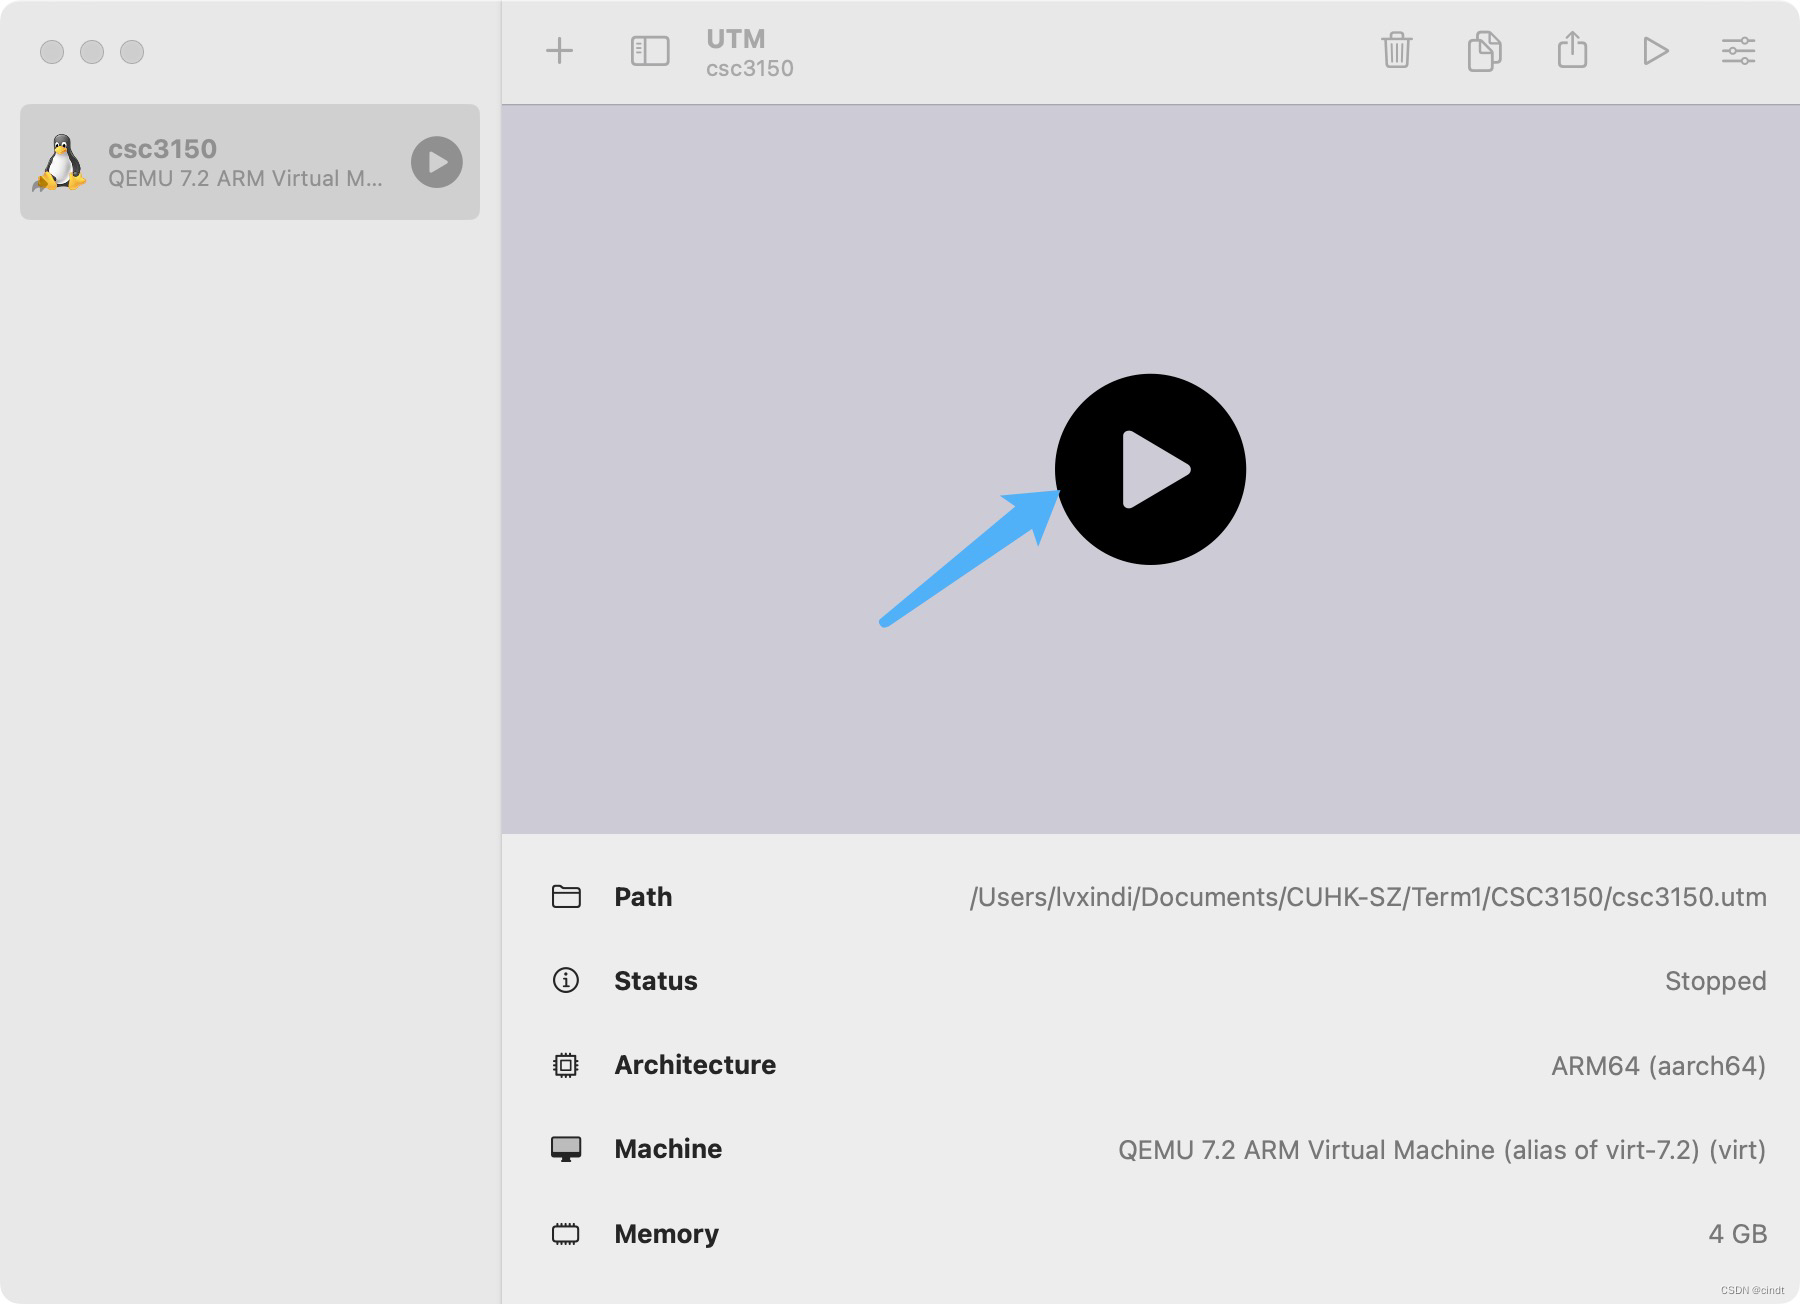
Decompress the zip file (you should get a UTM system archive file). Put the system archive to your course directory (please reserve at least more than 20GB of space). Then launch UTM -> Create a New Virtual Machine -> Open -> Select the system archive. After the VM sucessfully launches. The VM is set up.
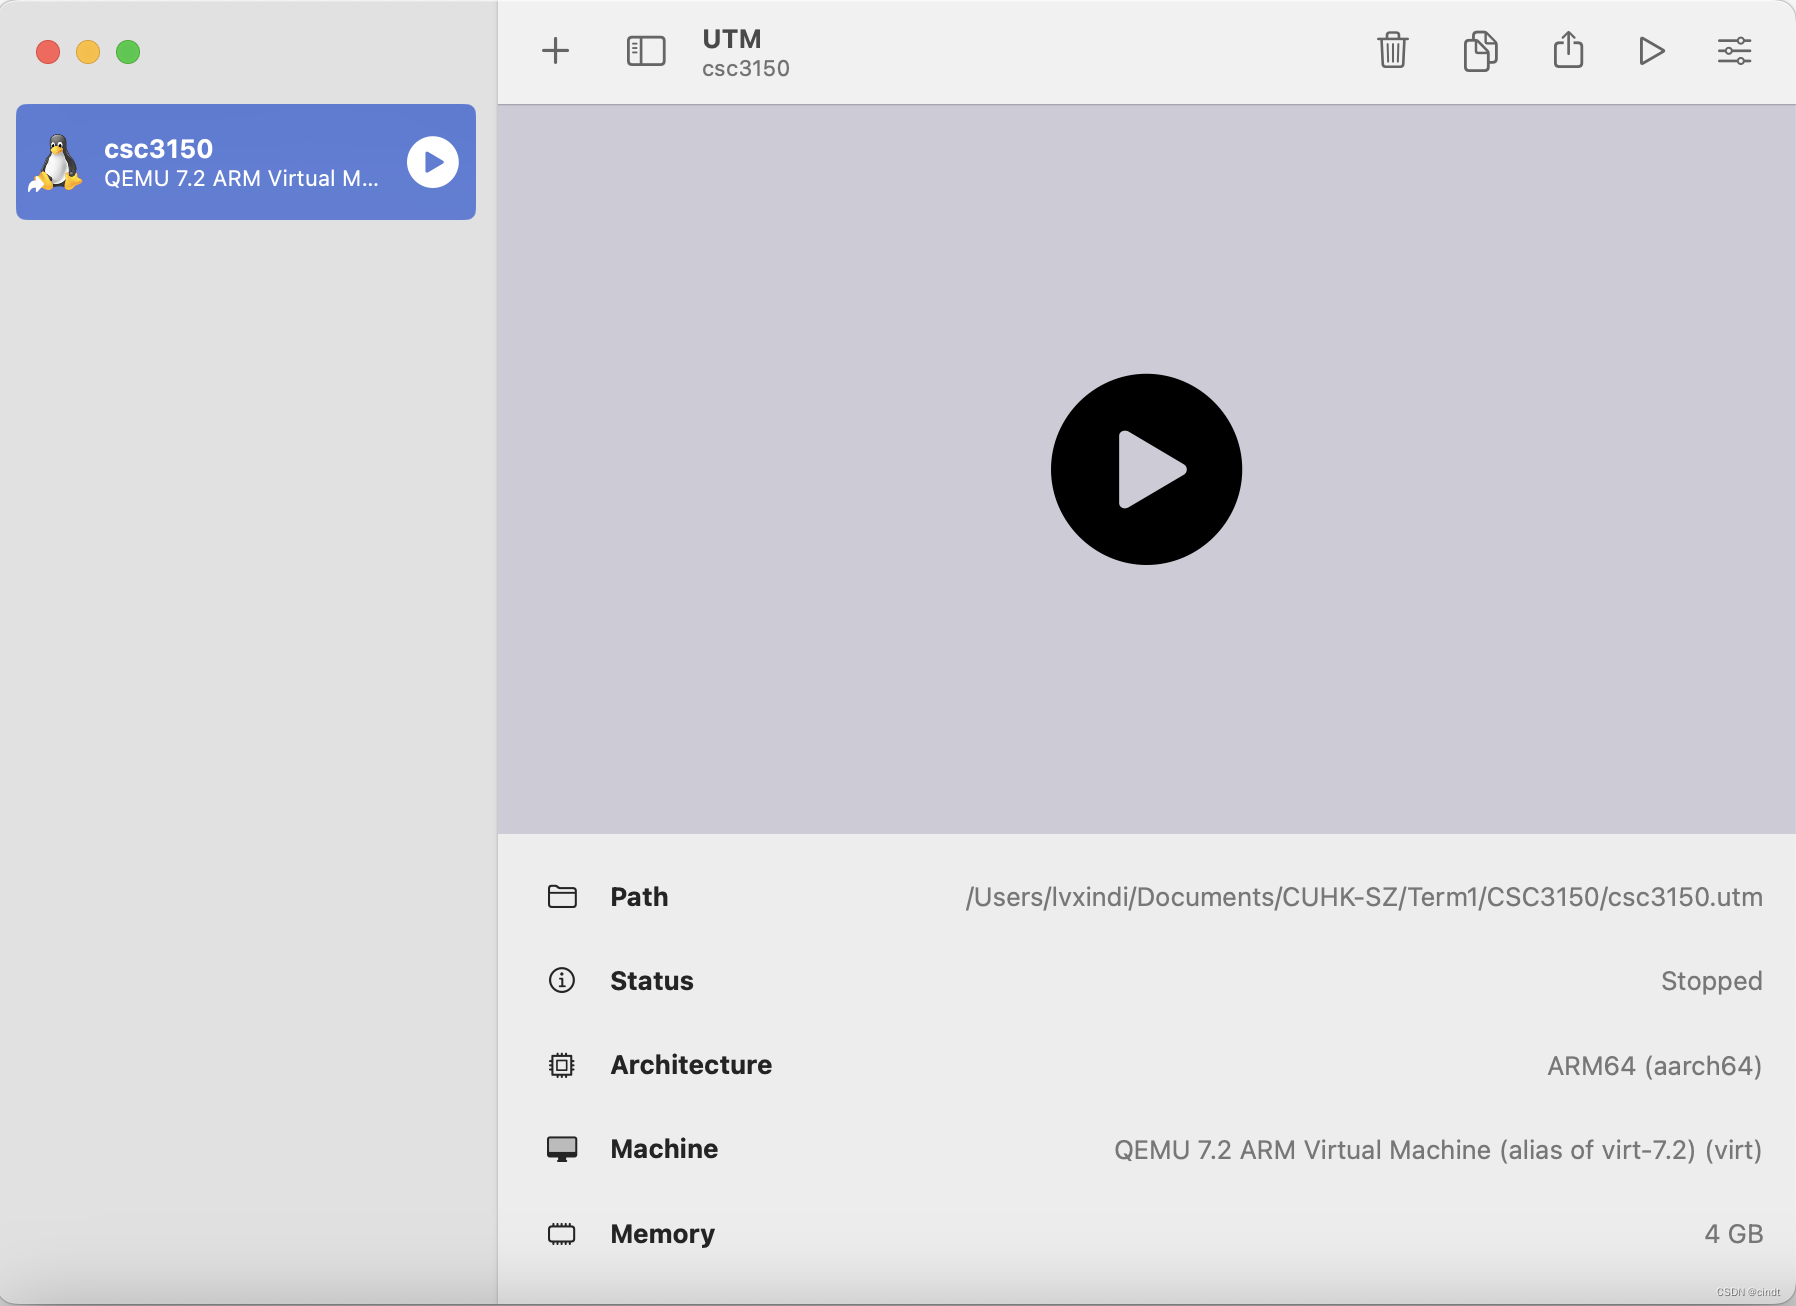
安装完成的样子如下:
Set up SSH
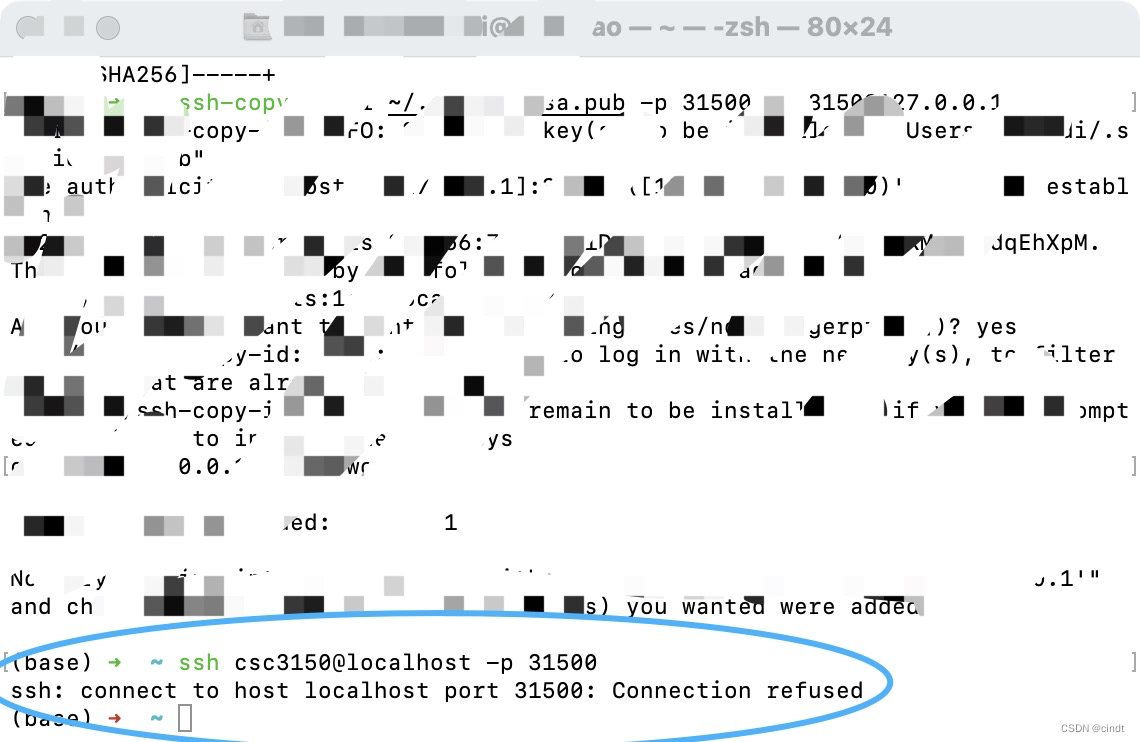
In terminal, make sure you can connect to the VM:
ssh csc3150@localhost -p 31500(password is also csc3150).
“ssh: connect to host localhost port 31500: Connection refused”问题:
这个时候不论我们在mac的Terminal应用还是在vsc的terminal中输入这行代码都会返回一个拒绝链接的结果,如下图所示。
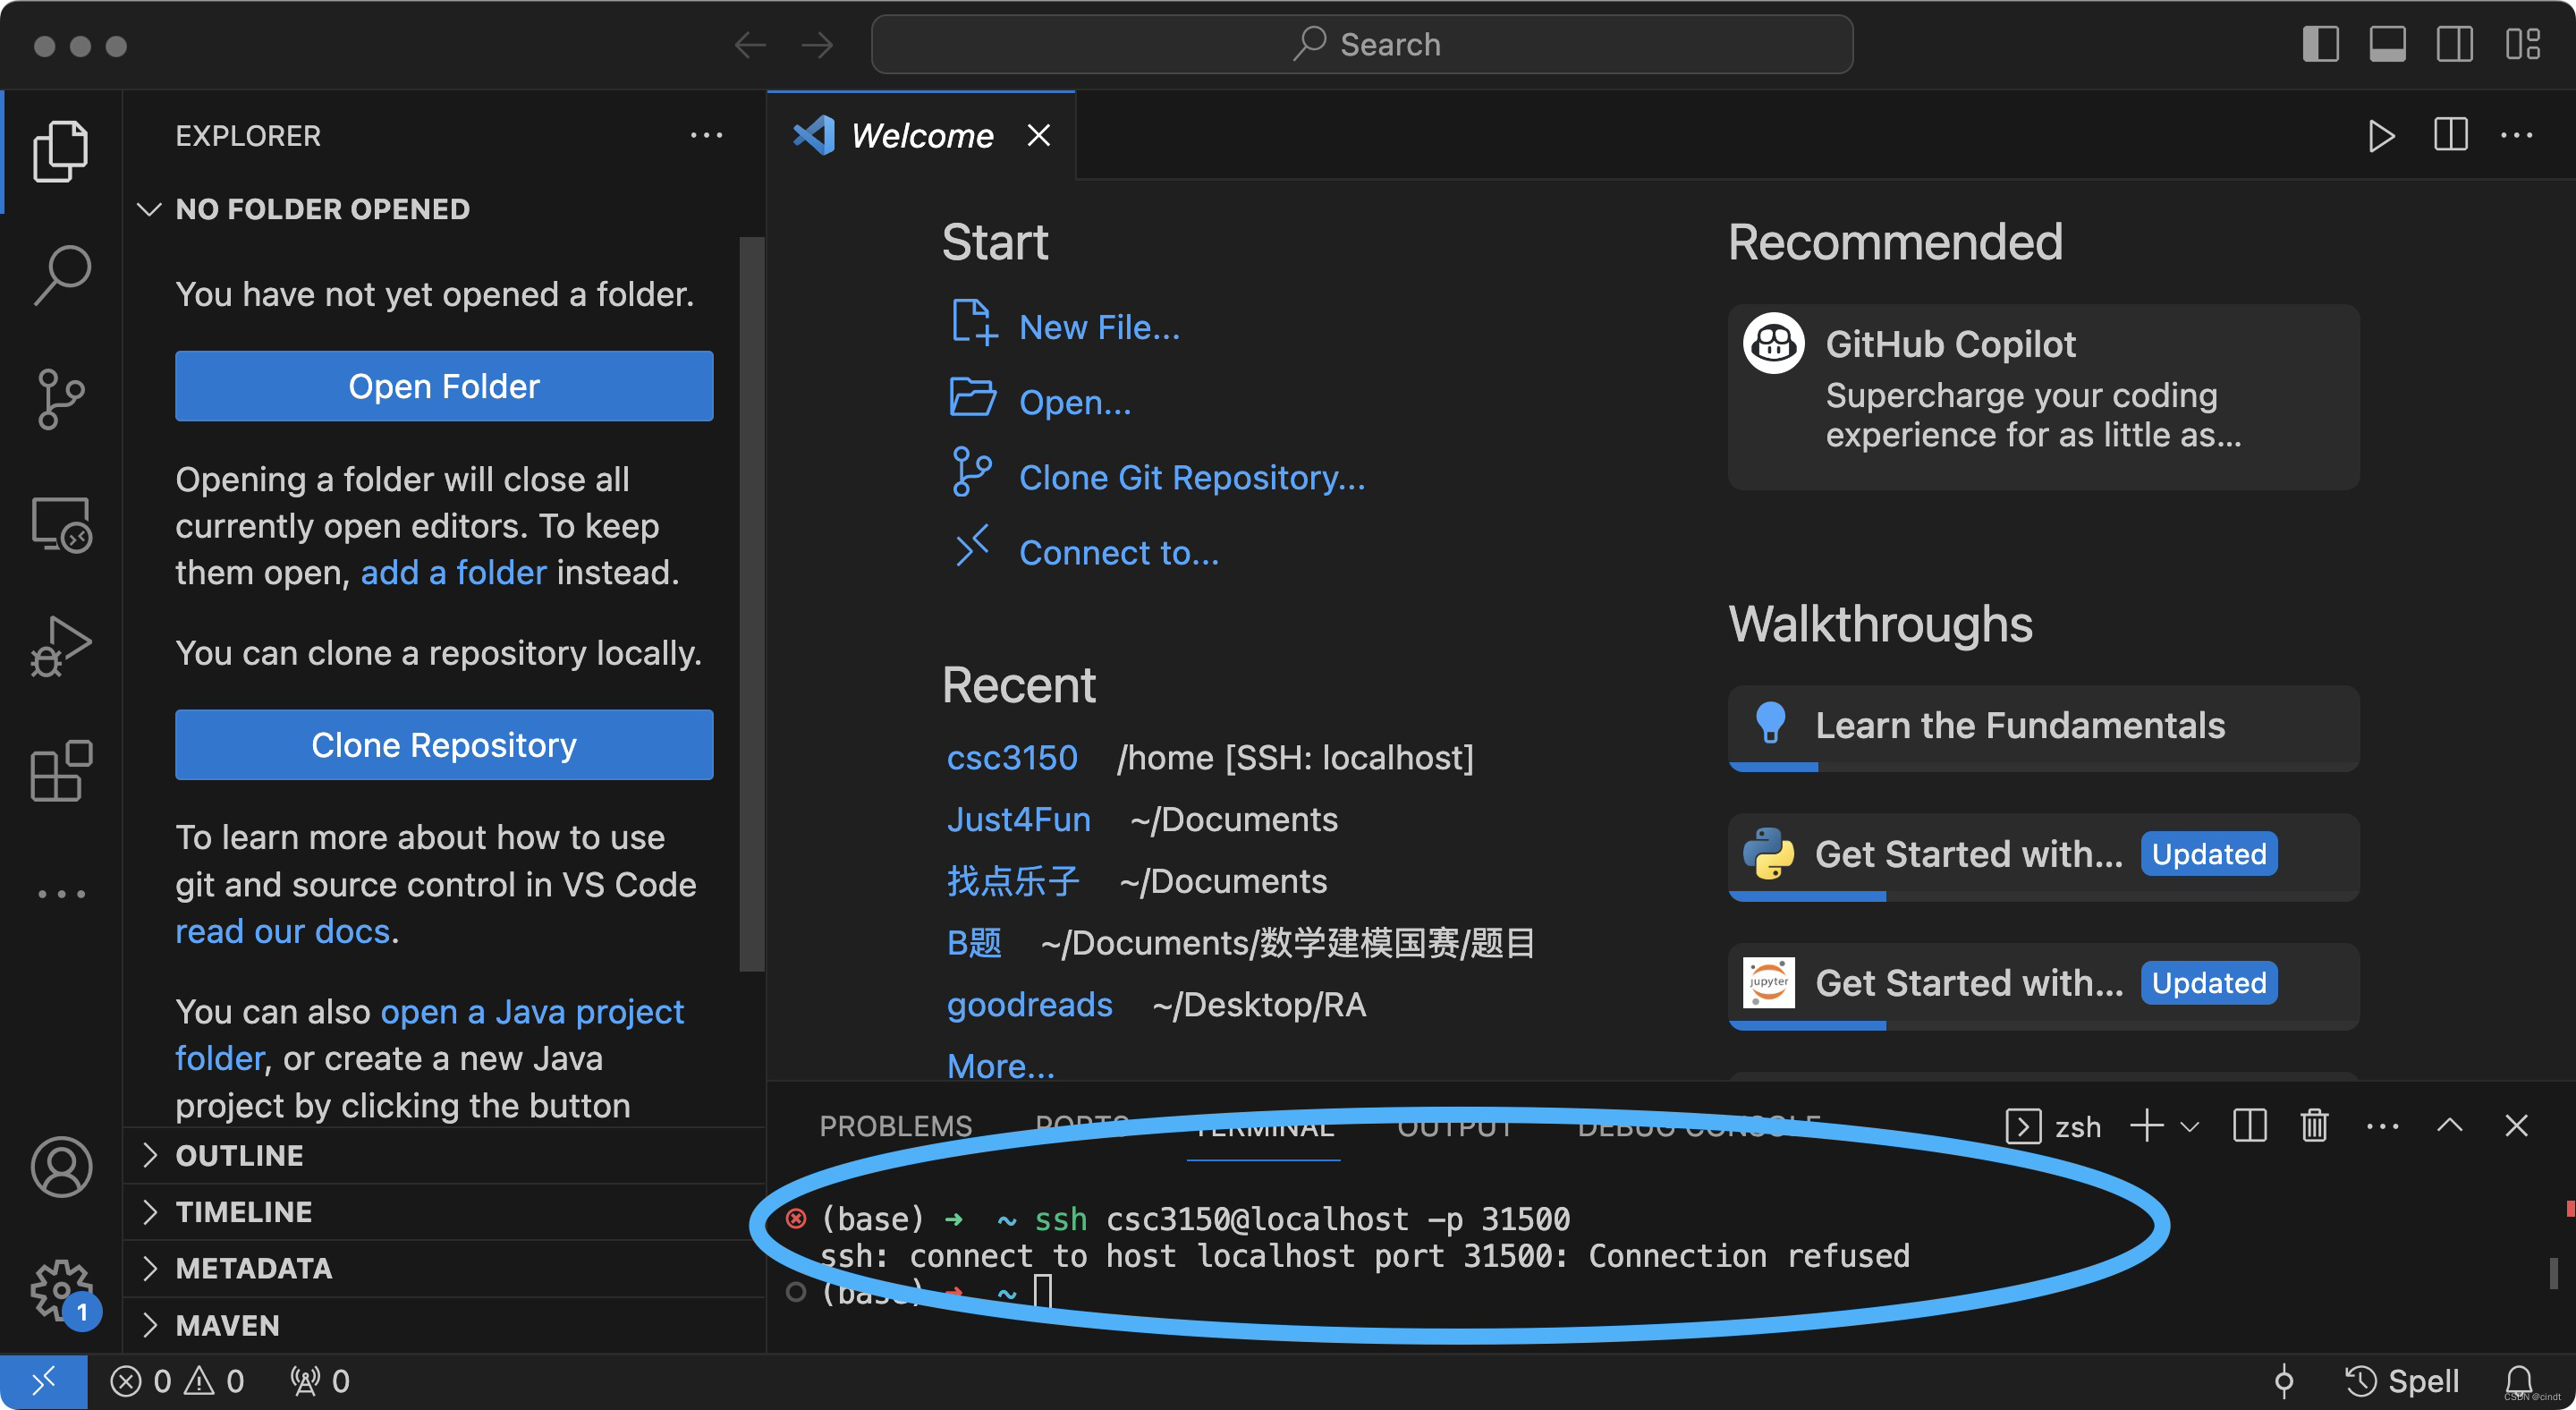
解决方法:
只要先在在UTM中boot一下安装好的虚拟机再在terminal中用ssh连接就可以了
会打开如下窗口
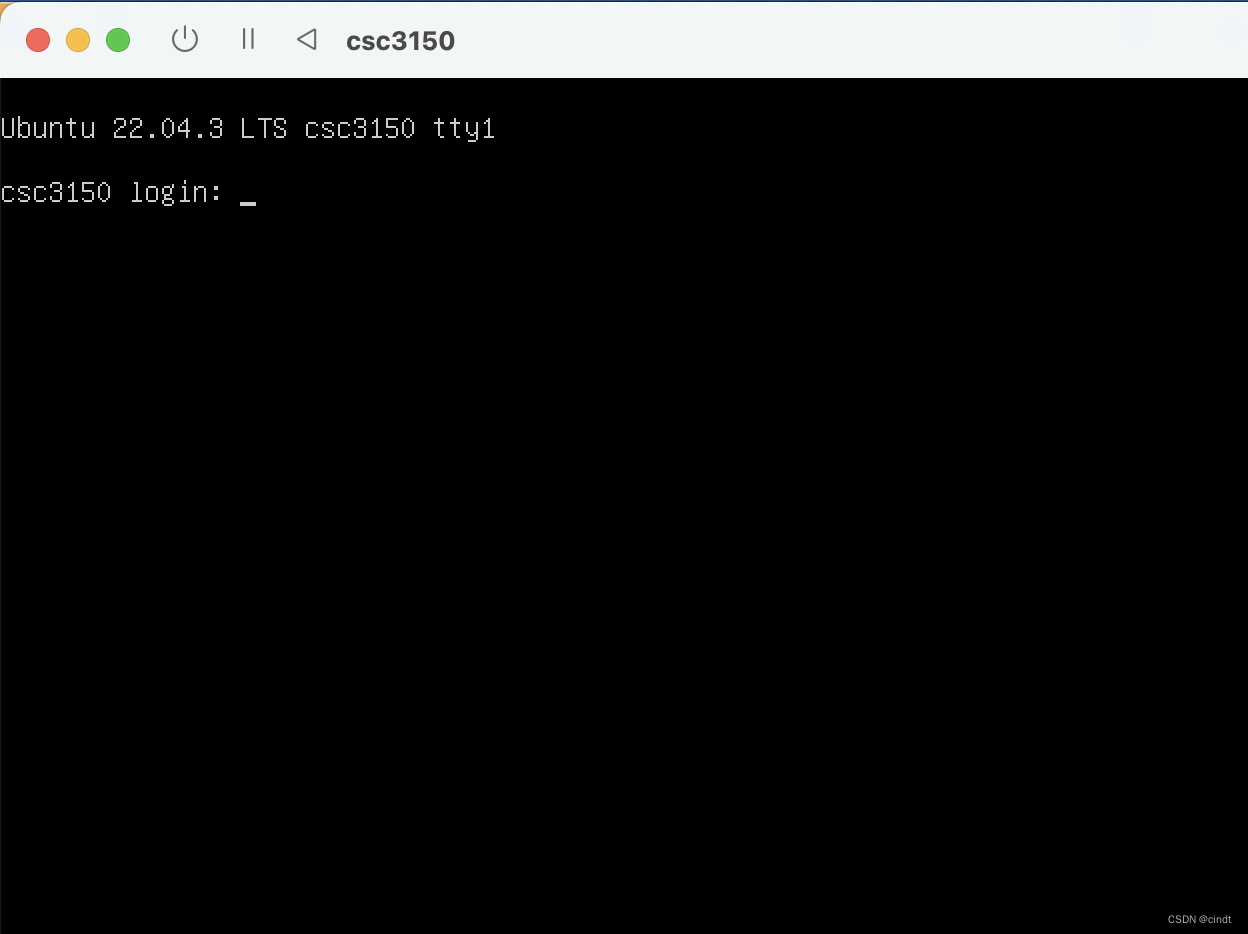
此时再在terminal中输入
ssh csc3150@localhost -p 31500提示输入密码,输入csc3150就链接成功了。
Set up VS Code
To simplified the workflow, you are recommended to set up Remote SSH plugin in VS Code.
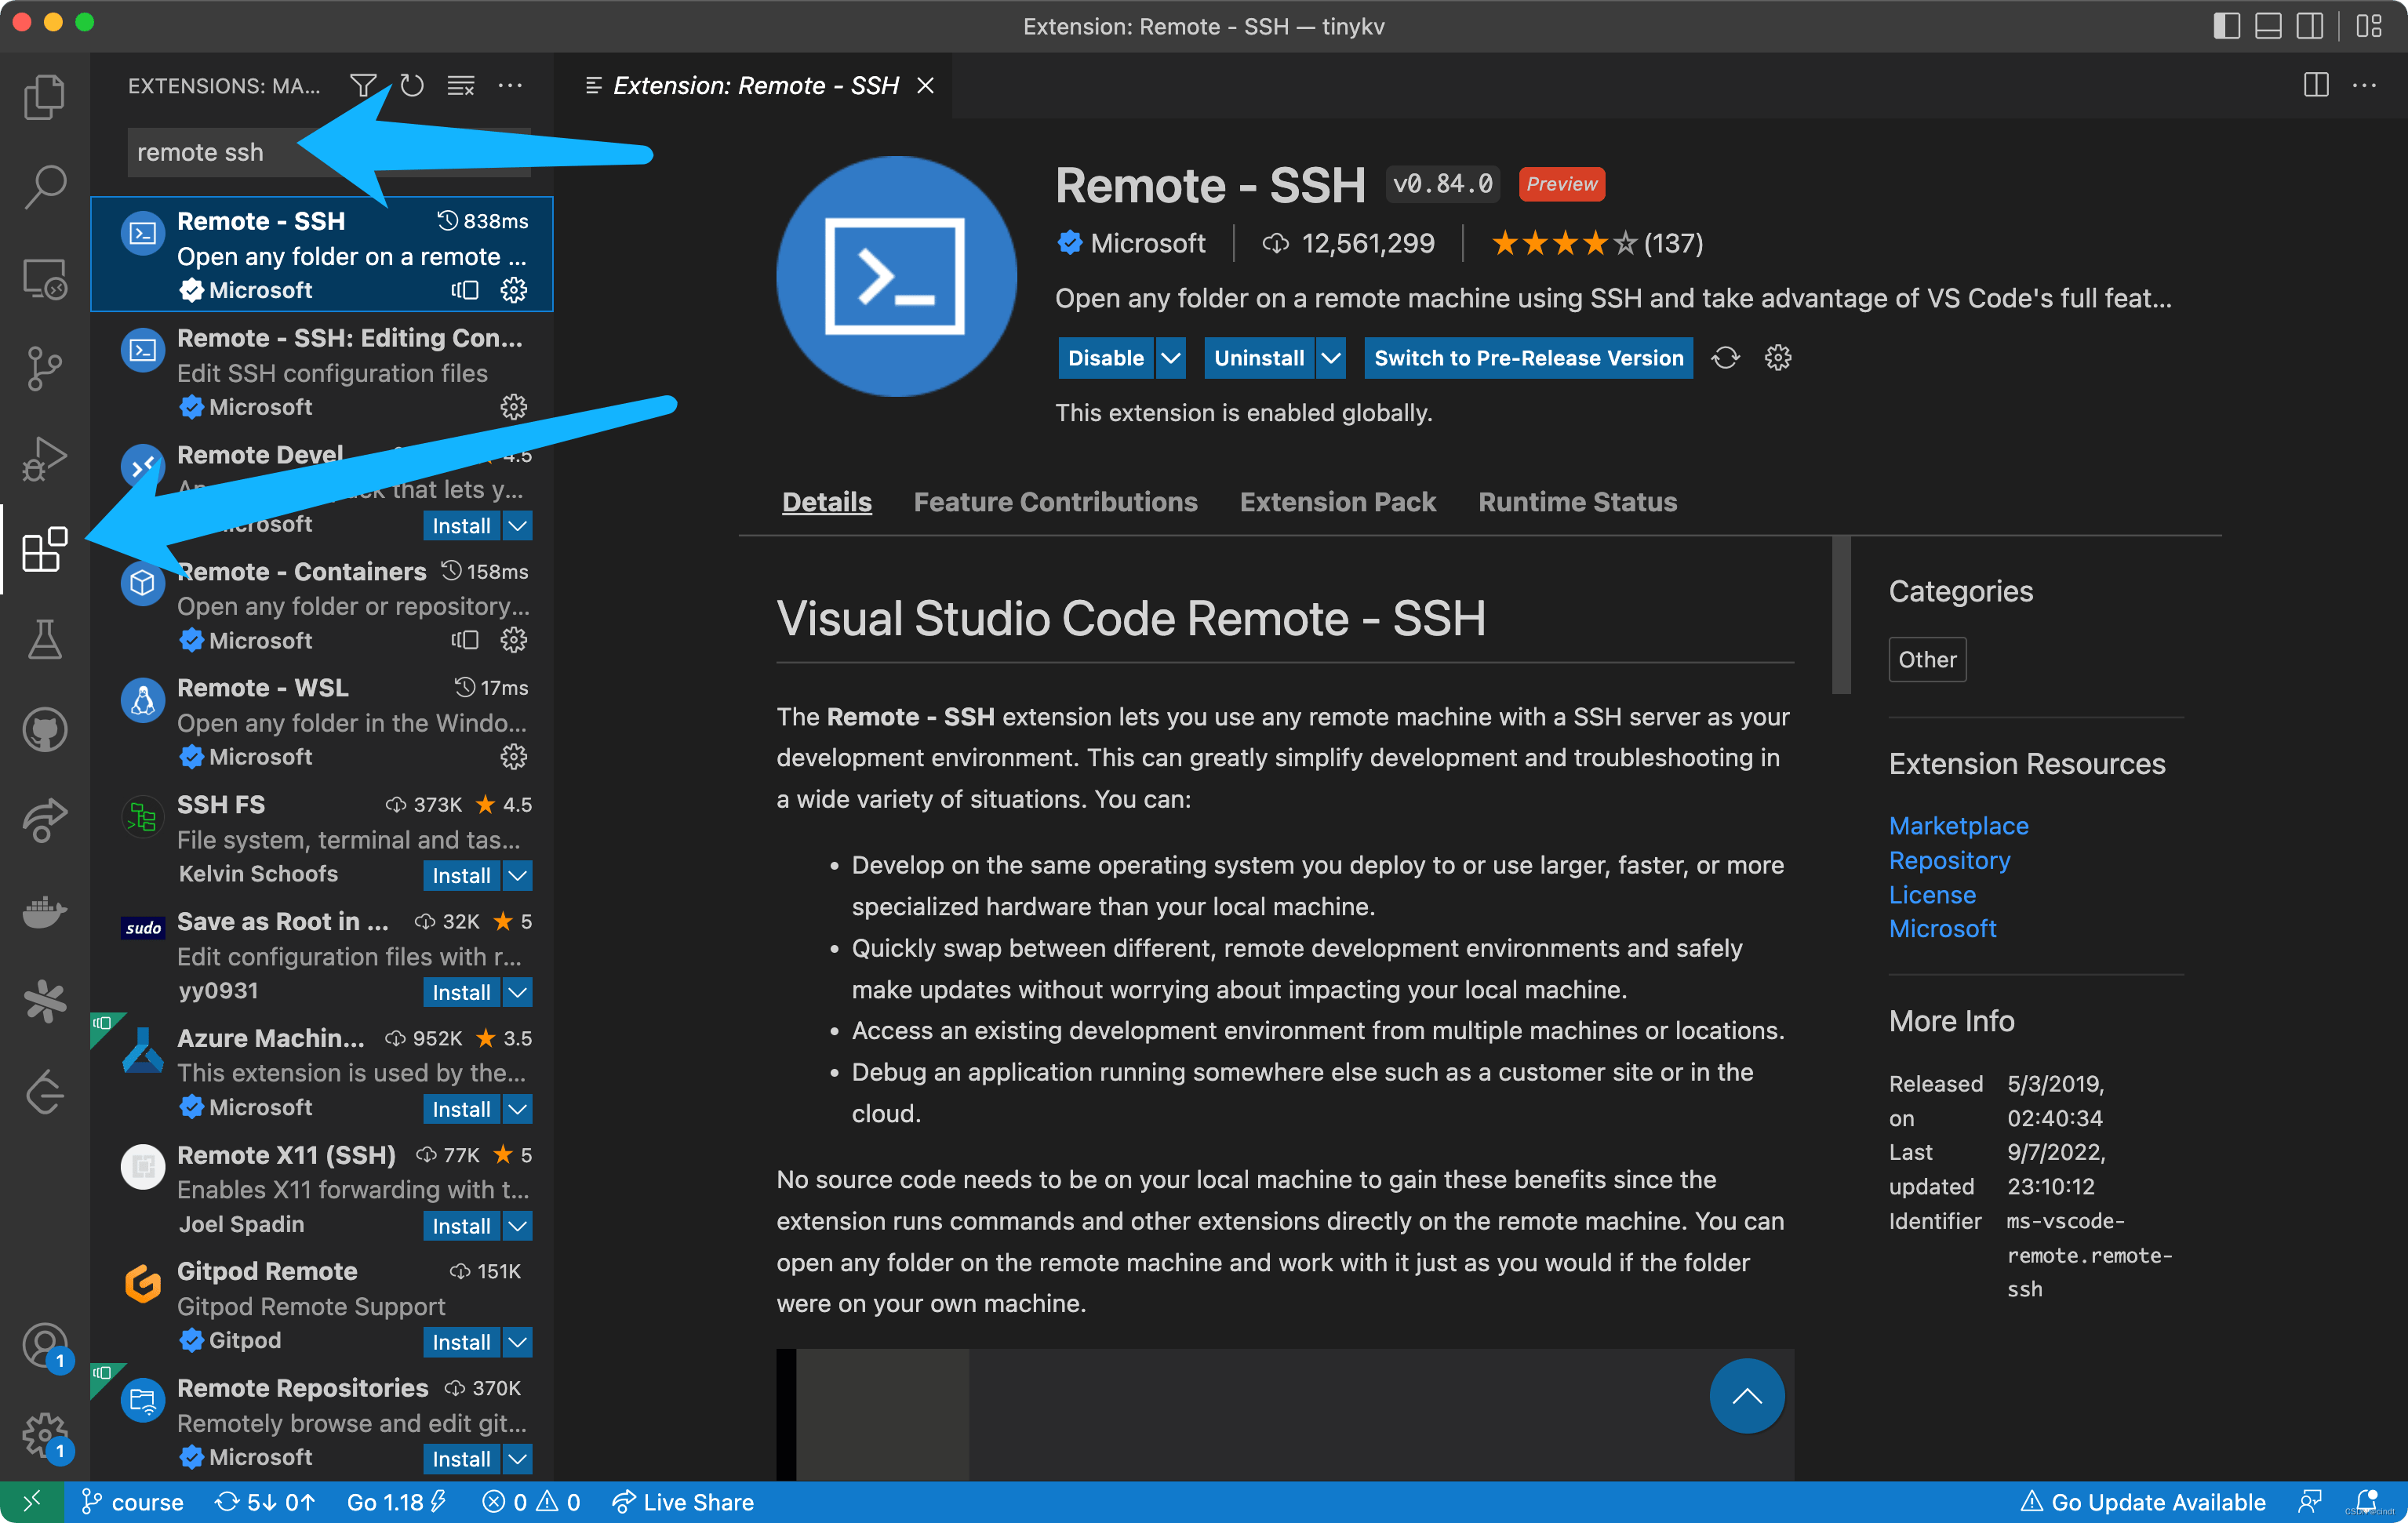
Install Remote SSH Plugin
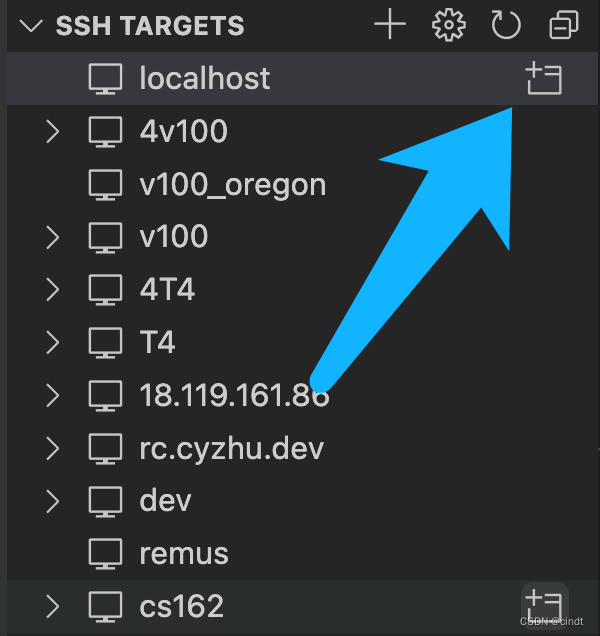
After installing, go to the remote explorer tab, click add in SSH-TARGETS.
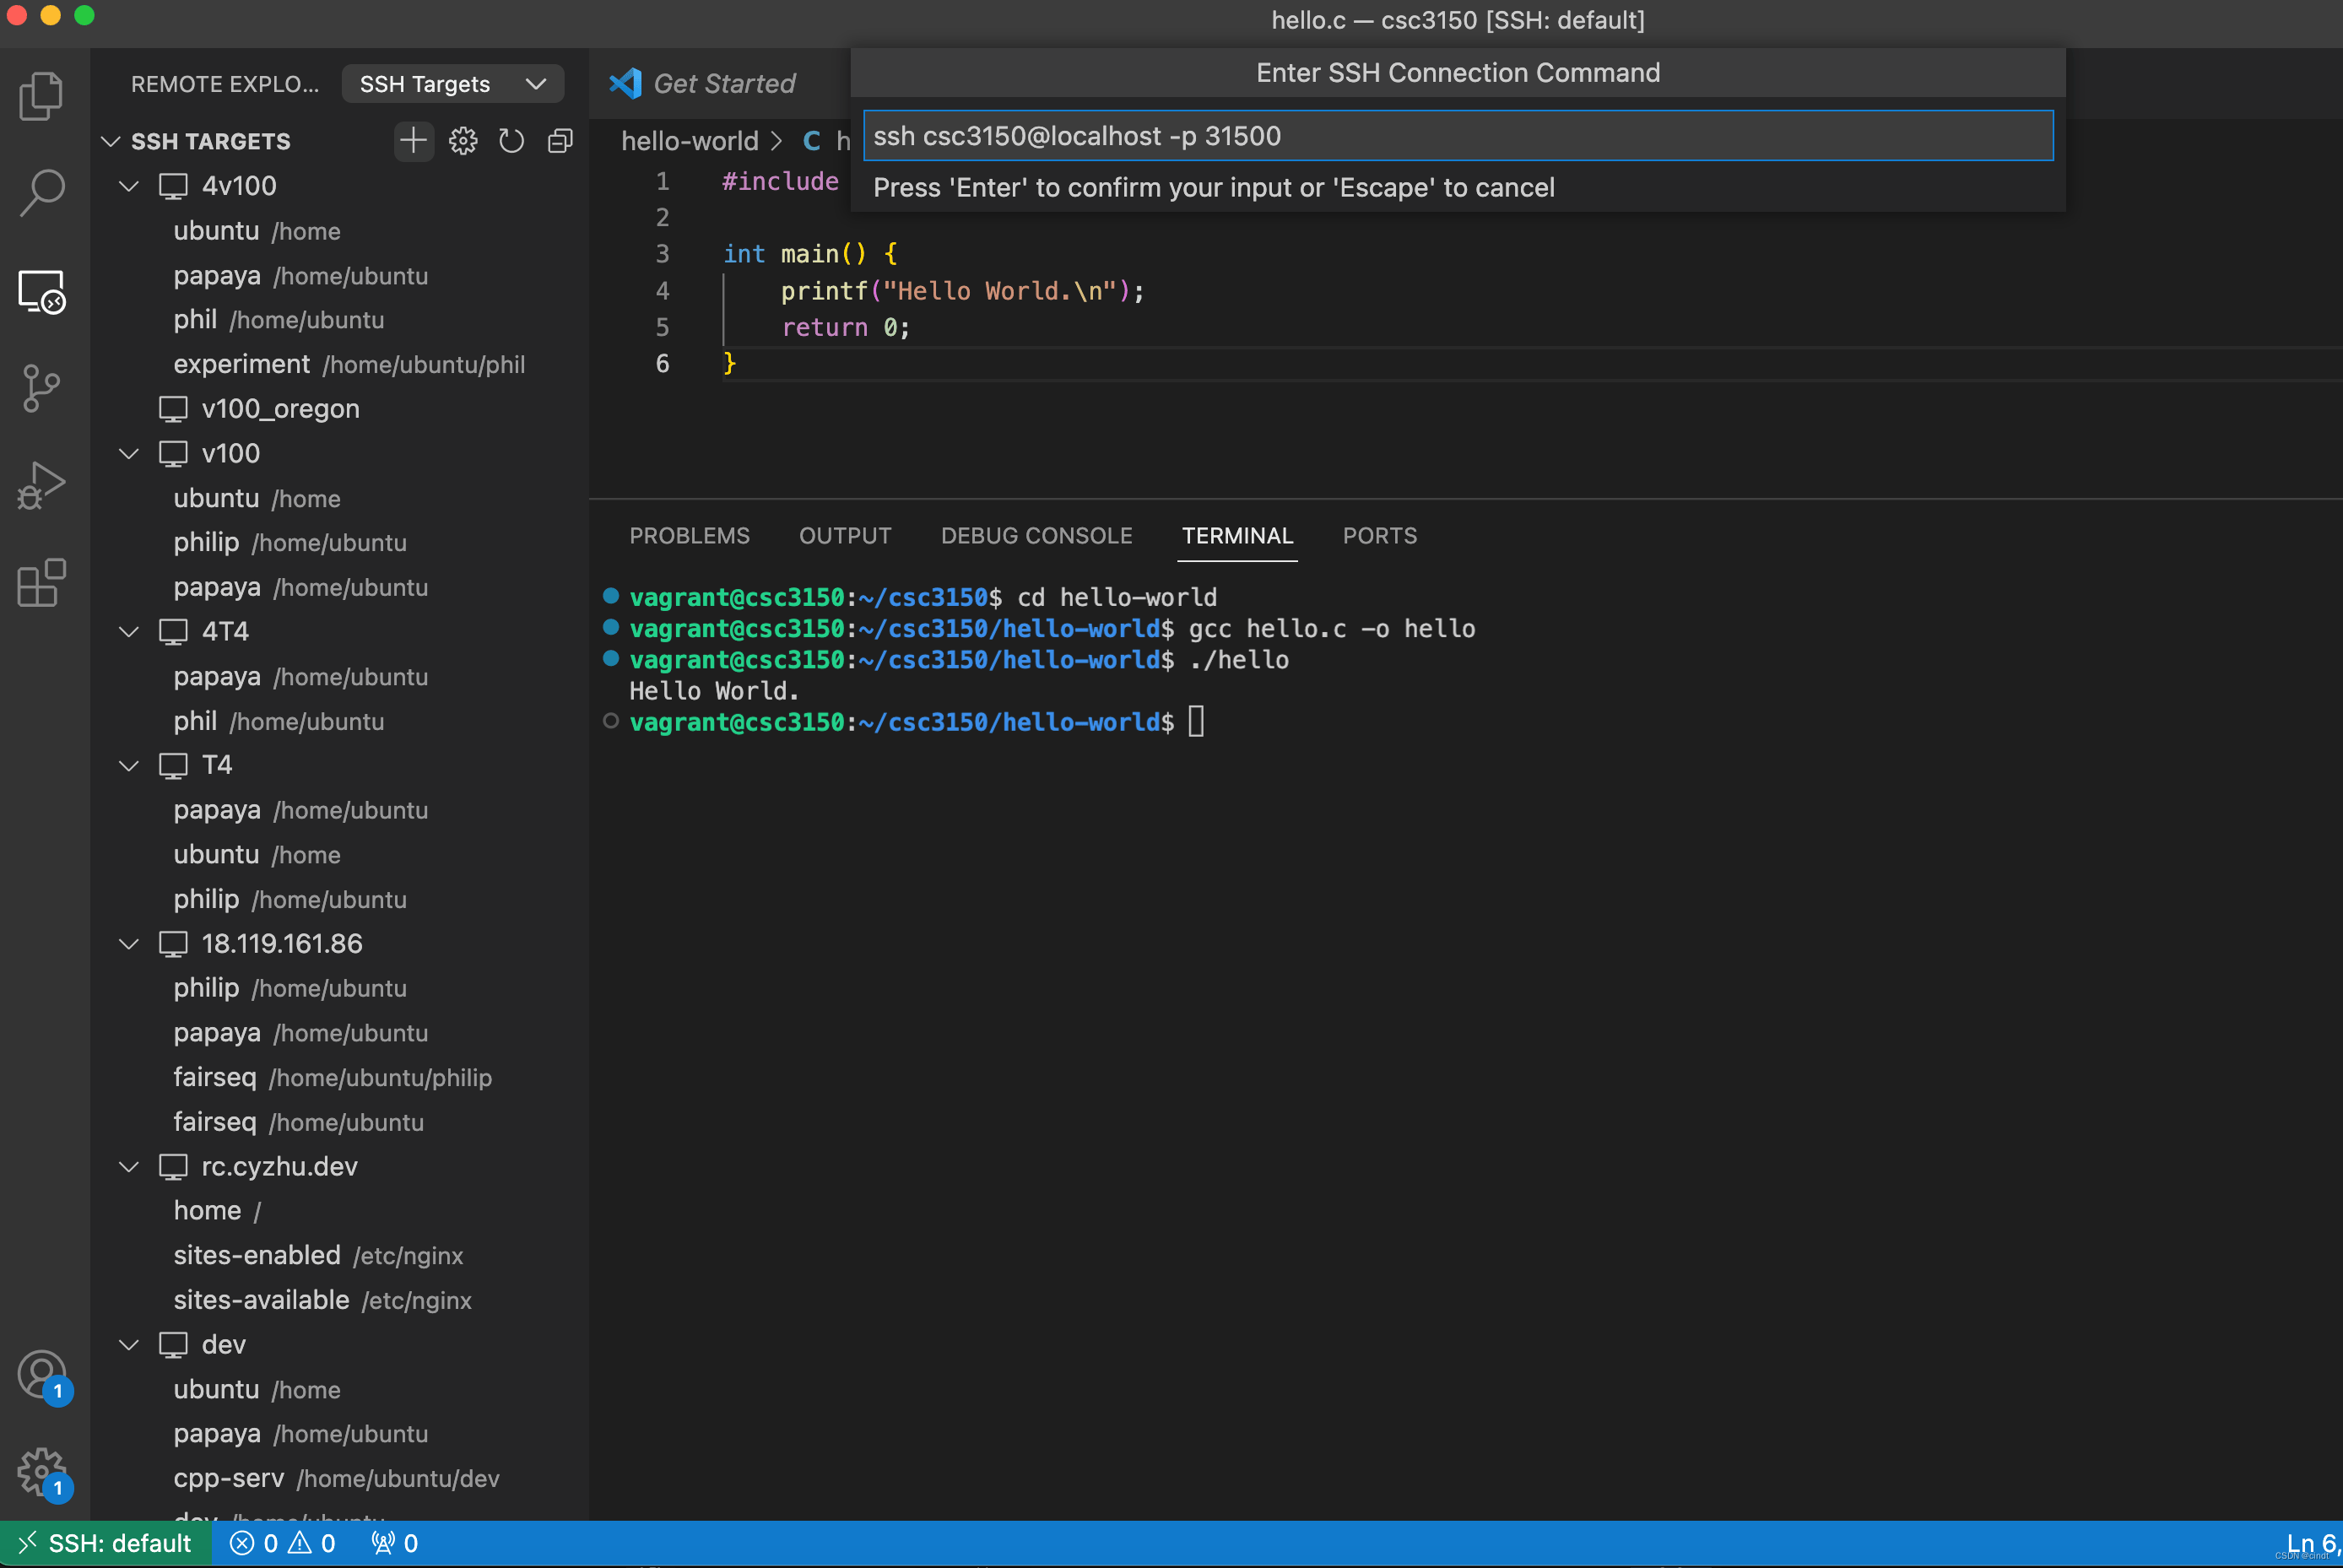
这一步的时候我的VSC没有SSH-TARGETS,我的VSC显示如下

没有关系,直接点击SSH的加号,然后按照上上图中的要求输入。
Launch a new window with target called "localhost"
这里虽然会“it may take some time for it to load”,但是不要一直等着,在VSC窗口上方会让你输入密码,笔者这里就是没有看到所以一直等到time out了好几次,非常浪费时间。
The first time you connect to the VM via VS Code, it may take some time for it to load. Wait patiently. After it finshes loading, start a terminal.
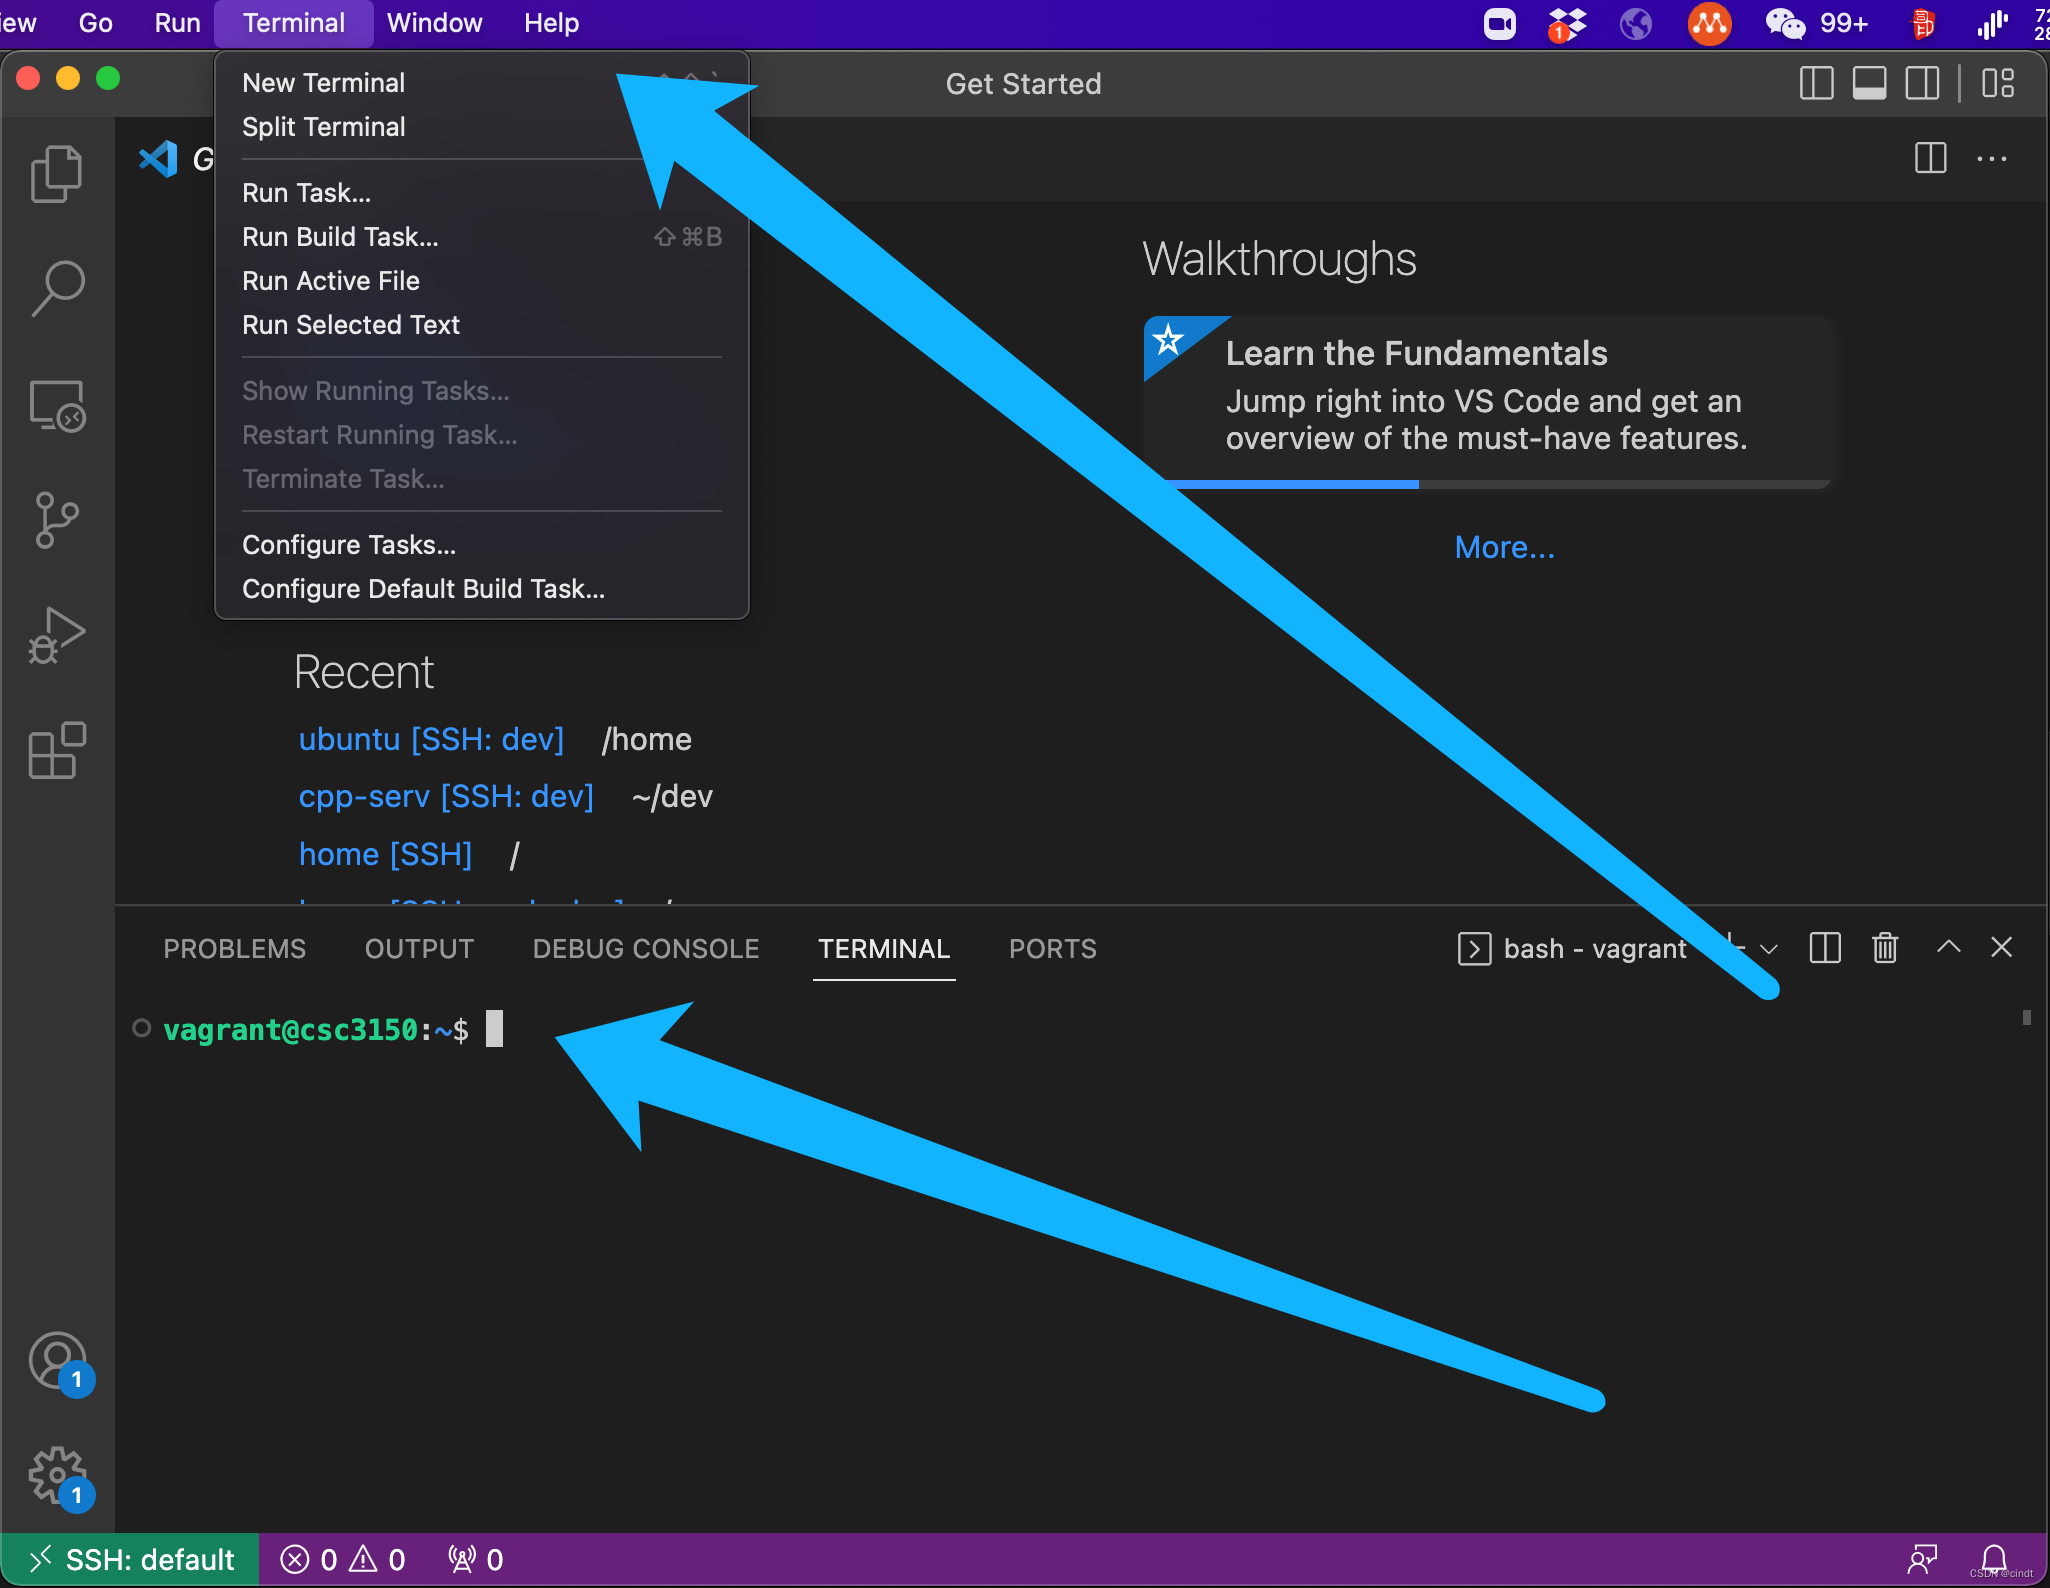
In the terminal you just opened, install essential dependencies and libraries:
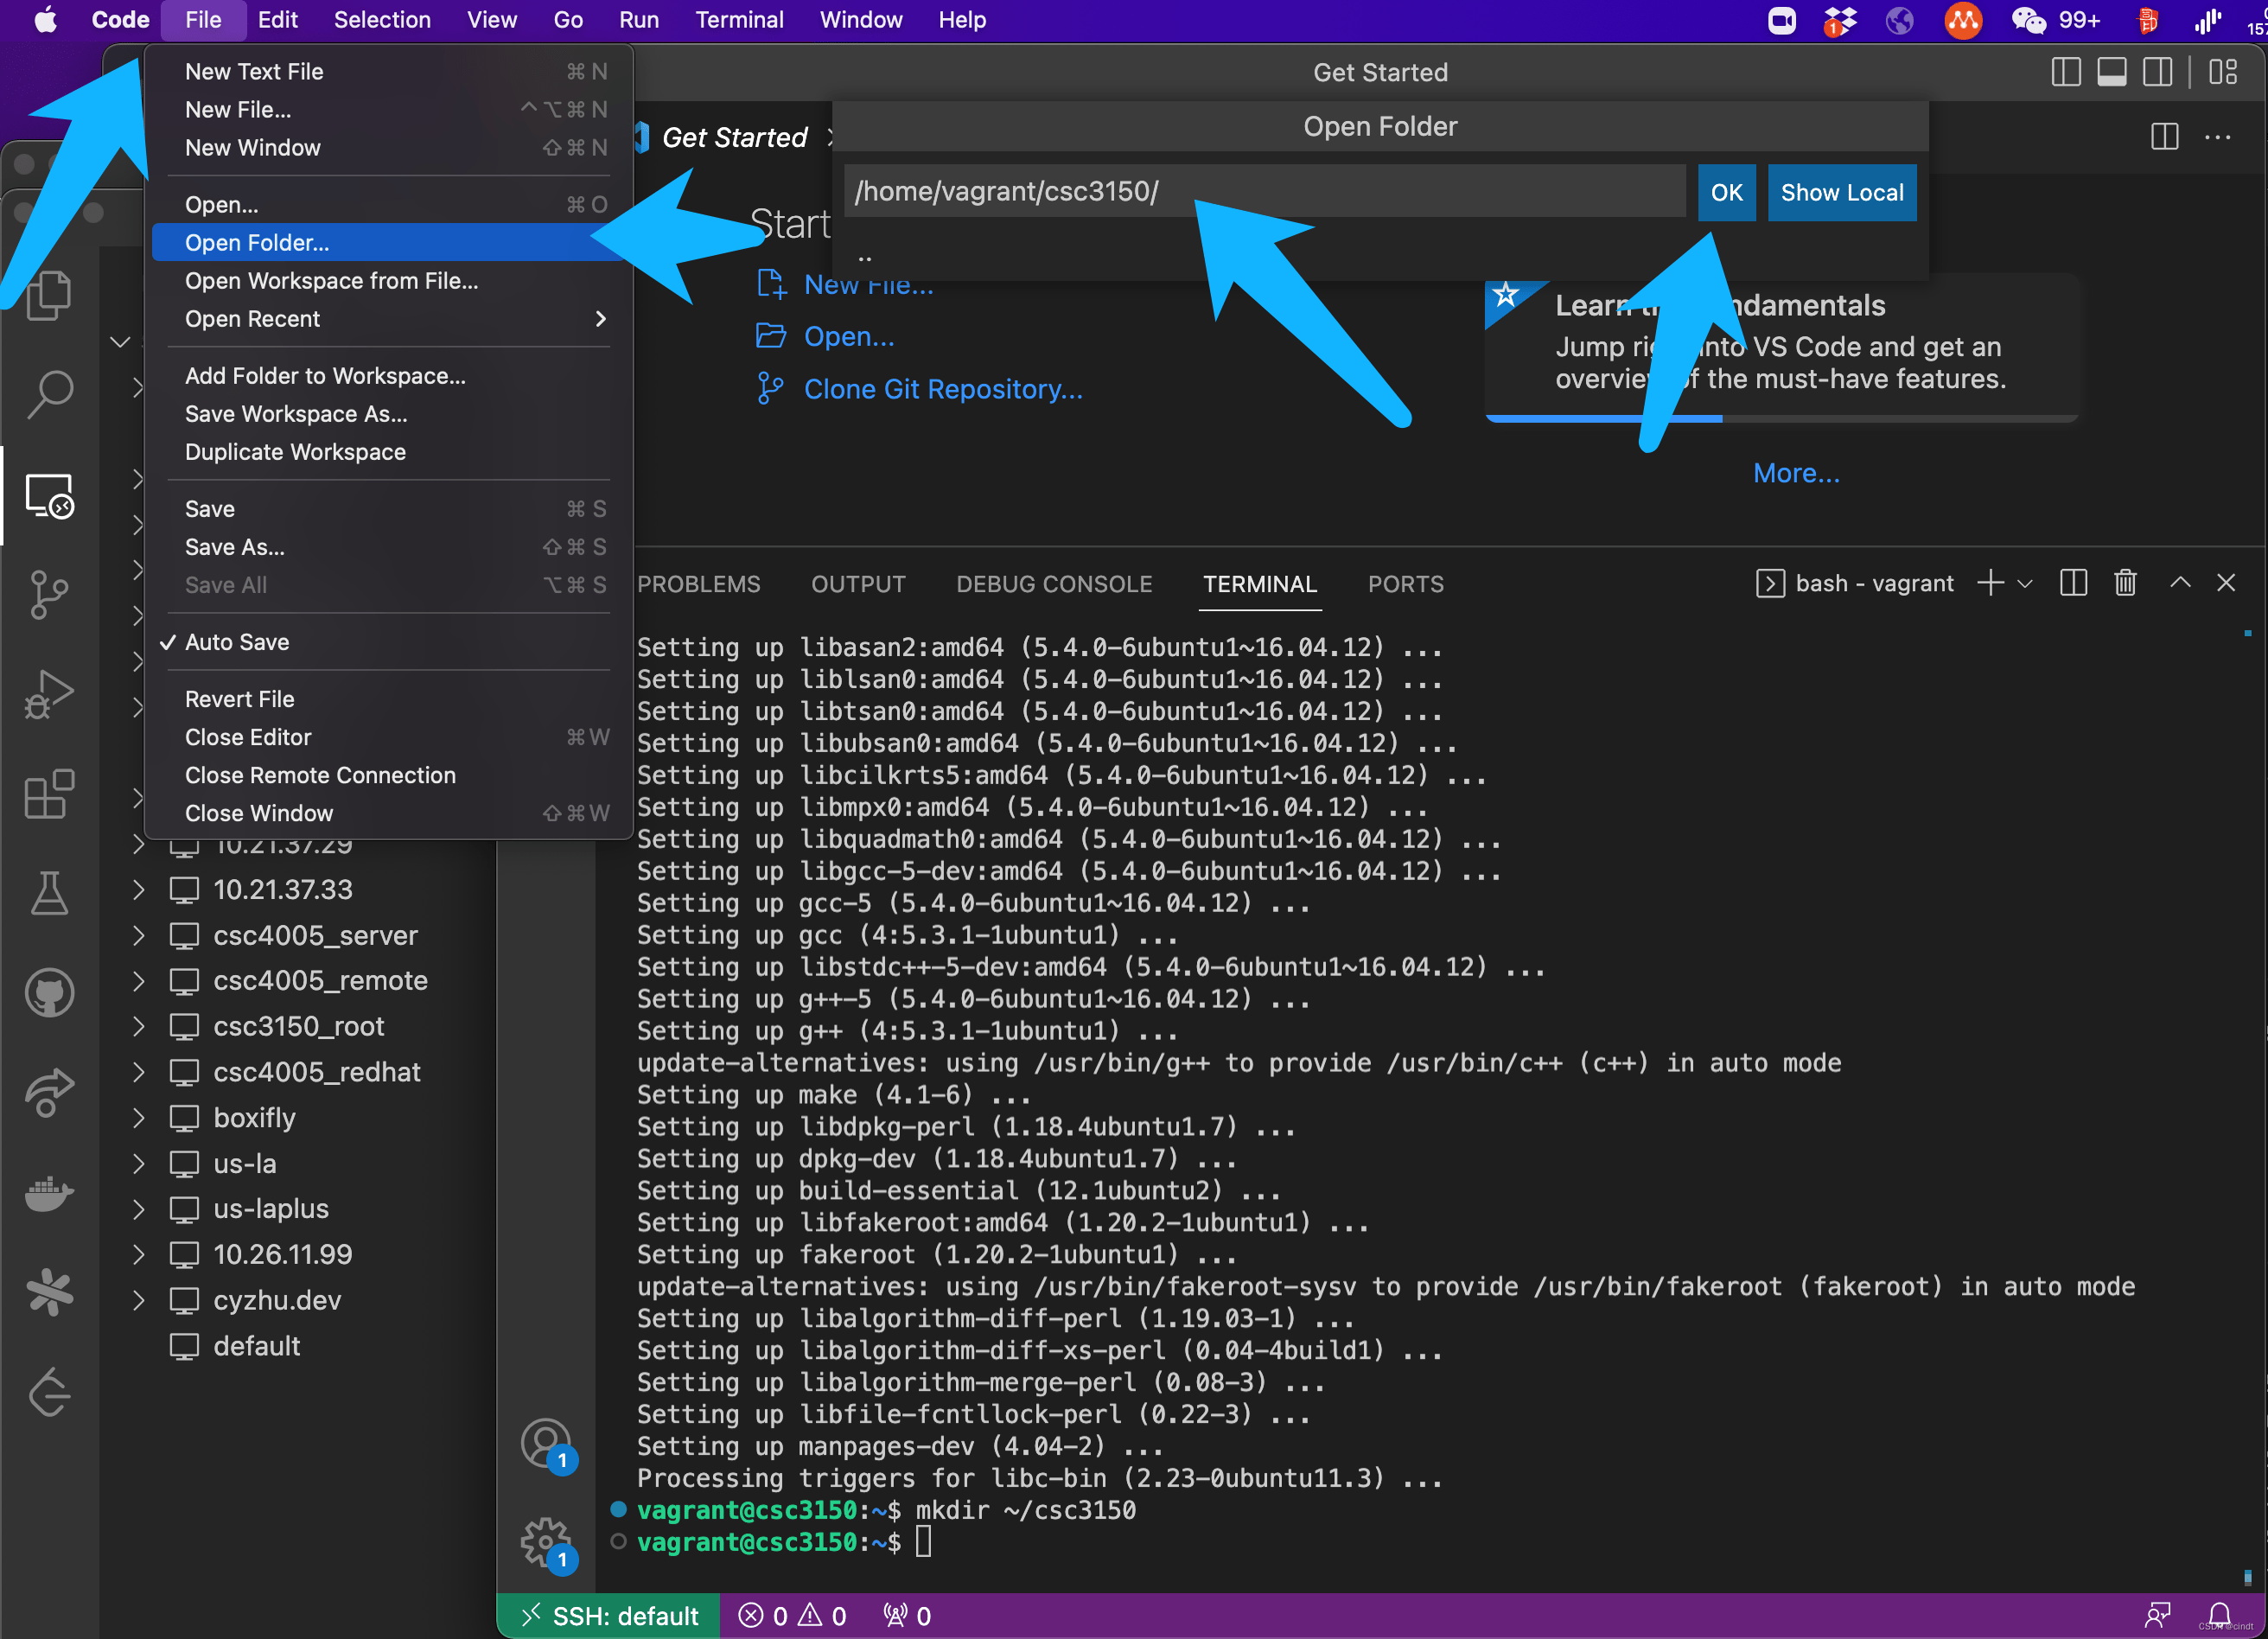
sudo apt update && sudo apt install -y build-essential(it may take a while). After it finishes, create a directory for the course:
mkdir -p ~/csc3150After everything, you can open a folder in the VS Code window to locate to the directory you create:
Finally, try a hello world program on the VM
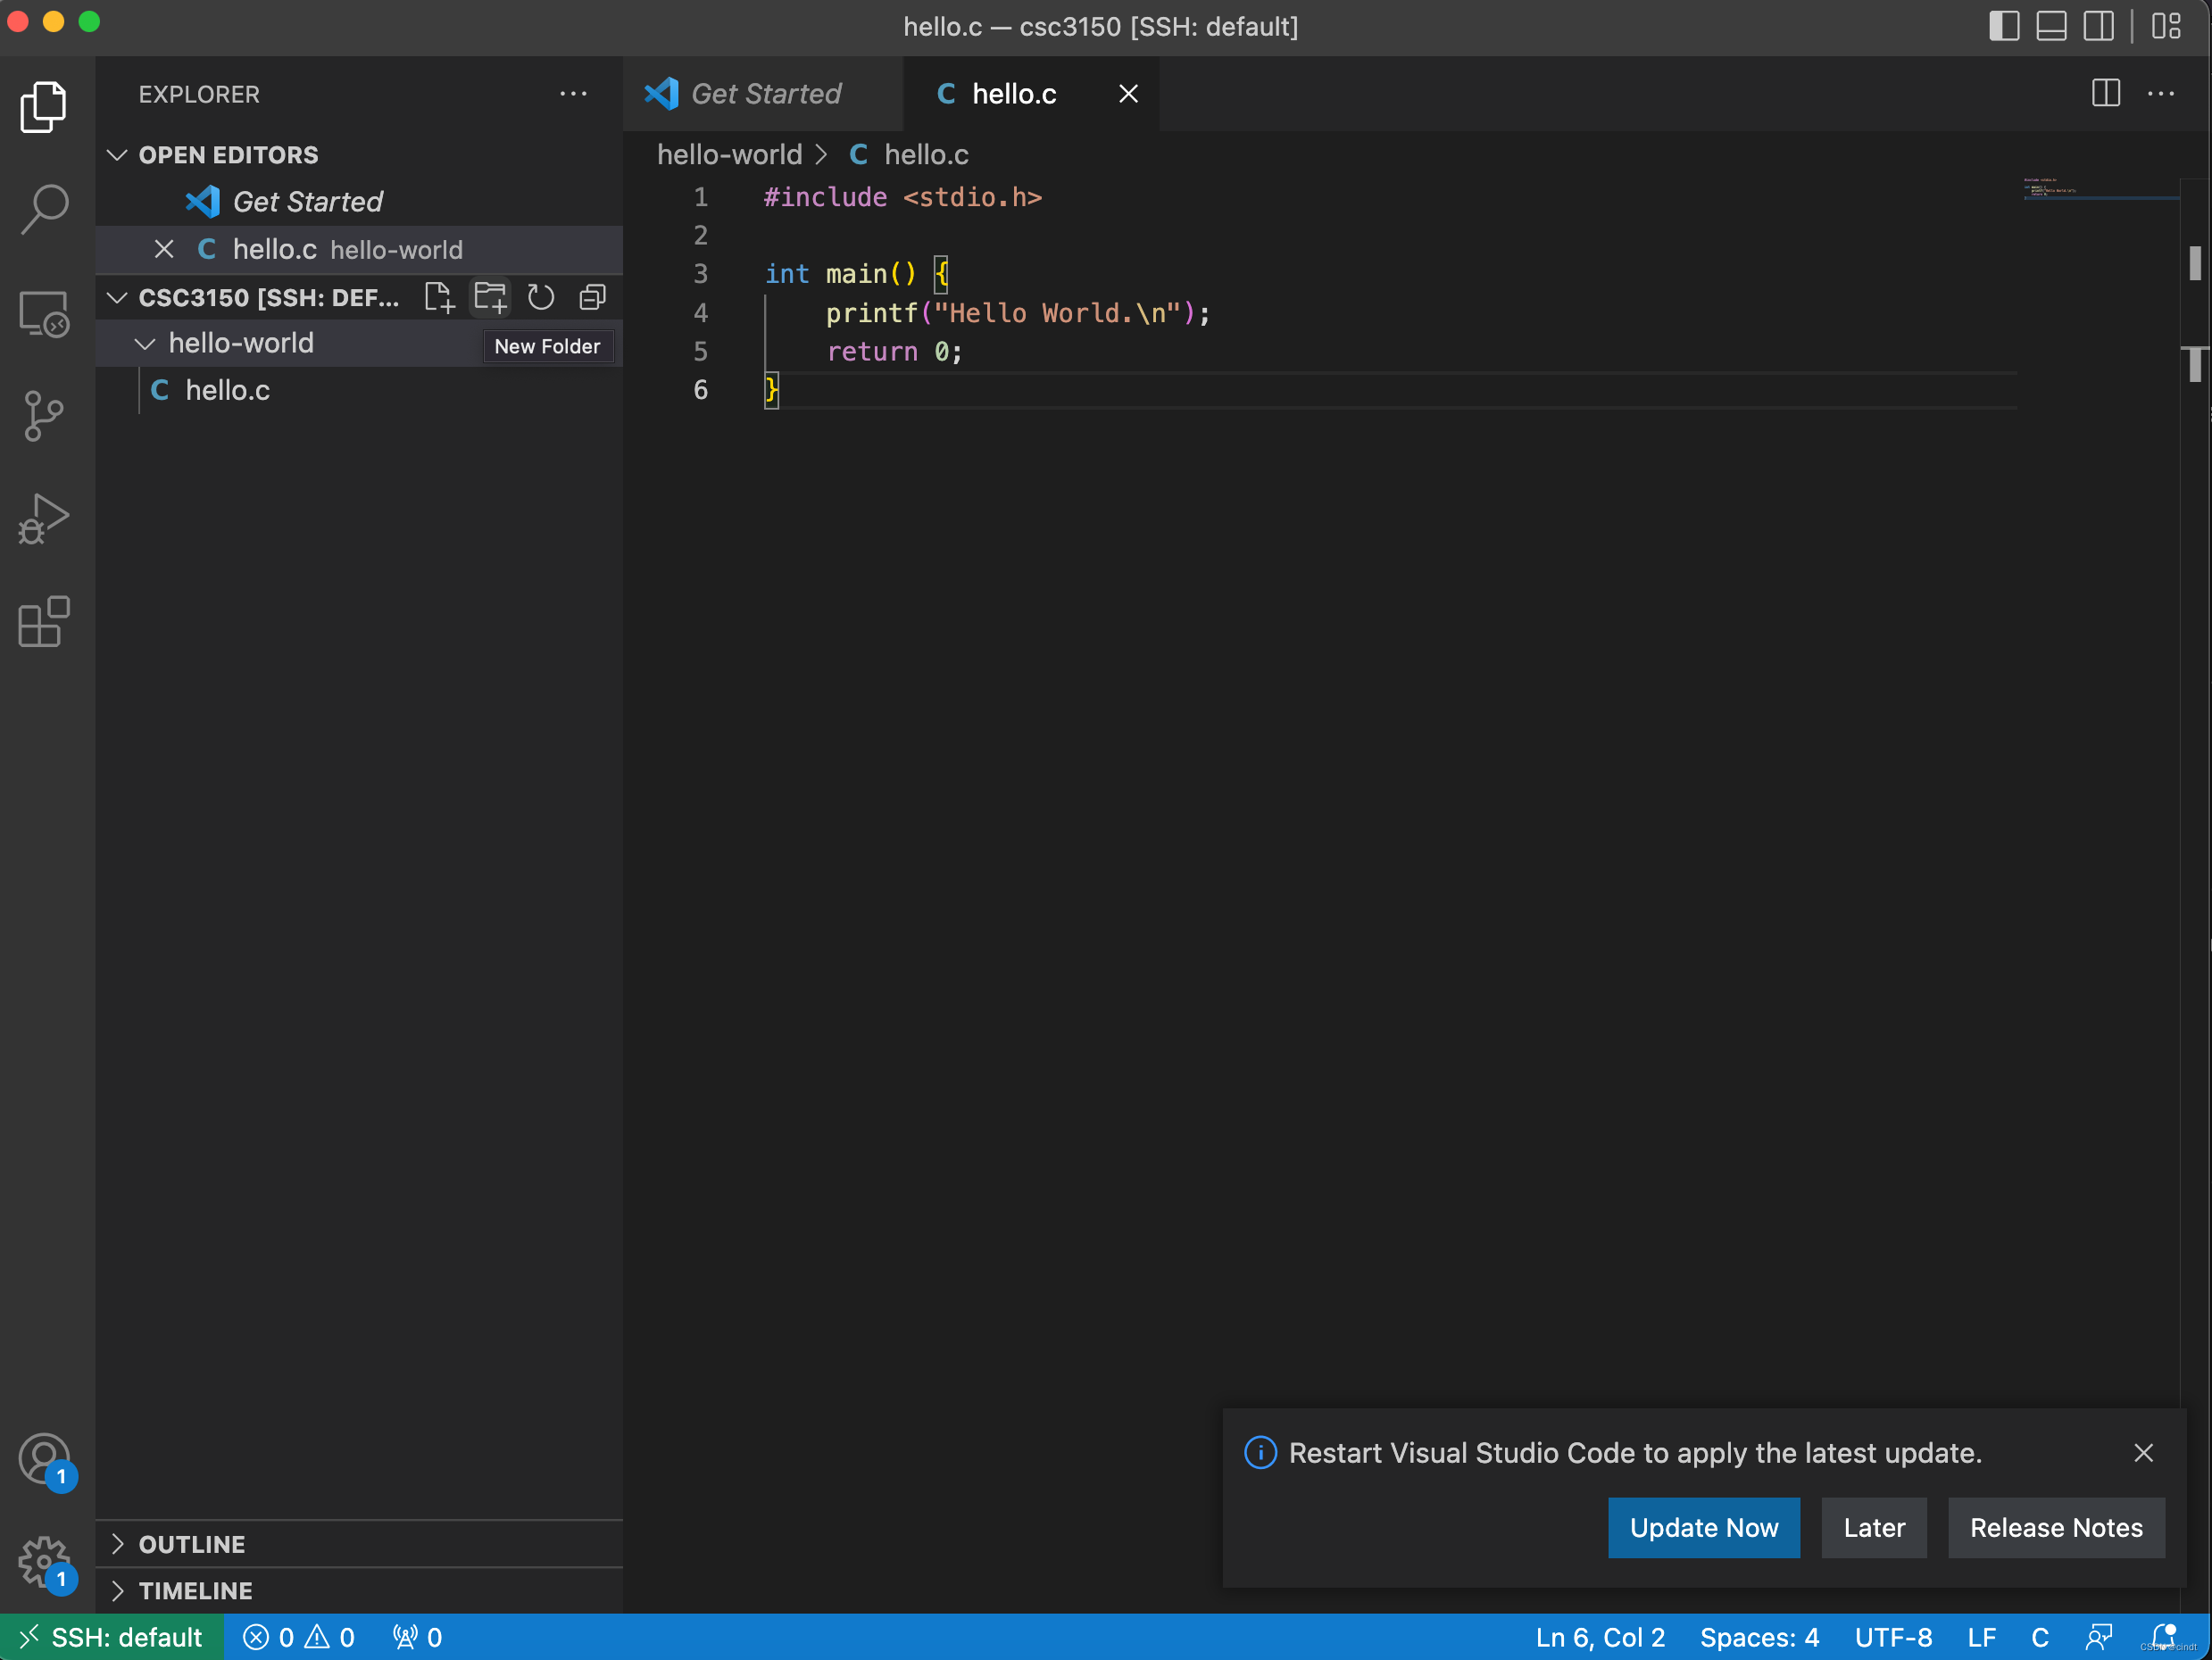
As usual, open a (remote) terminal in VS Code and compile the hello world program (gcc hello.c -o hello) and try to run it.
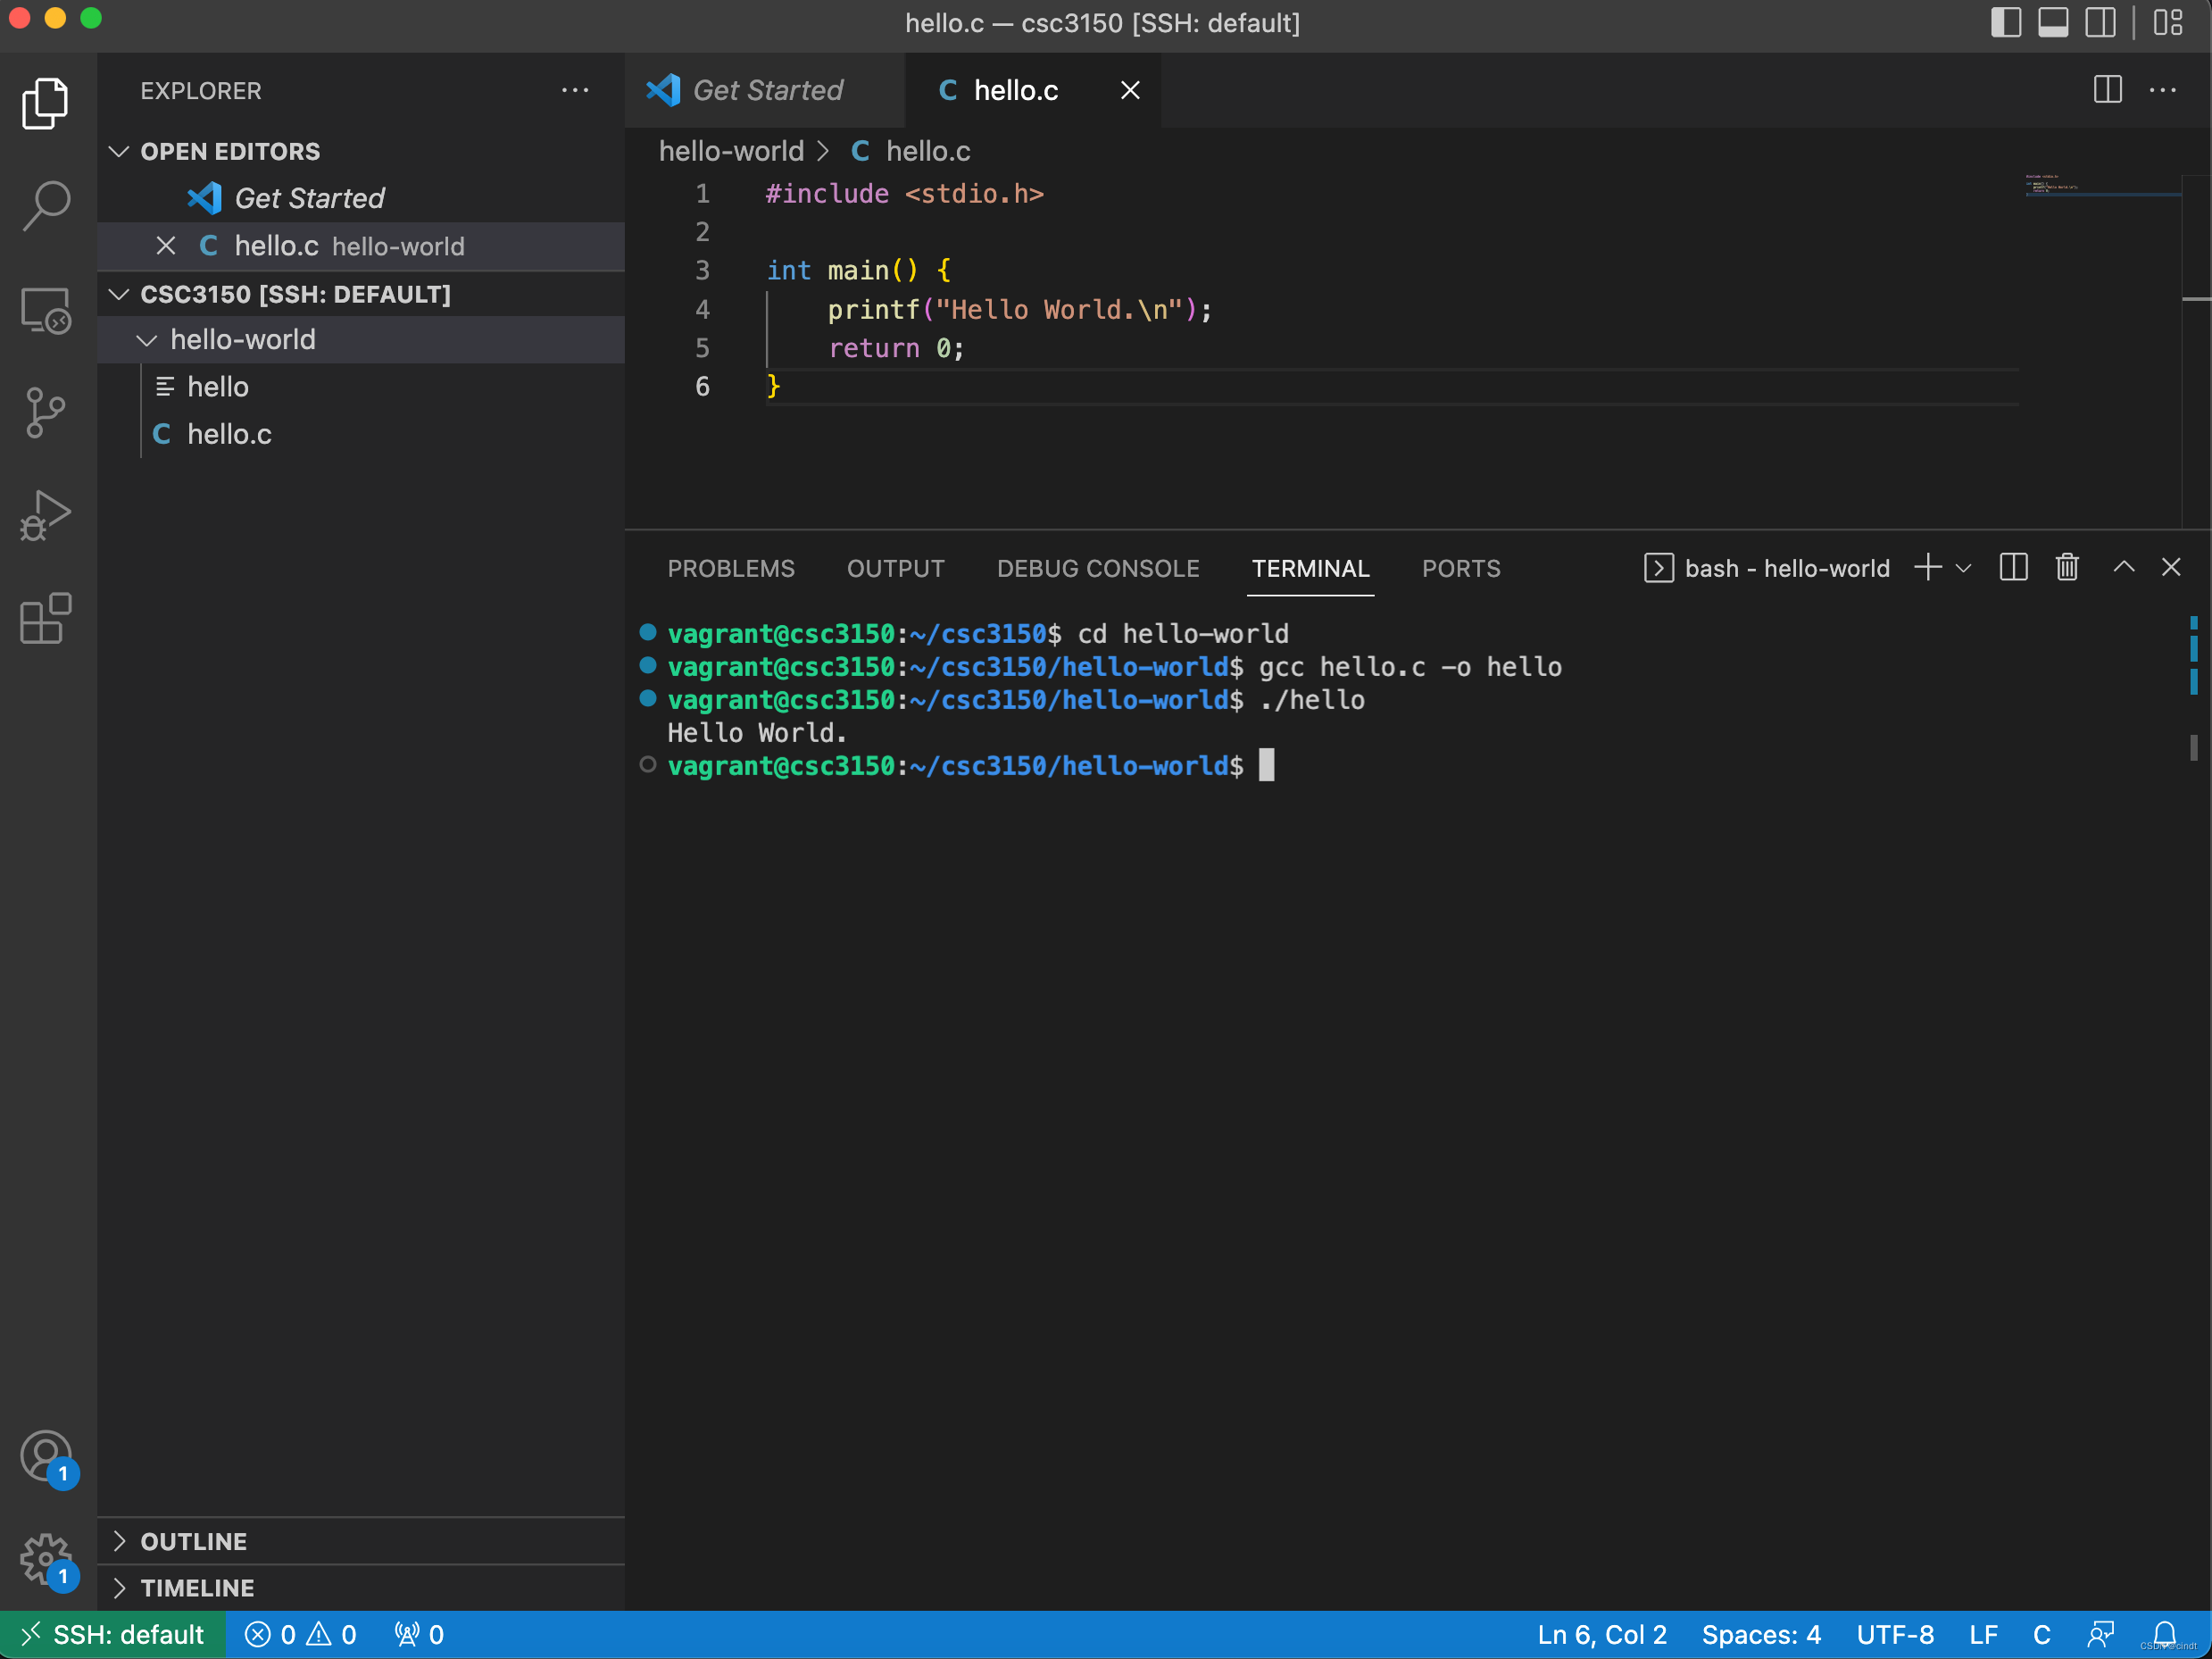
You are good to go
Set up Private Key Auth. (Optional)
You are recommended to set up private key ssh authentication to avoid inputing password everytime and frequent disconnection from the ssh server on VM. Procedures are as follows:
Generate ssh key pair: in terminal execute ssh-keygen leave both the file name and passphase blank (adopt default settings).
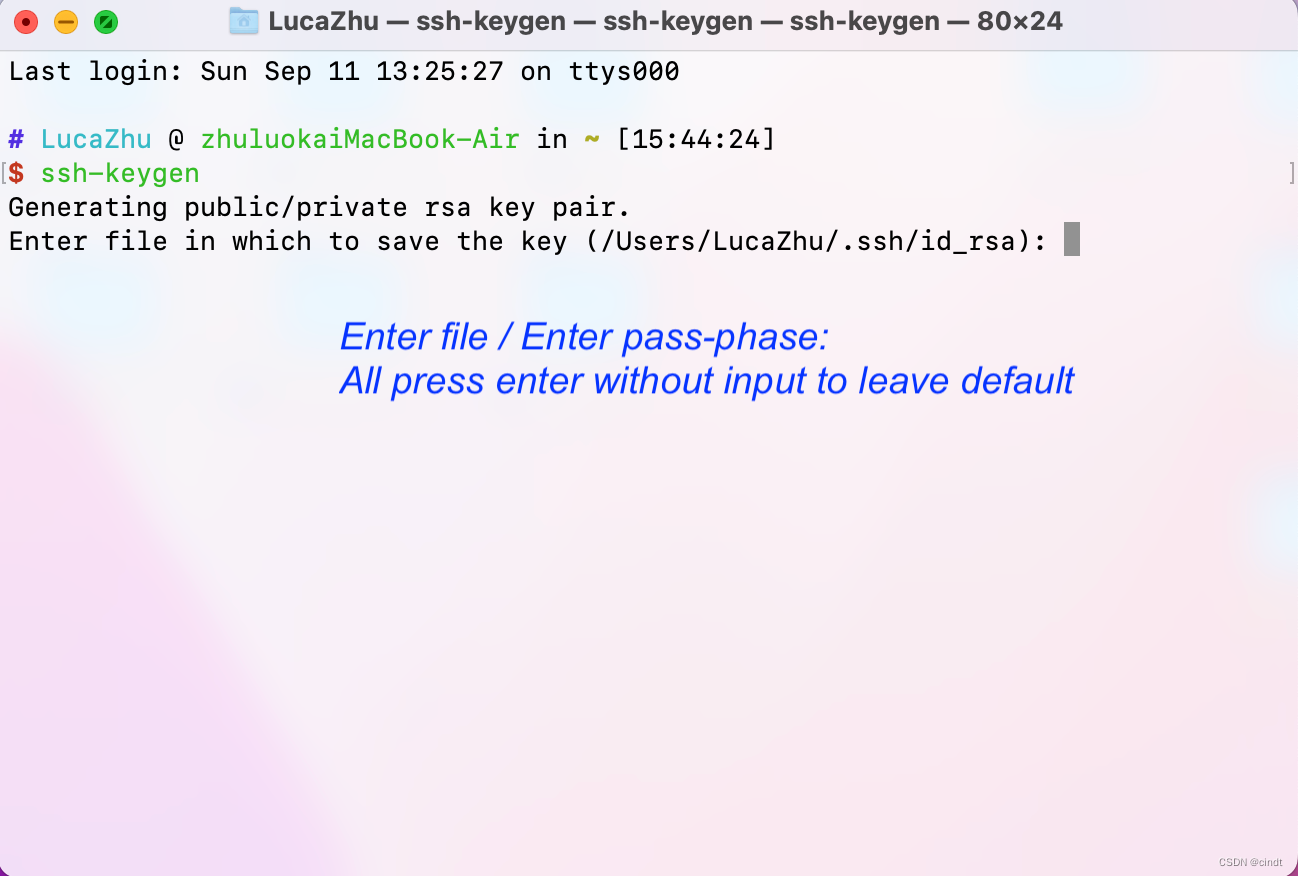
Generate SSH Key Pair
In some cases, you may already have a key named id_rsa in ~/.ssh/. It's fine and do NOT override the previous one (as it may be used by other applications).
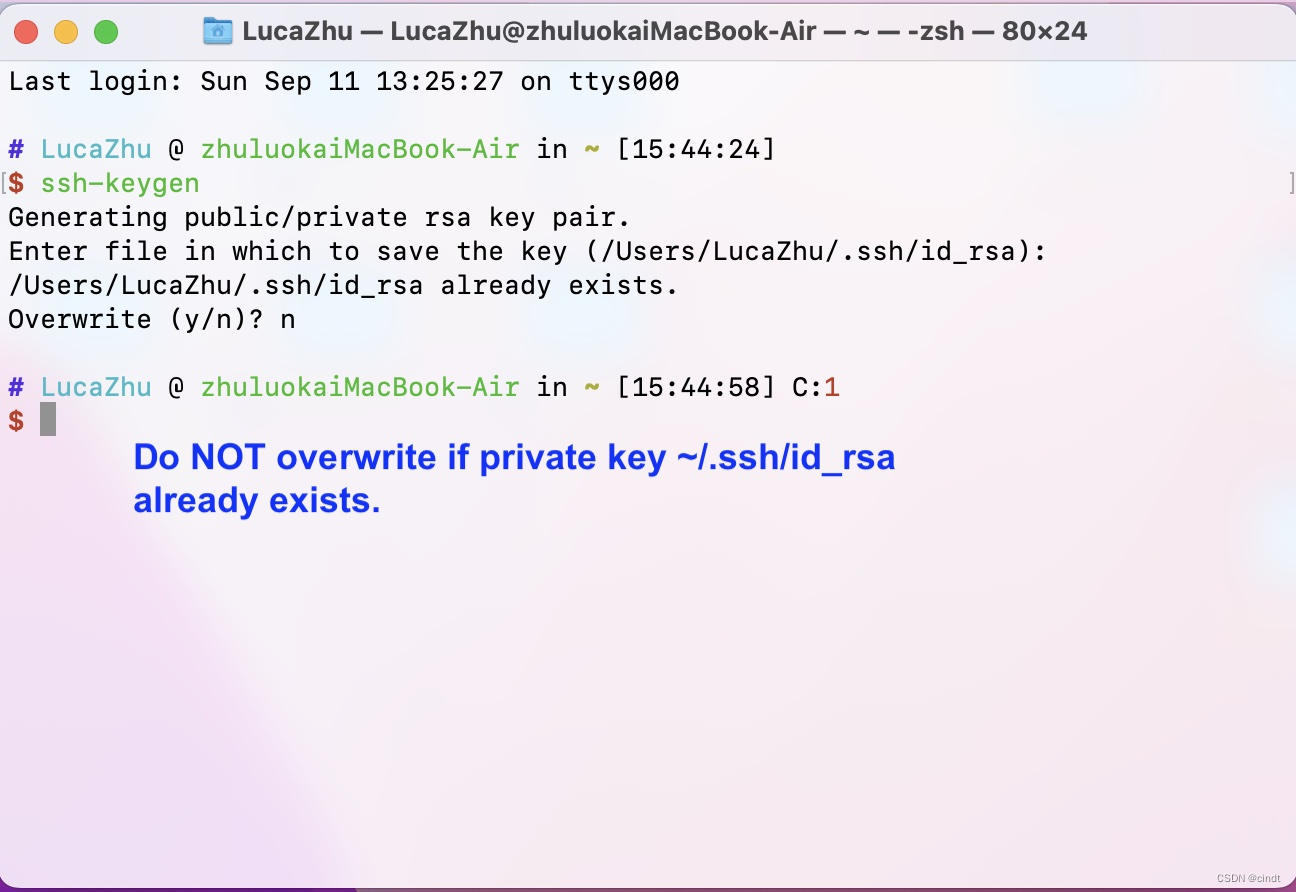
Do NOT Overwrite
Then just copy the public key to server by executing:
ssh-copy-id -i ~/.ssh/id_rsa.pub -p 31500 csc3150@127.0.0.1
Copy the Public Key to Server
You are all set. Now you don't need password any more to connect to the VM, and the connection in VS Code will be more stable.


 被折叠的 条评论
为什么被折叠?
被折叠的 条评论
为什么被折叠?
 到【灌水乐园】发言


