


接触Kivy是奔着使用python便捷又是跨平台工具去的,如此一套代码可以发布为各类平台的成果。但是由于网络环境限制,以及kivy工具链上各类工具的频繁迭代,即使按照github上的kivy buildozer官方文档,也很难打包成功,kivy的打包问题成了噩梦。本人有一个项目使用了kivy,历时差不多将近两年。最近更新app功能,手贱升级了ubuntu操作系统,原先buildozer可以顺利打包发布的,系统升级后就无法打包了,反复折腾了近一个月,网上资料很少,可供下载的虚拟机镜像是ubuntu16的很陈旧,折腾了许久解决不了,欲哭无泪。几次天人交战,产生了放弃kivy,改用android studio的想法。而最初选择技术路线时决定使用kivy的初衷,以及过去学习使用kivy已经的大量精力,让我不忍放弃kivy带来的前功尽弃,并且内心也相信kivy在国外挺流行应当不会仅仅是个玩具,这些因素让我坚持了下来。终于在一个凌晨,终于重新修复了buildozer打包问题。由于kivy/buildozer工具链繁长,担心万一哪天中间某工具随系统升级,而旧版本的资源无法下载,再次引发打包失败的问题,于是想到做一个Docker镜像,把buildozer打包的工具链版本固化下来,一劳永逸解决这个问题。
1 以Ubuntu作为基础镜像
(1)选择目前最成熟的ubuntu20.04作为基础镜像。
sudo docker pull ubuntu:20.04
sudo docker images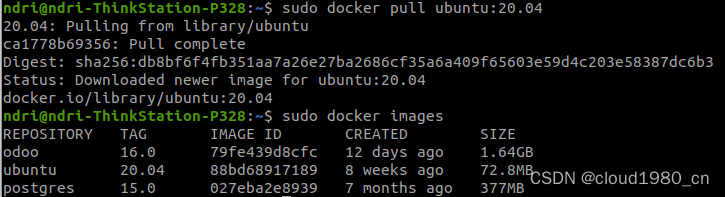
(2)将ubuntu镜像改名为ubuntu20_buildozer:20230612,删除原ubuntu镜像。
sudo docker tag ubuntu:20.04 ubuntu20_buildozer:20230612
sudo docker rmi ubuntu:20.04
sudo docker images

2 为基础镜像添加kivy buildozer工具
(1)启动容器
sudo docker run -it --name my-buildozer ubuntu20_buildozer:20230612其中,-it 参数表示要启动一个交互式的终端会话;--name my-buildozer 参数指定容器的名称为 my-buildozer;ubuntu20_buildozer:20230612 是之前重命名的 Ubuntu 镜像;
执行以上命令后,将会进入 Ubuntu 镜像的root用户命令行界面。在这里,可以执行任何标准的 Ubuntu 命令,就像在本地 Ubuntu 系统上一样。
![]()
如果不小心关闭了,或者以后想再进入运行的容器,运行
sudo docker exec -it my-buildozer /bin/bash(2)安装编辑器工具及更新系统
先安装小体积的终端编辑器nano。
创建kivy用户名,密码是kivy,并从root用户切换到kivy用户(使用root用户虽然不会出错,但每次运行buildozer时都会出现警告信息),加强home文件夹的操作权限为777。
更新apt源为国内源(比如清华源),然后update,full-upgrade,再安装其他工具。
apt update
apt install nano sudo
useradd kivy -s /bin/bash #创建kivy用户
passwd kivy   #设置密码
adduser kivy sudo #kivy用户增加sudo权限
su kivy    #切换到kivy用户
sudo mkdir /home/kivy    #创建~文件夹
sudo chmod 777 home/ -R    #设置权限
sudo nano /etc/apt/sources.listdeb http://mirrors.aliyun.com/ubuntu/ focal main restricted universe multiverse
deb-src http://mirrors.aliyun.com/ubuntu/ focal main restricted universe multiverse
deb http://mirrors.aliyun.com/ubuntu/ focal-security main restricted universe multiverse
deb-src http://mirrors.aliyun.com/ubuntu/ focal-security main restricted universe multiverse
deb http://mirrors.aliyun.com/ubuntu/ focal-updates main restricted universe multiverse
deb-src http://mirrors.aliyun.com/ubuntu/ focal-updates main restricted universe multiverse
# deb https://mirrors.aliyun.com/ubuntu/ focal-proposed main restricted universe multiverse
# deb-src https://mirrors.aliyun.com/ubuntu/ focal-proposed main restricted universe multiverse
deb http://mirrors.aliyun.com/ubuntu/ focal-backports main restricted universe multiverse
deb-src http://mirrors.aliyun.com/ubuntu/ focal-backports main restricted universe multiverse
sudo apt update
sudo apt full-upgrade
(3)安装buildozer所需的环境工具
sudo apt install python3 python3-pip

sudo apt-get install openjdk-8-jdk openjdk-8-jdk-headless

sudo apt install cython tree git unzip autoconf automake build-essential ccache cmake gettext libffi-dev libltdl-dev libssl-dev libtool patch pkg-config python3-setuptools zip zlib1g-dev wget lld

sudo pip install  buildozer==1.2.0
sudo pip install kivy==2.0.0
sudo pip install sh==1.12.14
注意,这里需要降低 sh 库的版本 是因为最新的ubuntu20更新python3时,会把sh库升级到2.0,会导致sh输出的type是str,而非stdout,python for android之前的版本都会出错,机缘巧合发现了这个问题,所以降级为1.12.14。
3 kivy buildozer打包
(1)创建buildozer相关文件夹
/home/kivy里建立两个文件夹,src里存放源代码,tools存放buildozer打包所需的python-for-android工具。在src下创建自己的kivy应用,比如“myApp”
cd home/kivy
mkdir src
mkdir tools
cd src
mkdir myapp
cd myapp
(2)新建main.py文件
nano /home/kivy/src/myapp/main.py(3)写一个最基本的kivy程序。
import kivy

from kivy.app import App
from kivy.uix.label import Label


class HelloWorldApp(App):

    def build(self):
        return Label(text='Hello, World!')

if __name__ == '__main__':
    HelloWorldApp().run()
(4)运行buildozer打包
1)初始化
进入在程序目录,buildozer init 初始化打包环境,自动创建了一个buildozer.spec文件。
解决打包的关键在于配置builozer.spec文件。接下来将逐步修改完善这个文件。
cd /home/kivy/src/myapp
buildozer init
2)下载python-for-android
在修改buildozer.spec之前,先下载kivy官方提供的python-for-android到/home/kivy/tools目录。选择tag为v2021.09.05的版本下载(该版本以及配套的ndk等参数经长时间测试比较稳定)
wget https://github.com/kivy/python-for-android/archive/refs/tags/v2021.09.05.zip
3)修改 buildozer.spec文件
buildozer.spec文件主要修改的地方有:
# Kivy version to use
osx.kivy_version = 2.0.0

# (int) Target Android API, should be as high as possible.
android.api = 27

# (str) Android NDK version to use
android.ndk = 19c

# (str) The Android arch to build for, choices: armeabi-v7a, arm64-v8a, x86, x86_64
android.arch = armeabi-v7a

# (str) python-for-android git clone directory (if empty, it will be automatically cloned from github)
p4a.source_dir = /home/kivy/tools/python-for-android-2021.09.05
p4a就是python-for-android,我们已经事先下载到指定目录,配置文件相应修改,打包时就可以跳过下载,避免各种各种网络问题。两年前项目使用的平板配置比较老,使用的android8系统,因此app的arch选v7a。
4)打包buildozer android debug
buildozer android debug第一次打包需要下载ndk、sdk以及一些python库,耗时比较久,如果遇到网络不稳定要多试几次。成功一次后,再打包就秒杀了。
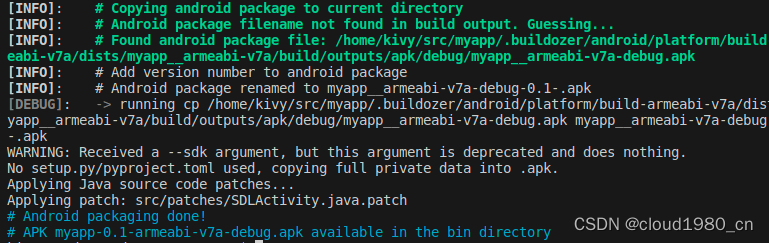
打包好的文件位于/home/kivy/src/myapp/bin/目录里,默认的名字叫myapp-0.1-armeabi-v7a-debug.apk
5)将这个文件从容器拷贝到主机(比如主机的 ~ 目录)
docker cp my-buildozer:/home/kivy/src/myapp/bin/myapp-0.1-armeabi-v7a-debug.apk ~6)再将这个文件从主机传输到android设备(比如android设备上的 /storage/emulated/0 目录)
cd ~
sudo adb push myapp-0.1-armeabi-v7a-debug.apk /storage/emulated/0
在android平板设备上运行成功(如果运行不成功,有各种各样的因素,有kivy本身版本问题,有第三方库的问题,有源代码本身问题等等,这个后面再写博客来总结下)。

从容器中复制文件到主机比较麻烦,后面会介绍怎样在容器中共享主机的文件夹。
buildozer打包问题的关键在于buildozer.spec的配置,现在我们完成了最基础的helloworld的kivy打包,完整的buildozer.spec文件如下:
[app]

# (str) Title of your application
title = My Application

# (str) Package name
package.name = myapp

# (str) Package domain (needed for android/ios packaging)
package.domain = org.test

# (str) Source code where the main.py live
source.dir = .

# (list) Source files to include (let empty to include all the files)
source.include_exts = py,png,jpg,kv,atlas

# (list) List of inclusions using pattern matching
#source.include_patterns = assets/*,images/*.png

# (list) Source files to exclude (let empty to not exclude anything)
#source.exclude_exts = spec

# (list) List of directory to exclude (let empty to not exclude anything)
#source.exclude_dirs = tests, bin

# (list) List of exclusions using pattern matching
#source.exclude_patterns = license,images/*/*.jpg

# (str) Application versioning (method 1)
version = 0.1

# (str) Application versioning (method 2)
# version.regex = __version__ = ['"](.*)['"]
# version.filename = %(source.dir)s/main.py

# (list) Application requirements
# comma separated e.g. requirements = sqlite3,kivy
requirements = python3,kivy

# (str) Custom source folders for requirements
# Sets custom source for any requirements with recipes
# requirements.source.kivy = ../../kivy

# (list) Garden requirements
#garden_requirements =

# (str) Presplash of the application
#presplash.filename = %(source.dir)s/data/presplash.png

# (str) Icon of the application
#icon.filename = %(source.dir)s/data/icon.png

# (str) Supported orientation (one of landscape, sensorLandscape, portrait or all)
orientation = portrait

# (list) List of service to declare
#services = NAME:ENTRYPOINT_TO_PY,NAME2:ENTRYPOINT2_TO_PY

#
# OSX Specific
#

#
# author = © Copyright Info

# change the major version of python used by the app
osx.python_version = 3

# Kivy version to use
# osx.kivy_version = 2.0.0

#
# Android specific
#

# (bool) Indicate if the application should be fullscreen or not
fullscreen = 0

# (string) Presplash background color (for new android toolchain)
# Supported formats are: #RRGGBB #AARRGGBB or one of the following names:
# red, blue, green, black, white, gray, cyan, magenta, yellow, lightgray,
# darkgray, grey, lightgrey, darkgrey, aqua, fuchsia, lime, maroon, navy,
# olive, purple, silver, teal.
#android.presplash_color = #FFFFFF

# (list) Permissions
#android.permissions = INTERNET

# (int) Target Android API, should be as high as possible.
android.api = 27

# (int) Minimum API your APK will support.
#android.minapi = 21

# (int) Android SDK version to use
#android.sdk = 26.0.1

# (str) Android NDK version to use
android.ndk = 19c

# (int) Android NDK API to use. This is the minimum API your app will support, it should usually match android.minapi.
#android.ndk_api = 21

# (bool) Use --private data storage (True) or --dir public storage (False)
#android.private_storage = True

# (str) Android NDK directory (if empty, it will be automatically downloaded.)
#android.ndk_path =

# (str) Android SDK directory (if empty, it will be automatically downloaded.)
#android.sdk_path =

# (str) ANT directory (if empty, it will be automatically downloaded.)
#android.ant_path =

# (bool) If True, then skip trying to update the Android sdk
# This can be useful to avoid excess Internet downloads or save time
# when an update is due and you just want to test/build your package
# android.skip_update = False

# (bool) If True, then automatically accept SDK license
# agreements. This is intended for automation only. If set to False,
# the default, you will be shown the license when first running
# buildozer.
# android.accept_sdk_license = False

# (str) Android entry point, default is ok for Kivy-based app
#android.entrypoint = org.renpy.android.PythonActivity

# (str) Android app theme, default is ok for Kivy-based app
# android.apptheme = "@android:style/Theme.NoTitleBar"

# (list) Pattern to whitelist for the whole project
#android.whitelist =

# (str) Path to a custom whitelist file
#android.whitelist_src =

# (str) Path to a custom blacklist file
#android.blacklist_src =

# (list) List of Java .jar files to add to the libs so that pyjnius can access
# their classes. Don't add jars that you do not need, since extra jars can slow
# down the build process. Allows wildcards matching, for example:
# OUYA-ODK/libs/*.jar
#android.add_jars = foo.jar,bar.jar,path/to/more/*.jar

# (list) List of Java files to add to the android project (can be java or a
# directory containing the files)
#android.add_src =

# (list) Android AAR archives to add (currently works only with sdl2_gradle
# bootstrap)
#android.add_aars =

# (list) Gradle dependencies to add (currently works only with sdl2_gradle
# bootstrap)
#android.gradle_dependencies =

# (list) add java compile options
# this can for example be necessary when importing certain java libraries using the 'android.gradle_dependencies' option
# see https://developer.android.com/studio/write/java8-support for further information
# android.add_compile_options = "sourceCompatibility = 1.8", "targetCompatibility = 1.8"

# (list) Gradle repositories to add {can be necessary for some android.gradle_dependencies}
# please enclose in double quotes
# e.g. android.gradle_repositories = "maven { url 'https://kotlin.bintray.com/ktor' }"
#android.add_gradle_repositories =

# (list) packaging options to add
# see https://google.github.io/android-gradle-dsl/current/com.android.build.gradle.internal.dsl.PackagingOptions.html
# can be necessary to solve conflicts in gradle_dependencies
# please enclose in double quotes
# e.g. android.add_packaging_options = "exclude 'META-INF/common.kotlin_module'", "exclude 'META-INF/*.kotlin_module'"
#android.add_gradle_repositories =

# (list) Java classes to add as activities to the manifest.
#android.add_activities = com.example.ExampleActivity

# (str) OUYA Console category. Should be one of GAME or APP
# If you leave this blank, OUYA support will not be enabled
#android.ouya.category = GAME

# (str) Filename of OUYA Console icon. It must be a 732x412 png image.
#android.ouya.icon.filename = %(source.dir)s/data/ouya_icon.png

# (str) XML file to include as an intent filters in <activity> tag
#android.manifest.intent_filters =

# (str) launchMode to set for the main activity
#android.manifest.launch_mode = standard

# (list) Android additional libraries to copy into libs/armeabi
#android.add_libs_armeabi = libs/android/*.so
#android.add_libs_armeabi_v7a = libs/android-v7/*.so
#android.add_libs_arm64_v8a = libs/android-v8/*.so
#android.add_libs_x86 = libs/android-x86/*.so
#android.add_libs_mips = libs/android-mips/*.so

# (bool) Indicate whether the screen should stay on
# Don't forget to add the WAKE_LOCK permission if you set this to True
#android.wakelock = False

# (list) Android application meta-data to set (key=value format)
#android.meta_data =

# (list) Android library project to add (will be added in the
# project.properties automatically.)
#android.library_references =

# (list) Android shared libraries which will be added to AndroidManifest.xml using <uses-library> tag
#android.uses_library =

# (str) Android logcat filters to use
#android.logcat_filters = *:S python:D

# (bool) Copy library instead of making a libpymodules.so
#android.copy_libs = 1

# (str) The Android arch to build for, choices: armeabi-v7a, arm64-v8a, x86, x86_64
android.arch = armeabi-v7a

# (int) overrides automatic versionCode computation (used in build.gradle)
# this is not the same as app version and should only be edited if you know what you're doing
# android.numeric_version = 1


#android.build_tools_version = 28.0.3

#
# Python for android (p4a) specific
#

# (str) python-for-android fork to use, defaults to upstream (kivy)
#p4a.fork = kivy

# (str) python-for-android branch to use, defaults to master
#p4a.branch = master

# (str) python-for-android git clone directory (if empty, it will be automatically cloned from github)
p4a.source_dir = /home/kivy/tools/python-for-android-2021.09.05

# (str) The directory in which python-for-android should look for your own build recipes (if any)
#p4a.local_recipes =

# (str) Filename to the hook for p4a
#p4a.hook =

# (str) Bootstrap to use for android builds
# p4a.bootstrap = sdl2

# (int) port number to specify an explicit --port= p4a argument (eg for bootstrap flask)
#p4a.port =


#
# iOS specific
#

# (str) Path to a custom kivy-ios folder
#ios.kivy_ios_dir = ../kivy-ios
# Alternately, specify the URL and branch of a git checkout:
ios.kivy_ios_url = https://github.com/kivy/kivy-ios
ios.kivy_ios_branch = master

# Another platform dependency: ios-deploy
# Uncomment to use a custom checkout
#ios.ios_deploy_dir = ../ios_deploy
# Or specify URL and branch
ios.ios_deploy_url = https://github.com/phonegap/ios-deploy
ios.ios_deploy_branch = 1.7.0

# (str) Name of the certificate to use for signing the debug version
# Get a list of available identities: buildozer ios list_identities
#ios.codesign.debug = "iPhone Developer: <lastname> <firstname> (<hexstring>)"

# (str) Name of the certificate to use for signing the release version
#ios.codesign.release = %(ios.codesign.debug)s


[buildozer]

# (int) Log level (0 = error only, 1 = info, 2 = debug (with command output))
log_level = 2

# (int) Display warning if buildozer is run as root (0 = False, 1 = True)
warn_on_root = 1

# (str) Path to build artifact storage, absolute or relative to spec file
# build_dir = ./.buildozer

# (str) Path to build output (i.e. .apk, .ipa) storage
# bin_dir = ./bin

#    -----------------------------------------------------------------------------
#    List as sections
#
#    You can define all the "list" as [section:key].
#    Each line will be considered as a option to the list.
#    Let's take [app] / source.exclude_patterns.
#    Instead of doing:
#
#[app]
#source.exclude_patterns = license,data/audio/*.wav,data/images/original/*
#
#    This can be translated into:
#
#[app:source.exclude_patterns]
#license
#data/audio/*.wav
#data/images/original/*
#


#    -----------------------------------------------------------------------------
#    Profiles
#
#    You can extend section / key with a profile
#    For example, you want to deploy a demo version of your application without
#    HD content. You could first change the title to add "(demo)" in the name
#    and extend the excluded directories to remove the HD content.
#
#[app@demo]
#title = My Application (demo)
#
#[app:source.exclude_patterns@demo]
#images/hd/*
#
#    Then, invoke the command line with the "demo" profile:
#
#buildozer --profile demo android debug
我们把这个buildozer.spec文件也备份到容器的tools目录中。
cp /home/kivy/src/myapp/buildozer.spec /home/kivy/tools4 生成buildozer镜像
经过不懈努力,我们的my-buildozer容器已经可以成功打包了。接下来我们基于这个容器生成镜像。
(1)停止容器运行
sudo docker stop my-buildozer(2)生成镜像,填写新标签v1.0
sudo docker commit my-buildozer ubuntu20_buildozer:v1sudo docker images查看主机镜像,可以看到新生成了一个7.75GB的镜像,体积增大不少,这是由于镜像中安装了一些环境条件、buildozer工具链以及完成了一个基础的kivy打包产生的文件。

5 容器与主机共享文件夹并测试
上文提到,在容器中操作文件到主机比较麻烦,接下来我们用共享主机文件夹的方式来测试新生成的镜像。
(1)新建容器并挂载主机的一个共享目录
要在容器内共享主机文件夹,可以使用Docker的-v选项来挂载主机目录。具体来说,可以使用以下命令将主机目录(如主机中的当前目录是 /home/ndri/kivy/helloworld ,用 $(pwd) 指代)挂载到新容器ready-buildozer的 /home/kivy/helloworld 目录:
sudo docker run -it -v $(pwd):/home/kivy/helloworld --name mybuildozer ubuntu20_buildozer:v1在物理机通过 sudo docker ps -a查看到新建了一个名为mybuildozer的容器。

(2)容器打包主机共享目录测试
1)进入容器(如ps查看时没退出则可跳过本步骤)
sudo docker exec -it mybuildozer /bin/bash
2)切换到kivy用户
su kivy
cd home/kivy/helloworld/
3)将备份的spec文件拷贝到 home/kivy/helloworld/ 目录
cp /home/kivy/tools/buildozer.spec /home/kivy/helloworld//home/kivy里建立两个文件夹,src里存
可以看到物理机和容器的helloworld目录里,都有之前备份的spec配置文件。
4)buildozer打包
buildozer android debugsdk、ant、ndk、python-for-andord等环境在容器中都已经存在,不需要下载了,避免了工具链的网络不稳定问题以及版本问题,接下来打包程序只需要下载python3.8的包(相对来说,pip网络比工具链的其他工具可靠多了),并编译,打包。

通过漫长的步骤,我们制作了自己的buildozer镜像,消除了心中工具链和网络不稳定的担忧。接下来,我们把这个镜像上传dockerhub,长期备份。
6 上传镜像到dockerhub
上文提到,在容器中操作文件到主机比较麻烦,接下来我们用共享主机文件夹的方式来测试新生成的镜像。
1)镜像重命名
上传dockerhub的镜像,需要以dockerhub的用户名作为标记,然后加上 /镜像名
sudo docker tag ubuntu20_buildozer:v1 dingweijie/ubuntu20_buildozer:v1
2)登录并上传
sudo docker login    #在终端提示中,输入用户名密码

sudo docker push dingweijie/ubuntu20_buildozer:v1
本文镜像使用说明:
cloud1980/kivy_buildozer_docker: Docker of buildozer1.2.0 in ubuntu20.04 (github.com)
dingweijie/ubuntu20_buildozer - Docker Image | Docker Hub
拉取本文镜像:
sudo docker pull dingweijie/ubuntu20_buildozer


 4970
4970

 被折叠的 条评论
为什么被折叠?
被折叠的 条评论
为什么被折叠?
 到【灌水乐园】发言


