


 本文详细介绍了如何在Apache Servicemix环境下利用Camel进行文件路由与消息集成,包括启动Servicemix、安装功能组件、配置路由、发布与启动路由、管理路由以及使用ActiveMQ的示例。
转自:http://blog.csdn.net/lubiaopan/article/details/16339007
该文章算是笔记,针对的是apache-servicemix-4.5.3相配套的qucikstart.pdf文档。
基本操作
启动servicemix:运行 "apache-servicemix-4.5.3\bin"文件夹下面的servicemix.bat,弹出ServiceMix的控制台,在这个控制台上可以增加或删除bundles,安装各种可选的特性。
查看已经安装的bundles:运行 osgi:list 命令
查看日志:运行 log:display 命令
只查看异常日志:运行 log:display-exception 命令
设置日志级别:运行 log:set DEBUG 命令(以DEBUG举例)
查看某个级别的日志:运行 log:display | grep DEBUG(以DEBUG举例)
查看可用的功能组件:运行 feature:list 命令
查看某个类别的可用功能组件:运行 feature:list | grep camel (以camel举例)
安装某个功能组件:运行 feature:install webconsole (以webconsole举例)
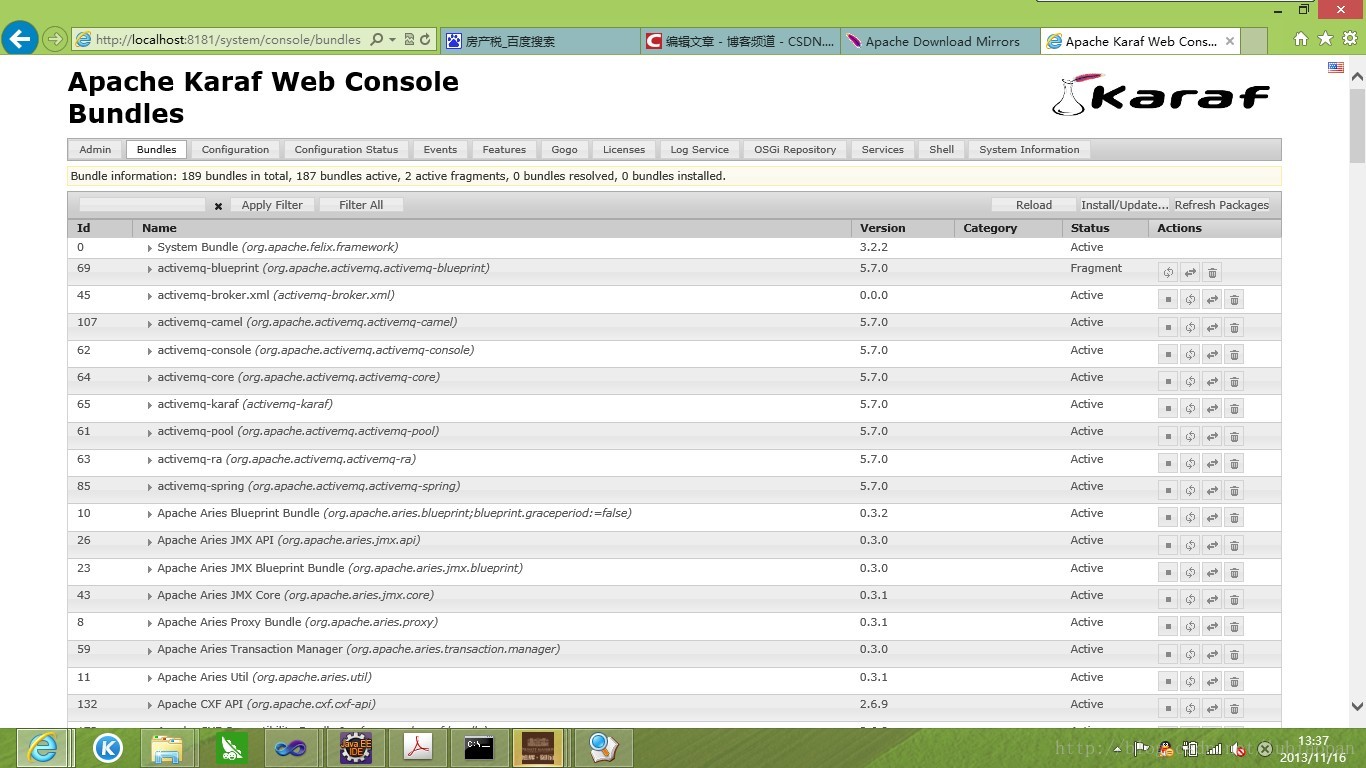
webconsole是网页版的管理客户端,URL为:http://localhost:8181/system/console ,用户名/密码:smx/smx
简单示例:使用Camel
Apache Camel是一个开源的、功能丰富的应用集成框架,它支持常见的EIP模式,是一个强大的基于规则的路由引擎,可以轻松的实现消息路由和消息转换,ServiceMix对Camel进行了深度集成来支持各种复杂的ESB功能。
本例中实现一个非常简单的路由功能:将文件从 camel/input 文件夹移到 camel/output 文件夹。
1、创建路由配置文件study_one.xml (camel支持两种风格的路由配置文件,一种是针对blueprint容器的,一种是针对spring容器的,这里用的是blueprint)
- <?xml version="1.0" encoding="UTF-8"?>
- <blueprint xmlns="http://www.osgi.org/xmlns/blueprint/v1.0.0" xmlns:xsi="http://www.w3.org/2001/XMLSchema-instance"
- xsi:schemaLocation="
- http://www.osgi.org/xmlns/blueprint/v1.0.0
- http://www.osgi.org/xmlns/blueprint/v1.0.0/blueprint.xsd">
- <camelContext xmlns="http://camel.apache.org/schema/blueprint">
- <route>
- <!--camel采用URI来描述各种组件,如file:表示文件,http:表示web,activemq:表示消息队列-->
- <from uri="file:camel/input"/><!--文件路由的起始文件夹-->
- <log message="Moving ${file:name} to the output directory"/><!--文件路由时需打印的日志内容-->
- <to uri="file:camel/output"/><!--文件路由的终点文件夹-->
- </route>
- </camelContext>
- </blueprint>
2、发布和启动路由
第一步:将study_one.xml移到ServiceMix下的deploy文件夹下,该文件将会被ServiceMix加载和发布。
第二步:转到ServiceMix根目录,会发现新创建了一个camel/input 文件夹。
第三步:向camle/input文件夹下copy任一文件,然后到camel/output下查看,会发现copy的同时文件被传递到了ouput下面,说明路由生效了。
第四步:查看日志,运行log:display命令,将会发现被路由文件的相关信息。
3、管理路由
第一步:查找study_one.xml路由文件对应的bundle。运行osgi:list,从运行结果中查找study_one.xml,截图如下:

从截图中可知该路由对应的bundle id是181,Blueprint Container被创建出来用于启动这个路由(如果用的是spring配置文件,则Spring那一些会显示Started)。
第二步:终止路由。运行osgi:stop 181,将路由终止,向camel/input下copy一个文件,然后到camel/output下查看,文件未被移过来,说明终止成功。
第三步:开启路由。运行osgi:start 181,去camel/output下查看,第二步未被移动的文件被移到了该文件夹下,说明启动成功。
使用ActiveMQ
1、创建第一个路由,该路由将activemq/input文件夹下的文件路由到atvive/output文件夹下,创建的原理及步骤同上。
其中配置文件study_MQ1.xml的内容如下:
- <?xml version="1.0" encoding="utf-8"?>
- <blueprint
- xmlns="http://www.osgi.org/xmlns/blueprint/v1.0.0"
- xmlns:xsi="http://www.w3.org/2001/XMLSchema-instance"
- xsi:schemaLocation="
- http://www.osgi.org/xmlns/blueprint/v1.0.0
- http://www.osgi.org/xmlns/blueprint/v1.0.0/blueprint.xsd">
- <camelContext xmlns="http://camel.apache.org/schema/blueprint">
- <route>
- <from uri="file:activemq/input"/>
- <to uri="file:activemq/output"/>
- <setBody>
- <simple>
- FileMovedEvent(file: ${file:name}, timestamp: ${date:now:hh:MM:ss.SSS})
- </simple>
- </setBody>
- <to uri="activemq://events" />
- </route>
- </camelContext>
- </blueprint>
该文件和上面study_one.xml最大的区别在于,该文件对应的路由不再直接记录move日志,而是将待记录的日志内容以消息的方式发送到MQ中。
2、创建第二个路由,该路由负责从MQ中去数据,然后将数据move到日志中去。
其中配置文件study_MQ2.xml的内容如下:
- <?xml version="1.0" encoding="utf-8"?>
- <blueprint
- xmlns="http://www.osgi.org/xmlns/blueprint/v1.0.0"
- xmlns:xsi="http://www.w3.org/2001/XMLSchema-instance"
- xsi:schemaLocation="
- http://www.osgi.org/xmlns/blueprint/v1.0.0
- http://www.osgi.org/xmlns/blueprint/v1.0.0/blueprint.xsd">
- <camelContext xmlns="http://camel.apache.org/schema/blueprint">
- <route>
- <from uri="activemq://events"/>
- <to uri="log:events"/>
- </route>
- </camelContext>
- </blueprint>
发布好这个路由文件之后,通过log:display命令就可以查看activemq/input对应的日志信息了。
MQ最大的特点就是发送数据一方和取数据的一方是完全透明,两者之间不需要建立连接。当study_MQ2.xml的路由关闭的时候如果向activemq/input中copy文件,日志信息照样会传到MQ中,当MQ2启动的时候它照样会取到这些信息。


 9500
9500

 被折叠的 条评论
为什么被折叠?
被折叠的 条评论
为什么被折叠?
 到【灌水乐园】发言


