


1、配好环境(网上很多不细讲)
①app下的build.gradle
dependencies {

    implementation fileTree(dir: "libs", include: ["*.jar"])
    implementation 'androidx.appcompat:appcompat:1.3.1'
    implementation 'com.google.android.material:material:1.4.0'
    implementation 'androidx.constraintlayout:constraintlayout:2.0.4'
    implementation files('libs\\uiautomator.jar')
    testImplementation 'junit:junit:4.+'
    androidTestImplementation 'androidx.test.ext:junit:1.1.3'
    androidTestImplementation 'androidx.test.espresso:espresso-core:3.4.0'
    androidTestImplementation 'com.android.support.test.uiautomator:uiautomator-v18:2.1.2'
}
②jar包
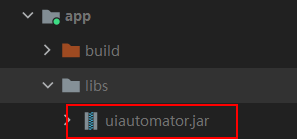
2、在这个文件夹下新建一个类:

3、编辑这个类
package com.example.uiautomatortestapp;
import android.app.Instrumentation;
import android.support.test.uiautomator.UiDevice;
import android.support.test.uiautomator.UiObjectNotFoundException;
import android.util.Log;
import androidx.test.ext.junit.runners.AndroidJUnit4;
import androidx.test.platform.app.InstrumentationRegistry;
import org.junit.Test;
import org.junit.runner.RunWith;
import java.io.File;
@RunWith(AndroidJUnit4.class)
public class TestClass {
private static Instrumentation mInstrumentation;
public static UiDevice mUidevices;
public static String TAG = "BaseTest";
public static void setup() {
//一些初始化
Log.e(TAG, "测试前");
mInstrumentation = InstrumentationRegistry.getInstrumentation();
mUidevices = UiDevice.getInstance(mInstrumentation);
try {
mUidevices.wakeUp();
} catch (Exception e) {
}
}
public static void sleep(long time) {
try {
Thread.sleep(time);
} catch (Exception e) {
e.printStackTrace();
}
}
@Test
public void test000() throws UiObjectNotFoundException {
setup();
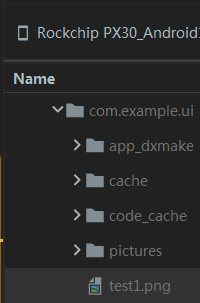
//路径:“/data/data/你的包名/随便一个名字.png”
mUidevices.getInstance().takeScreenshot(new File("/data/data/com.example.uiautomatortestapp/test1.png"));
sleep(500);
}
}
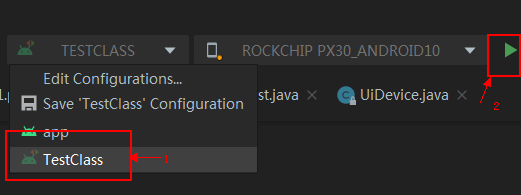
4、运行入口调整
①方法一

②方法二
5、查看结果
6、备注
我运行的环境是设备,不是AVD哦
截图成果应该是运行TestClass时设备上实时显示的界面哦


 1726
1726


 被折叠的 条评论
为什么被折叠?
被折叠的 条评论
为什么被折叠?
 到【灌水乐园】发言


