


 博客介绍了tsnecuda的安装和使用,包括生成环境的requirements.txt、安装tsne环境等,还提及tsne使用pytorch1.4.0与模型生成使用pytorch1.6.0的问题。因修改保存模型代码麻烦,将torch从1.4.0升级到1.6.0,最后提到了CAM的实例代码和效果图。
tsnecuda
安装和使用
-
生成环境的requirements.txt,参考[1]
ty@ubuntu:~$ conda env list
ty@ubuntu:~$ source activate p36t14
(p36t14) ty@ubuntu:~$ pip3 freeze > requirements.txt删除requirements.txt中无关的两行
olefile @ file:///Users/ktietz/demo/mc3/conda-bld/olefile_1629805411829/work
six @ file:///tmp/build/80754af9/six_1644875935023/work -
安装tsne环境
conda create -n tsne python=3.6 -y
pip3 install -r requirements -
tsne cuda的安装和使用,参考【2】
conda install -c CannyLab -c pytorch tsnecuda -
tsne使用pytorch1.4.0,而模型生成使用pytorch1.6.0。修改保存模型的代码。参考[3]
torch.save(infos, la_file, _use_new_zipfile_serialization=False)
参考:
[1] python 虚拟环境创建和requirements的使用 https://www.cnblogs.com/dairuiquan/p/11981256.html
[2] tsne cuda项目地址 https://github.com/CannyLab/tsne-cuda
[3] 低版本torch加载高版本torch模型 https://blog.csdn.net/lbj1260200629/article/details/109848137
torch的升级
修改保存模型代码,或者取出模型重新保存,很麻烦。所以将torch1.4.0升级到1.6.0
- 复制旧版本的虚拟环境
conda create -n p36t16 --clone tsnecuda
- 卸载旧版本的torch和torchvision
pip uninstall torch
pip uninstall torchvision
- 安装新版的torch和torchvision
pip install torch=1.6.0 torchvision=0.7.0 (1.6的torch需要0.7vision)
CAM
实例代码
import sys
import os
from PIL import Image
import torch
import numpy as np
import cv2
import matplotlib.pyplot as plt
import torchvision.transforms as transforms
import torchvision.models as models


def draw_CAM(model, img_path, save_path, transform=None, visual_heatmap=False):
    # load image and preprocess
    img = Image.open(img_path).convert('RGB')
    if transform:
        img = test_transform(img) #     c x h x w
    img = img.unsqueeze(0)        # 1 x c x h x w

    # get output feature/score
    model.eval()
    features = model.features(img) # 1 x 512 x 7 x 7
    features = model.avgpool(features) # 1 x 512 x 7 x 7
    features_v = features.view(features.size(0), -1) # 1 x 25088
    output = model.classifier(features_v) # 1 x 1000
    pred = torch.argmax(output).item()
    pred_class = output[:, pred]

    ## helper function
    def extract(g):
        global features_grad
        features_grad = g
    features.register_hook(extract)

    pred_class.backward()

    grads = features_grad   # 1 x 512 x 7 x 7
    pooled_grads = torch.nn.functional.adaptive_avg_pool2d(grads, (1, 1))
    pooled_grads = pooled_grads[0] # 512 x 1 x 1
    features = features[0]         # 512 x 7 x 7
    for i in range(512):
        features[i, ...] *= pooled_grads[i, ...]

    # Keras implementation
    heatmap = features.detach().numpy()
    heatmap = np.mean(heatmap, axis=0)
    heatmap = np.maximum(heatmap, 0)
    heatmap /= np.max(heatmap)
    if visual_heatmap:
        plt.matshow(heatmap)
        plt.savefig(fname='./heatmap.jpg', format='jpg')

    src = cv2.imread(img_path)  # w x h x c
    heatmap = cv2.resize(heatmap, (src.shape[1], src.shape[0]))  # 将热力图的大小调整为与原始图像相同
    heatmap = np.uint8(255 * heatmap)  # 将热力图转换为RGB格式
    heatmap = cv2.applyColorMap(heatmap, cv2.COLORMAP_JET)  # 将热力图应用于原始图像
    superimposed_img = heatmap * 0.4 + src  # 这里的0.4是热力图强度因子
    cv2.imwrite(save_path, superimposed_img)  # 将图像保存到硬盘

if __name__ == '__main__':
    if len(sys.argv) != 2:
        print('for example:\npython demo.py antelope_10031.jpg')
    else:
        model = models.vgg19_bn(pretrained=True)
        image_path = sys.argv[1]
        test_transform = transforms.Compose([
            transforms.Resize((224, 224)),
         transforms.ToTensor()
        ])

        '''
        思想: 将图片resize成224 x 224,用网络生成heatmap,
               将heatmap缩放到图片原尺度
               将原图和缩放后的heatmap叠加在一起
        '''
        draw_CAM(model, image_path, './demo.jpg', test_transform, True)
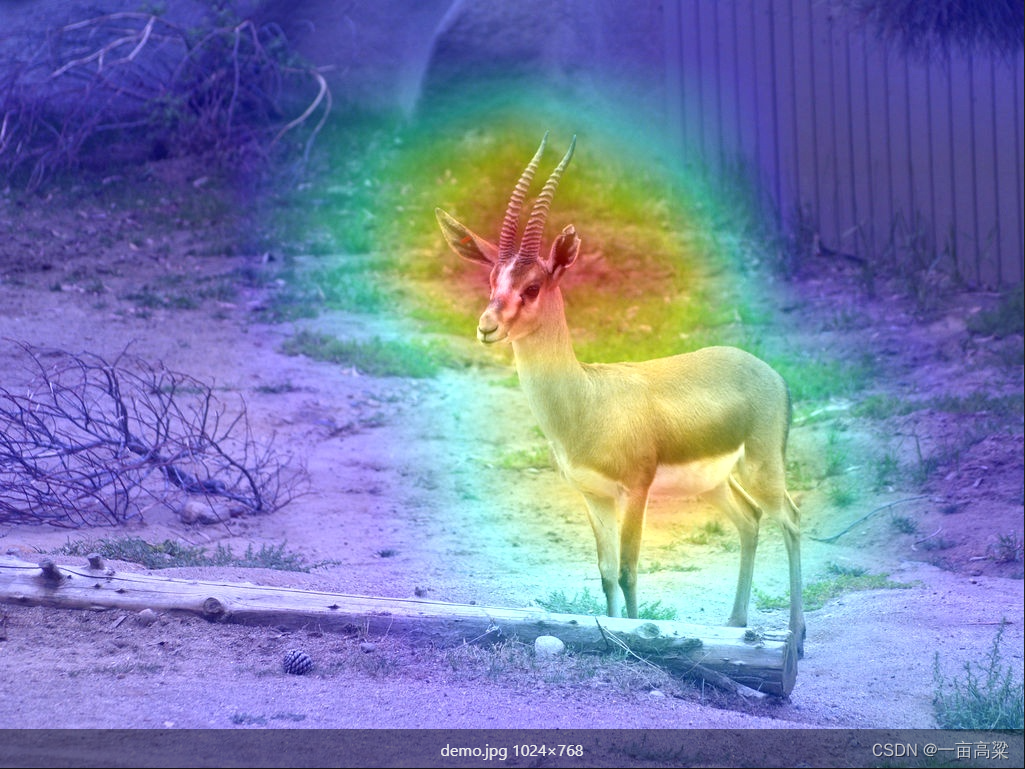
效果图


 355
355

 被折叠的 条评论
为什么被折叠?
被折叠的 条评论
为什么被折叠?
 到【灌水乐园】发言


