


鉴于特征仓库热度下降,特将历史库存放出😄
背景
数据工程师与算法工程师在数据存取上存在沟通成本,基于现状存在以下问题:
- 提供训练使用的离线特征与在线服务使用的在线特征,构造方式存在差异,离线、在线特征数据一致性存疑
- 算法工程师使用特征存在冗余,重复造轮子不仅会出现特征质量参差而且效率低下
- 同步离线特征与在线特征能缩短训练到服务pipeline的开发时间,能提高模型迭代速度
简介
从业务背景、公司技术栈现状、框架重量、二次开发门槛、热度等方面考量,特征仓库的方案选型feast-spark(feast 0.9)
特征仓库的定位是管理,所以特征仓库既不研发离线数据仓库也不提供实时计算。
特征仓库提供特征元数据与离线、在线数据的关联,同时提供离线数据与在线数据的同步;最终实现特征复用、离线和在线特征数据一致性
原理
feast core存储、管理特征表的元数据
特征表的元数据,记录了特征的字段信息、关联的特征数据存储地址(如离线仓库在s3或hdfs,在线仓库在redis或es)
离线和在线特征的同步,保证模型训练与模型服务数据的一致性
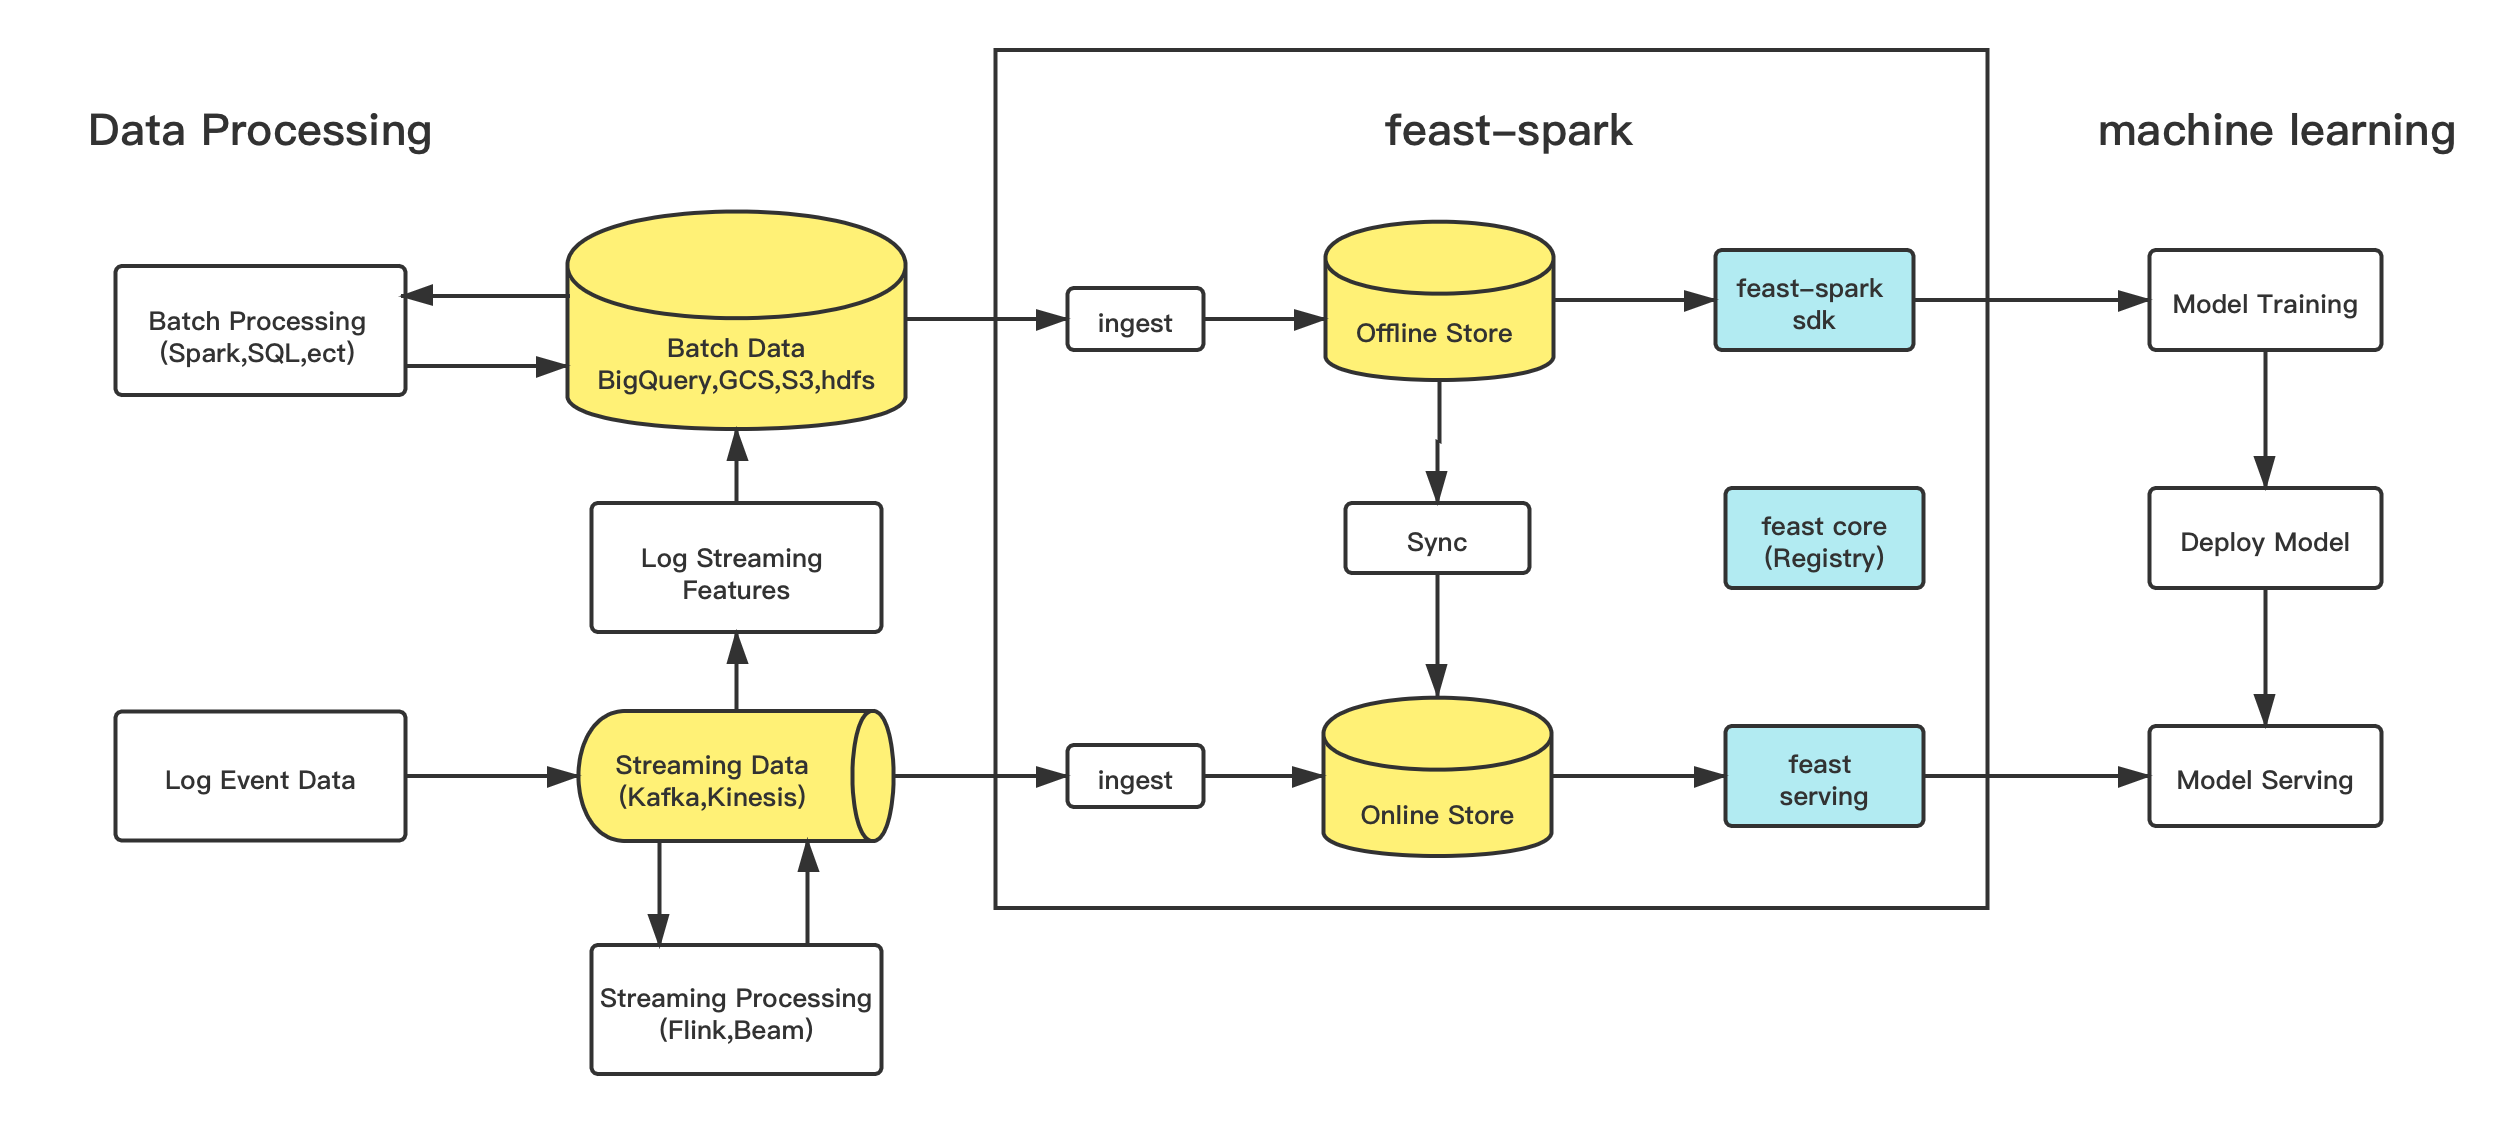
feast-spark与数据处理和机器学习的关系可以参考如下的架构图:
具体功能的实现细节:
1.注册特征表元数据
sdk通过grpc请求,将特征表结构元数据注册到feast core注册中心:
def _apply_feature_table(self, project: str, feature_table: FeatureTable):
    """
    Registers a single feature table with Feast

    Args:
        feature_table: Feature table that will be registered
    """

    feature_table.is_valid()
    feature_table_proto = feature_table.to_spec_proto()

    # Convert the feature table to a request and send to Feast Core
    try:
        apply_feature_table_response = self._core_service.ApplyFeatureTable(
            ApplyFeatureTableRequest(project=project, table_spec=feature_table_proto),  # type: ignore
            timeout=self._config.getint(opt.GRPC_CONNECTION_TIMEOUT),
            metadata=self._get_grpc_metadata(),
        )  # type: ApplyFeatureTableResponse
    except grpc.RpcError as e:
        raise grpc.RpcError(e.details())
feast core注册中心接口:
@Override
public void applyFeatureTable(
    ApplyFeatureTableRequest request,
    StreamObserver<ApplyFeatureTableResponse> responseObserver) {
String projectName = SpecService.resolveProjectName(request.getProject());
String tableName = request.getTableSpec().getName();

try {
    // Check if user has authorization to apply feature table
    authorizationService.authorizeRequest(SecurityContextHolder.getContext(), projectName);

    ApplyFeatureTableResponse response = specService.applyFeatureTable(request);
    responseObserver.onNext(response);
    responseObserver.onCompleted();
} catch (AccessDeniedException e) {
    log.info(
        String.format(
            "ApplyFeatureTable: Not authorized to access project to apply: %s", projectName));
    responseObserver.onError(
        Status.PERMISSION_DENIED
            .withDescription(e.getMessage())
            .withCause(e)
            .asRuntimeException());
}

/**
* Applies the given FeatureTable to the FeatureTable registry. Creates the FeatureTable if does
* not exist, otherwise updates the existing FeatureTable. Applies FeatureTable in project if
* specified, otherwise in default project.
*
* @param request Contains FeatureTable spec and project parameters used to create or update a
*     FeatureTable.
* @throws NoSuchElementException projects and entities referenced in request do not exist.
* @return response containing the applied FeatureTable spec.
*/
@Transactional
public ApplyFeatureTableResponse applyFeatureTable(ApplyFeatureTableRequest request) {
String projectName = resolveProjectName(request.getProject());

// Check that specification provided is valid
FeatureTableSpec applySpec = request.getTableSpec();
FeatureTableValidator.validateSpec(applySpec);

// Prevent apply if the project is archived.
Project project = projectRepository.findById(projectName).orElse(new Project(projectName));
if (project.isArchived()) {
    throw new IllegalArgumentException(
        String.format(
            "Cannot apply Feature Table to archived Project: (table: %s, project: %s)",
            applySpec.getName(), projectName));
}

// Create or update depending on whether there is an existing Feature Table
Optional<FeatureTable> existingTable =
    tableRepository.findFeatureTableByNameAndProject_Name(applySpec.getName(), projectName);
FeatureTable table = FeatureTable.fromProto(projectName, applySpec, entityRepository);
if (existingTable.isPresent() && table.equals(existingTable.get())) {
    // Skip update if no change is detected
    return ApplyFeatureTableResponse.newBuilder().setTable(existingTable.get().toProto()).build();
}
if (existingTable.isPresent()) {
    existingTable.get().updateFromProto(projectName, applySpec, entityRepository);
    table = existingTable.get();
}

// Commit FeatureTable to database and return applied FeatureTable
tableRepository.saveAndFlush(table);
return ApplyFeatureTableResponse.newBuilder().setTable(table.toProto()).build();
}
2.拽取批数据到离线特征仓库
将批特征数据,拽取到特征表关联的离线特征存地址,实现大致分为如下3个步骤:
a. 对拽取的数据格式做判断(目前只支持parquet格式的批数据)
# Check 1) Only parquet file format for FeatureTable batch source is supported
        if (
            feature_table.batch_source
            and issubclass(type(feature_table.batch_source), FileSource)
            and isinstance(
                type(feature_table.batch_source.file_options.file_format), ParquetFormat
            )
        ):
            raise Exception(
                f"No suitable batch source found for FeatureTable, {name}."
                f"Only BATCH_FILE source with parquet format is supported for batch ingestion."
            )

        # read raw data from local, we will support hdfs data later
        pyarrow_table, column_names = _read_table_from_source(source)
b. 以特征表为参照系,对拽取的数据作字段校验
# Check 2) Check if FeatureTable batch source field mappings can be found in provided source table
        _check_field_mappings(
            column_names,
            name,
            feature_table.batch_source.event_timestamp_column,
            feature_table.batch_source.field_mapping,
        )
c. 将批数据,拽取到特征表关联的离线特征存储地址
def _upload_to_file_source(
    file_url: str, with_partitions: bool, dest_path: str, config: Config
) -> None:
    """
    Uploads data into a FileSource. Currently supports GCS, S3, HDFS and Local FS.

    Args:
        file_url: file url of FileSource defined for FeatureTable
        with_partitions: whether to treat dest_path as dir with partitioned table
        dest_path: path to file or dir to be uploaded
        config: Config instance to configure FileSource
    """
    from urllib.parse import urlparse

    uri = urlparse(file_url)
    staging_client = get_staging_client(uri.scheme, config)

# supported offline storage middleware
storage_clients = {
    GS: _gcs_client,
    S3: _s3_client,
    S3A: _s3a_client,
    AZURE_SCHEME: _azure_blob_client,
    LOCAL_FILE: _local_fs_client,
    HDFS_FILE: _hdfs_fs_client
}
3.流数据拽取到在线仓库
由于目前只实现了redis作在线特征仓库,下面的实现也只以redis为例,实现大致分为如下3个步骤:
a. 取流式队列的消息数据(以kafka为例)
val input = config.source match {
    case source: KafkaSource =>
    sparkSession.readStream
        .format("kafka")
        .option("kafka.bootstrap.servers", source.bootstrapServers)
        .option("subscribe", source.topic)
        .load()
    case source: MemoryStreamingSource =>
    source.read
}

val parsed = config.source.asInstanceOf[StreamingSource].format match {
    case ProtoFormat(classPath) =>
    val parser = protoParser(sparkSession, classPath)
    input.withColumn("features", parser($"value"))
    case AvroFormat(schemaJson) =>
    input.select(from_avro($"value", schemaJson).alias("features"))
    case _ =>
    val columns = input.columns.map(input(_))
    input.select(struct(columns: _*).alias("features"))
}

val projected = parsed
    .select("features.*")
    .select(projection: _*)
b.对消息队列字段做校验
val query = projected.writeStream
    .foreachBatch { (batchDF: DataFrame, batchID: Long) =>
    val rowsAfterValidation = if (validationUDF.nonEmpty) {
        val columns = batchDF.columns.map(batchDF(_))
        batchDF.withColumn(
        "_isValid",
        rowValidator.allChecks && validationUDF.get(struct(columns: _*))
        )
    } else {
        batchDF.withColumn("_isValid", rowValidator.allChecks)
    }
    rowsAfterValidation.persist()
    implicit def rowEncoder: Encoder[Row] = RowEncoder(rowsAfterValidation.schema)
c.消息数据写到在线仓库
目前在线仓库是redis,特征数据的key都是经过加密处理;通过timestamp更新key对应的数据,保证特征数据是最新版本
rowsAfterValidation
    .map(metrics.incrementRead)
    .filter(if (config.doNotIngestInvalidRows) expr("_isValid") else rowValidator.allChecks)
    .write
    .format("feast.ingestion.stores.redis")
    .option("entity_columns", featureTable.entities.map(_.name).mkString(","))
    .option("namespace", featureTable.name)
    .option("project_name", featureTable.project)
    .option("timestamp_column", config.source.eventTimestampColumn)
    .option("max_age", config.featureTable.maxAge.getOrElse(0L))
    .save()
override def insert(data: DataFrame, overwrite: Boolean): Unit = {
// repartition for deduplication
val dataToStore =
    if (config.repartitionByEntity && data.rdd.getNumPartitions > 1)
    data
        .repartition(data.rdd.getNumPartitions, config.entityColumns.map(col): _*)
        .localCheckpoint()
    else data

dataToStore.foreachPartition { partition: Iterator[Row] =>
    // grouped iterator to only allocate memory for a portion of rows
    partition.grouped(config.iteratorGroupingSize).foreach { batch =>
4.获取离线特征数据
目前离线特征仓库没有版本功能,离线仓库采用的是一种近似关联的处理策略:能获取entity对应的最新离线特征数据
获取离线特征数据,分为如下几步:
a. 从特征表批数据存放地址读取数据
feature_tables = [_feature_table_from_dict(dct) for dct in feature_tables_conf]
feature_tables_sources = [
    _source_from_dict(dct) for dct in feature_tables_sources_conf
]
entity_source = _source_from_dict(entity_source_conf)

entity_df = _read_and_verify_entity_df_from_source(spark, entity_source)

feature_table_dfs = [
    _read_and_verify_feature_table_df_from_source(spark, feature_table, source,)
    for feature_table, source in zip(feature_tables, feature_tables_sources)
]
b.筛选出时间范围内的数据
def _filter_feature_table_by_time_range(
    feature_table_df: DataFrame,
    feature_table: FeatureTable,
    feature_event_timestamp_column: str,
    entity_df: DataFrame,
    entity_event_timestamp_column: str,
):
    entity_max_timestamp = entity_df.agg(
        {entity_event_timestamp_column: "max"}
    ).collect()[0][0]
    entity_min_timestamp = entity_df.agg(
        {entity_event_timestamp_column: "min"}
    ).collect()[0][0]

    feature_table_timestamp_filter = (
        col(feature_event_timestamp_column).between(
            entity_min_timestamp - timedelta(seconds=feature_table.max_age),
            entity_max_timestamp,
        )
        if feature_table.max_age
        else col(feature_event_timestamp_column) <= entity_max_timestamp
    )

    time_range_filtered_df = feature_table_df.filter(feature_table_timestamp_filter)

    return time_range_filtered_df
c.近似特征表关联
近似特征表关联操作,是获取离线特征数据的核心部分,能保证关联的特征字段数据为当前最新数据
用户在定义特征表字段max_age为特征作用时间范围容忍度(近似偏差的范围)
entity_with_id = entity_df.withColumn("_row_nr", monotonically_increasing_id())

feature_event_timestamp_column_with_prefix = (
    f"{feature_table.name}__{EVENT_TIMESTAMP_ALIAS}"
)
feature_created_timestamp_column_with_prefix = (
    f"{feature_table.name}__{CREATED_TIMESTAMP_ALIAS}"
)

projection = [
    col(col_name).alias(f"{feature_table.name}__{col_name}")
    for col_name in feature_table_df.columns
]

aliased_feature_table_df = feature_table_df.select(projection)

join_cond = (
    entity_with_id[entity_event_timestamp_column]
    >= aliased_feature_table_df[feature_event_timestamp_column_with_prefix]
)
if feature_table.max_age:
    join_cond = join_cond & (
        aliased_feature_table_df[feature_event_timestamp_column_with_prefix]
        >= entity_with_id[entity_event_timestamp_column]
        - expr(f"INTERVAL {feature_table.max_age} seconds")
    )

for key in feature_table.entity_names:
    join_cond = join_cond & (
        entity_with_id[key]
        == aliased_feature_table_df[f"{feature_table.name}__{key}"]
    )

conditional_join = entity_with_id.join(
    aliased_feature_table_df, join_cond, "leftOuter"
)
for key in feature_table.entity_names:
    conditional_join = conditional_join.drop(
        aliased_feature_table_df[f"{feature_table.name}__{key}"]
    )

window = Window.partitionBy("_row_nr", *feature_table.entity_names).orderBy(
    col(feature_event_timestamp_column_with_prefix).desc(),
    col(feature_created_timestamp_column_with_prefix).desc(),
)
filter_most_recent_feature_timestamp = conditional_join.withColumn(
    "_rank", row_number().over(window)
).filter(col("_rank") == 1)

return filter_most_recent_feature_timestamp.select(
    entity_df.columns
    + [
        f"{feature_table.name}__{feature}"
        for feature in feature_table.feature_names
    ]
)
5.离线特征同步到在线特征仓库
将特征从离线仓库同步到在线仓库,实现大致分为如下3个步骤:
a. 读取特征表的离线特征
val input = config.source match {
    case source: BQSource =>
    BigQueryReader.createBatchSource(
        sparkSession.sqlContext,
        source,
        config.startTime,
        config.endTime
    )
    case source: FileSource =>
    FileReader.createBatchSource(
        sparkSession.sqlContext,
        source,
        config.startTime,
        config.endTime
    )
}

val projected = input.select(projection: _*).cache()
b.离线特征数据作数据校验
implicit def rowEncoder: Encoder[Row] = RowEncoder(projected.schema)

TypeCheck.allTypesMatch(projected.schema, featureTable) match {
    case Some(error) =>
    throw new RuntimeException(s"Dataframe columns don't match expected feature types: $error")
    case _ => ()
}
c.离线特征数据存储到在线仓库
val validRows = projected
    .map(metrics.incrementRead)
    .filter(rowValidator.allChecks)

validRows.write
    .format("feast.ingestion.stores.redis")
    .option("entity_columns", featureTable.entities.map(_.name).mkString(","))
    .option("namespace", featureTable.name)
    .option("project_name", featureTable.project)
    .option("timestamp_column", config.source.eventTimestampColumn)
    .option("max_age", config.featureTable.maxAge.getOrElse(0L))
    .save()
6.获取在线特征数据
TODO
demo实操
原生feast-spark仅支持local、k8s、gcp模式下的spark,在我的分支中已经实现了on yarn的模式,下例中的配置皆适用于on yarn模式
通过一个简单的python案例,介绍仓库使用的全流程:
初始化连接到feast
from feast import Client, Feature, Entity, ValueType, FeatureTable
import feast_spark
from feast.data_source import FileSource, KafkaSource
from feast.data_format import ParquetFormat, AvroFormat


# 连接到feast的组件:core、serving、redis
feast_client = Client(
    project="wbliu_august_eleven", # 特征分组
    core_url="feast-release-feast-core.ume-feast:6565", # 实体、特征表元数据注册中心
    serving_url="feast-release-feast-serving.ume-feast:6566", # 特征服务中心
    # 使用feast额外的配置
    options={"spark_staging_location": "hdfs://xxx/home/jovyan/spark_staging_location",
            "spark_launcher": "yarn",
            "spark_home": "/usr/hdp/current/spark3-client/",
            "redis_host": "feast-release-feast-redis.ume-feast",
            "redis_port": 6380}
)


# 使用feast-spark做批量特征的操作
client = feast_spark.Client(feast_client)
使用feast查看历史元数据信息
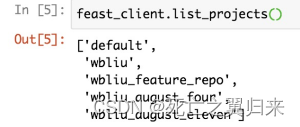
1.查看历史特征分组信息
feast_client.list_projects()
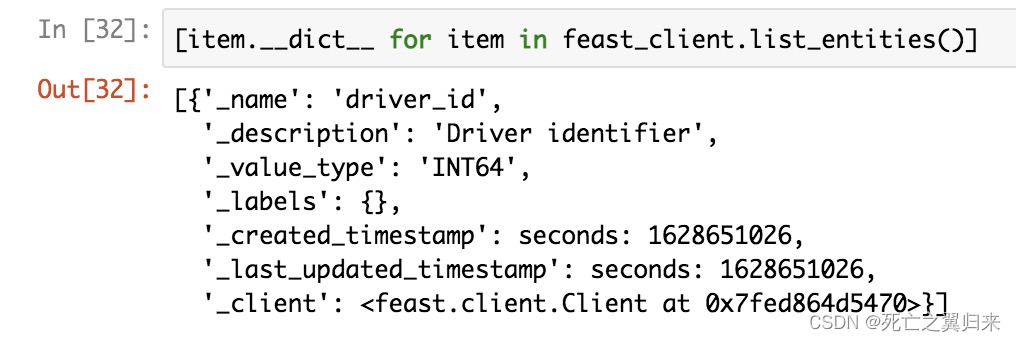
2.查看当前分组entity信息
feast_client.list_entities()
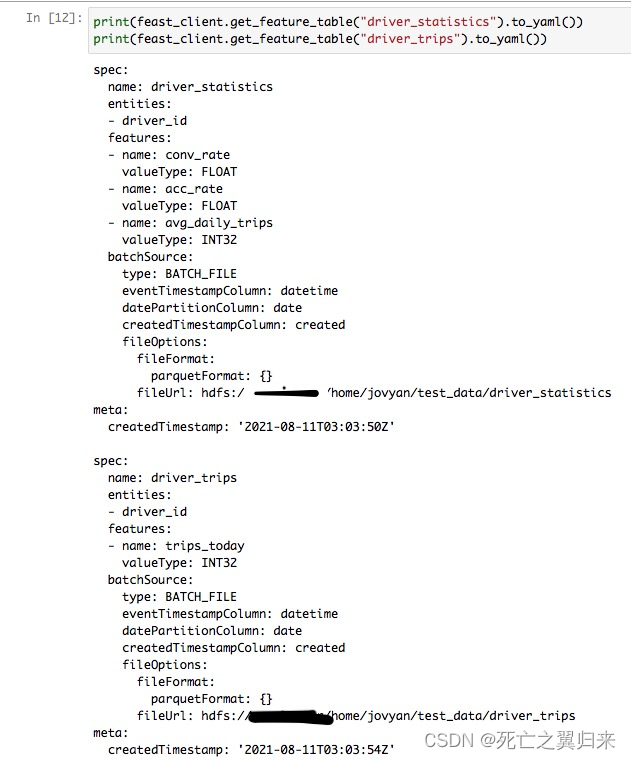
3.查看当前分组特征表信息
feast_client.list_feature_tables()

定义、注册entity和特征表到feast
1.定义entity
entity为特征表作表关联使用的主键
driver_id = Entity(name="driver_id", description="Driver identifier", value_type=ValueType.INT64)
2.定义特征
# Daily updated features
acc_rate = Feature("acc_rate", ValueType.FLOAT)
conv_rate = Feature("conv_rate", ValueType.FLOAT)
avg_daily_trips = Feature("avg_daily_trips", ValueType.INT32)
# Real-time updated features
trips_today = Feature("trips_today", ValueType.INT32)
3.定义特征表
driver_statistics = FeatureTable(
    name="driver_statistics", # 特征表名
    entities=["driver_id"], # 实体名
    features=[ # 特征对象
        acc_rate,
        conv_rate,
        avg_daily_trips
    ],
    batch_source=FileSource( # 特征表关联的批数据源信息
        event_timestamp_column="datetime", # 1.特征发生时间(必须有)
        created_timestamp_column="created", # 2.特征产生时间 (必须有)
        file_format=ParquetFormat(), # 批数据存储格式
        file_url="hdfs://xxxx/home/jovyan/test_data/driver_statistics", # 批数据存储地址
        date_partition_column="date" # 批数据存储划分partion的列
    )
)

driver_trips = FeatureTable(
    name="driver_trips",
    entities=["driver_id"],
    features=[
        trips_today
    ],
    batch_source=FileSource(
        event_timestamp_column="datetime",
        created_timestamp_column="created",
        file_format=ParquetFormat(),
        file_url="hdfs://xxx/home/jovyan/test_data/driver_trips",
        date_partition_column="date"
    )
)
4.注册特征表、entity到feast
# Registering entities and feature tables in Feast Core
feast_client.apply(driver_id)
feast_client.apply(driver_statistics)
feast_client.apply(driver_trips)
5.准备特征数据
一般特征数据在特征处理之后生成,这个例子没有提前准备特征数据,所以临时生成一份特征数据:
def generate_entities():
    return np.random.choice(999999, size=100, replace=False)

def generate_trips(entities):
    df = pd.DataFrame(columns=["driver_id", "trips_today", "datetime", "created"])
    df['driver_id'] = entities
    df['trips_today'] = np.random.randint(0, 1000, size=100).astype(np.int32)
    df['datetime'] = pd.to_datetime(
        np.random.randint(
            datetime(2020, 10, 10).timestamp(),
            datetime(2020, 10, 20).timestamp(),
            size=100),
        unit="s"
    )
    df['created'] = pd.to_datetime(datetime.now())
    return df

def generate_stats(entities):
    df = pd.DataFrame(columns=["driver_id", "conv_rate", "acc_rate", "avg_daily_trips", "datetime", "created"])
    df['driver_id'] = entities
    df['conv_rate'] = np.random.random(size=100).astype(np.float32)
    df['acc_rate'] = np.random.random(size=100).astype(np.float32)
    df['avg_daily_trips'] = np.random.randint(0, 1000, size=100).astype(np.int32)
    df['datetime'] = pd.to_datetime(
        np.random.randint(
            datetime(2020, 10, 10).timestamp(),
            datetime(2020, 10, 20).timestamp(),
            size=100),
        unit="s"
    )
    df['created'] = pd.to_datetime(datetime.now())
    return df

entities = generate_entities()
stats_df = generate_stats(entities)
trips_df = generate_trips(entities)
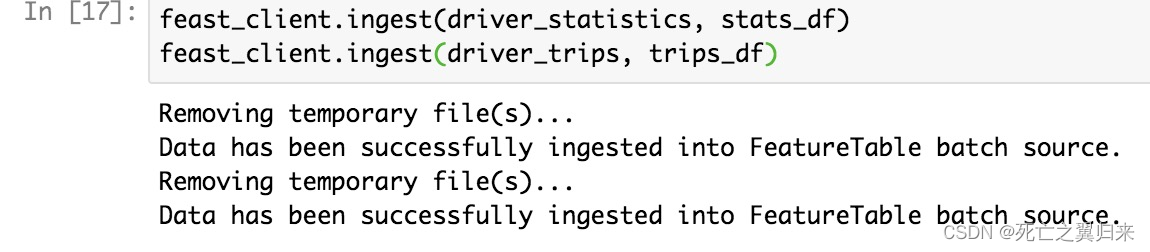
拽取特征数据,到对应的特征表批数据源地址
feast_client.ingest(driver_statistics, stats_df)
feast_client.ingest(driver_trips, trips_df)
获取离线训练特征数据
# Historical Retrieval For Training
# 准备需要抽取数据的范围
entities_with_timestamp = pd.DataFrame(columns=['driver_id', 'event_timestamp'])
entities_with_timestamp['driver_id'] = np.random.choice(entities, 10, replace=False)
entities_with_timestamp['event_timestamp'] = pd.to_datetime(np.random.randint(
    datetime(2020, 10, 18).timestamp(),
    datetime(2020, 10, 20).timestamp(),
    size=10), unit='s')

# get_historical_features will return immediately once the Spark job has been submitted succesfully.
job = client.get_historical_features(
    feature_refs=[# 需要使用的特征表和特征字段
        "driver_statistics:avg_daily_trips",
        "driver_statistics:conv_rate",
        "driver_statistics:acc_rate",
        "driver_trips:trips_today"
    ],
    entity_source=entities_with_timestamp, # 需要抽取的数据范围
    output_location="hdfs://xxx/home/jovyan/historical_feature_output" # 抽取的特征数据存放地址
)
离线特征数据同步到在线仓库
# offline to online ingestion
job = client.start_offline_to_online_ingestion(
    driver_statistics, # 需要同步的特征表
    datetime(2020, 10, 10), # 同步特征的事件时间范围
    datetime(2020, 10, 20)
拽取流数据到在线仓库
这个例子没有提前准备流特征数据,临时构建一份kafka数据:
def send_avro_record_to_kafka(topic, record):
    value_schema = avro.schema.parse(avro_schema_json)
    writer = DatumWriter(value_schema)
    bytes_writer = io.BytesIO()
    encoder = BinaryEncoder(bytes_writer)
    writer.write(record, encoder)

    producer = Producer({
        "bootstrap.servers": KAFKA_BROKER,
    })
    producer.produce(topic=topic, value=bytes_writer.getvalue())
    producer.flush()


# Note: depending on the Kafka configuration you may need to create the Kafka topic first, like below:
# from confluent_kafka.admin import AdminClient, NewTopic
# admin = AdminClient({'bootstrap.servers': KAFKA_BROKER})
# new_topic = NewTopic('driver_trips', num_partitions=1, replication_factor=3)
# admin.create_topics(new_topic)

for record in trips_df.drop(columns=['created']).to_dict('record'):
    record["datetime"] = (
        record["datetime"].to_pydatetime().replace(tzinfo=pytz.utc)
    )

    send_avro_record_to_kafka(topic="driver_trips", record=record)
添加流数据源到特征表,更新特征表元数据:
# ingest from streaming source
# Change this to any Kafka broker addresses which is accessible by the spark cluster
KAFKA_BROKER = os.getenv("DEMO_KAFKA_BROKERS", "kafka:9092")
avro_schema_json = json.dumps({
    "type": "record",
    "name": "DriverTrips",
    "fields": [
        {"name": "driver_id", "type": "long"},
        {"name": "trips_today", "type": "int"},
        {
            "name": "datetime",
            "type": {"type": "long", "logicalType": "timestamp-micros"},
        },
    ],
})
driver_trips.stream_source = KafkaSource(
    event_timestamp_column="datetime",
    created_timestamp_column="datetime",
    bootstrap_servers=KAFKA_BROKER,
    topic="driver_trips",
    message_format=AvroFormat(avro_schema_json)
)
client.apply(driver_trips)
拽取流数据到在线仓库:
# Start the streaming job and send avro record to Kafka
job = client.start_stream_to_online_ingestion(
    driver_trips
)
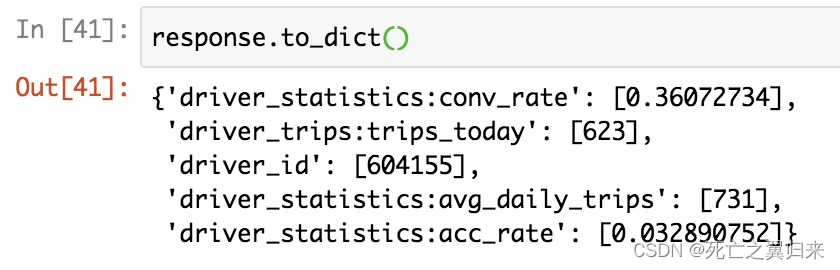
获取在线特征
response = feast_client.get_online_features(feature_refs=[ # 需要获取的特征列
        "driver_statistics:avg_daily_trips",
        "driver_statistics:conv_rate",
        "driver_statistics:acc_rate",
        "driver_trips:trips_today"
    ],
    entity_rows=[{"driver_id": 604155}], # 特征数据的主键
    project='wbliu')

response.to_dict()
目前还存在的问题
feast-spark虽然解决了一部分特征数据管理的问题,但是仍存在一些问题:
- 目前并未对离线、在线仓库做版本控制(和仓库的构建思路有一定关系)
- 特征的发现只能靠用户主动触发、需要用户具有一定的特征先验知识
- feast的使用、部署、环境等都有比较严苛的要求
展望
在feast 0.10+版本将会更轻量(对python开发者更友好)
使用方能继承实现更多个性化的特征仓库数据类型,帮助数据提供方(数仓)和数据使用方(算法)协作碰撞出更多火花
抛弃feast core、jobservice、serving等重组件,元数据可以采取本地(需要自己实现同步)或云的形式存储


 被折叠的 条评论
为什么被折叠?
被折叠的 条评论
为什么被折叠?
 到【灌水乐园】发言


