


 本文深入探讨了Android系统的最近任务功能实现原理,包括任务添加、缩略图生成、任务删除等核心流程,以及开机时的任务加载机制。
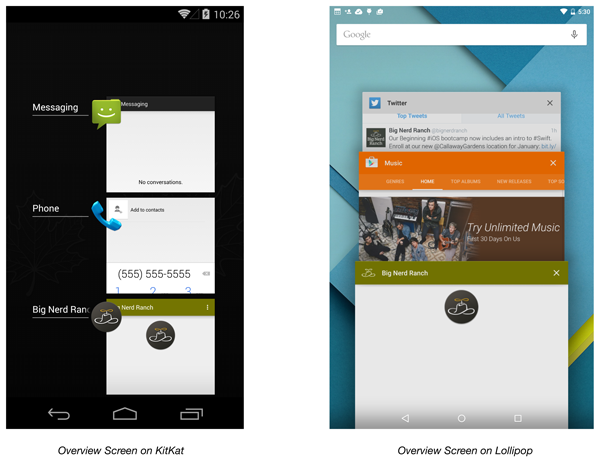
Android 4.0中添加了一个很有用的特性,那就是overView Screen功能,也就是最近任务预览功能。这个功能提供了一个列表试图,方便用户简单快捷地了解到最近使用的app或者最近进行的任务。这个功能和iOS的最近任务在界面上很相似。在android 5.0中,这个任务得到了进一步的加强,在android 5.0之前overView Screen中显示的任务快照是不可以配置的,但是在android 5.0中是可以配置的,开发者可以指定那些activity以什么样的形式,什么UI风格显示在最近任务列表中。在android 5.0中增加了很多的api来帮助开发者定制符合自己要求的最近任务预览界面。下图是android 5.0之前和5.0之后的overView screen界面效果对比:
在本文中,我们重点关注系统底层是怎么实现的,关于app怎么在android 5.0做关于overview screen的适配可以看下google的说明文档:
https://developer.android.com/guide/components/recents.html
或者Big Nerd Ranch的这篇技术贴也是不错的,简单明了:
https://www.bignerdranch.com/blog/polishing-your-Android-overview-screen-entry/
下面我们基于android 6.0系统,分析一下原生android中overview screen的实现原理。
启动app添加最近任务
我们知道在android 6.0中通过点击home上的一个icon就可以启动一个app,然后这个时候我们按下home键,再按下home右边(以nexus 6为例)的最近任务键就可以看到在overview screen中有我们刚才看到的app进程,并且界面就是我们刚才返回home那一瞬间的界面。下面,我们就结合android的源代码分析一下这个功能是怎么实现的。我们上面看到了overview screen的界面,这个部分分为两块,一个当时执行界面的缩略图的保存实现和当时执行任务的保存实现,下面我们就分这两块分析一下,首先看下task的保存过程。
最近任务task添加过程
我们知道在android中启动一个app的实质就是启动这个app的进程和这个app的主界面,所有我们app启动最后的一个操作就是把主界面进行resume显示出来,在我的Android ActivityManagerService(AMS)的Activity管理这篇博客中详细说明了android 6.0上的activity的启动流程,大家可以参考下。启动activity的最后有一步重要操作,那就是resume目标activity,掉用的是ActivityStack中的resumeTopActivityInnerLocked方法:
resumeTopActivityInnerLocked@ActivityStack.java
private boolean resumeTopActivityInnerLocked(ActivityRecord prev, Bundle options) {
    ...... //省略无关代码
    mRecentTasks.addLocked(next.task);
    ......
上面的代码我们把和overview screen无关的代码去除掉,我们看到这个方法中忘mRecentTasks添加了一个task,我们先看下mRecentTasks的定义:
private final RecentTasks mRecentTasks;它是RecentTasks的一个实例化对象,我们看一下这个类的声明:
/**
 * Class for managing the recent tasks list.
 */
class RecentTasks extends ArrayList<TaskRecord> {
这个类是继承自ArrayList类,是一个列表类的子类,因此从本质上来说这个类可以当做列表使用,事实上也确实是当做列表使用的,上面的注释页说明了这一点。从名字中也可以看出来,这个类是保存最近任务的一个列表类,其中保存的对象是TaskRecord类的对象,TaskRecord是一个task的抽象表示,专门用于描述一个task,一个task表示一个运行时的任务,一个app启动后默认就是有一个task的,这个task的名字和app的包名相同。一个task中会有一个activity栈,用于存放在这个task中曾经运行过的所有的activity信息。到这里我们在看一下RecentTasks中的addLocked方法就知道了这个方法中就是经过一些列的检查之后把TaskRecord对象放到列表中,并且保证线程间安全操作。这个方法代码比较长,这里我就贴出关键操作部分,其余的部分大家有兴趣可以自己看一下,逻辑是比较简单的:
addLocked@RecentTasks.java
final void addLocked(TaskRecord task) {
    ......
    // 将task添加到recent task列表的顶端,表示是最新使用的app
    add(0, task);
    // 通知将task任务持久化到磁盘,这个是重点操作,下面着重分析
    mService.notifyTaskPersisterLocked(task, false);
    ......
分析到这里,我们基本明白了,resumeTopActivityInnerLocked方法中调用的addLocked方法其实就是将启动的目标TaskRecord对象放到最近任务列表中。上面代码中我们提到了notifyTaskPersisterLocked这个操作,这个方法调用是我们分析的重点。
notifyTaskPersisterLocked@ActivityManagerService.java
/** Pokes the task persister. */
void notifyTaskPersisterLocked(TaskRecord task, boolean flush) {
    // 如果是home界面的task就不要加入最近任务列表
    if (task != null && task.stack != null && task.stack.isHomeStack()) {
        // Never persist the home stack.
        return;
    }
    // 重点调用
    mTaskPersister.wakeup(task, flush);
}
这段方法的实现比较简短,上面的代码中重点的调用就是wakeup方法的调用了,这个方法是定义在TaskPersister类中的,在分析这个方法之前,我们需要介绍一下TaskPersister这个类。
从名字上也可以看出,这个类就是用来将task信息持久化到磁盘上的一个类,这个类中有一个重要的线程,这个线程叫做LazyTaskWriterThread,是TaskPersister的内部类,这个线程是专门向磁盘中写入文件的,这些文件就是持久化之后的task,具体是怎么操作我们后面会详细分析,这里大家先有一个概念。这个线程一般情况是休眠的,那么什么时候会唤醒工作呢?那就是有数据写入的时候,TaskPersister提供了wakeup方法来唤醒这个工作线程,并且给出需要写入的task实例。这里还有一个问题那就是ActivityManagerService中的mTaskPersister对象是什么时候实例化的呢?答案是在ActivityManagerService的构造器中,在SystemServer启动的时候实例化:
systemReady@ActivityManagerService
public ActivityManagerService(Context systemContext) {
    ......
    mTaskPersister = new TaskPersister(systemDir, mStackSupervisor, mRecentTasks);
    ......
这里我们看到在AMS的构造器中开始将TaskPersister类实例化了。那么TaskPersister实例化的时候做了什么工作呢?我们看一下TaskPersister类的构造器:
// 根据AMS中传入的参数我们知道,第一个参数是/data/system目录的对象,第二个参数是ActivityStackSupervisor对象,最后一个参数是RecentTasks对象
TaskPersister(File systemDir, ActivityStackSupervisor stackSupervisor,
        RecentTasks recentTasks) {
    // 首先在/data/system目录下创建TASKS_DIRNAME(值为recent_tasks)名字的目录,这个目录保存所有已经持久化的task文件(xml格式).
    sTasksDir = new File(systemDir, TASKS_DIRNAME);
    if (!sTasksDir.exists()) {
        if (DEBUG) Slog.d(TAG, "Creating tasks directory " + sTasksDir);
        if (!sTasksDir.mkdir()) {
            Slog.e(TAG, "Failure creating tasks directory " + sTasksDir);
        }
    }

    // 在/data/system目录下创建IMAGES_DIRNAME(值为recent_images)的目录,这个目录主要存放在overview screen中显示的界面缩略图(png格式)。
    sImagesDir = new File(systemDir, IMAGES_DIRNAME);
    if (!sImagesDir.exists()) {
        if (DEBUG) Slog.d(TAG, "Creating images directory " + sTasksDir);
        if (!sImagesDir.mkdir()) {
            Slog.e(TAG, "Failure creating images directory " + sImagesDir);
        }
    }

    // 保存AMS传递进来的参数,后面的操作需要使用
    mStackSupervisor = stackSupervisor;
    mService = stackSupervisor.mService;
    mRecentTasks = recentTasks;

    // 创建实际工作的线程,这个线程就是实际往上面创建的目录写入文件地方
    mLazyTaskWriterThread = new LazyTaskWriterThread("LazyTaskWriterThread");
}
我们看到TaskPersister的初始化工作也是比较简单的,主要就是创建以后持久化需要写入文件的目录,然后就是创建一个工作线程对象,注意这个时候线程并没有启动。那么是哪里启动的呢?这个线程是通过TaskPersister的startPersisting方法启动的:
startPersisting@TaskPersister
void startPersisting() {
    // 如果线程没有启动的话,那就启动线程
    if (!mLazyTaskWriterThread.isAlive()) {
        mLazyTaskWriterThread.start();
    }
}
所以如果我们想要找到在AMS中哪里启动了这个线程就找哪里调用了这个方法就可以了。我们发现这个方法是在AMS的systemReady中调用的,systemReady会在系统服务启动完成的时候回调:
systemReady@ActivityManagerService
public void systemReady(final Runnable goingCallback) {
    ......
    mTaskPersister.startPersisting();
    ......
因此,我们的AMS启动完成的时候TaskPersister对象就已经准备完毕,并且其中的线程也已经启动完成了。
在我们对TaskPersister类有了一个简要的了解之后,我们就可以继续分析wakeup方法的实现了:
wakeup@TaskPersister.java
void wakeup(TaskRecord task, boolean flush) {
    // 同步操作,线程安全
    synchronized (this) {
        if (task != null) {
            int queueNdx;
            // 循环从mWriteQueue队列中查找如果当前的task已经存在于其中,并且这个task已经不在recent list中了,那么就直接调用removeThumbnails将task从mWriteQueue中移除。
            for (queueNdx = mWriteQueue.size() - 1; queueNdx >= 0; --queueNdx) {
                final WriteQueueItem item = mWriteQueue.get(queueNdx);
                if (item instanceof TaskWriteQueueItem &&
                        ((TaskWriteQueueItem) item).mTask == task) {
                    if (!task.inRecents) {
                        // This task is being removed.
                        removeThumbnails(task);
                    }
                    break;
                }
            }

            // queueNdx小于0表示在mWriteQueue没有找到,task.isPersistable表示这个app是不是可以持久化的,默认是true,app开发者可以在AndroidManifest中的activity字段中使用android:excludeFromRecents="true"或者启动某个activity的时候使用FLAG_ACTIVITY_EXCLUDE_FROM_RECENTS,这样这里的task.isPersistable就是false,这个app也就不会在overview screen显示了。
            if (queueNdx < 0 && task.isPersistable) {
                // 往mWriteQueue队列中添加一个TaskWriteQueueItem对象
                mWriteQueue.add(new TaskWriteQueueItem(task));
            }
        } else {
            // Dummy.
            // 如果传递进来的task是null的话,那么这里就往mWriteQueue中添加一个WriteQueueItem对象
            mWriteQueue.add(new WriteQueueItem());
        }
        // 如果调用者要求立即写入(flush为true)或者待写入队列的大小达到了最大的队列(MAX_WRITE_QUEUE_LENGTH = 6)的限制,那就将写入时间值为FLUSH_QUEUE(-1),表示立即写入。
        if (flush || mWriteQueue.size() > MAX_WRITE_QUEUE_LENGTH) {
            mNextWriteTime = FLUSH_QUEUE;
        } else if (mNextWriteTime == 0) {
            // 否则延迟写入PRE_TASK_DELAY_MS(3000ms)
            mNextWriteTime = SystemClock.uptimeMillis() + PRE_TASK_DELAY_MS;
        }
        if (DEBUG) Slog.d(TAG, "wakeup: task=" + task + " flush=" + flush + " mNextWriteTime="
                + mNextWriteTime + " mWriteQueue.size=" + mWriteQueue.size()
                + " Callers=" + Debug.getCallers(4));
        // 通知唤醒等待休眠的工作线程。
        notifyAll();
    }

    // 调用yieldIfQueueTooDeep方法使得当前线程让步,让我们的工作线程得以运行。
    yieldIfQueueTooDeep();
}
wakeup的工作原理我在上面的注释中已经解释了,这里不再赘述。这里需要说明一下的有两点:
1. WriteQueueItem,TaskWriteQueueItem,ImageWriteQueueItem类之间的关系
这三个类之间的关系如下:TaskWriteQueueItem和ImageWriteQueueItem都是WriteQueueItem类的子类。其中WriteQueueItem类内部没有任何数据和方法,只是一个表示一个可写入的对象的抽象,其中TaskWriteQueueItem类的实现:
private static class TaskWriteQueueItem extends WriteQueueItem {
    final TaskRecord mTask;
    TaskWriteQueueItem(TaskRecord task) {
        mTask = task;
    }
}
这个类就是一个task的包装类,表示一个可以持久化的task。
下面是ImageWriteQueueItem的实现:
private static class ImageWriteQueueItem extends WriteQueueItem {
    final String mFilename;
    Bitmap mImage;
    ImageWriteQueueItem(String filename, Bitmap image) {
        mFilename = filename;
        mImage = image;
    }
}
这也是一个image的包装类,主要用户描述一个需要持久化保存的图片,下面我们分析图片保存的时候详细分析。
上面的wakeup方法中我们只是需要写入一个TaskWriteQueueItem。
2. yieldIfQueueTooDeep方法实现
前面说到了这个方法就是当前线程让步,让我们的工作线程得以运行,那么它是怎么实现的呢?我们看下源码:
private void yieldIfQueueTooDeep() {
    boolean stall = false;
    synchronized (this) {
        // 如果我们要求立即写入的话,那么stall就是true
        if (mNextWriteTime == FLUSH_QUEUE) {
            stall = true;
        }
    }

    // 如果stall为true就调用Thread.yield方法来使得当前线程让步。
    if (stall) {
        Thread.yield();
    }
}
这里的核心操作还是Thread.yield()这个调用,这个调用就是使得当前线程主动让步cpu时间,使得我们的写入工作线程能够轮转运行,当然这只是针对VM的建议性的操作,VM不会保证一定会这么执行,关于yield的更多操作可以参考这个博客:
http://blog.csdn.net/striveyee/article/details/44257969
上面我们分析了wakeup的实现原理,总的来说就是当activity resume的时候会将task添加到recent task列表中,添加的时候会唤醒TaskPersister类中的工作线程,并且以参数的形式告知task。TaskPersister类对象和其中的线程是AMS启动的时候实例化和启动的。下面我们看下最近任务中的缩略图的添加的实现。
最近任务缩略图的实现
为了明确我们这部分的实现,我们需要知道两件事情,第一缩略图放在什么位置,第二缩略图在什么时候以什么方式生成。我们首先看第一个问题,要知道图片放在什么位置,这个好办,我们上面分析TaskPersister类的时候,发现这个类中是往/data/system/recent_images目录中写图片文件的。好的现在我们关注第二个问题,首先是要知道什么时候产生缩略图,这个我们可以不用分析代码,直接实验观察就可以了,我们adb shell进入这个目录(需要root),在overview中任务清空的情况下,我们不停地ls这个目录下的内容,然后我们启动手机上的任意一个应用。经过观察之后,会发现,这个缩略图每次都是在当前activity退出前台的时候生成缩略图。下面是我测试的时候,打开短信界面的缩略图(文件名是45_task_thumbnail.png,这个名字是AMS中命名的,下面我们会分析):
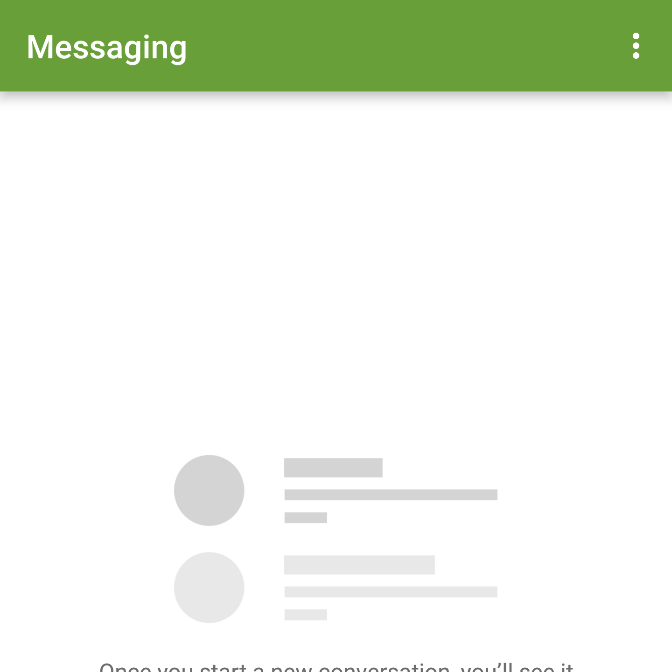
我的overview screen如下:
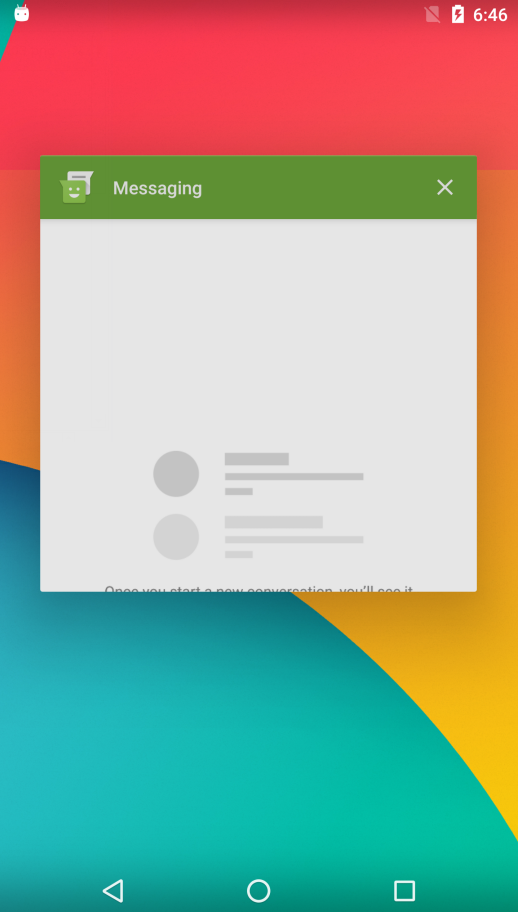
可以看到,缩略图就是显示在overview中的图片。
我们观察的现象是每当activity退出前台(按下返回键/home键/recent list键等)的时候都会生成缩略图,那就是说极有可能是在我们的activity被pause的时候,会生成缩略图!是不是这样的呢?我们看下代码就知道了,我们看activity的resume代码,为什么呢?因为我们当前activity的pause是在task中的下一个activity resume中完成的,我们还是查看resumeTopActivityInnerLocked这个方法:
resumeTopActivityInnerLocked@ActivityStack.java
private boolean resumeTopActivityInnerLocked(ActivityRecord prev, Bundle options) {
    ......
    // We need to start pausing the current activity so the top one
    // can be resumed...
    boolean dontWaitForPause = (next.info.flags&ActivityInfo.FLAG_RESUME_WHILE_PAUSING) != 0;
    // pause当前的activity
    boolean pausing = mStackSupervisor.pauseBackStacks(userLeaving, true, dontWaitForPause);
    ......
我们看到这里pause了当前显示的activity,使用了pauseBackStacks方法:
pauseBackStacks@ActivityStackSupervisor
/**
 * Pause all activities in either all of the stacks or just the back stacks.
 * @param userLeaving Passed to pauseActivity() to indicate whether to call onUserLeaving().
 * @return true if any activity was paused as a result of this call.
 */
boolean pauseBackStacks(boolean userLeaving, boolean resuming, boolean dontWait) {
    boolean someActivityPaused = false;
    for (int displayNdx = mActivityDisplays.size() - 1; displayNdx >= 0; --displayNdx) {
        ArrayList<ActivityStack> stacks = mActivityDisplays.valueAt(displayNdx).mStacks;
        for (int stackNdx = stacks.size() - 1; stackNdx >= 0; --stackNdx) {
            final ActivityStack stack = stacks.get(stackNdx);
            if (!isFrontStack(stack) && stack.mResumedActivity != null) {
                if (DEBUG_STATES) Slog.d(TAG_STATES, "pauseBackStacks: stack=" + stack +
                        " mResumedActivity=" + stack.mResumedActivity);
                // 调用ActivityStack的startPausingLocked将activity pause
                someActivityPaused |= stack.startPausingLocked(userLeaving, false, resuming,
                        dontWait);
            }
        }
    }
    return someActivityPaused;
}
我们看到这里调用了startPausingLocked方法:
startPausingLocked@ActivityStack
final boolean startPausingLocked(boolean userLeaving, boolean uiSleeping, boolean resuming,
            boolean dontWait) {
    ......
    if (mService.mHasRecents && (next == null || next.noDisplay || next.task != prev.task || uiSleeping)) {
        // 对了!!!就是这里截屏了!!!
        prev.updateThumbnailLocked(screenshotActivities(prev), null);
    }
    ......
我们在startPausingLocked中验证了我们之前的猜想,现在我们先看下updateThumbnailLocked的实现:
updateThumbnailLocked@ActivityRecord
void updateThumbnailLocked(Bitmap newThumbnail, CharSequence description) {
    if (newThumbnail != null) {
        if (DEBUG_THUMBNAILS) Slog.i(TAG_THUMBNAILS,
                "Setting thumbnail of " + this + " to " + newThumbnail);
        // 保存截图的bitmap
        boolean thumbnailUpdated = task.setLastThumbnail(newThumbnail);
        if (thumbnailUpdated && isPersistable()) {
            mStackSupervisor.mService.notifyTaskPersisterLocked(task, false);
        }
    }
    task.lastDescription = description;
}
这里的第一个参数就是bitmap,它是一个位图的表达类,上面的代码中调用了setLastThumbnail方法来保存截图得到的bitmap:
setLastThumbnail@TaskRecord
/**
 * Sets the last thumbnail.
 * @return whether the thumbnail was set
 */
boolean setLastThumbnail(Bitmap thumbnail) {
    if (mLastThumbnail != thumbnail) {
        mLastThumbnail = thumbnail;
        if (thumbnail == null) {
            if (mLastThumbnailFile != null) {
                mLastThumbnailFile.delete();
            }
        } else {
            // yes!这里开始调用我们上面说道的saveImage方法保存图片了!!
            mService.mTaskPersister.saveImage(thumbnail, mFilename);
        }
        return true;
    }
    return false;
}
到这里我们还需要看下上面screenshotActivities这个截图的操作是怎么进行的:
screenshotActivities@ActivityStack
public final Bitmap screenshotActivities(ActivityRecord who) {
  if (DEBUG_SCREENSHOTS) Slog.d(TAG_SCREENSHOTS, "screenshotActivities: " + who);
  if (who.noDisplay) {
      if (DEBUG_SCREENSHOTS) Slog.d(TAG_SCREENSHOTS, "\tNo display");
      return null;
  }

  // home桌面的话,那就跳过,因为从来不会将home桌面显示overview screen中
  if (isHomeStack()) {
      // This is an optimization -- since we never show Home or Recents within Recents itself,
      // we can just go ahead and skip taking the screenshot if this is the home stack.
      if (DEBUG_SCREENSHOTS) Slog.d(TAG_SCREENSHOTS, "\tHome stack");
      return null;
  }

  int w = mService.mThumbnailWidth;
  int h = mService.mThumbnailHeight;
  if (w > 0) {
      if (DEBUG_SCREENSHOTS) Slog.d(TAG_SCREENSHOTS, "\tTaking screenshot");
      // 调用WMS的screenshotApplications方法抓取当时的屏幕,并且生成bitmap对象。
      return mWindowManager.screenshotApplications(who.appToken, Display.DEFAULT_DISPLAY,
              w, h);
  }
  Slog.e(TAG, "Invalid thumbnail dimensions: " + w + "x" + h);
  return null;
}
上面的代码我们看到其实截图也不是AMS完成的,它是通过WMS间接完成的。
现在我们再来看一个东西,那就是图片缩略图是怎么命名的,这个很重要,因为SystemUI就是根据这个名字来加载在overview screen中显示的缩略图文件的。在上面的代码中,我们看到文件的名字就是mFilename字符串,这个字符串是在TaskRecord的初始化构造器中赋值的:
mFilename = String.valueOf(_taskId) + TASK_THUMBNAIL_SUFFIX +
                TaskPersister.IMAGE_EXTENSION;
这个赋值给出了缩略图文件名的命名方式:taskid + _task_thumbnail + .png。现在你明白上面的我pull下来的缩略图的文件名为什么是那个了吧?:)
最近任务缩略图和task写入过程
上面我们分析了task添加到最近任务列表中和缩略图生成的过程,现在我们来集中看一下这两个是怎么写入到磁盘中的。写入的操作全部都是在TaskPersister类的LazyTaskWriterThread线程中完成的:
LazyTaskWriterThread@TaskPersister
private class LazyTaskWriterThread extends Thread {

    LazyTaskWriterThread(String name) {
        super(name);
    }

    @Override
    public void run() {
        Process.setThreadPriority(Process.THREAD_PRIORITY_BACKGROUND);
        // 保存所有持久化task的id的集合
        ArraySet<Integer> persistentTaskIds = new ArraySet<Integer>();
        while (true) {
            // We can't lock mService while holding TaskPersister.this, but we don't want to
            // call removeObsoleteFiles every time through the loop, only the last time before
            // going to sleep. The risk is that we call removeObsoleteFiles() successively.
            // 如果mWriteQueue是空的话,表示所有需要写入的数据全部写入,此时probablyDone为true,表示已经完成写入操作。
            final boolean probablyDone;
            synchronized (TaskPersister.this) {
                probablyDone = mWriteQueue.isEmpty();
            }
            // 如果已经写完所有需要写入的数据的话
            if (probablyDone) {
                if (DEBUG) Slog.d(TAG, "Looking for obsolete files.");
                // 先将persistentTaskIds列表清空,下面重新添加
                persistentTaskIds.clear();
                synchronized (mService) {
                    if (DEBUG) Slog.d(TAG, "mRecents=" + mRecentTasks);
                    // 从mRecentTasks中循环执行
                    for (int taskNdx = mRecentTasks.size() - 1; taskNdx >= 0; --taskNdx) {
                        final TaskRecord task = mRecentTasks.get(taskNdx);
                        if (DEBUG) Slog.d(TAG, "LazyTaskWriter: task=" + task +
                                " persistable=" + task.isPersistable);
                        // 如果这个task是可以持久化的并且这个task存在于recent list中
                        if ((task.isPersistable || task.inRecents)
                                && (task.stack == null || !task.stack.isHomeStack())) {
                            if (DEBUG) Slog.d(TAG, "adding to persistentTaskIds task=" + task);
                            // 将这个task的id添加到persistentTaskIds中去
                            persistentTaskIds.add(task.taskId);
                        } else {
                            if (DEBUG) Slog.d(TAG,
                                    "omitting from persistentTaskIds task=" + task);
                        }
                    }
                }
                // 这里调用removeObsoleteFiles移在persistentTaskIds不存在,并且在/data/system/recent_tasks和/data/system/recent_images中存的对应task的task文件和image缩略图文件。
                removeObsoleteFiles(persistentTaskIds);
            }

            // If mNextWriteTime, then don't delay between each call to saveToXml().
            final WriteQueueItem item;
            synchronized (TaskPersister.this) {
                // mNextWriteTime不是FLUSH_QUEUE表示,客户端不要求这个输出立即写入,这是我们可以推迟INTER_WRITE_DELAY_MS(500ms)再写入。
                if (mNextWriteTime != FLUSH_QUEUE) {
                    // The next write we don't have to wait so long.
                    mNextWriteTime = SystemClock.uptimeMillis() + INTER_WRITE_DELAY_MS;
                    if (DEBUG) Slog.d(TAG, "Next write time may be in " +
                            INTER_WRITE_DELAY_MS + " msec. (" + mNextWriteTime + ")");
                }

                // 如果mWriteQueue为空,意味着没有数据需要写入,这个时候我们的线程可以休眠
                while (mWriteQueue.isEmpty()) {
                    if (mNextWriteTime != 0) {
                        mNextWriteTime = 0; // idle.
                        // 休眠之前唤醒其他等待的写入操作。
                        TaskPersister.this.notifyAll(); // wake up flush() if needed.
                    }
                    try {
                        if (DEBUG) Slog.d(TAG, "LazyTaskWriter: waiting indefinitely.")
                        // 这里直接休眠,直到有人请求写入数据唤醒
                        TaskPersister.this.wait();
                    } catch (InterruptedException e) {
                    }
                    // Invariant: mNextWriteTime is either FLUSH_QUEUE or PRE_WRITE_DELAY_MS
                    // from now.
                }
                // 唤醒之后我们从mWriteQueue中取出一条数据,准备写入。
                item = mWriteQueue.remove(0);

                // 记下当前系统时间
                long now = SystemClock.uptimeMillis();
                if (DEBUG) Slog.d(TAG, "LazyTaskWriter: now=" + now + " mNextWriteTime=" +
                        mNextWriteTime + " mWriteQueue.size=" + mWriteQueue.size());
                // 如果当前时间比之前设定的写入时间小的话,那就继续休眠直到到达规定的写入时间,为了防止多个线程同时请求写入数据而更新mNextWriteTime,这里需要循环执行。
                while (now < mNextWriteTime) {
                    try {
                        if (DEBUG) Slog.d(TAG, "LazyTaskWriter: waiting " +
                                (mNextWriteTime - now));
                        // 继续休眠剩下的时间
                        TaskPersister.this.wait(mNextWriteTime - now);
                    } catch (InterruptedException e) {
                    }
                    now = SystemClock.uptimeMillis();
                }

                // Got something to do.
            }

            // 现在开始正式写入操作,分为两种情况:需要写入的是图片文件和task,首先是image写入操作。
            if (item instanceof ImageWriteQueueItem) {
                ImageWriteQueueItem imageWriteQueueItem = (ImageWriteQueueItem) item;
                final String filename = imageWriteQueueItem.mFilename;
                final Bitmap bitmap = imageWriteQueueItem.mImage;
                if (DEBUG) Slog.d(TAG, "writing bitmap: filename=" + filename);
                FileOutputStream imageFile = null;
                try {
                    imageFile = new FileOutputStream(new File(sImagesDir, filename));
                    // 这个简单直接调用Bitmap的compress方法生成一个缩略图然后放到/data/system/recent_images目录下,文件名就是mFilename(命名规则参照上面的分析)。
                    bitmap.compress(Bitmap.CompressFormat.PNG, 100, imageFile);
                } catch (Exception e) {
                    Slog.e(TAG, "saveImage: unable to save " + filename, e);
                } finally {
                    IoUtils.closeQuietly(imageFile);
                }
            // 如果需要写入的数据是task的话
            } else if (item instanceof TaskWriteQueueItem) {
                // Write out one task.
                StringWriter stringWriter = null;
                TaskRecord task = ((TaskWriteQueueItem) item).mTask;
                if (DEBUG) Slog.d(TAG, "Writing task=" + task);
                synchronized (mService) {
                    // 这个task存在于最近任务列表中才会写入,否则没有意义。
                    if (task.inRecents) {
                        // Still there.
                        try {
                            if (DEBUG) Slog.d(TAG, "Saving task=" + task);
                            // 这里调用了saveToXml实际写入task,看名字应该是用xml格式写入。
                            stringWriter = saveToXml(task);
                        } catch (IOException e) {
                        } catch (XmlPullParserException e) {
                        }
                    }
                }
                if (stringWriter != null) {
                    // Write out xml file while not holding mService lock.
                    FileOutputStream file = null;
                    AtomicFile atomicFile = null;
                    try {
                        atomicFile = new AtomicFile(new File(sTasksDir, String.valueOf(
                                task.taskId) + RECENTS_FILENAME + TASK_EXTENSION));
                        // 下面的代码通过java io直接写入磁盘
                        file = atomicFile.startWrite();
                        file.write(stringWriter.toString().getBytes());
                        file.write('\n');
                        atomicFile.finishWrite(file);
                    } catch (IOException e) {
                        if (file != null) {
                            atomicFile.failWrite(file);
                        }
                        Slog.e(TAG, "Unable to open " + atomicFile + " for persisting. " +
                                e);
                    }
                }
            }
        }
    }
}
上面的写入大部分的逻辑我已经在注释中说明了,这里不再赘述。这里需要再说明一下:图片的写入就是一个二进制io的过程,没有什么复杂的;task的写入是通过saveToXml方法完成的,我们下面看下这个方法:
saveToXml@TaskPersister
// 这个方法返回一个StringWriter对象,方便后面的byte写入。
private StringWriter saveToXml(TaskRecord task) throws IOException, XmlPullParserException {
    if (DEBUG) Slog.d(TAG, "saveToXml: task=" + task);
    // 使用xmlSerializer来实现xml
    final XmlSerializer xmlSerializer = new FastXmlSerializer();
    StringWriter stringWriter = new StringWriter();
    xmlSerializer.setOutput(stringWriter);

    if (DEBUG) xmlSerializer.setFeature(
                "http://xmlpull.org/v1/doc/features.html#indent-output", true);

    // save task
    xmlSerializer.startDocument(null, true);

    xmlSerializer.startTag(null, TAG_TASK);
    // 这里调用了TaskRecord的saveToXml来序列化xml
    task.saveToXml(xmlSerializer);
    xmlSerializer.endTag(null, TAG_TASK);

    xmlSerializer.endDocument();
    xmlSerializer.flush();

    return stringWriter;
}
上面的代码主要通过TaskRecord的saveToXml来序列化xml,下面我们看下这个代码:
saveToXml@TaskRecord
void saveToXml(XmlSerializer out) throws IOException, XmlPullParserException {
    if (DEBUG_RECENTS) Slog.i(TAG_RECENTS, "Saving task=" + this);

    out.attribute(null, ATTR_TASKID, String.valueOf(taskId));
    if (realActivity != null) {
        out.attribute(null, ATTR_REALACTIVITY, realActivity.flattenToShortString());
    }
    if (origActivity != null) {
        out.attribute(null, ATTR_ORIGACTIVITY, origActivity.flattenToShortString());
    }
    // Write affinity, and root affinity if it is different from affinity.
    // We use the special string "@" for a null root affinity, so we can identify
    // later whether we were given a root affinity or should just make it the
    // same as the affinity.
    if (affinity != null) {
        out.attribute(null, ATTR_AFFINITY, affinity);
        if (!affinity.equals(rootAffinity)) {
            out.attribute(null, ATTR_ROOT_AFFINITY, rootAffinity != null ? rootAffinity : "@");
        }
    } else if (rootAffinity != null) {
        out.attribute(null, ATTR_ROOT_AFFINITY, rootAffinity != null ? rootAffinity : "@");
    }
    out.attribute(null, ATTR_ROOTHASRESET, String.valueOf(rootWasReset));
    out.attribute(null, ATTR_AUTOREMOVERECENTS, String.valueOf(autoRemoveRecents));
    out.attribute(null, ATTR_ASKEDCOMPATMODE, String.valueOf(askedCompatMode));
    out.attribute(null, ATTR_USERID, String.valueOf(userId));
    out.attribute(null, ATTR_EFFECTIVE_UID, String.valueOf(effectiveUid));
    out.attribute(null, ATTR_TASKTYPE, String.valueOf(taskType));
    out.attribute(null, ATTR_FIRSTACTIVETIME, String.valueOf(firstActiveTime));
    out.attribute(null, ATTR_LASTACTIVETIME, String.valueOf(lastActiveTime));
    out.attribute(null, ATTR_LASTTIMEMOVED, String.valueOf(mLastTimeMoved));
    out.attribute(null, ATTR_NEVERRELINQUISH, String.valueOf(mNeverRelinquishIdentity));
    if (lastDescription != null) {
        out.attribute(null, ATTR_LASTDESCRIPTION, lastDescription.toString());
    }
    if (lastTaskDescription != null) {
        lastTaskDescription.saveToXml(out);
    }
    out.attribute(null, ATTR_TASK_AFFILIATION_COLOR, String.valueOf(mAffiliatedTaskColor));
    out.attribute(null, ATTR_TASK_AFFILIATION, String.valueOf(mAffiliatedTaskId));
    out.attribute(null, ATTR_PREV_AFFILIATION, String.valueOf(mPrevAffiliateTaskId));
    out.attribute(null, ATTR_NEXT_AFFILIATION, String.valueOf(mNextAffiliateTaskId));
    out.attribute(null, ATTR_CALLING_UID, String.valueOf(mCallingUid));
    out.attribute(null, ATTR_CALLING_PACKAGE, mCallingPackage == null ? "" : mCallingPackage);
    out.attribute(null, ATTR_RESIZEABLE, String.valueOf(mResizeable));
    out.attribute(null, ATTR_PRIVILEGED, String.valueOf(mPrivileged));

    if (affinityIntent != null) {
        out.startTag(null, TAG_AFFINITYINTENT);
        affinityIntent.saveToXml(out);
        out.endTag(null, TAG_AFFINITYINTENT);
    }

    out.startTag(null, TAG_INTENT);
    intent.saveToXml(out);
    out.endTag(null, TAG_INTENT);

    final ArrayList<ActivityRecord> activities = mActivities;
    final int numActivities = activities.size();
    for (int activityNdx = 0; activityNdx < numActivities; ++activityNdx) {
        final ActivityRecord r = activities.get(activityNdx);
        if (r.info.persistableMode == ActivityInfo.PERSIST_ROOT_ONLY || !r.isPersistable() ||
                ((r.intent.getFlags() & FLAG_ACTIVITY_NEW_DOCUMENT
                        | FLAG_ACTIVITY_RETAIN_IN_RECENTS) == FLAG_ACTIVITY_NEW_DOCUMENT) &&
                        activityNdx > 0) {
            // Stop at first non-persistable or first break in task (CLEAR_WHEN_TASK_RESET).
            break;
        }
        out.startTag(null, TAG_ACTIVITY);
        r.saveToXml(out);
        out.endTag(null, TAG_ACTIVITY);
    }
}
我们看到这个方法中就是实际的将task的各种参数写入XmlSerializer序列化器对象中去,这些xml的tag和实际数据含义,在TaskRecord中全部有定义:
static final String ATTR_TASKID = "task_id";
private static final String TAG_INTENT = "intent";
private static final String TAG_AFFINITYINTENT = "affinity_intent";
static final String ATTR_REALACTIVITY = "real_activity";
private static final String ATTR_ORIGACTIVITY = "orig_activity";
private static final String TAG_ACTIVITY = "activity";
private static final String ATTR_AFFINITY = "affinity";
private static final String ATTR_ROOT_AFFINITY = "root_affinity";
private static final String ATTR_ROOTHASRESET = "root_has_reset";
private static final String ATTR_AUTOREMOVERECENTS = "auto_remove_recents";
private static final String ATTR_ASKEDCOMPATMODE = "asked_compat_mode";
private static final String ATTR_USERID = "user_id";
private static final String ATTR_EFFECTIVE_UID = "effective_uid";
private static final String ATTR_TASKTYPE = "task_type";
private static final String ATTR_FIRSTACTIVETIME = "first_active_time";
private static final String ATTR_LASTACTIVETIME = "last_active_time";
private static final String ATTR_LASTDESCRIPTION = "last_description";
private static final String ATTR_LASTTIMEMOVED = "last_time_moved";
private static final String ATTR_NEVERRELINQUISH = "never_relinquish_identity";
static final String ATTR_TASK_AFFILIATION = "task_affiliation";
private static final String ATTR_PREV_AFFILIATION = "prev_affiliation";
private static final String ATTR_NEXT_AFFILIATION = "next_affiliation";
private static final String ATTR_TASK_AFFILIATION_COLOR = "task_affiliation_color";
private static final String ATTR_CALLING_UID = "calling_uid";
private static final String ATTR_CALLING_PACKAGE = "calling_package";
private static final String ATTR_RESIZEABLE = "resizeable";
private static final String ATTR_PRIVILEGED = "privileged";

private static final String TASK_THUMBNAIL_SUFFIX = "_task_thumbnail";

static final boolean IGNORE_RETURN_TO_RECENTS = true;

static final int INVALID_TASK_ID = -1;

final int taskId;       // Unique identifier for this task.
String affinity;        // The affinity name for this task, or null; may change identity.
String rootAffinity;    // Initial base affinity, or null; does not change from initial root.
final IVoiceInteractionSession voiceSession;    // Voice interaction session driving task
final IVoiceInteractor voiceInteractor;         // Associated interactor to provide to app
Intent intent;          // The original intent that started the task.
Intent affinityIntent;  // Intent of affinity-moved activity that started this task.
int effectiveUid;       // The current effective uid of the identity of this task.
ComponentName origActivity; // The non-alias activity component of the intent.
ComponentName realActivity; // The actual activity component that started the task.
long firstActiveTime;   // First time this task was active.
long lastActiveTime;    // Last time this task was active, including sleep.
boolean inRecents;      // Actually in the recents list?
boolean isAvailable;    // Is the activity available to be launched?
boolean rootWasReset;   // True if the intent at the root of the task had
                        // the FLAG_ACTIVITY_RESET_TASK_IF_NEEDED flag.
boolean autoRemoveRecents;  // If true, we should automatically remove the task from
                            // recents when activity finishes
boolean askedCompatMode;// Have asked the user about compat mode for this task.
boolean hasBeenVisible; // Set if any activities in the task have been visible to the user.

String stringName;      // caching of toString() result.
int userId;             // user for which this task was created

int numFullscreen;      // Number of fullscreen activities.

boolean mResizeable;    // Activities in the task resizeable. Based on the resizable setting of
                        // the root activity.
int mLockTaskMode;      // Which tasklock mode to launch this task in. One of
                        // ActivityManager.LOCK_TASK_LAUNCH_MODE_*
private boolean mPrivileged;    // The root activity application of this task holds
                                // privileged permissions.
这里我们就不一一分析这些数据的含义了,注释中说的很清楚。
这样的话我们就能够将task以xml的形式写入到磁盘的/data/system/recent_task目录下了,下面是我的手机启动浏览器为例的task文件(文件名45_task.xml,命名规则和缩略图类似):
<?xml version='1.0' encoding='utf-8' standalone='yes' ?>
<task
  task_id="7"
  real_activity="com.android.browser/.BrowserActivity"
  affinity="android.task.browser"
  root_has_reset="true"
  auto_remove_recents="false"
  asked_compat_mode="false"
  user_id="0"
  effective_uid="10023"
  task_type="0"
  first_active_time="7104486131"
  last_active_time="7104516476"
  last_time_moved="7104486054"
  never_relinquish_identity="true"
  task_description_color="ffe6e6e6"
  task_affiliation_color="-1644826"
  task_affiliation="7"
  prev_affiliation="-1"
  next_affiliation="-1"
  calling_uid="10009"
  calling_package="com.android.launcher3"
  resizeable="false"
  privileged="false">
    <intent
      action="android.intent.action.MAIN"
      component="com.android.browser/.BrowserActivity"
      flags="10200000">
    <categories
      category="android.intent.category.LAUNCHER" />
    </intent>
</task>
这些数据和上面我们看到的代码中的数据域是一致的。
到这里我们就分析完了,overview screen中的缩略图和task文件的添加过程。下面我们看一下在最近任务中用户通过滑动删除一个task的过程。
滑动最近任务删除
用户通过点击recent task按键可以弹出overview screen,然后用户可以通过向左或者向右滑动的方式删除某个task。现在我们分析一下这个过程是怎么实现的。
首先用户点击的recent task按键输入导航键,导航键的实现是在system ui包中的,而overview screen中的滑动事件处理是在SystemUI的TaskStackView中操作的。
onStackTaskRemoved@TaskStackView.java
public void onStackTaskRemoved(TaskStack stack, Task removedTask, Task newFrontMostTask) {
    ......
    // Notify the callback that we've removed the task and it can clean up after it. Note, we
    // do this after onAllTaskViewsDismissed() is called, to allow the home activity to be
    // started before the call to remove the task.
    mCb.onTaskViewDismissed(removedTask);
上面的代码中通过回调onTaskViewDismissed移除一个task:
onTaskViewDismissed@RecentsView.java
@Override
public void onTaskViewDismissed(TaskView tv) {
    Task task = tv.getTask();
    int taskIndex = mStack.indexOfTask(task);
    boolean taskWasFocused = tv.isFocusedTask();
    // Announce for accessibility
    tv.announceForAccessibility(getContext().getString(R.string.accessibility_recents_item_dismissed,
            tv.getTask().activityLabel));
    // Remove the task from the view
    // 这里实际移除task
    mStack.removeTask(task);
    // If the dismissed task was focused, then we should focus the new task in the same index
    if (taskWasFocused) {
        ArrayList<Task> tasks = mStack.getTasks();
        int nextTaskIndex = Math.min(tasks.size() - 1, taskIndex - 1);
        if (nextTaskIndex >= 0) {
            Task nextTask = tasks.get(nextTaskIndex);
            TaskView nextTv = getChildViewForTask(nextTask);
            if (nextTv != null) {
                // Focus the next task, and only animate the visible state if we are launched
                // from Alt-Tab
                nextTv.setFocusedTask(mConfig.launchedWithAltTab);
            }
        }
    }
}
上面的代码中通过removeTask来移除task,这个方法实现在SystemServicesProxy.java中:
removeTask@SystemServicesProxy.java
/** Removes the task */
public void removeTask(final int taskId) {
    if (mAm == null) return;
    if (Constants.DebugFlags.App.EnableSystemServicesProxy) return;

    // Remove the task.
    mBgThreadHandler.post(new Runnable() {
        @Override
        public void run() {
            mAm.removeTask(taskId);
        }
    });
}
这里我们看到是通过Binder实际和AMS交互,调用的AMS的removeTask:
removeTask@ActivityManagerService
@Override
public boolean removeTask(int taskId) {
    synchronized (this) {
        enforceCallingPermission(android.Manifest.permission.REMOVE_TASKS,
                "removeTask()");
        long ident = Binder.clearCallingIdentity();
        try {
            return removeTaskByIdLocked(taskId, true);
        } finally {
            Binder.restoreCallingIdentity(ident);
        }
    }
}
这里进一步调用了removeTaskByIdLocked来操作:
removeTaskByIdLocked@ActivityManagerService
/**
 * Removes the task with the specified task id.
 *
 * @param taskId Identifier of the task to be removed.
 * @param killProcess Kill any process associated with the task if possible.
 * @return Returns true if the given task was found and removed.
 */
private boolean removeTaskByIdLocked(int taskId, boolean killProcess) {
    TaskRecord tr = mStackSupervisor.anyTaskForIdLocked(taskId, false);
    if (tr != null) {
        tr.removeTaskActivitiesLocked();
        // 这里从最近任务列表中移除了task
        cleanUpRemovedTaskLocked(tr, killProcess);
        if (tr.isPersistable) {
            // 唤醒TaskPersister中线程开始工作,这里的task参数是null就表示删除相应的文件,下面我们会分析。
            notifyTaskPersisterLocked(null, true);
        }
        return true;
    }
    Slog.w(TAG, "Request to remove task ignored for non-existent task " + taskId);
    return false;
}
这里我们看到了首先是调用了cleanUpRemovedTaskLocked方法移除task:
cleanUpRemovedTaskLocked@ActivityManagerService
private void cleanUpRemovedTaskLocked(TaskRecord tr, boolean killProcess) {
    mRecentTasks.remove(tr);
    ......
然后就是通过notifyTaskPersisterLocked唤醒TaskPersister中的线程:
notifyTaskPersisterLocked@ActivityManagerService
/** Pokes the task persister. */
void notifyTaskPersisterLocked(TaskRecord task, boolean flush) {
    if (task != null && task.stack != null && task.stack.isHomeStack()) {
        // Never persist the home stack.
        return;
    }
    mTaskPersister.wakeup(task, flush);
}
我们现在需要记住我们这里调用wakeup方法的task参数是null,我们现在看下wakeup方法中的处理:
void wakeup(TaskRecord task, boolean flush) {
    synchronized (this) {
        if (task != null) {
            int queueNdx;
            for (queueNdx = mWriteQueue.size() - 1; queueNdx >= 0; --queueNdx) {
                final WriteQueueItem item = mWriteQueue.get(queueNdx);
                if (item instanceof TaskWriteQueueItem &&
                        ((TaskWriteQueueItem) item).mTask == task) {
                    if (!task.inRecents) {
                        // This task is being removed.
                        removeThumbnails(task);
                    }
                    break;
                }
            }
            if (queueNdx < 0 && task.isPersistable) {
                mWriteQueue.add(new TaskWriteQueueItem(task));
            }
        } else {
            // Dummy.
            // 这里处理task为null的情况,如果是null的话,那就往队列中放一个写入数据类的父类WriteQueueItem。
            mWriteQueue.add(new WriteQueueItem());
        }
        if (flush || mWriteQueue.size() > MAX_WRITE_QUEUE_LENGTH) {
            mNextWriteTime = FLUSH_QUEUE;
        } else if (mNextWriteTime == 0) {
            mNextWriteTime = SystemClock.uptimeMillis() + PRE_TASK_DELAY_MS;
        }
        if (DEBUG) Slog.d(TAG, "wakeup: task=" + task + " flush=" + flush + " mNextWriteTime="
                + mNextWriteTime + " mWriteQueue.size=" + mWriteQueue.size()
                + " Callers=" + Debug.getCallers(4));
        notifyAll();
    }

    yieldIfQueueTooDeep();
}
当task为空的时候,我们就往队列中放一个写入数据类的父类WriteQueueItem,我们在上面分析LazyTaskWriterThread这个类写入的时候,看到了如果是父类的话那将不做任何写入操作,但是线程进入下一次循环之后会调用removeObsoleteFiles方法:
removeObsoleteFiles@TaskPersister
private void removeObsoleteFiles(ArraySet<Integer> persistentTaskIds) {
    // 移除多余的task文件
    removeObsoleteFiles(persistentTaskIds, sTasksDir.listFiles());
    // 移除多余的image文件
    removeObsoleteFiles(persistentTaskIds, sImagesDir.listFiles());
}
上面的操作会调用这个多态方法:
private static void removeObsoleteFiles(ArraySet<Integer> persistentTaskIds, File[] files) {
    if (DEBUG) Slog.d(TAG, "removeObsoleteFile: persistentTaskIds=" + persistentTaskIds +
            " files=" + files);
    if (files == null) {
        Slog.e(TAG, "File error accessing recents directory (too many files open?).");
        return;
    }
    for (int fileNdx = 0; fileNdx < files.length; ++fileNdx) {
        File file = files[fileNdx];
        String filename = file.getName();
        final int taskIdEnd = filename.indexOf('_');
        if (taskIdEnd > 0) {
            final int taskId;
            try {
                taskId = Integer.valueOf(filename.substring(0, taskIdEnd));
                if (DEBUG) Slog.d(TAG, "removeObsoleteFile: Found taskId=" + taskId);
            } catch (Exception e) {
                Slog.wtf(TAG, "removeObsoleteFile: Can't parse file=" + file.getName());
                file.delete();
                continue;
            }
            // 如果persistentTaskIds中有这个id并且我们的目录列表中有的话,那就直接删除它!!
            if (!persistentTaskIds.contains(taskId)) {
                if (DEBUG) Slog.d(TAG, "removeObsoleteFile: deleting file=" + file.getName());
                file.delete();
            }
        }
    }
}
到这里我们就分析完了,缩略图和task文件的删除过程。
最近任务在系统开机的时候的加载
我们android 6.0中的overview screen中的内容是不会因为系统重启而丢失的,因为根据上面的分析可知我们将数据持久化到磁盘中了,系统开机的时候,AMS会重新加载那些保存的task:
systemReady@ActivityManagerService
public void systemReady(final Runnable goingCallback) {
    ......
    mRecentTasks.clear();
    mRecentTasks.addAll(mTaskPersister.restoreTasksLocked());
    mRecentTasks.cleanupLocked(UserHandle.USER_ALL);
    ......
可以看到,这里我们的操作就是首先清空mRecentTasks列表,然后通过调用TaskPersister类的restoreTasksLocked方法重新加载保存的task文件,restoreTasksLocked方法我们就不分析了,这个操作就是xml序列化的反过程,大家可以自行分析下。
上面我们只是分析了task的重新加载的过程,那么最近任务缩略图是在哪里加载的呢?答案是SystemUI中,在系统开机的时候系统会启动SystemUI,然后SystemUI的RecentsTaskLoader类会实际去/data/system/recent_images目录下加载图片,这里就不详细分析它的实现了。另外在系统启动完成之后,用户通过点击recent list按键来查看最近任务的话,这个时候图片还没有来得及写入到磁盘中,但是这个时候就需要显示图片,这个时候SystemUI的RecentsTaskLoader会通过Binder向AMS请求这个缩略图文件,稍后的时候这个图片就会被存储。


 782
782

 被折叠的 条评论
为什么被折叠?
被折叠的 条评论
为什么被折叠?
 到【灌水乐园】发言


