


大三下学期的企业实训——电商项目的开发,此课程内容为开发一个电商网站的所有模板,包括框架搭建、用户管理、商品分类、商品、订单、收货地址、购物车等。此博客是在上完实训课后的总结,跟大家分享一下。
主要任务:框架搭建。
1、创建项目
建立一个Dynamic Web Project,在此项目中我们暂定项目名称为shop。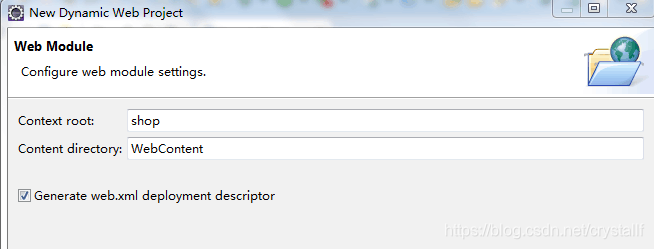
注意:记得勾选建立web.xml的选项,因为我们在配置时为防止中文乱码会在web.xml中配置,当然还有其他方面的原因,暂且不提。
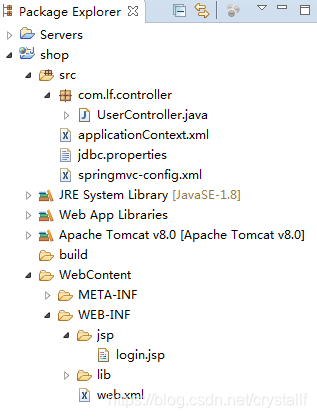
然后我们需要将项目中所需要的jar包拷到WebContent/WEB-INF/lib下面,因为我们后期会用到jar里的类。对于相关jar包可去网上下载。
2、配置文件
(1)applicationContext.xml 此文件在src下面创建。创建完成后需要添加完整的约束。
<beans xmlns="http://www.springframework.org/schema/beans"
xmlns:xsi="http://www.w3.org/2001/XMLSchema-instance"
xmlns:mvc="http://www.springframework.org/schema/mvc"
xmlns:context="http://www.springframework.org/schema/context"
xmlns:aop="http://www.springframework.org/schema/aop"
xmlns:tx="http://www.springframework.org/schema/tx"
xsi:schemaLocation="http://www.springframework.org/schema/beans
    http://www.springframework.org/schema/beans/spring-beans-4.3.xsd
    http://www.springframework.org/schema/mvc
    http://www.springframework.org/schema/mvc/spring-mvc-4.3.xsd
    http://www.springframework.org/schema/context
    http://www.springframework.org/schema/context/spring-context-4.3.xsd
    http://www.springframework.org/schema/aop
    http://www.springframework.org/schema/aop/spring-aop-4.3.xsd
    http://www.springframework.org/schema/tx
    http://www.springframework.org/schema/tx/spring-tx-4.3.xsd">
</beans>
添加完约束后,配置事务管理器等,此部分在“beans”内完成。
<!-- 配置扫描@Service @@Repository注解 -->
<context:component-scan base-package=“com.zq.service" />

<!--读取jdbc.properties -->
<context:property-placeholder location="classpath:jdbc.properties" />

<!-- 打开aspectj的注解开发方式 -->
<aop:aspectj-autoproxy />

<!-- 配置数据库连接 -->
<bean id="dataSource" class="com.mchange.v2.c3p0.ComboPooledDataSource">
	<property name="driverClass" value="${driverClass}"></property>
	<property name="jdbcUrl" value="${jdbcUrl}"></property>
	<property name="user" value="${user}"></property>
	<property name="password" value="${password}"></property>
</bean>

<!-- 配置事务管理器 -->
<bean id="transactionManager"
	class="org.springframework.jdbc.datasource.DataSourceTransactionManager">
	<property name="dataSource" ref="dataSource"></property>
</bean>

<!-- 注册一下事务管理器的驱动 -->
<tx:annotation-driven transaction-manager="transactionManager" />
(2)jdbc.properties 此文件在src下面创建。
driverClass=com.mysql.jdbc.Driver
jdbcUrl=jdbc:mysql://localhost:3306/shop
user=root
password=root
(3)springmvc-config.xml 此文件在src下面创建。注意:约束同(1)。
<!-- 配置扫描器 -->
<context:component-scan base-package="com.zq.controller" />
<!-- 注解驱动 -->
<mvc:annotation-driven />
<!--配置静态资源的访问映射,此配置中的文件,将不被前端控制器拦截 -->
<mvc:resources location="/js/" mapping="/js/**" />
<mvc:resources location="/css/" mapping="/css/**" />
<mvc:resources location="/images/" mapping="/images/**" />

<!-- 配置视图解释器ViewResolver -->
<bean id="jspViewResolver“ class="org.springframework.web.servlet.view.InternalResourceViewResolver">
	<property name="prefix" value="/WEB-INF/jsp/" />
	<property name="suffix" value=".jsp" />
</bean>

<!-- 配置拦截器,先不加 -->
<!-- <mvc:interceptors>
	<mvc:interceptor>
		<mvc:mapping path="/**" />
		<bean class="com.zq.interceptor.LoginInterceptor" />
	</mvc:interceptor>
</mvc:interceptors> -->
(4)web.xml
<!-- 配置加载Spring文件的监听器-->
<context-param>
	<param-name>contextConfigLocation</param-name>
	<param-value>classpath:applicationContext.xml</param-value>
</context-param>
<listener>
	<listener-class>
		org.springframework.web.context.ContextLoaderListener
	</listener-class>
</listener>

<!-- 防止中文乱码,过滤器 -->
<filter>
	<filter-name>encodingFilter</filter-name>
  	<filter-class>org.springframework.web.filter.CharacterEncodingFilter</filter-class>
  	<init-param>
  		<param-name>encoding</param-name>
  		<param-value>UTF-8</param-value>
  	</init-param>
</filter>
<filter-mapping>
  	<filter-name>encodingFilter</filter-name>
  	<url-pattern>/*</url-pattern>
</filter-mapping>
<servlet>
	<!-- 前端控制器 -->
  	<servlet-name>springmvc</servlet-name>
  	<servlet-class>org.springframework.web.servlet.DispatcherServlet</servlet-class>

  	<!-- 初始化加载配置文件 可以不配,不配时,默认加载的springmvc的配置文件,去WEB-INF下面找:servlet的名称-servlet.xml-->
  	<init-param>
  		<param-name>contextConfigLocation</param-name>
  		<param-value>classpath:springmvc-config.xml</param-value>
  	</init-param>

  	<!-- 表示容器一启动就加载servlet -->
  	<load-on-startup>1</load-on-startup>
</servlet>
<servlet-mapping>
	<servlet-name>springmvc</servlet-name>
  	<url-pattern>*.do</url-pattern>
	<!-- /拦截所有的请求,*.do拦截访问请求地址后缀是.do的 -->
</servlet-mapping>
3、测试一下
首先在WebContent/WEB-INF建一个文件夹为jsp,并创建一个login.jsp;在src下创建一个包,并创建一个类UserController。

启动运行后,在其地址栏后添加user/toLogin.do,其运行结果如图:

未完待续…


 1110
1110


 被折叠的 条评论
为什么被折叠?
被折叠的 条评论
为什么被折叠?
 到【灌水乐园】发言


