


前言
花了一整天的时间在研究怎么搭这个Jstorm服务,本人对于linux特别不熟练,加上没有特别完美的小白教程,Github上官方的教程也有个别的地方语焉不详,总之踩了很多的坑。终于在踩遍了各种坑之后,才总算把服务成功在阿里云的一台云服务器上成功搭建起来了。因此写下这篇文章,一是给想要搭建Jstorm的人一个参考,希望有所帮助,二是给自己做个笔记,把坑捋一捋,防止以后忘了。
所需材料
- jdk-8u91-linux-x64.tar.gz
- zookeeper-3.4.8.tar.gz
- jstorm-2.1.1.zip
- apache-tomcat-8.0.36.tar.gz
mkdir /home/hadoop
cd /home/hadoop
JDK的安装与配置
wget http://download.oracle.com/otn-pub/java/jdk/8u91-b14/jdk-8u91-linux-x64.tar.gz
tar -xvzf jdk-8u91-linux-x64.tar.gz
32位系统请下载32位版本的JDK,上面完成了JDK的下载与解压,下面需要配置JDK的环境变量
编辑~/.bashrc文件,添加环境变量,JAVA_HOME的路径根据个人解压位置不同需要更改,我的JDK解压之后路径就是/home/hadoop/jdk1.8.0_91
vi ~/.bashrc
export JAVA_HOME=/home/hadoop/jdk1.8.0_91
export JAVA_BIN=$JAVA_HOME/bin
export JAVA_LIB=$JAVA_HOME/lib
export CLASSPATH=.:$JAVA_LIB/tools.jar:$JAVA_LIB/dt.jar
export PATH=$JAVA_BIN:$PATH添加完上述文本后,执行source ~/.bashrc,使改变生效。
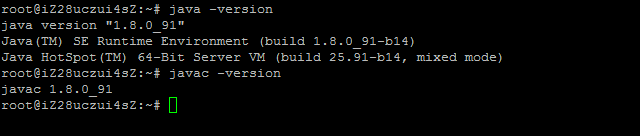
接下来执行java -version和javac -version来检查环境变量是否更改成功,若成功将如下图所示
Zookeeper的安装与配置
cd /home/hadoop
wget https://mirrors.tuna.tsinghua.edu.cn/apache/zookeeper/zookeeper-3.4.8/zookeeper-3.4.8.tar.gz
tar -zxvf zookeeper-3.4.8.tar.gz
配置环境变量
vi /etc/profile
加入以下内容
export ZOOKEEPER_HOME=/home/hadoop/zookeeper-3.4.8
export PATH=$PATH:$JSTORM_HOME/bin:$ZOOKEEPER_HOME/bin
CLASSPATH=$ZOOKEEPER_HOME/lib完成以后执行source ~/.bashrc,使配置生效
进入$ZOOKEEPER_HOME/conf目录,将zoo_sample.cfg重命名为zoo.cfg
cd $ZOOKEEPER_HOME/conf
mv zoo_sample.cfg zoo.cfg
修改zoo.cfg文件,参考我的配置文件以下
# sending a request and getting an acknowledgement
syncLimit=5
# the directory where the snapshot is stored.
# do not use /tmp for storage, /tmp here is just
# example sakes.
dataDir=/tmp/zookeeper
# the port at which the clients will connect
clientPort=2181
# the maximum number of client connections.
# increase this if you need to handle more clients
#maxClientCnxns=60
#
# Be sure to read the maintenance section of the
# administrator guide before turning on autopurge.
#
# http://zookeeper.apache.org/doc/current/zookeeperAdmin.html#sc_maintenance
#
# The number of snapshots to retain in dataDir
#autopurge.snapRetainCount=3
# Purge task interval in hours
# Set to "0" to disable auto purge feature
#autopurge.purgeInterval=1
server.1=115.29.141.33:2888:3888
启动Zookeeper
cd $ZOOKEEPER_HOME/bin
./zkServer.sh start
Jstorm的安装与配置
cd /home/hadoop
unzip jstorm-2.1.1.zip配置环境变量,vi ~/.bashrc,添加以下内容
export JSTORM_HOME=/home/hadoop/jstorm-2.1.1
export PATH=$PATH:$JSTORM_HOME/bin:$ZOOKEEPER_HOME/bin完成以后执行source ~/.bashrc,使配置生效
配置Jstorm的配置文件
cd $JSTORM_HOME/conf
vi storm.yaml
我的配置文件参考如下
########### These MUST be filled in for a storm configuration
 storm.zookeeper.servers:
     - "localhost"

 storm.zookeeper.root: "/jstorm"
 nimbus.childopts: "-Xmx256m"
 supervisor.childopts: "-Xmx256m"
 worker.childopts: "-Xmx128m"
# cluster.name: "default"

 #nimbus.host/nimbus.host.start.supervisor is being used by $JSTORM_HOME/bin/start.sh
 #it only support IP, please don't set hostname
 # For example
 # nimbus.host: "10.132.168.10, 10.132.168.45"
 nimbus.host: "localhost"
 #nimbus.host.start.supervisor: false

# %JSTORM_HOME% is the jstorm home directory
 storm.local.dir: "%JSTORM_HOME%/data"
 # please set absolute path, default path is JSTORM_HOME/logs
# jstorm.log.dir: "absolute path"

# java.library.path: "/usr/local/lib:/opt/local/lib:/usr/lib"


# if supervisor.slots.ports is null,
# the port list will be generated by cpu cores and system memory size
# for example,
# there are cpu_num = system_physical_cpu_num/supervisor.slots.port.cpu.weight
# there are mem_num = system_physical_memory_size/(worker.memory.size * supervisor.slots.port.mem.weight)
# The final port number is min(cpu_num, mem_num)
# supervisor.slots.ports.base: 6800
# supervisor.slots.port.cpu.weight: 1.2
# supervisor.slots.port.mem.weight: 0.7
# supervisor.slots.ports: null
# supervisor.slots.ports:
#    - 6800
#    - 6801
#    - 6802
#    - 6803

# Default disable user-define classloader
# If there are jar conflict between jstorm and application,
# please enable it
# topology.enable.classloader: false

# enable supervisor use cgroup to make resource isolation
# Before enable it, you should make sure:
#       1. Linux version (>= 2.6.18)
#       2. Have installed cgroup (check the file's existence:/proc/cgroups)
#       3. You should start your supervisor on root
# You can get more about cgroup:
#   http://t.cn/8s7nexU
# supervisor.enable.cgroup: false


### Netty will send multiple messages in one batch
### Setting true will improve throughput, but more latency
# storm.messaging.netty.transfer.async.batch: true

### if this setting  is true, it will use disruptor as internal queue, which size is limited
### otherwise, it will use LinkedBlockingDeque as internal queue , which size is unlimited
### generally when this setting is true, the topology will be more stable,
### but when there is a data loop flow, for example A -> B -> C -> A
### and the data flow occur blocking, please set this as false
# topology.buffer.size.limited: true

### default worker memory size, unit is byte
# worker.memory.size: 2147483648

# Metrics Monitor
# topology.performance.metrics: it is the switch flag for performance
# purpose. When it is disabled, the data of timer and histogram metrics
# will not be collected.
# topology.alimonitor.metrics.post: If it is disable, metrics data
# will only be printed to log. If it is enabled, the metrics data will be
# posted to alimonitor besides printing to log.
# topology.performance.metrics: true
# topology.alimonitor.metrics.post: false

# UI MultiCluster
# Following is an example of multicluster UI configuration
# ui.clusters:
#     - {
#         name: "jstorm",
#         zkRoot: "/jstorm",
#         zkServers:
#             [ "localhost"],
#         zkPort: 2181,
#       }
启动nimbus或supervisor
cd $JSTORM_HOME/bin
nohup jstorm nimbus &
nohup jstorm supervisor &
采用nohup模式启动,启动是否成功需要查看log日志,否则直接启动的话会踩到终端一旦关闭服务自动挂掉的坑。需要注意的地方就是,如果启动nimbus或者supervisor的时候报JVM内存不足的错的时候,就应该参考我的配置文件里加上内存的配置。
JStorm-UI的安装与配置
在提交 topology.jar的节点上,执行以下命令:
mkdri ~/.jstorm
cp $JSTORM_HOME/conf/storm.yaml ~/.jstorm
部署并启动tomcat
cd home/hadoop
tar -xvzf apache-tomcat-8.0.36.tar.gz
cd apache-tomcat-8.0.36/webapps
cp $JSTORM_HOME/jstorm-ui-2.1.1.war ./
mv ROOT ROOT.old
ln -s jstorm-2.1.0 ROOT(注意,不是ln -s jstorm-2.1.0.war ROOT)
cd ../bin
./startup.sh
此时访问该服务器IP:8080就能够看到成功部署后的画面了,如下图。务必先启动zookeeper,再启动nimbus或supervisor,最后启动tomcat。

致谢
搭建过程中参考jstorm安装配置以及JStorm环境搭建,非常感谢作者的辛勤劳动!


 5377
5377

 被折叠的 条评论
为什么被折叠?
被折叠的 条评论
为什么被折叠?
 到【灌水乐园】发言


