


文章目录
一、网络分层
参考:互联网协议入门

分清 TCP、UDP 和 HTTP 协议的区别。
传输层有两个传输协议:TCP(传输控制协议)和 UDP(用户数据报协议),TCP 是一个可靠的面向连接的协议,UDP 是不可靠的或者说无连接的协议。
应用层是传输层的上层,作用是对传输层的数据进行解读,应用层规定了对传输层的数据进行解读的格式。如 HTTP、FTP、Telnet、SMTP、POP3 等。
二、TCP 的三次握手与四次挥手
参考:TCP报文格式
示意图:

2.1、三次握手
- 第一次握手:建立连接。客户端发送连接请求报文段,将 SYN 设置为 1、Sequence Number(seq)为 x;接下来客户端进入 SYN_SENT 状态,等待服务端的确认。
- 第二次握手:服务器收到客户端的 SYN 报文段,对 SYN 报文段进行确认,设置 Acknowledgement Number(ACK)为 x+1(seq+1);同时自己还有发送 SYN 请求信息,将 SYN 设置为 1,seq 为 y。服务端将上述所有信息放到 SYN+ACK 报文段中,一并发送给客户端,此时服务端进入 SYN_REVD 状态。
- 第三次握手:客户端收到服务端的 SYN+ACK 报文段;然后将 ACK 设置为 y+1,向服务端发送 ACK 报文段,这个报文段发送完毕后,客户端和服务端都进入 ESTABLISHED(TCP 连接成功)状态,完成 TCP 的三次握手。
2.2、四次挥手
- 第一次挥手:客户端设置 seq 和 ACK,向服务端发送一个 FIN 报文段。此时,客户端进入 FIN_WAIT_1 状态,表示客户端没有数据要发送给服务端了。
- 第二次挥手:服务端收到了客户端发送的 FIN 报文段,向客户端回了一个 ACK 报文段。
- 第三次挥手:服务端向客户端发送 FIN 报文段,请求关闭连接,同时服务端进入 LAST_ACK 状态。
- 第四次挥手:客户端收到服务端发送的 FIN 报文段,向服务端发送 ACK 报文段,然后客户端进入 TIME_WAIT 状态。服务端收到客户端的 ACK 报文段以后,就关闭连接。此时,客户端等待 2MSL(最大报文段生存时间)后依然没有收到回复,则说明服务端已正常关闭,这样客户端也可以关闭连接了。
三、HTTP 协议
3.1、HTTP 简介
3.1.1、HTTP 历史版本
- HTTP 0.9:1991 年发布的第一个版本,只有一个命令 GET,服务器只能回应 HTML 格式的字符串。
- HTTP 1.0:1996 年发布的版本,内容量大大增加。除了 GET 命令外,还引入了 POST 命令和 HEAD 命令。HTTP 请求和回应的格式除了数据部分,每次通信都必须包括头信息,用来描述一些元数据。
- HTTP 1.1:1997 年发布的版本,进一步完善了 HTTP 协议,直到现在还是最流行的版本。
- SPDY 协议:2009 年谷歌为了解决 HTTP 1.1 效率不高的问题而自行研发的协议。
- HTTP 2:2015 年新发布的版本,SPDY 协议的主要特性也在此版本中。
3.1.2、HTTP 协议的主要特点
- 支持 C/S(客户端/服务器)模式。
- 简单快速:客户端向服务器请求服务时,只需传送请求方法和路径。请求方法常用的有 GET、HEAD、POST,每种方法规定了客户端与服务器联系的类型不同。由于 HTTP 协议简单,使得 HTTP 服务器的程序规模小,因而通信速度很快。
- 灵活:HTTP 允许传输任意类型的数据对象。正在传输的类型由 Content-Type 加以标记。
- 无连接:无连接的含义是限制每次连接只处理一个请求。服务器处理完客户端的请求,并受到客户端的应答后,即断开连接。采用这种方式可以节省传输时间。
- 无状态:HTTP 协议是无状态协议,无状态是指协议对于事务处理没有记忆能力。缺少状态意味着如果后续处理需要前面的信息,则它必须重传,这样可能导致每次连接传送的数据量增大;而另一方面,在服务器不需要先前信息时它的应答速度就较快。
3.1.3、HTTP URL格式
http://host[":"port][abs_path]
http:表示要通过 HTTP 协议来定位网络资源。
host:表示合法的 Internet 主机域名或者 IP 地址。
port:指定一个端口号,为空使用默认端口 80。
abs_path:指定请求资源的 URI(Web 上任意的可用资源)。
3.2、HTTP 请求报文
HTTP 报文是面向文本的,报文中的每一个字段都是一些 ASCII 码串,各个字段的长度是不确定的。一般一个 HTTP 请求报文由请求行、请求报头、空行和请求数据 4 个部分组成。


1、请求行
请求行由请求方法,URL 和协议版本组成。格式如下:
Method Request-URL HTTP-Version CRLF
- Method:请求方法。
- Request-URL:统一资源标识符。
- HTTP-Version:请求的 HTTP 协议版本。
- CRLF:回车和换行(除了作为结尾的 CRLF 外,不允许出现单独的 CR 或 LF 字符)。
其中 HTTP 的请求方法有如下 8 种。
- GET:请求获取 Request-URL 所标识的资源。
- POST:在 Request-URL 所标识的资源后附加新的数据。
- HEAD:请求获取由 Request-URL 所标识的消息响应报头。
- PUT:请求服务器存储一个资源,并用 Request-URL 作为其标识。
- DELETE:请求服务器删除 Request-URL 所标识的资源。
- TRACE:请求服务器回送收到的请求消息,主要用于测试或诊断。
- CONNECT:HTTP 1.1 协议中预留给能够将连接改为管道方式的代理服务器。
- OPTIONS:请求查询服务器的性能,或者查询与资源相关的选项和需求。
2、 请求报头
在请求行之后会有 0 个或者多个请求报头,每个请求报头都包含一个名字和一个值,它们之间用英文冒号 “:” 分割。
3、 请求数据
请求数据不在 GET 方法中使用,而在 POST 方法中使用。POST 方法适用于需要客户端填写表单的场合,与请求数据相关的最常用的请求报头是 Content-Type 和 Content-Length。
3.3、HTTP 响应报文
HTTP 的响应报文由状态行、响应报头、空行、响应正文组成。


1、状态行
状态行格式如下。
HTTP-Version Status-Code Reason-Phrase CRLF
-
HTTP-Version:服务器的 HTTP 协议版本。
-
Status-Code :服务器发回的响应状态码,状态码由 3 位数字组成,第一个数字定义了响应的类别。有 5 种可能取值。
(1)100~199:指示信息,收到请求,需要请求继续执行操作。
(2)200~299:请求成功,请求已被成功接收并处理。
(3)300~399:重定向,要完成请求必须进行更进一步的操作。
(4)400~499:客户端错误,请求有语法错误或请求无法实现。
(5)500~599:服务器错误,服务器不能实现合法的请求。常见的状态码如下。
(1)200 OK:客户端请求成功。
(2)400 Bad Request:客户端请求有语法错误,服务器无法理解。
(3)401 Unauthorized:请求未经授权,这个状态码必须和 WWW-Authenticate 报头域一起使用。
(4)403 Forbidden:服务器收到请求,但是拒绝提供服务。
(5)500 Internal Server Error:服务器内部错误,无法完成请求。
(6)503 Server Unavailable:服务器当前不能处理客户端的请求,一段时间后可能恢复正常。 -
Reason-Phrase:原因短语(状态码描述)。
-
CRLF:回车和换行。
2、响应报头
在状态行之后会有 0 个或者多个请求报头,每个响应报头都包含一个名字和一个值,它们之间用英文冒号 “:” 分割。
3、响应正文
服务器返回的内容,如 JSON 数据。
3.4、HTTP 的消息报头
消息报头分为通用报头、请求报头、响应报头、实体报头等。消息报头由键值对组成,每行一对,关键字和值用英文冒号 “:” 分隔。
3.4.1、通用报头
它既可以出现在请求报头,也可以出现在响应报头中。
- Date:表示消息产生的日期和时间。
- Connection:允许发送指定连接的选项。例如指定连接是连续的;或者指定 “close” 选项,通知服务器,在响应完成后,关闭连接。
- Cache-Control:用于指定缓存指令,缓存指令是单向的(响应中出现的缓存指令在请求中未必会出现),且是独立的(一个消息的缓存指令不会影响另一个消息处理的缓存机制)。
3.4.2、请求报头
请求报头通知服务器关于客户端请求的信息。典型的请求报头如下。
- Host:请求的主机名,允许多个域名同处一个 IP 地址,即虚拟主机。
- User-Agent:发送请求的浏览器类型、操作系统等信息。
- Accept:客户端可识别的内容类型列表,用于指定客户端接收哪些类型的信息。
- Accept-Encoding:客户端可识别的数据编码。
- Accept-Language:表示浏览器所支持的语言类型。
- Connection:允许客户端和服务器指定与请求/响应连接有关的选项。例如,这时为 Keep-Alive 则表示保持连接。
- Transfer-Encoding:告知接收端为了保证报文的可靠传输,对报文采用了什么编码方式。
3.4.3、响应报头
用于服务器传递自身信息的响应。
- Location:用于重定向接收者到一个新的位置,常用在更换域名的时候。
- Server:包含服务器用来处理请求的系统信息,与 User-Agent 请求报头是相对应的。
3.4.4、实体报头
实体报头用来定义被传送资源的信息,其既可用于请求也可用于响应。请求和响应消息都可以传送一个实体。
- Content-Type:发送给接收者的实体正文的媒体类型。
- Content-Lenght:实体正文的长度。
- Content-Language:描述资源所用的自然语言。
- Content-Encoding:实体报头被用作媒体类型的修饰符。它的值指示了已经被应用到实体正文的附加内容的编码,因而要获得 Content-Type 报头域中所引用的媒体类型,必须采用相应的解码机制。
- Last-Modified:实体报头用于指示资源的最后修改日期和时间。
- Expires:实体报头给出响应过期的日期和时间。
3.5、使用 Fiddler 抓包
请求报文
响应报文
后续更新。。。
四、HttpClient 与 HttpURLConnection
无论是自己封装的网络请求类还是第三方的网络请求框架,都离不开这两个库。
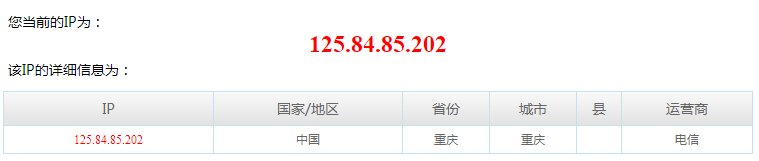
在这里我们使用淘宝的 IP 地址库,它同时支持 GET 和 POST 请求。首先查询一个 IP 归属地。
再看淘宝 IP 地址库的接口说明。

4.1、HttpClient
Android SDK 中包含了 HttpClient。Android 6.0 版本中直接删除了 HttpClient 类库。如果仍想使用它,解决办法就是在相应 module 下的 build.gradle 中加入如下代码。
android {
    ...
    useLibrary 'org.apache.http.legacy'
}
4.1.1、HttpClient 的 GET 请求
Get 请求的参数暴露在 URL 中,这有些不大妥当,而且 URL 的长度也有限制:长度在 2048 字符之内,在 HTTP 1.1 后 URL 长度才没有了限制。一般情况下 POST 可以替代 GET。
- 创建 HttpClient。
    private HttpClient createHttpClient() {
        HttpParams params = new BasicHttpParams();
        // 设置连接超时
        HttpConnectionParams.setConnectionTimeout(params, 15000);
        // 设置请求超时
        HttpConnectionParams.setSoTimeout(params, 15000);
        HttpConnectionParams.setTcpNoDelay(params, true);
        HttpProtocolParams.setVersion(params, HttpVersion.HTTP_1_1);
        HttpProtocolParams.setContentCharset(params, HTTP.UTF_8);
        // 持续握手
        HttpProtocolParams.setUseExpectContinue(params, true);
        HttpClient httpClient = new DefaultHttpClient(params);
        return httpClient;
    }
- 创建 HttpGet,请求网络并得到 HttpResponse。
    private void useHttpClientGet(String url) {
        HttpGet httpGet = new HttpGet(url);
        httpGet.addHeader("Connection", "Keep-Alive");
        try {
            HttpClient httpClient = createHttpClient();
            HttpResponse httpResponse = httpClient.execute(httpGet);
            HttpEntity httpEntity = httpResponse.getEntity();
            int code = httpResponse.getStatusLine().getStatusCode();
            if (null != httpEntity) {
                InputStream inputStream = httpEntity.getContent();
                String response = convertStreamToString(inputStream);
                Log.d("TAG", "请求状态码:" + code + "\n请求结果:\n" + response);
                inputStream.close();
            }
        } catch (IOException e) {
            e.printStackTrace();
        }
    }
- 将请求结果转换成 String
    private String convertStreamToString(InputStream inputStream) throws IOException {
        BufferedReader reader = new BufferedReader(new InputStreamReader(inputStream));
        StringBuffer sb = new StringBuffer();
        String line = null;
        while ((line = reader.readLine()) != null) {
            sb.append(line).append("\n");
        }
        String response = sb.toString();
        return response;
    }
- 开启线程访问 API。
        new Thread(new Runnable() {
            @Override
            public void run() {
                useHttpClientGet("http://ip.taobao.com/outGetIpInfo?ip=125.84.85.202&accessKey=alibaba-inc");
            }
        }).start();
4.1.2、HttpClient 的 POST 请求
POST 请求和 GET 请求类似,就是需要配置要传递的参数。请求代码如下。
    private void useHttpClientPost(String url) {
        HttpPost httpPost = new HttpPost(url);
        httpPost.addHeader("Connection", "Keep-Alive");
        try {
            HttpClient httpClient = createHttpClient();
            List<NameValuePair> postParams = new ArrayList<>();
            // 要传递的参数
            postParams.add(new BasicNameValuePair("ip", "125.84.85.202"));
            postParams.add(new BasicNameValuePair("accessKey", "alibaba-inc"));
            httpPost.setEntity(new UrlEncodedFormEntity(postParams));
            HttpResponse httpResponse = httpClient.execute(httpPost);
            HttpEntity httpEntity = httpResponse.getEntity();
            int code = httpResponse.getStatusLine().getStatusCode();
            if (null != httpEntity) {
                InputStream inputStream = httpEntity.getContent();
                String response = convertStreamToString(inputStream);
                Log.d("TAG", "请求状态码:" + code + "\n请求结果:\n" + response);
                inputStream.close();
            }
        } catch (IOException e) {
            e.printStackTrace();
        }
    }
        new Thread(new Runnable() {
            @Override
            public void run() {
                useHttpClientPost("http://ip.taobao.com/outGetIpInfo");
            }
        }).start();
不管是使用 GET 还是 POST,都可以成功获取数据。运行效果如下。

4.2、HttpURLConnection
在 Android 2.2 版本及其之前的版本使用 HttpClient 是较好的选择;而在 2.3 版本及其之后,HttpURLConnection 则是最佳的选择,它的 API 简单,体积较小,因而非常适用于 Android 项目。HttpURLConnection 的压缩和缓存机制可以有效地减少网络访问的流量,在提升速度和省电方面也起到了较大的作用。
创建一个 UrlConnManager 类。
public class UrlConnManager {

    public static HttpURLConnection getHttpURLConnectionGet(String url) {
        HttpURLConnection httpURLConnection = null;
        try {
            URL mUrl = new URL(url);
            httpURLConnection = (HttpURLConnection) mUrl.openConnection();
            // 设置连接超时时间
            httpURLConnection.setConnectTimeout(15000);
            // 设置读取超时时间
            httpURLConnection.setReadTimeout(15000);
            // 设置请求方法
            httpURLConnection.setRequestMethod("GET");
            // 添加 Header
            httpURLConnection.setRequestProperty("Connection", "Keep-Alive");
            // 接收输入流
            httpURLConnection.setDoInput(true);
            // 传递参数时需要开启
            httpURLConnection.setDoOutput(true);
        } catch (IOException e) {
            e.printStackTrace();
        }
        return httpURLConnection;
    }

    public static HttpURLConnection getHttpURLConnectionPost(String url) {
        HttpURLConnection httpURLConnection = null;
        try {
            URL mUrl = new URL(url);
            httpURLConnection = (HttpURLConnection) mUrl.openConnection();
            // 设置连接超时时间
            httpURLConnection.setConnectTimeout(15000);
            // 设置读取超时时间
            httpURLConnection.setReadTimeout(15000);
            // 设置请求方法
            httpURLConnection.setRequestMethod("POST");
            // 添加 Header
            httpURLConnection.setRequestProperty("Connection", "Keep-Alive");
            // 接收输入流
            httpURLConnection.setDoInput(true);
            // 传递参数时需要开启
            httpURLConnection.setDoOutput(true);
        } catch (IOException e) {
            e.printStackTrace();
        }
        return httpURLConnection;
    }

    public static void postParams(OutputStream output, List<NameValuePair> paramsList) throws IOException {
        StringBuilder builder = new StringBuilder();
        for (NameValuePair pair : paramsList) {
            if (!TextUtils.isEmpty(builder)) {
                builder.append("&");
            }
            builder.append(URLEncoder.encode(pair.getName(), "UTF-8"));
            builder.append("=");
            builder.append(URLEncoder.encode(pair.getValue(), "UTF-8"));
        }
        BufferedWriter writer = new BufferedWriter(new OutputStreamWriter(output, "UTF-8"));
        writer.write(builder.toString());
        writer.flush();
        writer.close();
    }
}
4.2.1、HttpURLConnection 的 GET 请求
    private void useHttpUrlConnectionGet(String url) {
        InputStream inputStream = null;
        HttpURLConnection httpURLConnection = UrlConnManager.getHttpURLConnectionGet(url);
        try {
            httpURLConnection.connect();
            inputStream = httpURLConnection.getInputStream();
            int code = httpURLConnection.getResponseCode();
            String response = convertStreamToString(inputStream);
            Log.d("TAG", "请求状态码:" + code + "\n请求结果:\n" + response);
            inputStream.close();
        } catch (IOException e) {
            e.printStackTrace();
        }
    }
        new Thread(new Runnable() {
            @Override
            public void run() {
                useHttpUrlConnectionGet("http://ip.taobao.com/outGetIpInfo?ip=125.84.85.202&accessKey=alibaba-inc");
            }
        }).start();
4.2.2、HttpURLConnection 的 POST 请求
    private void useHttpUrlConnectionPost(String url) {
        InputStream inputStream = null;
        HttpURLConnection httpURLConnection = UrlConnManager.getHttpURLConnectionPost(url);
        try {
            List<NameValuePair> postParams = new ArrayList<>();
            postParams.add(new BasicNameValuePair("ip", "125.84.85.202"));
            postParams.add(new BasicNameValuePair("accessKey", "alibaba-inc"));
            UrlConnManager.postParams(httpURLConnection.getOutputStream(), postParams);
            httpURLConnection.connect();
            inputStream = httpURLConnection.getInputStream();
            int code = httpURLConnection.getResponseCode();
            String response = convertStreamToString(inputStream);
            Log.d("TAG", "请求状态码:" + code + "\n请求结果:\n" + response);
            inputStream.close();
        } catch (IOException e) {
            e.printStackTrace();
        }
    }
        new Thread(new Runnable() {
            @Override
            public void run() {
                useHttpUrlConnectionPost("http://ip.taobao.com/outGetIpInfo");
            }
        }).start();
五、解析 Volley
Volley 在访问网络取得数据,加载图片等数据量不大但通信频繁的网络操作,在性能方面有大幅度的调整。而对于大数据量的网络操作,比如下载文件等,Volley 的表现却非常糟糕。
5.1、Volley 基本用法
5.1.1、导包
implementation 'com.android.volley:volley:1.1.1'
5.1.2、创建队列
Volley 请求网络都是基于队列的,只需要把请求放在请求队列中,请求队列会依次进行请求。一般情况下,如果一个应用程序的网络请求不频繁,可以只有一个请求队列(对应 Application),如果网络请求较多,则可以是一个 Activity 对应一个网络请求队列。
RequestQueue queue = Volley.newRequestQueue(getApplicationContext());
5.1.3、请求数据类型
根据需求,Volley 提供了 StringRequest ,JsonRequest,ImageRequest 等,其中,StringRequet 返回的数据是 String 类型,JsonRequest 返回的是 Json 格式的,ImageRequest 返回的是一个 Bitmap。
- StringRequest 提供了两个构造方法,如果不传入请求方法即使用第一个构造方法,默认是 GET 请求。
        StringRequest stringRequest = new StringRequest(Request.Method.GET,
                "http://ip.taobao.com/outGetIpInfo?ip=125.84.85.202&accessKey=alibaba-inc",
                new Response.Listener<String>() {
                    @Override
                    public void onResponse(String response) {
                        Log.d("TAG", response);
                    }
                },
                new Response.ErrorListener() {
                    @Override
                    public void onErrorResponse(VolleyError error) {
                        Log.d("TAG", error.getMessage(), error);
                    }
                });
        // 将请求添加到请求队列中
        queue.add(jsonObjectRequest);
D/TAG: {"data":{"area":"","country":"中国","isp_id":"100017","queryIp":"125.84.85.202","city":"重庆","ip":"125.84.85.202","isp":"电信","county":"","region_id":"500000","area_id":"","county_id":null,"region":"重庆","country_id":"CN","city_id":"500100"},"msg":"query success","code":0}
- JsonRequest 和 StringRequest 使用方法类似,先根据 Json 数据创建一个实体类 IpModel。
public class IpModel {
    private int code;
    private DataBean data;

    public int getCode() {
        return code;
    }

    public void setCode(int code) {
        this.code = code;
    }

    public DataBean getData() {
        return data;
    }

    public void setData(DataBean data) {
        this.data = data;
    }

    public static class DataBean {

        private String ip;
        private String country;
        private String area;
        private String region;
        private String city;
        private String county;
        private String isp;
        private String country_id;
        private String area_id;
        private String region_id;
        private String city_id;
        private String county_id;
        private String isp_id;

        public String getIp() {
            return ip;
        }

        public void setIp(String ip) {
            this.ip = ip;
        }

        public String getCountry() {
            return country;
        }

        public void setCountry(String country) {
            this.country = country;
        }

        public String getArea() {
            return area;
        }

        public void setArea(String area) {
            this.area = area;
        }

        public String getRegion() {
            return region;
        }

        public void setRegion(String region) {
            this.region = region;
        }

        public String getCity() {
            return city;
        }

        public void setCity(String city) {
            this.city = city;
        }

        public String getCounty() {
            return county;
        }

        public void setCounty(String county) {
            this.county = county;
        }

        public String getIsp() {
            return isp;
        }

        public void setIsp(String isp) {
            this.isp = isp;
        }

        public String getCountry_id() {
            return country_id;
        }

        public void setCountry_id(String country_id) {
            this.country_id = country_id;
        }

        public String getArea_id() {
            return area_id;
        }

        public void setArea_id(String area_id) {
            this.area_id = area_id;
        }

        public String getRegion_id() {
            return region_id;
        }

        public void setRegion_id(String region_id) {
            this.region_id = region_id;
        }

        public String getCity_id() {
            return city_id;
        }

        public void setCity_id(String city_id) {
            this.city_id = city_id;
        }

        public String getCounty_id() {
            return county_id;
        }

        public void setCounty_id(String county_id) {
            this.county_id = county_id;
        }

        public String getIsp_id() {
            return isp_id;
        }

        public void setIsp_id(String isp_id) {
            this.isp_id = isp_id;
        }
    }
}
        JsonObjectRequest jsonObjectRequest = new JsonObjectRequest(Request.Method.GET,
                "http://ip.taobao.com/outGetIpInfo?ip=125.84.85.202&accessKey=alibaba-inc",
                new JSONObject(),
                new Response.Listener<JSONObject>() {
                    @Override
                    public void onResponse(JSONObject response) {
                        IpModel ipModel = new Gson().fromJson(response.toString(), IpModel.class);
                        if (null != ipModel && null != ipModel.getData()) {
                            String city = ipModel.getData().getCity();
                            Log.d("TAG", city);
                        }
                    }
                },
                new Response.ErrorListener() {
                    @Override
                    public void onErrorResponse(VolleyError error) {
                        Log.d("TAG", error.getMessage(), error);
                    }
                });
        // 将请求添加到请求队列中
        queue.add(jsonObjectRequest);
D/TAG: 重庆
- ImageRequest 加载图片,方法已经过时,使用方法和 StringRequest,JsonRequest 类似,可以设置图片的最大宽度和高度,如果图片超过最大宽高,则会进行压缩。
        ivPic = findViewById(R.id.ivPic);
        ImageRequest imageRequest = new ImageRequest("https://img-blog.csdnimg.cn/20201215103529586.png",
                new Response.Listener<Bitmap>() {
                    @Override
                    public void onResponse(Bitmap response) {
                        ivPic.setImageBitmap(response);
                    }
                }, 0, 0, Bitmap.Config.RGB_565,
                new Response.ErrorListener() {
                    @Override
                    public void onErrorResponse(VolleyError error) {
                        ivPic.setImageResource(R.mipmap.ic_launcher);
                    }
                });
        // 将请求添加到请求队列中
        queue.add(jsonObjectRequest);

- ImageLoader 的内部使用 ImageRequest 来实现,它的构造方法可以传入一个 ImageCache 缓存形参,实现图片缓存的功能;同时还可以过滤重复连接,避免重复发送请求。与 ImageRequest 不同,ImageLoader 加载图片会先显示默认的图片,等待图片加载完成才会显示在 ImageView 上。
public class BitmapCache implements ImageLoader.ImageCache {
    private LruCache<String, Bitmap> mCache;

    public BitmapCache() {
        int maxSize = 8 * 1024 * 1024;
        mCache = new LruCache<String, Bitmap>(maxSize) {
            @Override
            protected int sizeOf(String key, Bitmap bitmap) {
                return bitmap.getRowBytes() * bitmap.getHeight();
            }
        };
    }

    @Override
    public Bitmap getBitmap(String url) {
        return mCache.get(url);
    }

    @Override
    public void putBitmap(String url, Bitmap bitmap) {
        mCache.put(url, bitmap);
    }
}
            ImageLoader imageLoader = new ImageLoader(queue, new BitmapCache());
            ImageLoader.ImageListener listener = ImageLoader.getImageListener(ivPic, R.mipmap.ic_default, R.mipmap.ic_default);
            // imageLoader.get("https://img-blog.csdnimg.cn/20201215103529586.png", listener);
            // imageLoader.get("https://img-blog.csdnimg.cn/20201215103529586.png", listener, 0, 0);
            // 设置最大宽高,设置 ImageView 的 ScaleType 属性
            imageLoader.get("https://img-blog.csdnimg.cn/20201215103529586.png", listener, 0, 0, ImageView.ScaleType.CENTER_CROP);
- NetworkImageView 是一个自定义控件,继承自 ImageView,其封装了网络加载图片的功能。没有提供最大宽高的设置方法,而是根据设置的控件的宽高结合网络图片的宽高,内部会自动实现压缩。如果不想要压缩,可以设置 NetworkImageView 的宽高为 wrap_content。
    <com.android.volley.toolbox.NetworkImageView
        android:id="@+id/nivPic"
        android:layout_width="200dp"
        android:layout_height="200dp" />
        nivPic = findViewById(R.id.nivPic);
        ImageLoader imageLoader = new ImageLoader(queue, new BitmapCache());
        nivPic.setDefaultImageResId(R.mipmap.ic_default);
        nivPic.setErrorImageResId(R.mipmap.ic_default);
        nivPic.setImageUrl("https://img-blog.csdnimg.cn/20201215103529586.png", imageLoader);
六、解析 OkHttp
6.1、配置 gradle,GitHub 地址
implementation 'com.squareup.okhttp3:okhttp:4.9.0'
6.2、异步 GET 请求
        Request.Builder requestBuilder = new Request.Builder().url("http://ip.taobao.com/outGetIpInfo?ip=125.84.85.202&accessKey=alibaba-inc");
        requestBuilder.method("GET", null);
        Request request = requestBuilder.build();
        OkHttpClient okHttpClient = new OkHttpClient();
        Call call = okHttpClient.newCall(request);
        call.enqueue(new Callback() {
            @Override
            public void onFailure(@NotNull Call call, @NotNull IOException e) {
                Toast.makeText(getApplicationContext(), "请求失败", Toast.LENGTH_SHORT).show();
            }

            @Override
            public void onResponse(@NotNull Call call, @NotNull Response response) throws IOException {
                String str = response.body().string();
                Log.d("TAG", str);
                runOnUiThread(new Runnable() {
                    @Override
                    public void run() {
                        Toast.makeText(getApplicationContext(), "请求成功", Toast.LENGTH_SHORT).show();
                    }
                });
            }
        });
基本步骤就是创建 OkHttpClient、Request 和 Call,最后调用 Call 的 enqueue() 方法。但是每次这么写很麻烦,是需要进行封装的。需要注意的是 onResponse 回调并非是在 UI 线程,如果想要调用同步 GET 请求,就调用 Call 的 execute 方法。
6.3、异步 POST 请求
        RequestBody formBody = new FormBody.Builder()
                .add("ip", "125.84.85.20")
                .add("accessKey", "alibaba-inc")
                .build();
        Request request = new Request.Builder()
                .url("http://ip.taobao.com/outGetIpInfo")
                .post(formBody)
                .build();
        OkHttpClient okHttpClient = new OkHttpClient();
        Call call = okHttpClient.newCall(request);
        call.enqueue(new Callback() {
            @Override
            public void onFailure(@NotNull Call call, @NotNull IOException e) {
                Toast.makeText(getApplicationContext(), "请求失败", Toast.LENGTH_SHORT).show();
            }

            @Override
            public void onResponse(@NotNull Call call, @NotNull Response response) throws IOException {
                String str = response.body().string();
                Log.d("TAG", str);
                runOnUiThread(new Runnable() {
                    @Override
                    public void run() {
                        Toast.makeText(getApplicationContext(), "请求成功", Toast.LENGTH_SHORT).show();
                    }
                });
            }
        });
6.4、异步上传文件(未测试)
Android 6.0 以上需要动态申请权限。
上传文件本身也是一个 POST 请求,首先定义上传文件类型。
public static final MediaType MEDIA_TYPE_MARKDOWN = MediaType.parse("text/x-markdown;charset=utf-8");
在 SD 卡根目录创建一个 test.txt 文件,里面的内容为 “OkHttp”。
        String filePath = "";
        if (Environment.getExternalStorageState().equals(Environment.MEDIA_MOUNTED)) {
            filePath = Environment.getExternalStorageDirectory().getAbsolutePath();
        } else {
            return;
        }
        File file = new File(filePath, "test.txt");
        Request request = new Request.Builder()
                .url("https://api.github.com/markdown/raw")
                .post(RequestBody.create(MEDIA_TYPE_MARKDOWN, file))
                .build();
        OkHttpClient okHttpClient = new OkHttpClient();
        okHttpClient.newCall(request).enqueue(new Callback() {
            @Override
            public void onFailure(Call call, IOException e) {
                Toast.makeText(getApplicationContext(), "文件上传失败", Toast.LENGTH_SHORT).show();
            }

            @Override
            public void onResponse(Call call, Response response) throws IOException {
                Log.d("TAG", response.body().string());
                runOnUiThread(new Runnable() {
                    @Override
                    public void run() {
                        Toast.makeText(getApplicationContext(), "文件上传成功", Toast.LENGTH_SHORT).show();
                    }
                });
            }
        });
如果要改为同步上传文件,只要调用 OkHttpClient.newCall(request).execute() 就可以了。最终请求网络返回的结果就是我们 txt 文件中的内容。
6.5、异步下载文件
Android 6.0 以上需要动态申请权限。
        String url = "https://img-blog.csdnimg.cn/20201215103529586.png";
        Request request = new Request.Builder().url(url).build();
        OkHttpClient okHttpClient = new OkHttpClient();
        okHttpClient.newCall(request).enqueue(new Callback() {
            @Override
            public void onFailure(@NotNull Call call, @NotNull IOException e) {
                Toast.makeText(getApplicationContext(), "文件下载失败", Toast.LENGTH_SHORT).show();
            }

            @Override
            public void onResponse(@NotNull Call call, @NotNull Response response) throws IOException {
                InputStream inputStream = response.body().byteStream();
                FileOutputStream fileOutputStream = null;
                String filepath = "";
                try {
                    if (Environment.getExternalStorageState().equals(Environment.MEDIA_MOUNTED)) {
                        filepath = Environment.getExternalStorageDirectory().getAbsolutePath();
                    } else {
                        filepath = getFilesDir().getAbsolutePath();
                    }
                    File file = new File(filepath, "test.png");
                    if (null != file) {
                        fileOutputStream = new FileOutputStream(file);
                        byte[] buffer = new byte[2048];
                        int len = 0;
                        while ((len = inputStream.read(buffer)) != -1) {
                            fileOutputStream.write(buffer, 0, len);
                        }
                        fileOutputStream.flush();
                        runOnUiThread(new Runnable() {
                            @Override
                            public void run() {
                                Toast.makeText(getApplicationContext(), "文件存储成功", Toast.LENGTH_SHORT).show();
                            }
                        });
                    } else {
                        runOnUiThread(new Runnable() {
                            @Override
                            public void run() {
                                Toast.makeText(getApplicationContext(), "文件存储失败", Toast.LENGTH_SHORT).show();
                            }
                        });
                    }
                } catch (IOException e) {
                    Log.e("TAG", "IOException");
                    e.printStackTrace();
                }
            }
        });
6.6、异步上传 Multipart 文件(未测试)
Android 6.0 以上需要动态申请权限。
有时上传文件,同时还需要传其他类型的字段。在这里并没有服务器接收这个 Multipart 文件,只是示例。
        OkHttpClient okHttpClient = new OkHttpClient();
        RequestBody requestBody = new MultipartBody.Builder()
                .setType(MultipartBody.FORM)
                .addFormDataPart("title", "test") // 1
                .addFormDataPart("image", "test.png", RequestBody.create(MEDIA_TYPE_PNG, new File("/sdcard/test.png"))) // 2
                .build();
        Request request = new Request.Builder()
                .header("Authorization", "Client-ID " + "...")
                .url("https://api.imgur.com/3/image")
                .post(requestBody)
                .build();
        okHttpClient.newCall(request).enqueue(new Callback() {
            @Override
            public void onFailure(Call call, IOException e) {

            }

            @Override
            public void onResponse(Call call, Response response) throws IOException {
                Log.d("TAG", response.body().string());
            }
        });
首先定义上传文件类型,注释 1 处是常见的 key-value 形式的参数上传;而注释 2 处则上传表单。addFormDataPart 方法的第一个参数时 key 值,第二个参数是上传文件的名字,第三个参数是需要上传的文件。
6.7、设置超时时间和缓存
创建 OkHttpClient 对象时使用 build,代码如下。
        File file = getExternalCacheDir();
        int cacheSize = 10 * 1024 * 1024;
        OkHttpClient okHttpClient = new OkHttpClient.Builder()
                .connectTimeout(15, TimeUnit.SECONDS)
                .writeTimeout(20, TimeUnit.SECONDS)
                .readTimeout(20, TimeUnit.SECONDS)
                .cache(new Cache(file.getAbsoluteFile(), cacheSize))
                .build();
6.8、取消请求
使用 call.cancel() 可以立即停止一个正在执行的 call。当用户离开一个应用或者跳转到其他界面时,使用 call.cancel() 可以节约网络资源;另外,不管同步还是异步的 call 都可以取消,也可以通过 tag 来同时取消多个请求。当构建一个请求时,使用 Request.Builder.tag(Object tag) 来分配一个标签,之后就可以用 OkHttpClient.cancel(Object tag) 来取消所有带有这个 tag 的 call。
6.9、关于封装
- 避免重复代码调用。
- 将请求结果回调改为 UI 线程。
原理就是写一个双重检查模式的单例,在开始创建的时候配置好 OkHttp,并创建 Handler,在请求网络的时候用 Handler 将请求的结果回调给 UI 线程。
6.9.1、首先写一个抽象类用于请求回调
public abstract class ResultCallback {
    public abstract void onError(Request request, Exception e);

    public abstract void onResponse(String str) throws IOException;
}
6.9.2、封装 OkHttp
public class OkHttpEngine {
    private static volatile OkHttpEngine mInstance;
    private OkHttpClient mOkHttpClient;
    private Handler mHandler;

    public static OkHttpEngine getInstance(Context context) {
        if (mInstance == null) {
            synchronized (OkHttpEngine.class) {
                if (mInstance == null) {
                    mInstance = new OkHttpEngine(context);
                }
            }
        }
        return mInstance;
    }

    private OkHttpEngine(Context context) {
        File file = context.getExternalCacheDir();
        int cacheSize = 10 * 1024 * 1024;
        mOkHttpClient = new OkHttpClient.Builder()
                .connectTimeout(15, TimeUnit.SECONDS)
                .writeTimeout(20, TimeUnit.SECONDS)
                .readTimeout(20, TimeUnit.SECONDS)
                .cache(new Cache(file.getAbsoluteFile(), cacheSize))
                .build();
        mHandler = new Handler();
    }

    /**
     * 异步 GET 请求
     *
     * @param url
     * @param callback
     */
    public void getAsyncHttp(String url, ResultCallback callback) {
        final Request request = new Request.Builder().url(url).build();
        Call call = mOkHttpClient.newCall(request);
        dealResult(call, callback);
    }

    private void dealResult(Call call, final ResultCallback callback) {
        call.enqueue(new Callback() {
            @Override
            public void onFailure(@NotNull Call call, @NotNull IOException e) {
                sendFailedCallback(call.request(), e, callback);
            }

            @Override
            public void onResponse(@NotNull Call call, @NotNull Response response) throws IOException {
                sendSuccessCallback(response.body().string(), callback);
            }
        });
    }

    private void sendSuccessCallback(String string, ResultCallback callback) {
        mHandler.post(new Runnable() {
            @Override
            public void run() {
                if (callback != null) {
                    try {
                        callback.onResponse(string);
                    } catch (IOException e) {
                        e.printStackTrace();
                    }
                }
            }
        });
    }

    private void sendFailedCallback(Request request, IOException e, ResultCallback callback) {
        mHandler.post(new Runnable() {
            @Override
            public void run() {
                if (callback != null) {
                    callback.onError(request, e);
                }
            }
        });
    }
}
6.9.3、使用
        OkHttpEngine.getInstance(this).getAsyncHttp("http://ip.taobao.com/outGetIpInfo?ip=125.84.85.202&accessKey=alibaba-inc", new ResultCallback() {
            @Override
            public void onError(Request request, Exception e) {
                Toast.makeText(getApplicationContext(), "请求失败", Toast.LENGTH_SHORT).show();
            }

            @Override
            public void onResponse(String str) throws IOException {
                Log.d("TAG", str);
                Toast.makeText(getApplicationContext(), "请求成功", Toast.LENGTH_SHORT).show();
            }
        });
七、解析 Retrofit
7.1、配置 build.gradle
    implementation 'com.squareup.retrofit2:retrofit:2.9.0'
    implementation 'com.squareup.retrofit2:converter-gson:2.9.0'
这里添加了 Gson 类型数据的依赖包。
7.2、Retrofit 的注解分类
-
HTTP 请求方法注解
GET、POST、PUT、DELETE、HEAD、PATCH、OPTIONS 和 HTTP 8 种。前 7 种分别对应 HTTP 的请求方法,HTTP 可以替换以上 7 种。 -
标记类注解
FormUrlEncoded、Multipart 和 Streaming 3 种, FormUrlEncoded 和 Multipart 后面会讲到,Streaming 代表响应的数据以流的形式返回,如果不适用它,则默认会把全部数据加载到内存,所以下载大文件时需要加上这个注解。 -
参数类注解
Header、Headers、Body、Path、Field、FieldMap、Part、PartMap、Query 和 QueryMap 等。
7.3、GET 请求访问网络
public interface IpService {
    @GET("outGetIpInfo?ip=125.84.85.202&accessKey=alibaba-inc")
    Call<IpModel> getIpMsg();
}
        String url = "http://ip.taobao.com/";
        Retrofit retrofit = new Retrofit.Builder()
                .baseUrl(url)
                .addConverterFactory(GsonConverterFactory.create())
                .build();
        IpService ipService = retrofit.create(IpService.class); // 这里使用了动态代理模式
        Call<IpModel> call = ipService.getIpMsg();
        call.enqueue(new Callback<IpModel>() {
            @Override
            public void onResponse(Call<IpModel> call, Response<IpModel> response) {
                String country = response.body().getData().getCountry();
                Log.d("TAG", country);
                Toast.makeText(getApplicationContext(), country, Toast.LENGTH_SHORT).show();
            }

            @Override
            public void onFailure(Call<IpModel> call, Throwable t) {

            }
        });
这里是异步请求网络,回调的 Callback 是运行在 UI 线程的。如果想同步请求网络,使用 call.execute(),想中断网络请求,使用 call.cancel()。
动态配置 URL 地址:@Path
public interface IpService {
    @GET("{path}?ip=125.84.85.202&accessKey=alibaba-inc")
    Call<IpModel> getIpMsg(@Path("path") String path);
}
在 GET 注解中包含了 {path},它对应着 @Path 注解中的 “path” 的值。
        String url = "http://ip.taobao.com/";
        Retrofit retrofit = new Retrofit.Builder()
                .baseUrl(url)
                .addConverterFactory(GsonConverterFactory.create())
                .build();
        IpService ipService = retrofit.create(IpService.class);
        Call<IpModel> call = ipService.getIpMsg("outGetIpInfo");
        call.enqueue(new Callback<IpModel>() {
            @Override
            public void onResponse(Call<IpModel> call, Response<IpModel> response) {
                String country = response.body().getData().getCountry();
                Log.d("TAG", country);
                Toast.makeText(getApplicationContext(), country, Toast.LENGTH_SHORT).show();
            }

            @Override
            public void onFailure(Call<IpModel> call, Throwable t) {

            }
        });
动态指定查询条件:@Query
public interface IpService {
    @GET("outGetIpInfo")
    Call<IpModel> getIpMsg(@Query("ip") String ip,
                           @Query("accessKey") String accessKey);
}
        String url = "http://ip.taobao.com/";
        Retrofit retrofit = new Retrofit.Builder()
                .baseUrl(url)
                .addConverterFactory(GsonConverterFactory.create())
                .build();
        IpService ipService = retrofit.create(IpService.class);
        Call<IpModel> call = ipService.getIpMsg("125.84.85.202", "alibaba-inc");
        call.enqueue(new Callback<IpModel>() {
            @Override
            public void onResponse(Call<IpModel> call, Response<IpModel> response) {
                String country = response.body().getData().getCountry();
                Log.d("TAG", country);
                Toast.makeText(getApplicationContext(), country, Toast.LENGTH_SHORT).show();
            }

            @Override
            public void onFailure(Call<IpModel> call, Throwable t) {

            }
        });
动态指定查询条件组:@QueryMap
public interface IpService {
    @GET("outGetIpInfo")
    Call<IpModel> getIpMsg(@QueryMap Map<String, String> options);
}
        String url = "http://ip.taobao.com/";
        Retrofit retrofit = new Retrofit.Builder()
                .baseUrl(url)
                .addConverterFactory(GsonConverterFactory.create())
                .build();
        IpService ipService = retrofit.create(IpService.class);
        Map<String, String> params = new HashMap<>();
        params.put("ip", "125.84.85.202");
        params.put("accessKey", "alibaba-inc");
        Call<IpModel> call = ipService.getIpMsg(params);
        call.enqueue(new Callback<IpModel>() {
            @Override
            public void onResponse(Call<IpModel> call, Response<IpModel> response) {
                String country = response.body().getData().getCountry();
                Log.d("TAG", country);
                Toast.makeText(getApplicationContext(), country, Toast.LENGTH_SHORT).show();
            }

            @Override
            public void onFailure(Call<IpModel> call, Throwable t) {

            }
        });
7.4、POST 请求访问网络
传输数据类型为键值对:@Field
public interface IpService {
    @FormUrlEncoded
    @POST("outGetIpInfo")
    Call<IpModel> getIpMsg(@Field("ip") String ip,
                           @Field("accessKey") String accessKey);
}
        String url = "http://ip.taobao.com/";
        Retrofit retrofit = new Retrofit.Builder()
                .baseUrl(url)
                .addConverterFactory(GsonConverterFactory.create())
                .build();
        IpService ipService = retrofit.create(IpService.class);
        Call<IpModel> call = ipService.getIpMsg("125.84.85.202", "alibaba-inc");
        call.enqueue(new Callback<IpModel>() {
            @Override
            public void onResponse(Call<IpModel> call, Response<IpModel> response) {
                String country = response.body().getData().getCountry();
                Log.d("TAG", country);
                Toast.makeText(getApplicationContext(), country, Toast.LENGTH_SHORT).show();
            }

            @Override
            public void onFailure(Call<IpModel> call, Throwable t) {

            }
        });
传输数据类型为 JSON 字符串:@Body
在此示例中,由于淘宝 IP 地址库并不支持此类型的请求数据,所以不会成功返回结果,@Body 注解标注的对象会被转换为一个 JSON 字符串作为请求数据提交给服务器。
{"ip": "125.84.85.202", "accessKey": "alibaba - inc"}
public interface IpService {
    @POST("outGetIpInfo")
    Call<IpModel> getIpMsg(@Body RequestBean bean);
}
        String url = "http://ip.taobao.com/";
        Retrofit retrofit = new Retrofit.Builder()
                .baseUrl(url)
                .addConverterFactory(GsonConverterFactory.create())
                .build();
        IpService ipService = retrofit.create(IpService.class);
        Call<IpModel> call = ipService.getIpMsg(new RequestBean("125.84.85.202", "alibaba-inc"));
        call.enqueue(new Callback<IpModel>() {
            @Override
            public void onResponse(Call<IpModel> call, Response<IpModel> response) {
                String country = response.body().getData().getCountry();
                Log.d("TAG", country);
                Toast.makeText(getApplicationContext(), country, Toast.LENGTH_SHORT).show();
            }

            @Override
            public void onFailure(Call<IpModel> call, Throwable t) {

            }
        });
单个文件上传:@Part (未测试)
Android 6.0 以上需要动态申请权限。
public interface IpService {
    @Multipart
    @POST("user/photo")
    Call<ResponseBean> updateUser(@Part MultipartBody.Part photo, @Part("description") RequestBody description);
}
Multipart 注解表示允许多个 @Part。updateUser 方法中第一个参数是准备上传的图片文件,使用了 MultipartBody.Part 类型;第二个参数是 RequestBody 类型,用来传递简单的键值对用来描述。
        String url = "";
        Retrofit retrofit = new Retrofit.Builder()
                .baseUrl(url)
                .addConverterFactory(GsonConverterFactory.create())
                .build();
        File file = new File(Environment.getExternalStorageDirectory(), "test.png");
        RequestBody requestBody = RequestBody.create(MediaType.parse("image/png"), file);
        RequestBody description = RequestBody.create(null, "文件描述");
        // photos 是参数名称,是服务端 request.getParmars()要用的,需要和服端约定好
        MultipartBody.Part photo = MultipartBody.Part.createFormData("photo", file.getName(), requestBody);
        IpService ipService = retrofit.create(IpService.class);
        Call<ResponseBean> call = ipService.updateUser(photo, description);
        call.enqueue(new Callback<ResponseBean>() {
            @Override
            public void onResponse(Call<ResponseBean> call, Response<ResponseBean> response) {
                String result= response.body().getResult();
                Log.d("TAG", result);
                Toast.makeText(getApplicationContext(), result, Toast.LENGTH_SHORT).show();
            }

            @Override
            public void onFailure(Call<ResponseBean> call, Throwable t) {

            }
        });
public class ResponseBean {
    private String result;

    public String getResult() {
        return result;
    }

    public void setResult(String result) {
        this.result = result;
    }
}
多个文件上传:@PartMap (未测试)
Android 6.0 以上需要动态申请权限。
public interface IpService {
    @Multipart
    @POST("user/photo")
    Call<ResponseBean> updateUser(@PartMap Map<String, RequestBody> photos, @Part("description") RequestBody description);
}
        String url = "";
        Retrofit retrofit = new Retrofit.Builder()
                .baseUrl(url)
                .addConverterFactory(GsonConverterFactory.create())
                .build();
        Map<String, RequestBody> photos = new HashMap<>();
        File file1 = new File(Environment.getExternalStorageDirectory(), "test1.png");
        File file2 = new File(Environment.getExternalStorageDirectory(), "test2.png");
        File file3 = new File(Environment.getExternalStorageDirectory(), "test3.png");
        RequestBody requestBody1 = RequestBody.create(MediaType.parse("image/png"), file1);
        RequestBody requestBody2 = RequestBody.create(MediaType.parse("image/png"), file2);
        RequestBody requestBody3 = RequestBody.create(MediaType.parse("image/png"), file3);
        RequestBody description = RequestBody.create(null, "文件描述");
        IpService ipService = retrofit.create(IpService.class);
        //注意:file 就是与服务器对应的 key,后面 filename 是服务器得到的文件名
        photos.put("file\"; filename=\"" + file1.getName(), requestBody1);
        photos.put("file\"; filename=\"" + file2.getName(), requestBody2);
        photos.put("file\"; filename=\"" + file3.getName(), requestBody3);
        Call<ResponseBean> call = ipService.updateUser(photos, description);
        call.enqueue(new Callback<ResponseBean>() {
            @Override
            public void onResponse(Call<ResponseBean> call, Response<ResponseBean> response) {
                String result = response.body().getResult();
                Log.d("TAG", result);
                Toast.makeText(getApplicationContext(), result, Toast.LENGTH_SHORT).show();
            }

            @Override
            public void onFailure(Call<ResponseBean> call, Throwable t) {

            }
        });
    }
消息报头 Header (未测试)
在 HTTP 请求中,为了防止攻击或过滤掉不安全的访问,或者添加特殊加密的访问等,以便减轻服务器的压力和保证请求的安全,通常会在消息报头中携带一些特殊的消息头处理。Retrofit 也提供了 @Header 来添加消息报头。添加消息报头有两种方式:一种是静态的,另一种是动态的。
- 静态方式
public interface IpService {
    @Multipart
    @POST("user/photo")
    @Headers("Accept-Encoding:application/json")
    Call<ResponseBean> updateUser(@PartMap Map<String, RequestBody> photos, @Part("description") RequestBody description);
}

// 添加多个,用 {} 包含起来
public interface IpService {
    @Multipart
    @POST("user/photo")
    @Headers({"Accept-Encoding:application/json", "User-Agent:MoonRetrofit"})
    Call<ResponseBean> updateUser(@PartMap Map<String, RequestBody> photos, @Part("description") RequestBody description);
}
- 动态方式
public interface IpService {
    @Multipart
    @POST("user/photo")
    Call<ResponseBean> updateUser(@PartMap Map<String, RequestBody> photos, @Part("description") RequestBody description, @Header("Location") String location);
}


 4703
4703


 被折叠的 条评论
为什么被折叠?
被折叠的 条评论
为什么被折叠?
 到【灌水乐园】发言


