


 本文介绍了如何利用Python和OpenCV技术自动识别并操作Windows扫雷游戏,包括窗口截取、雷块分割、颜色识别以及扫雷算法的实现过程。开发者通过读取雷块中心像素判断类别,并设计了相应的算法来模拟游戏玩法。
大家好,相信许多人很早就知道有扫雷这么一款经典的游戏,更是有不少人曾听说过中国雷圣,也是中国扫雷第一、世界综合排名第二的郭蔚嘉的顶顶大名。扫雷作为一款在Windows9x时代就已经诞生的经典游戏,从过去到现在依然都有着它独特的魅力:快节奏高精准的鼠标操作要求、快速的反应能力、刷新纪录的快感,这些都是扫雷给雷友们带来的、只属于扫雷的独一无二的兴奋点。
本文将介绍使用Python+OpenCV实现自动扫雷。对于自动扫雷而言,大致的开发过程是这样的:完成窗体内容截取部分,雷块分割,实现雷块类型识别,进而构建扫雷算法。
1.窗体截取
窗体截取是一个逻辑上简单,实现起来却相当麻烦的部分,而且还是必不可少的部分。通过Spy++得到了以下两点信息:
class_name = "TMain"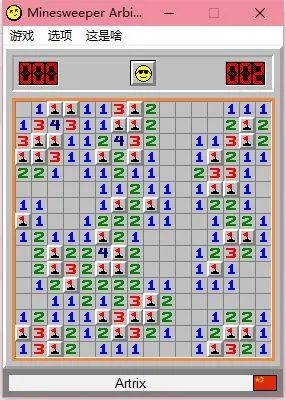
title_name = "Minesweeper Arbiter "-
ms_arbiter.exe的主窗体类别为"TMain"
-
ms_arbiter.exe的主窗体名称为"Minesweeper Arbiter "
采用win32gui来获取窗体的位置信息,具体代码如下:
hwnd = win32gui.FindWindow(class_name, title_name)
if hwnd:
left, top, right, bottom = win32gui.GetWindowRect(hwnd)
通过以上代码,得到了窗体相对于整块屏幕的位置,之后通过PIL来进行扫雷界面的棋盘截取。
from PIL import ImageGrab

left += 15
top += 101
right -= 15
bottom -= 43

rect = (left, top, right, bottom)
img = ImageGrab.grab().crop(rect)
这些数据仅在Windows10下测试通过,如果在别的Windows系统下,不保证相对位置的正确性,因为老版本的系统可能有不同宽度的窗体边框。
2.雷块分割
在进行雷块分割之前,事先需要了解雷块的尺寸以及它的边框大小,在ms_arbiter下,每一个雷块的尺寸为16px*16px。知道雷块尺寸,就可以进行每一个雷块的裁剪。
block_width, block_height = 16, 16
  blocks_x = int((right - left) / block_width)
  blocks_y = int((bottom - top) / block_height)
建立一个二维数组用于存储每一个雷块的图像,并且进行图像分割,保存在之前建立的数组中。
def crop_block(hole_img, x, y):
        x1, y1 = x * block_width, y * block_height
        x2, y2 = x1 + block_width, y1 + block_height
return hole_img.crop((x1, y1, x2, y2))

blocks_img = [[0 for i in range(blocks_y)] for i in range(blocks_x)]

for y in range(blocks_y):
for x in range(blocks_x):
        blocks_img[x][y] = crop_block(img, x, y)
将整个图像获取、分割的部分封装成一个库,随时调用,将这一部分封装成imageProcess.py,其中函数get_frame()用于完成上述的图像获取、分割过程。
3.雷块识别
这一部分可能是整个项目里除了扫雷算法本身之外最重要的部分,在进行雷块检测的时候采用了比较简单的特征,高效并且可以满足要求。
def analyze_block(self, block, location):
    block = imageProcess.pil_to_cv(block)

    block_color = block[8, 8]
    x, y = location[0], location[1]

    # -1:Not opened
    # -2:Opened but blank
    # -3:Un initialized

    # Opened
if self.equal(block_color, self.rgb_to_bgr((192, 192, 192))):
if not self.equal(block[8, 1], self.rgb_to_bgr((255, 255, 255))):
self.blocks_num[x][y] = -2
self.is_started = True
else:
self.blocks_num[x][y] = -1

    elif self.equal(block_color, self.rgb_to_bgr((0, 0, 255))):
self.blocks_num[x][y] = 1

    elif self.equal(block_color, self.rgb_to_bgr((0, 128, 0))):
self.blocks_num[x][y] = 2

    elif self.equal(block_color, self.rgb_to_bgr((255, 0, 0))):
self.blocks_num[x][y] = 3

    elif self.equal(block_color, self.rgb_to_bgr((0, 0, 128))):
self.blocks_num[x][y] = 4

    elif self.equal(block_color, self.rgb_to_bgr((128, 0, 0))):
self.blocks_num[x][y] = 5

    elif self.equal(block_color, self.rgb_to_bgr((0, 128, 128))):
self.blocks_num[x][y] = 6

    elif self.equal(block_color, self.rgb_to_bgr((0, 0, 0))):
if self.equal(block[6, 6], self.rgb_to_bgr((255, 255, 255))):
            # Is mine
self.blocks_num[x][y] = 9
        elif self.equal(block[5, 8], self.rgb_to_bgr((255, 0, 0))):
            # Is flag
self.blocks_num[x][y] = 0
else:
self.blocks_num[x][y] = 7

    elif self.equal(block_color, self.rgb_to_bgr((128, 128, 128))):
self.blocks_num[x][y] = 8
else:
self.blocks_num[x][y] = -3
self.is_mine_form = False

if self.blocks_num[x][y] == -3 or not self.blocks_num[x][y] == -1:
self.is_new_start = False
可以看到,采用读取每个雷块的中心点像素的方式来判断雷块的类别,并且针对插旗、未点开、已点开但是空白等情况进行了进一步判断。具体色值是笔者直接取色得到的,并且屏幕截图的色彩也没有经过压缩,所以通过中心像素结合其他特征点来判断类别已经足够了,并且做到了高效率。
采用如下标注方式:
- 1-8:表示数字1到8
- 9:表示是地雷
- 0:表示插旗
- -1:表示未打开
- -2:表示打开但是空白
- -3:表示不是扫雷游戏中的任何方块类型
4.扫雷算法实现
首先需要一个能够找出一个雷块的九宫格范围的所有方块位置的方法,因为扫雷游戏的特殊性,在棋盘的四边是没有九宫格的边缘部分的,所以要筛选来排除掉可能超过边界的访问。
def generate_kernel(k, k_width, k_height, block_location):

     ls = []
     loc_x, loc_y = block_location[0], block_location[1]

for now_y in range(k_height):
for now_x in range(k_width):
if k[now_y][now_x]:
                 rel_x, rel_y = now_x - 1, now_y - 1
                 ls.append((loc_y + rel_y, loc_x + rel_x))
return ls

 kernel_width, kernel_height = 3, 3

# Kernel mode:[Row][Col]
 kernel = [[1, 1, 1], [1, 1, 1], [1, 1, 1]]

# Left border
if x == 0:
for i in range(kernel_height):
         kernel[i][0] = 0

# Right border
if x == self.blocks_x - 1:
for i in range(kernel_height):
         kernel[i][kernel_width - 1] = 0

# Top border
if y == 0:
for i in range(kernel_width):
         kernel[0][i] = 0

# Bottom border
if y == self.blocks_y - 1:
for i in range(kernel_width):
         kernel[kernel_height - 1][i] = 0

# Generate the search map
 to_visit = generate_kernel(kernel, kernel_width, kernel_height, location)
在这一部分通过检测当前雷块是否在棋盘的各个边缘来进行核的删除(在核中,1为保留,0为舍弃),之后通过generate_kernel函数来进行最终坐标的生成。
def count_unopen_blocks(blocks):
    count = 0
for single_block in blocks:
if self.blocks_num[single_block[1]][single_block[0]] == -1:
            count += 1
return count

def mark_as_mine(blocks):
for single_block in blocks:
if self.blocks_num[single_block[1]][single_block[0]] == -1:
self.blocks_is_mine[single_block[1]][single_block[0]] = 1

unopen_blocks = count_unopen_blocks(to_visit)
if unopen_blocks == self.blocks_num[x][y]:
     mark_as_mine(to_visit)
在完成核的生成之后,有一个需要去检测的雷块“地址簿”:to_visit。通过count_unopen_blocks函数来统计周围九宫格范围的未打开数量,并且和当前雷块的数字进行比对,如果相等则将所有九宫格内雷块通过mark_as_mine函数来标注为地雷。
def mark_to_click_block(blocks):
for single_block in blocks:

# Not Mine
if not self.blocks_is_mine[single_block[1]][single_block[0]] == 1:
# Click-able
if self.blocks_num[single_block[1]][single_block[0]] == -1:

# Source Syntax: [y][x] - Converted
if not (single_block[1], single_block[0]) in self.next_steps:
self.next_steps.append((single_block[1], single_block[0]))

def count_mines(blocks):
    count = 0
for single_block in blocks:
if self.blocks_is_mine[single_block[1]][single_block[0]] == 1:
            count += 1
return count

mines_count = count_mines(to_visit)

if mines_count == block:
    mark_to_click_block(to_visit)
扫雷流程中的第二步也采用和第一步相近的方法来实现。先用和第一步完全一样的方法来生成需要访问的雷块的核,之后生成具体的雷块位置,通过count_mines函数来获取九宫格范围内所有雷块的数量,并且判断当前九宫格内所有雷块是否已经被检测出来。
如果是,则通过mark_to_click_block函数来排除九宫格内已经被标记为地雷的雷块,并且将剩余的安全雷块加入next_steps数组内。
# Analyze the number of blocks
self.iterate_blocks_image(BoomMine.analyze_block)

# Mark all mines
self.iterate_blocks_number(BoomMine.detect_mine)

# Calculate where to click
self.iterate_blocks_number(BoomMine.detect_to_click_block)

if self.is_in_form(mouseOperation.get_mouse_point()):
for to_click in self.next_steps:
         on_screen_location = self.rel_loc_to_real(to_click)
         mouseOperation.mouse_move(on_screen_location[0], on_screen_location[1])
         mouseOperation.mouse_click()
在最终的实现内,将几个过程都封装成为了函数,并且可以通过iterate_blocks_number方法来对所有雷块都使用传入的函数来进行处理,这有点类似Python中Filter的作用。


 被折叠的 条评论
为什么被折叠?
被折叠的 条评论
为什么被折叠?
 到【灌水乐园】发言


