


生成证书
确定电脑安装好JDK,配置好环境变量,进入cmd窗口,输入下面命令:
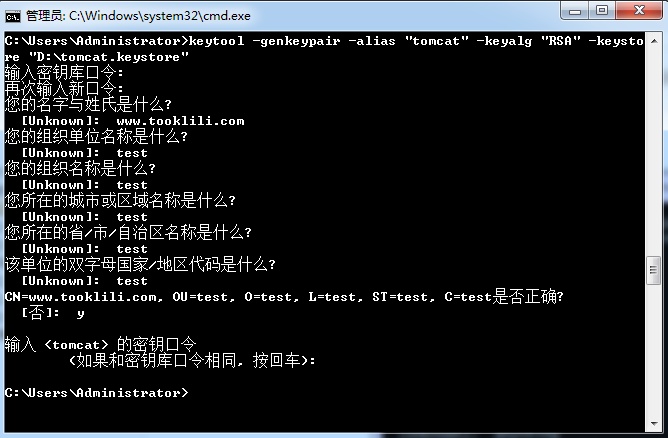
keytool -genkeypair -alias "tomcat" -keyalg "RSA" -keystore "D:\tomcat.keystore"接着会让你填一些基本信息:
下面简单介绍一下:
密钥库口令:123456(这个密码非常重要)
名字与姓氏:www.tooklili.com(以后访问的域名或IP地址,非常重要,证书和域名或IP绑定)
组织单位名称:test(随便填)
组织名称:test(随便填)
城市:test(随便填)
省市自治区:test(随便填)
国家地区代码:test(随便填)
将证书配置到tomcat中
打开tomcat的配置文件conf/server.xml。
配置如下:
<Connector port="8447" protocol="org.apache.coyote.http11.Http11Protocol"
 maxThreads="150" SSLEnabled="true" scheme="https" secure="true"
clientAuth="false"
sslProtocol="TLS"
keystoreFile="/project/tomcat/tomcat-8084-https/tomcat.keystore" keystorePass="123456"/>其中,keystoreFile是上一步生成的证书文件地址,keystorePass是上一步的密钥库口令,此处端口默认为8443,我改成了8447。
测试https
将测试项目放到tomcat的webapps中,访问:https://www.tooklili.com:8447/项目名称
如果访问成功,则https配置成功。
Tomcat设置访问http时自动转化成https
修改conf/web.xml文件,在web.xml的末尾追加以下配置:
<security-constraint>
 <web-resource-collection>
 <web-resource-name>SSL</web-resource-name>
        <url-pattern>/*</url-pattern>
    </web-resource-collection>
    <user-data-constraint>
        <transport-guarantee>CONFIDENTIAL</transport-guarantee>
    </user-data-constraint>
</security-constraint>


 被折叠的 条评论
为什么被折叠?
被折叠的 条评论
为什么被折叠?
 到【灌水乐园】发言


