


【文章末尾给大家准备了大量的福利】
docker概述
Docker是一个开源的容器引擎,基于Go语言开发,同时基于Apache2.0协议开发。对Docker简单的理解就是使用Docker可以
把一台服务器隔离成一个个独立的容器,我们可以把这地方描述的容器理解成一个沙盒。在每个容器中运行一个程序,不同的容器
之间相互隔离,容器的创建,停止,以及启动基本都是秒为单位,而且容器对资源的需求也是非常有限的,比起虚拟化的技术而言,
可以节约很多的资源成本。在DevOps技术栈体系和可持续交付中占据了重要的位置。
docker安装
内存检测
[root@wuyaShare ~]# uname -r
3.10.0-1160.31.1.el7.x86_64
系统升级
yum update 安装依赖包
yum install -y yum-utils device-mapper-persistent-data lvm2设置yum源
yum-config-manager --add-repo https://download.docker.com/linux/centos/docker-ce.repo查看docker版本
yum list docker-ce --showduplicates | sort -r
#执行后,输出的结果信息如下:
Installed Packages
docker-ce.x86_64            3:20.10.9-3.el7                    docker-ce-stable
docker-ce.x86_64            3:20.10.8-3.el7                    docker-ce-stable
docker-ce.x86_64            3:20.10.7-3.el7                    docker-ce-stable
docker-ce.x86_64            3:20.10.7-3.el7                    @docker-ce-stable
docker安装
yum install docker-ce-19.03.1-3.el7验证版本
docker version
#执行后,输出的结果信息为
Client: Docker Engine - Community
Version: 20.10.7
API version: 1.41
Go version: go1.13.15
Git commit: f0df350
Built: Wed Jun 2 11:58:10 2021
OS/Arch: linux/amd64
Context: default
Experimental: true
Server: Docker Engine - Community
Engine:
Version: 20.10.7
API version: 1.41 (minimum version 1.12)
Go version: go1.13.15
Git commit: b0f5bc3
Built: Wed Jun 2 11:56:35 2021
OS/Arch: linux/amd64
Experimental: false
containerd:
Version: 1.4.6
GitCommit: d71fcd7d8303cbf684402823e425e9dd2e99285d
runc:
Version: 1.0.0-rc95
GitCommit: b9ee9c6314599f1b4a7f497e1f1f856fe433d3b7
docker-init:
Version: 0.19.0
GitCommit: de40ad0设置开机启动
systemctl start docker
systemctl enable docker
查看docker状态
systemctl status docker
#执行后,输出的结果信息如下所示
● docker.service - Docker Application Container Engine
   Loaded: loaded (/usr/lib/systemd/system/docker.service; enabled; vendor preset: disabled)
   Active: active (running) since Sun 2021-10-10 11:29:53 CST; 5 days ago
     Docs: https://docs.docker.com
 Main PID: 25805 (dockerd)
    Tasks: 12
   Memory: 63.1M
   CGroup: /system.slice/docker.service
           └─25805 /usr/bin/dockerd -H fd:// --containerd=/run/containerd/containerd.sock
查看docker信息
查看docker的存储路径以及docker的信息,命令为:docker info ,具体指令执行以及输出信息为:
docker info
#执行如上的基本信息后显示如下(部分信息)
Operating System: CentOS Linux 7 (Core)
OSType: linux
Architecture: x86_64
CPUs: 2
Total Memory: 3.7GiB
Name: wuyaShare
ID: KBS5:IWHS:POJW:BLCG:XSQ5:OU2B:5YPB:KXCW:JYZP:GHYI:KP4M:VEA5
Docker Root Dir: /var/lib/docker
Debug Mode: false
Username: wuyashare
Registry: https://index.docker.io/v1/
Labels:
Experimental: false
Insecure Registries:
127.0.0.0/8
Registry Mirrors:
https://8xpkSwnt.mirror.aliyuncs.com/
Live Restore Enabled: false
Docker管理
初玩docker
安装docker完成后,我们先来玩下docker的基本使用。不管是学习任何的编程语言还是学习docker,都先向世界好,下面也详细
的演示下这部分的过程,输入指令为:
docker run hello-world
#输入如上的指令后,输出的结果信息如下
Unable to find image 'hello-world:latest' locally
latest: Pulling from library/hello-world
2db29710123e: Pull complete
Digest: sha256:37a0b92b08d4919615c3ee023f7ddb068d12b8387475d64c622ac30f45c29c51
Status: Downloaded newer image for hello-world:latest
Hello from Docker!
This message shows that your installation appears to be working correctly.
To generate this message, Docker took the following steps:
1. The Docker client contacted the Docker daemon.
2. The Docker daemon pulled the "hello-world" image from the Docker Hub.
(amd64)
3. The Docker daemon created a new container from that image which runs the
executable that produces the output you are currently reading.
4. The Docker daemon streamed that output to the Docker client, which sent it
to your terminal.
To try something more ambitious, you can run an Ubuntu container with:
$ docker run -it ubuntu bash
Share images, automate workflows, and more with a free Docker ID:
https://hub.docker.com/
For more examples and ideas, visit:
https://docs.docker.com/get-started/备注:docker run imageName后,实际上docker内部的整个过程,是先从docker hub获取镜像的信息后,然后运行这个docker的镜像。
获取镜像
在docker中,我看首先需要从docker hub获取到镜像,也就是image,然后才可以运行它。docker获取镜像的步骤可以总结为如下:
-
获取该软件的docker镜像,直接可以进行搜索,比如docker pull nginx
-
运行该容器,运行成功后可以启动一个容器,可以nginx服务就运行在一个容器里面了
-
停止容器,删除该镜像
docker容器式的环境更可以看成是一个沙盒的环境,在这个沙盒的环境中,我们可以搭建对应的环境,比如安装一个centos的操作系统。
下面详细的演示下获取centos镜像的过程,具体指令如下:
#获取镜像的指令可以总结为:docker pull imageName:image的版本
[root@wuyaShare ~]# docker pull centos:7.8.2003
7.8.2003: Pulling from library/centos
9b4ebb48de8d: Pull complete
Digest: sha256:8540a199ad51c6b7b51492fa9fee27549fd11b3bb913e888ab2ccf77cbb72cc1
Status: Downloaded newer image for centos:7.8.2003
docker.io/library/centos:7.8.2003
如上可以看到已经获取到centos的镜像信息,可以查看它的镜像,指令具体为:
docker images执行后,输出结果信息如下:
REPOSITORY   TAG        IMAGE ID       CREATED         SIZE
centos       7.8.2003   afb6fca791e0   17 months ago   203MB
获取到镜像后,就可以运行镜像的信息,运行使用到的指令具体总结为如下:
-
-it:开启交互式的命令
下面主要演示运行centos:7.8.2003的镜像信息,如下所示:
[root@wuyaShare ~]# docker run -it centos:7.8.2003 bash
[root@b35d9c343f4b /]# date
Fri Oct 15 08:33:16 UTC 2021
[root@b35d9c343f4b /]# echo "Hello Docker"
Hello Docker
如果想退出该环境,使用的命令为:exit就可以退出了。
查看镜像
获取镜像后,我们可以查看镜像的信息,查看镜像的指令可以查看所有的镜像,也可以查看具体的镜像信息和格式化的查看。
查看所有
查看所有的镜像信息使用的指令为:
docker images or docker image ls
#执行如上的指令后,显示查看到的镜像的信息
[root@wuyaShare ~]# docker images
REPOSITORY TAG IMAGE ID CREATED SIZE
centos 7.8.2003 afb6fca791e0 17 months ago 203MB
[root@wuyaShare ~]# docker image ls
REPOSITORY TAG IMAGE ID CREATED SIZE
centos 7.8.2003 afb6fca791e0 17 months ago 203MB
查看具体镜像
当docker镜像很多的时候,也可以查看具体的镜像信息,这个使用可以使用docker image ls | grep imageName,如下具体
演示下该指令的使用,具体如下:
[root@wuyaShare ~]# docker image ls | grep centos
centos       7.8.2003   afb6fca791e0   17 months ago   203MB
显示镜像ID
某些时候,需要只查看镜像的ID,并不需要展示其他的信息,下面演示只查看镜像的ID的,指令如下:
[root@wuyaShare ~]# docker images -q
afb6fca791e0
查看镜像详细信息
获取到镜像的ID后,可以使用指令inspect查看镜像的详细的信息,命令如下所示:
docker image inspect $(docker images -q)
#仅仅使用于mac和Linux的系统,windows系统该命令是无法使用的
运行镜像
获取docker的镜像后,就可以运行对应的docker的镜像信息了,运行的命令为run,具体指令总结如下:
-
-it:开启交互式的命令
-
--rm:容器退出时删除容器的记录信息
-
--name:指定容器的名称
-
-d:后台方式运行容器
每个镜像运行后,都会在容器中存在一条记录的信息,查询的指令为:
docker ps -a 下面演示主要运行centos:7.8.2003的镜像信息,来演示它的过程:
[root@wuyaShare ~]# docker run -it --name centos7.8.2003 centos:7.8.2003
[root@3db6f936ed4b /]# date
Fri Oct 15 09:14:17 UTC 2021
执行后,可以再查看容器中的记录信息,具体如下:
[root@wuyaShare ~]# docker ps -a
CONTAINER ID   IMAGE             COMMAND       CREATED              STATUS                          PORTS     NAMES
3db6f936ed4b   centos:7.8.2003   "/bin/bash"   About a minute ago   Exited (0) About a minute ago             centos7.8.2003
如上,可以看到容器的名称为:centos7.8.2003。
如果每次运行镜像不想在容器中记录它的信息,那么就可以带上--rm,下面具体演示下它的使用:
[root@wuyaShare ~]# docker run -it --rm --name centos7.8.2003 centos:7.8.2003
[root@e096c9fd6281 /]# date
Fri Oct 15 10:42:43 UTC 2021
[root@e096c9fd6281 /]# exit
exit
#查看容器记录,显示为空
[root@wuyaShare ~]# docker ps -a
CONTAINER ID IMAGE COMMAND CREATED STATUS PORTS NAMES镜像信息修改
删除镜像
删除镜像可以使用镜像的ID,名字,摘要等方式来进行删除。删除镜像主要是两种方式,具体总结如下。
docker的镜像未被容器运行
未被执行的镜像,直接可以根据ID,NAME来进行删除,下面详细的演示该过程。
依据name删除
#获取镜像信息
[root@wuyaShare ~]# docker pull hello-world
Using default tag: latest
latest: Pulling from library/hello-world
2db29710123e: Pull complete
Digest: sha256:37a0b92b08d4919615c3ee023f7ddb068d12b8387475d64c622ac30f45c29c51
Status: Downloaded newer image for hello-world:latest
docker.io/library/hello-world:latest
#查看获取的镜像信息
[root@wuyaShare ~]# docker images
REPOSITORY TAG IMAGE ID CREATED SIZE
hello-world latest feb5d9fea6a5 3 weeks ago 13.3kB
#根据name来删除镜像
[root@wuyaShare ~]# docker rmi hello-world
Untagged: hello-world:latest
Untagged: hello-world@sha256:37a0b92b08d4919615c3ee023f7ddb068d12b8387475d64c622ac30f45c29c51
Deleted: sha256:feb5d9fea6a5e9606aa995e879d862b825965ba48de054caab5ef356dc6b3412
Deleted: sha256:e07ee1baac5fae6a26f30cabfe54a36d3402f96afda318fe0a96cec4ca393359
[root@wuyaShare ~]# docker images
REPOSITORY TAG IMAGE ID CREATED SIZE依据ID删除
#获取镜像信息
[root@wuyaShare ~]# docker pull hello-world
Using default tag: latest
latest: Pulling from library/hello-world
2db29710123e: Pull complete
Digest: sha256:37a0b92b08d4919615c3ee023f7ddb068d12b8387475d64c622ac30f45c29c51
Status: Downloaded newer image for hello-world:latest
docker.io/library/hello-world:latest
#查看获取的镜像
[root@wuyaShare ~]# docker images
REPOSITORY TAG IMAGE ID CREATED SIZE
hello-world latest feb5d9fea6a5 3 weeks ago 13.3kB
#根据ID删除镜像
[root@wuyaShare ~]# docker rmi feb5d9fea6a5
Untagged: hello-world:latest
Untagged: hello-world@sha256:37a0b92b08d4919615c3ee023f7ddb068d12b8387475d64c622ac30f45c29c51
Deleted: sha256:feb5d9fea6a5e9606aa995e879d862b825965ba48de054caab5ef356dc6b3412
Deleted: sha256:e07ee1baac5fae6a26f30cabfe54a36d3402f96afda318fe0a96cec4ca393359
[root@wuyaShare ~]# docker images
REPOSITORY TAG IMAGE ID CREATED SIZEdocker的镜像被容器运行
如果一个镜像被容器运行了,那么删除镜像的步骤可以总结为:
-
得到容器的ID信息
-
删除关联的容器ID
-
使用name或者ID来删除镜像
下面通过一个具体的案例来演示它的过程,具体演示过程如下所示:
#查看镜像信息
[root@wuyaShare ~]# docker images
REPOSITORY TAG IMAGE ID CREATED SIZE
centos 7.8.2003 afb6fca791e0 17 months ago 203MB
#在容器中运行镜像
[root@wuyaShare ~]# docker run -it centos:7.8.2003 bash
[root@85c221e31867 /]# date
Mon Oct 18 15:00:54 UTC 2021
[root@85c221e31867 /]# exit
exit
#获取运行容器的ID
[root@wuyaShare ~]# docker ps -a
CONTAINER ID IMAGE COMMAND CREATED STATUS PORTS NAMES
85c221e31867 centos:7.8.2003 "bash" 11 seconds ago Exited (0) 6 seconds ago mystifying_shirley
#删除镜像运行的关联容器的ID信息
[root@wuyaShare ~]# docker rm 85c221e31867
85c221e31867
#根据name删除镜像
[root@wuyaShare ~]# docker rmi centos:7.8.2003
Untagged: centos:7.8.2003
Untagged: centos@sha256:8540a199ad51c6b7b51492fa9fee27549fd11b3bb913e888ab2ccf77cbb72cc1
Deleted: sha256:afb6fca791e071c66276202f8efca5ce3d3dc4fb218bcddff1bc565d981ddd1e
Deleted: sha256:fb82b029bea0a2a3b6a62a9c1e47e57fae2a82f629b2d1a346da4fc8fb53a0b6导出&导入镜像
在企业案例中,我们往往打包成一个镜像后,就会打包,然后把它发送给其他的同学来使用。那么在本案例中,我主要包一个centos的
镜像,里面也是安装了vim的编辑器,然后再在另外一个docker的导入和执行。镜像导入导出的场景:异地的办公模式,那么场景就是:
异地的开发同学写完代码后,然后把自己的应用程序打包成镜像,打包成镜像后,发送给测试同学,测试同学运行镜像(前提是把镜像
导入中docker中),镜像运行成功后,等于环境部署成功,可以测试通许可以开始测试了。
开发同学操作:
1、写代码
2、写的代码打包成镜像
3、把镜像导出
4、发送给测试同学
测试同学操作:
1、接收开发发送的镜像
2、导入镜像到docker中
3、运行镜像
4、开始测试
导出镜像
在本地的docker中打包一个镜像,然后导出,在容器里面安装了vim的编辑器,详细的过程如下:
#获取镜像
$ docker pull centos:7.8.2003
7.8.2003: Pulling from library/centos
9b4ebb48de8d: Pull complete
Digest: sha256:8540a199ad51c6b7b51492fa9fee27549fd11b3bb913e888ab2ccf77cbb72cc1
Status: Downloaded newer image for centos:7.8.2003
docker.io/library/centos:7.8.2003
#在容器中运行镜像
$ docker run -it --rm centos:7.8.2003 bash
#在容器中安装vim编辑器
[root@a1abbe762fa2 /]# yum install vim -y
#安装vim编辑器成功,退出容器
[root@a1abbe762fa2 /]# exit
exit
#导出容器到/var的目录下
$docker image save centos:7.8.2003 -o /Users/***/Desktop/centos.taz导入镜像
把本地的镜像上传到服务器,然后倒入后来进行执行,具体演示它的过程,具体如下:
#从本地把文件上传到Linux的服务器
scp centos.taz root@47.95.142.233:/root
root@47.95.142.233's password:
centos.taz 100% 201MB 3.4MB/s 00:59
#查看镜像信息
[root@wuyaShare ~]# docker images
REPOSITORY TAG IMAGE ID CREATED SIZE
#导入镜像信息
[root@wuyaShare ~]# docker image load -i /root/centos.taz
fb82b029bea0: Loading layer 211.1MB/211.1MB
Loaded image: centos:7.8.2003
#查看导入后的镜像信息
[root@wuyaShare ~]# docker images
REPOSITORY TAG IMAGE ID CREATED SIZE
centos 7.8.2003 afb6fca791e0 17 months ago 203MB
#运行镜像信息
[root@wuyaShare ~]# docker run -it --rm centos:7.8.2003 bash
[root@4503d78558da /]# date
Mon Oct 18 15:25:13 UTC 2021docker容器管理
docker run 镜像名称 这个过程可以理解为:把镜像文件创建成docker容器的一部分,然后再进行启动。特别需要注意的是:容器内
的进程必须是前台运行状态,否则容器直接退出。还有一点特别需要提醒的是:docker run 镜像名 如果镜像文件在本地的docker镜
像中不存在,那么就会在线去下载该镜像的资源信息。docker的容器启动成功后,使用docker ps -a可以查看容器的ID记录信息。
下面详细的演示这部分的应用:
#运行docker的镜像信息
[root@wuyaShare ~]# docker run -it centos:7.8.2003 bash
[root@b8c896d0a0d6 /]# date
Wed Oct 20 08:42:46 UTC 2021
[root@b8c896d0a0d6 /]# exit
exit
#查看运行的docker镜像的容器记录信息
[root@wuyaShare ~]# docker ps -a | grep centos
b8c896d0a0d6 centos:7.8.2003 "bash" 13 seconds ago Exited (0) 7 seconds ago容器命令
在运行镜像中,后面需要带一些指令的信息,这些指令的信息具体汇总为如下:
-
-d:后台运行
-
-it:交互式命令(bash)
-
--rm:容器挂掉后自动被删除
-
--name:给容器起一个名字
-
-p:端口映射
详细详细的演示下各个指令的具体使用,具体如下:
#运行容器的指令
docker run -it --rm --name centos.7.8.2003 centos:7.8.2003
#查看到的容器记录的信息
docker ps -a | grep centos
360df4b98625 centos:7.8.2003 "/bin/bash" 10 seconds ago Up 9 seconds centos.7.8.2003容器信息查看
一个容器执行后,我们可以使用如下的指令查看容器的详细信息,具体指令为:
#运行hello-world的容器
[root@wuyaShare ~]# docker run hello-world
Unable to find image 'hello-world:latest' locally
latest: Pulling from library/hello-world
#查看运行容器的记录信息
[root@wuyaShare ~]# docker ps -a | grep hello-world
b87b70fd99b5 hello-world "/hello" 11 seconds ago Exited (0) 11 seconds ago keen_dewdney
#查看容器的详细记录信息
[root@wuyaShare ~]# docker container inspect b87b70fd99b5
#备注,执行后,就会显示该容器的详细的信息log查看
在docker容器中,查看容器的日志信息的命令为:
docker logs -f 容器ID 下面详细的演示下这部分的使用,具体为:
docker run -it --rm centos:7.8.2003 bash
[root@51e2db607d0c /]#
#查询到容器的ID信息
docker ps -a | grep centos
51e2db607d0c centos:7.8.2003 "bash" 16 seconds ago Up 14 seconds great_kepler
#查看容器的日志信息
docker logs -f 51e2db607d0c
#在容器中操作的输出,就会显示到日志中,具体容器的操作如下:
[root@51e2db607d0c /]# echo "Hello Docker!"
bash: !": event not found
[root@51e2db607d0c /]# date
Wed Oct 20 08:55:41 UTC 2021
[root@51e2db607d0c /]# touch index.py
#日志文件显示的信息:
[root@wuyaShare ~]# docker logs -f 51e2db607d0c
[root@51e2db607d0c /]# echo "Hello Docker!"
bash: !": event not found
[root@51e2db607d0c /]# date
Wed Oct 20 08:55:41 UTC 2021
[root@51e2db607d0c /]# touch index.py
#如果只显示最新的5条日志信息,那么执行的命令为:
docker logs 51e2db607d0c | tail -5 容器提交
在一个容器里面,比如centos里面安装了vim的编辑器,如果没进行提交,那么下次进入还需要安装vim的编辑器,这其实是非常不友
好的,我们更加想要的是一个容器里面安装对应的应用程序后,下次进入还是存在的,但是前提条件是需要提交,下面详细的演示下
这部分的应用,具体步骤如下:
-
运行容器
[root@wuyaShare ~]# docker run -it --rm centos:7.8.2003 bash [root@b237640cd900 /]# vim bash: vim: command not found -
在容器里面安装应用程序
#安装vim的编辑器 [root@b237640cd900 /]# yum install vim -y -
查询到容器的ID信息
[root@wuyaShare ~]# docker ps -a | grep centos b237640cd900 centos:7.8.2003 "bash" 2 minutes ago Up 2 minutes quizzical_kalam -
提交容器
[root@wuyaShare ~]# docker commit b237640cd900 centos_vim sha256:bd0cd838f38d18dd8a840d9c0267b0ed2b5400cbb42c1267afcda4fbc36b8b2d #提交容器的时候,切记一定要保持运行的容器是不能退出的 -
退出容器,查看镜像信息,就会显示最新提交的centos_vim
[root@wuyaShare ~]# docker images | grep centos centos_vim latest bd0cd838f38d About a minute ago 402MB centos 7.8.2003 afb6fca791e0 17 months ago 203MB -
进入到容器centos_vim,就会显示出vim的编辑器
[root@wuyaShare ~]# docker run -it --rm centos_vim  bash
[root@a46fc0e60c71 /]# vim
容器停止&启动
容器运行后,可以启动容器,也是可以停止容器,以及查看容器的端口信息,下面还是以nginx的镜像信息为案例,来演示下这部分。
启动&停止容器
下面以nginx的镜像为案例来演示它的具体容器的停止和启动的演示,具体命令信息如下:
#运行镜像容器信息
[root@wuyaShare ~]# docker run -d -p 80:80 nginx
dc42dd7323a3b5de103f679378cb3f3288ed7e623c175acbd6420a68e7fb3bd4
#查看容器记录ID的信息
[root@wuyaShare ~]# docker ps -a
CONTAINER ID IMAGE COMMAND CREATED STATUS PORTS NAMES
dc42dd7323a3 nginx "/docker-entrypoint.…" 3 seconds ago Up 2 seconds 0.0.0.0:80->80/tcp brave_khayyam
#查看容器的端口
[root@wuyaShare ~]# docker port dc42dd7323a3
80/tcp -> 0.0.0.0:80
#停止容器
[root@wuyaShare ~]# docker stop dc42dd7323a3
dc42dd7323a3
[root@wuyaShare ~]# docker port dc42dd7323a3
#启动容器,启动容器后,就可以查看容器的ID的信息了
[root@wuyaShare ~]# docker start dc42dd7323a3
dc42dd7323a3
[root@wuyaShare ~]# docker port dc42dd7323a3
80/tcp -> 0.0.0.0:80容器交互式
在容器的管理中,也是可以通过exec的命令方式来查看容器交互式的命令信息,涉及到的命令信息以及交互具体如下:
#运行容器信息
[root@wuyaShare ~]# docker run -it --rm centos:7.8.2003 bash
[root@3466f8fe336c /]# touch index.txt
#通过exec命令的方式进入到交互式的命令信息
[root@wuyaShare ~]# docker exec -it 3466f8fe336c bash
[root@3466f8fe336c /]# ls
anaconda-post.log dev home lib media opt root sbin sys usr
bin etc index.txt lib64 mnt proc run srv tmp varDockerfile实战
Dockerfile概述
使用dockerfile主要是用于构建docker镜像文件信息,相当于一个脚本,通过dockerfile自己的指令,来构建软件依赖,文件依赖,
存储等等情况。
Dockerfile使用
在docker中创建镜像可以分为两个方法,这两个方法具体可以总结为如下:
-
手动修改容器内容,然后docker commit提交容器为新的镜像文件
-
通过在dockerfile中定义一系列的命令和参数构成的脚本,然后这些命令应用于基础镜像,依次添加层,最终生成一个新的镜像,这样就极大的简化了部署的工作。
Dockerfile组成部分
dockerfile的主要组成部分可以汇总为:
-
基础镜像信息
-
制作镜像操作指令 RUM
-
容器启动时执行指令CMD["/bin/bash"]
Dockerfile指令
Dockerfile基本指令
dockerfile的指令主要可以汇总为如下,使用dockerfile的前提是学习会这些指令的基本使用,具体如下:
-
FROM #指令基础镜像
-
MAINTAINER #指定维护者信息,也可以没有
-
RUN #具体执行的操作,在命令前面加上RUN即可
-
ADD #COPY文件,会自动进行解压
-
WORKDIR #设置当前工作目录
-
VOLUME #设置卷,挂载主机目录
-
EXPOSE #指定对外的端口
-
CMD #指定容器启动后需要干的事情
-
COPY #复制文件
-
ENV #环境变量
-
ENTRYPOINT #容器启动后执行的命令
Dockerfile入门
初玩Dockerfile
容器能够运行的前提是必须在容器内,有一个进程在前台运行,该容器内,比如是MySQL,那么也就是说有MySQL正在前台运行。下
面演示一个Linux中调用变量的案例应用,具体Dockerfile文件信息如下所示:
FROM centos:7.8.2003
MAINTAINER 无涯
#定义一个变量,变量的值是Docker
ENV name Docker!
#运行程序,输出变量的值
ENTRYPOINT  echo "Hello $name"
下面详细的演示构建Dockerfile的过程信息,构建的命令以及构建的过程具体如下;
#构建Dockerfile的镜像信息
docker build .
#执行如上构建的指令后,输出如下的信息
Sending build context to Docker daemon 15.87kB
Step 1/4 : FROM centos:7.8.2003
7.8.2003: Pulling from library/centos
9b4ebb48de8d: Pull complete
Digest: sha256:8540a199ad51c6b7b51492fa9fee27549fd11b3bb913e888ab2ccf77cbb72cc1
Status: Downloaded newer image for centos:7.8.2003
---> afb6fca791e0
Step 2/4 : MAINTAINER 无涯
---> Running in 2bfd2fad4751
Removing intermediate container 2bfd2fad4751
---> 71dad12c4110
Step 3/4 : ENV name Docker
---> Running in f70dc098790d
Removing intermediate container f70dc098790d
---> 3c5b5a752709
Step 4/4 : ENTRYPOINT echo "Hello $name"
---> Running in cf39ef605a9a
Removing intermediate container cf39ef605a9a
---> 2e70823e2d4a
Successfully built 2e70823e2d4a构建镜像成功后,可以查看该镜像信息以及运行该容器,执行的结果就会显示“Hello Docker”,具体见如下的操作过程:
#查看镜像的信息
[root@wuyaShare learnDocker]# docker images
REPOSITORY TAG IMAGE ID CREATED SIZE
<none> <none> 2e70823e2d4a 4 minutes ago 203MB
centos 7.8.2003 afb6fca791e0 17 months ago 203MB
#修改镜像的名称
[root@wuyaShare learnDocker]# docker tag 2e70823e2d4a centos_hello
#查看修改后的镜像名称
[root@wuyaShare learnDocker]# docker images
REPOSITORY TAG IMAGE ID CREATED SIZE
centos_hello latest 2e70823e2d4a 5 minutes ago 203MB
centos 7.8.2003 afb6fca791e0 17 months ago 203MB
#运行镜像以及显示镜像运行后的信息
[root@wuyaShare learnDocker]# docker run -it --rm centos_hello bash
Hello DockerDockerfile实战
部署Nginx
下面显示部署nginx的服务,期望部署是启动容器后,可以访问它的地址显示的信息。涉及到的nginx的Dockerfile的文件内容为:
FROM nginx
MAINTAINER 无涯
RUN echo "Hi, This Is A Docker Continer WebSite" > /usr/share/nginx/html/index.html
EXPOSE 80
下来开始构建该Dockerfile的文件,主要信息如下:
#构建docker镜像的信息
docker build -t nginx_container .
#构建docker镜像输出的信息
Sending build context to Docker daemon 15.87kB
Step 1/4 : FROM nginx
latest: Pulling from library/nginx
Digest: sha256:644a70516a26004c97d0d85c7fe1d0c3a67ea8ab7ddf4aff193d9f301670cf36
Status: Downloaded newer image for nginx:latest
---> 87a94228f133
Step 2/4 : MAINTAINER 无涯Share
---> Running in 99e2f6164553
Removing intermediate container 99e2f6164553
---> dd9da530d248
Step 3/4 : RUN echo "Hi, This Is A Docker Continer Website" > /usr/share/nginx/html/index.html
---> Running in fcf2344a86a1
Removing intermediate container fcf2344a86a1
---> ca224dc81b9a
Step 4/4 : EXPOSE 80
---> Running in 73a7d4fa90d1
Removing intermediate container 73a7d4fa90d1
---> 040e989b549b
Successfully built 040e989b549b
Successfully tagged nginx_container:latest下来运行该docker的镜像,具体详细过程如下所示:
#查看docker镜像的信息
[root@wuyaShare learnDocker]# docker image ls | grep nginx
nginx_container latest 040e989b549b 3 minutes ago 133MB
nginx latest 87a94228f133 9 days ago 133MB
#运行docker容器的信息
[root@wuyaShare learnDocker]# docker run -it --rm -d -p 80:80 nginx_container
b7a7dddbfb2303a2b07dd5cd1f9bfb07cf5d0e1c8e9130ac94c435b05a1055ec
#查看docker容器的记录
[root@wuyaShare learnDocker]# docker ps -a | grep nginx
b7a7dddbfb23 nginx_container "/docker-entrypoint.…" 10 seconds ago Up 9 seconds 0.0.0.0:80->80/tcp modest_pike
#查看容器端口
[root@wuyaShare learnDocker]# docker port b7a7dddbfb23
80/tcp -> 0.0.0.0:80
#验证nginx服务的可用行
[root@wuyaShare learnDocker]# curl http://localhost:80
Hi, This Is A Docker Continer Website部署Python
本案例主要使用Python语言,使用的WEB框架是Flask,然后来实现一个网站的部署过程,也就是说写好程序代码好后,开发dockerfile
的代码,执行以及生成镜像,其他人基于该镜像,docker run就可以在电脑跑起来对应的应用程序。
Flask代码
from flask import Flask,make_response,jsonify,abort,request
from flask_restful import Api,Resource
from flask_httpauth import HTTPBasicAuth
from flask import Flask
from flask_jwt import JWT, jwt_required, current_identity
from werkzeug.security import safe_str_cmp
app=Flask(__name__)
app.debug = True
app.config['SECRET_KEY'] = 'super-secret'
api=Api(app=app)
auth=HTTPBasicAuth()
@auth.get_password
def get_password(name):
if name=='admin':
return 'admin'
@auth.error_handler
def authoorized():
return make_response(jsonify({'msg':"请认证"}),403)
books=[
{'id':1,'author':'wuya','name':'Python接口自动化测试实战','done':True},
{'id':2,'author':'无涯','name':'Selenium3自动化测试实战','done':False}
]
class User(object):
def __init__(self, id, username, password):
self.id = id
self.username = username
self.password = password
def __str__(self):
return "User(id='%s')" % self.id
users = [
User(1, 'wuya', 'asd888'),
User(2, 'stage', 'asd888'),
User(3,'line','asd888')
]
username_table = {u.username: u for u in users}
userid_table = {u.id: u for u in users}
def authenticate(username, password):
user = username_table.get(username, None)
if user and safe_str_cmp(user.password.encode('utf-8'), password.encode('utf-8')):
return user
def identity(payload):
user_id = payload['identity']
return userid_table.get(user_id, None)
jwt = JWT(app, authenticate, identity)
class Books(Resource):
# decorators = [auth.login_required]
#decorators=[jwt_required()]
def get(self):
return jsonify({'status':0,'msg':'ok','datas':books})
def post(self):
if not request.json:
return jsonify({'status':1001,'msg':'请求参数不是JSON的数据,请检查,谢谢!'})
else:
book = {
'id': books[-1]['id'] + 1,
'author': request.json.get('author'),
'name': request.json.get('name'),
'done': True
}
books.append(book)
return {'status':1002,'msg': '添加书籍成功','datas':book}
# return jsonify({'status':1002,'msg': '添加书籍成功','datas':book}, 201)
class Book(Resource):
# decorators = [auth.login_required]
decorators = [jwt_required()]
def get(self,book_id):
book = list(filter(lambda t: t['id'] == book_id, books))
if len(book) == 0:
return jsonify({'status': 1003, 'msg': '很抱歉,您查询的书的信息不存在'})
else:
return jsonify({'status': 0, 'msg': 'ok', 'datas': book})
def put(self,book_id):
book = list(filter(lambda t: t['id'] == book_id, books))
if len(book) == 0:
return jsonify({'status': 1003, 'msg': '很抱歉,您查询的书的信息不存在'})
elif not request.json:
return jsonify({'status': 1001, 'msg': '请求参数不是JSON的数据,请检查,谢谢!'})
elif 'author' not in request.json:
return jsonify({'status': 1004, 'msg': '请求参数author不能为空'})
elif 'name' not in request.json:
return jsonify({'status': 1005, 'msg': '请求参数name不能为空'})
elif 'done' not in request.json:
return jsonify({'status': 1006, 'msg': '请求参数done不能为空'})
elif type(request.json['done'])!=bool:
return jsonify({'status': 1007, 'msg': '请求参数done为bool类型'})
else:
book[0]['author'] = request.json.get('author', book[0]['author'])
book[0]['name'] = request.json.get('name', book[0]['name'])
book[0]['done'] = request.json.get('done', book[0]['done'])
return jsonify({'status': 1008, 'msg': '更新书的信息成功', 'datas': book})
def delete(self,book_id):
book = list(filter(lambda t: t['id'] == book_id, books))
if len(book) == 0:
return jsonify({'status': 1003, 'msg': '很抱歉,您查询的书的信息不存在'})
else:
books.remove(book[0])
return jsonify({'status': 1009, 'msg': '删除书籍成功'})
api.add_resource(Books,'/v1/api/books')
api.add_resource(Book,'/v1/api/book/<int:book_id>')
if __name__ == '__main__':
app.run(debug=True,host='0.0.0.0')Dockerfile文件
这部分的Dockerfile文件的信息具体为:
FROM centos:7.8.2003
MAINTAINER 无涯
#下载yum
RUN curl -o /etc/yum.repos.d/CentOS-Base.repo  https://mirrors.aliyun.com/repo/Centos-7.repo;
RUN curl -o /etc/yum.repos.d/epel.repo http://mirrors.aliyun.com/repo/epel-7.repo;
#安装Python环境
RUN yum install python3-devel python3-pip -y
#安装flask库
RUN pip3 install -i https://pypi.douban.com/simple   flask
RUN pip3 install flask_restful
RUN pip3 install flask_httpauth
RUN pip3 install flask_jwt
#复制文件到容器目录
COPY app.py /opt
#切换目录
WORKDIR /opt
#启动服务
EXPOSE 5000
CMD ["python3","app.py"]
构建镜像
下来构建镜像,指令为:
docker build -t flask_web .
#执行构建后,部分输出信息
    ---> 654d11509ebb
Step 7/10 : COPY app.py /opt
    ---> cf4f278d900b
Step 8/10 : WORKDIR /opt
    ---> Running in 8dd988a4bf0d
Removing intermediate container 8dd988a4bf0d
    ---> 6866628f23f7
Step 9/10 : EXPOSE 5000
    ---> Running in 131bded2d074
Removing intermediate container 131bded2d074
    ---> b7876c74dae4
Step 10/10 : CMD ["python3","app.py"]
    ---> Running in 498f6c4ab849
Removing intermediate container 498f6c4ab849
    ---> 89f07acc5d97
Successfully built 89f07acc5d97
Successfully tagged flask_web:latest
运行容器
构建成功后,下来运行容器,具体详细过程如下:
[root@wuyaShare learnDocker]# docker run -it --rm -p 5000:5000 flask_web
   * Serving Flask app 'app' (lazy loading)
   * Environment: production
   WARNING: This is a development server. Do not use it in a production deployment.
   Use a production WSGI server instead.
   * Debug mode: on
   * Running on http://172.18.0.2:5000/ (Press CTRL+C to quit)
   * Restarting with stat
      * Debugger is active!
   * Debugger PIN: 132-410-186
验证容器
测试代码具体如下,模块名称为test_app.py,源码为:
import requests
def test_login():
r=requests.post(
url='http://172.18.0.2:5000/auth',
json={"username":"wuya","password":"asd888"})
assert r.status_code==200验证结果信息如下:
python3 -m pytest -v test_app.py
============================== test session starts ===============================
platform linux -- Python 3.7.1, pytest-6.2.5, py-1.10.0, pluggy-0.13.1 -- /usr/python37/bin/python3
collected 1 item
test_app.py::test_login PASSED 服务端收到的请求信息具体如下:
172.18.0.1 - - [21/Oct/2021 10:55:50] "POST /auth HTTP/1.1" 200 -部署SpringBoot
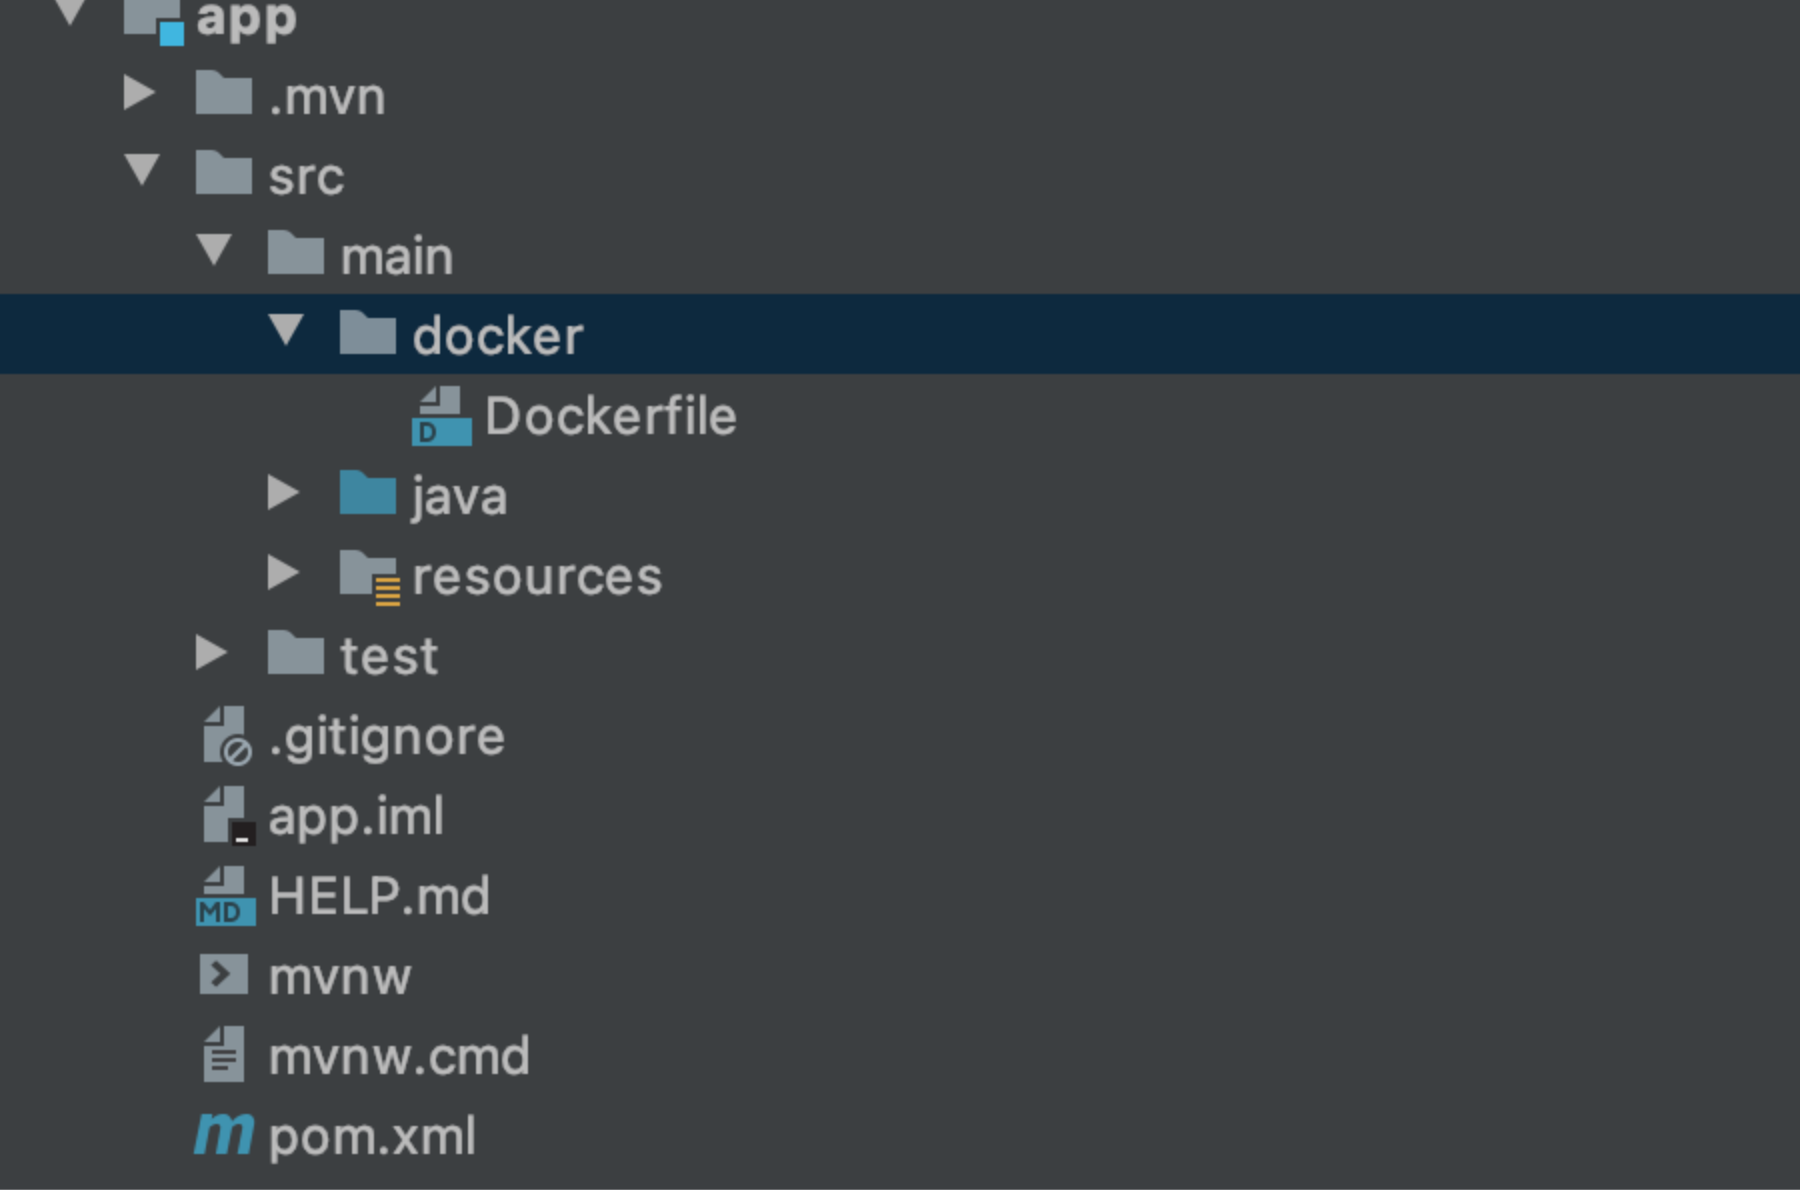
项目结构
创建SpringBoot的项目后,需要在src/main的目录下创建docker的文件夹,专门来管理Dockerfile的文件信息,整体项目结构信息如下:
Dockerfile文件
下来在docker文件夹里面创建Dockerfile的文件,文件内容具体如下:
FROM java:8
MAINTAINER 无涯
VOLUME /tmp
RUN mkdir /app
COPY app-0.0.1-SNAPSHOT.jar /app/app.jar
WORKDIR /app
EXPOSE 8080
CMD  ["java","-Djava.security.egd=file:/dev/./urandom","-jar","app.jar"]
Maven依赖插件
在Spring Boot中,需要在插件依赖中新增关于Docker的插件,详细的信息具体如下:
<!--Docker Maven依赖插件-->
<plugin>
    <groupId>com.spotify</groupId>
    <artifactId>docker-maven-plugin</artifactId>
    <configuration>
        <imageName>${project.name}:${project.version}</imageName>
        <!--Dockerfile文件存储目录-->
        <dockerDirectory>${project.basedir}/src/main/docker</dockerDirectory>
        <skipDockerBuild>false</skipDockerBuild>
        <resources>
            <resource>
                <directory>${project.build.directory}</directory>
                <include>${project.build.finalName}.jar</include>
            </resource>
        </resources>
    </configuration>
</plugin>
Maven构建
下来开始构建,构建的命令具体为:
mvn clean package -Dmaven.test.skip=true docker:build
#执行如上的构建命令后,输出的信息具体如下
Step 1/8 : FROM java:8
---> d23bdf5b1b1b
Step 2/8 : MAINTAINER 无涯
---> Running in 5f788f4733bf
Removing intermediate container 5f788f4733bf
---> 628dd9a79fb9
Step 3/8 : VOLUME /tmp
---> Running in 39c614cd1c00
Removing intermediate container 39c614cd1c00
---> ece8a35f07d9
Step 4/8 : RUN mkdir /app
---> Running in 77d1ccea2ab3
Removing intermediate container 77d1ccea2ab3
---> d28fbddcd816
Step 5/8 : COPY app-0.0.1-SNAPSHOT.jar /app/app.jar
---> 16fd34225aa2
Step 6/8 : WORKDIR /app
---> Running in 2d4098618383
Removing intermediate container 2d4098618383
---> 88888be40520
Step 7/8 : EXPOSE 8081
---> Running in f1452b177cfe
Removing intermediate container f1452b177cfe
---> 968944b64337
Step 8/8 : CMD ["java","-Djava.security.egd=file:/dev/./urandom","-jar","app.jar"]
---> Running in 07dc64c0c19f
Removing intermediate container 07dc64c0c19f
---> e6e04292173f
ProgressMessage{id=null, status=null, stream=null, error=null, progress=null, progressDetail=null}
Successfully built e6e04292173f
Successfully tagged app:0.0.1-SNAPSHOT
[INFO] Built app:0.0.1-SNAPSHOT
[INFO] ------------------------------------------------------------------------
[INFO] BUILD SUCCESS
[INFO] ------------------------------------------------------------------------
[INFO] Total time: 11.349 s
[INFO] Finished at: 2021-12-27T16:50:10+08:00
[INFO] ------------------------------------------------------------------------镜像验证
构建成功后,使用docker images就可以看到构建成功的镜像信息,具体如下:
docker images
REPOSITORY          TAG                 IMAGE ID            CREATED             SIZE
app                 0.0.1-SNAPSHOT      e6e04292173f        4 hours ago         664MB
下来开始运行镜像文件,运行的命令为:
docker run --rm -p8081:8081 e6e04292173f
#执行如上信息后,输出结果信息如下:
. ____ _ __ _ _
/\\ / ___'_ __ _ _(_)_ __ __ _ \ \ \ \
( ( )\___ | '_ | '_| | '_ \/ _` | \ \ \ \
\\/ ___)| |_)| | | | | || (_| | ) ) ) )
' |____| .__|_| |_|_| |_\__, | / / / /
=========|_|==============|___/=/_/_/_/
:: Spring Boot :: (v2.6.2)
2021-12-27 13:49:43.389 INFO 1 --- [ main] com.example.app.AppApplication : Starting AppApplication v0.0.1-SNAPSHOT using Java 1.8.0_111 on 22a0a65bbe46 with PID 1 (/app/app.jar started by root in /app)
2021-12-27 13:49:43.398 INFO 1 --- [ main] com.example.app.AppApplication : No active profile set, falling back to default profiles: default
2021-12-27 13:49:47.042 INFO 1 --- [ main] o.s.b.web.embedded.netty.NettyWebServer : Netty started on port 8081
2021-12-27 13:49:47.077 INFO 1 --- [ main] com.example.app.AppApplication : Started AppApplication in 4.99 seconds (JVM running for 6.14)下来在PostMan中访问地址,就可以看到访问网络请求后的响应结果信息。
Docker-compose启动镜像
Docker-compose
依据前面的SpringBoot的项目,在src/main/docker的文件夹下创建docker-compose.yml的文件,在该文件里面定义容器的网络,端口,
被启动的镜像信息,文件详细的信息如下:
version: '3.2'
services:
  app:
    image: app:0.0.1-SNAPSHOT
    hostname: localhost
    ports:
    - "8081:8081"
    networks:
      - mynetwork
networks:
  mynetwork:
    external: true
创建网络
下来创建网络,创建网络的目的是为了容器与宿主机是在同一个网络的模式下,一般我们创建的是Bridge,创建的命令为:
docker network create -o parent=en0 --driver=bridge --subnet=192.168.3.157/24 --gateway=192.168.3.157 mynetwork网络创建成功后,就可以查看到目前的网络情况中存在mynetwork,具体如下:
docker network ls
NETWORK ID          NAME                       DRIVER              SCOPE
5e0d06b35341        bridge                     bridge              local
34f731bed1dc        host                       host                local
4b5926f1e44d        mynetwork                  bridge              local
启动镜像
下来在src/main/docker的目录下,执行如下命令来启动镜像信息,具体如下:
docker-compose up -d
Creating docker_app_1 ... done
#获取容器的ID信息
docker ps -a
CONTAINER ID IMAGE COMMAND CREATED STATUS PORTS NAMES
caee578c4876 app:0.0.1-SNAPSHOT "java -Djava.securit…" 43 minutes ago Up 43 minutes 0.0.0.0:8081->8081/tcp docker_app_1
#查看日志信息
docker logs -f caee578c4876
. ____ _ __ _ _
/\\ / ___'_ __ _ _(_)_ __ __ _ \ \ \ \
( ( )\___ | '_ | '_| | '_ \/ _` | \ \ \ \
\\/ ___)| |_)| | | | | || (_| | ) ) ) )
' |____| .__|_| |_|_| |_\__, | / / / /
=========|_|==============|___/=/_/_/_/
:: Spring Boot :: (v2.6.2)
2021-12-29 01:52:37.085 INFO 1 --- [ main] com.example.app.AppApplication : Starting AppApplication v0.0.1-SNAPSHOT using Java 1.8.0_111 on localhost with PID 1 (/app/app.jar started by root in /app)
2021-12-29 01:52:37.090 INFO 1 --- [ main] com.example.app.AppApplication : No active profile set, falling back to default profiles: default
2021-12-29 01:52:39.280 INFO 1 --- [ main] o.s.b.web.embedded.netty.NettyWebServer : Netty started on port 8081
2021-12-29 01:52:39.291 INFO 1 --- [ main] com.example.app.AppApplication : Started AppApplication in 2.973 seconds (JVM running for 4.082)停止镜像
docker-compose  down
Stopping docker_app_1 ... done
Removing docker_app_1 ... done
Network mynetwork is external, skipping
更新配置文件
更新配置文件application.yaml,把服务的端口修改为8081
server:
  port: 8081
  servlet:
    session:
      timeout: 30
  tomcat:
    uri-encoding: UTF-8
自动化部署&验证
下面我们可以把自动构建镜像,以及自动启动服务,和自动化验证测试服务的过程,完全结合Jenkins持续集成的流水线,完全实现自动化的
部署和过程。
pipeline
在Jenkins持续集成的工具里面创建Pipeline的项目,设计到的脚本具体如下:
pipeline{
    agent any
    stages{
        stage('build the image'){
            steps{
                sh '''cd /Applications/code/workSpace/data/app
                mvn clean package  -Dmaven.test.skip=true   docker:build'''
            }
        }
        stage('run the container'){
            steps{
                sh '''cd /Applications/code/workSpace/data/app/src/main/docker
                docker-compose up -d '''
            }
        }
        stage('smoke test'){
            steps{
                sh '''cd /Applications/code/workSpace/data/app/src/main/docker
                sleep 10s
                python3 -m pytest -v test_springboot.py'''
            }
        }
    }
}
下来我们开始构建镜像,其实我们构建的过程,第一步主要就是打包镜像,第二步就是自动化测试的启动镜像,第三个步骤就是验证部署的服
务这部分,这部分也是可以理解为一个冒烟测试的过程。具体构建后输出的结果信息如下:
Successfully tagged app:0.0.1-SNAPSHOT
[INFO] Built app:0.0.1-SNAPSHOT
[INFO] ------------------------------------------------------------------------
[INFO] BUILD SUCCESS
[INFO] ------------------------------------------------------------------------
[INFO] Total time:  14.678 s
[INFO] Finished at: 2022-01-02T23:07:35+08:00
[INFO] ------------------------------------------------------------------------
[Pipeline] }
[Pipeline] // stage
[Pipeline] stage
[Pipeline] { (run the container)
[Pipeline] sh
+ cd /Applications/code/workSpace/data/app/src/main/docker
+ docker-compose up -d
Creating docker_app_1 ...
•[1A•[2K
Creating docker_app_1 ... •[32mdone•[0m


 2万+
2万+

 被折叠的 条评论
为什么被折叠?
被折叠的 条评论
为什么被折叠?
 到【灌水乐园】发言


