


因为需要用到TS,所以使用了VUE3.0的版本
页面效果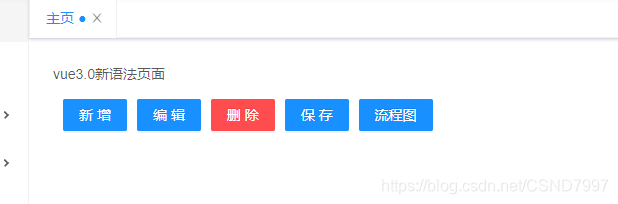
下面是新版本中父子组件传值用法
父组件中
首先:父组件引入子组件并传值,绑定方法
完整代码
<template>
  <div class="app">
    <ButtonToolbar :values="value" @toolabClick="toolabFun" :childFun="parentFun"/>
  </div>
</template>

<script lang="ts">
import { defineComponent, defineAsyncComponent, reactive, toRefs } from "vue";
import ButtonToolbar from "@/components/btnToolbar/index.vue";

export default defineComponent({
  name: "Main",
  components: {
    ButtonToolbar,
  },
  setup() {
    const data = reactive({
      value: ["新增", "编辑", "删除", "保存", "流程图"],
      // 第一种方法
      toolabFun(key: Number) {
        console.log(key);
      },
      // 第二种方法
      parentFun(key: Number) {
        console.log(key);
      },
    });
    return {
      ...toRefs(data),
    };
  },
});
</script>

<style lang="scss" scoped></style>
子组件
接受值
  props: {
    values: {
      type: Array,
      default: () => [],
    },
    childFun: {
      type: Function,
      required: true,
    },
  },
匹配值并绑定事件并触发父事件
 setup(props, context) {
    const data = reactive({
      buttonArray: [
        { id: 1, type: "primary", name: "新增", fun: "add" },
        { id: 2, type: "primary", name: "编辑", fun: "edit" },
        { id: 3, type: "primary", name: "保存", fun: "save" },
        { id: 4, type: "danger", name: "删除", fun: "delete" },
        { id: 5, type: "primary", name: "刷新", fun: "refresh" },
        { id: 6, type: "primary", name: "流程图", fun: "chart" },
      ],
      buttonArrayTem: [{}],

      init() {
        console.log(props.values)
      },

      clickFunction(key: Number) {
        // 第一种方法
        console.log(context);
        context.emit("toolabClick", key);
        // 第二种方法
        props.toolabClick(key);
      },
    });
    onMounted(() => {
      data.init();
    });

    return {
      ...toRefs(data),
    };
  },
**第一种的方法重点就在于在setup中传的参数content,打印一下**

**通过content.emit来触发父组件**


 2555
2555


 被折叠的 条评论
为什么被折叠?
被折叠的 条评论
为什么被折叠?
 到【灌水乐园】发言


