


SpringCloud无介绍快使用,sentinel熔断降级和限流的基本使用(二十一)
问题背景
从零开始学springcloud微服务项目
注意事项:
- 约定 > 配置 > 编码
- IDEA版本2021.1
- 这个项目,我分了很多篇章,每篇文章一个操作步骤,目的是显得更简单明了
- controller调service,service调dao
- 默认安装nginx
- 项目源码以及sentinel安装包
sentinel
1 登录github下载:https://github.com/alibaba/Sentinel/releases

2 在文件夹输入cmd,启动sentinel
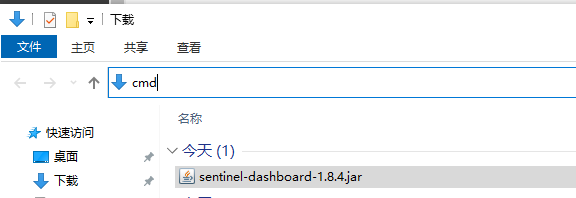
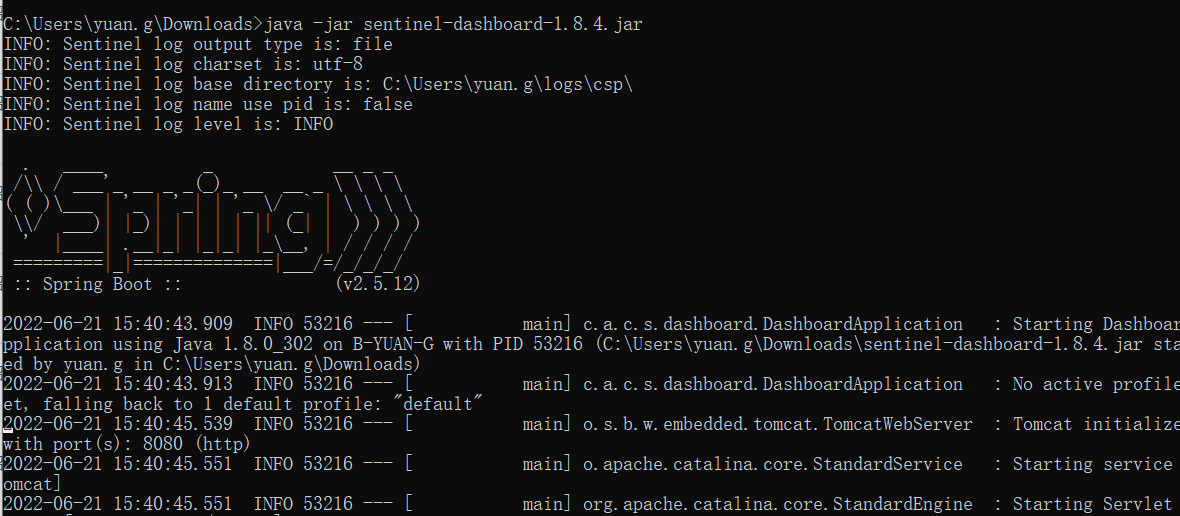
java -jar sentinel-dashboard-1.8.4.jar
由于默认8080端口,可能被占用,可以自己更改端口
java -jar sentinel-dashboard-1.8.4.jar --server.port=8081
更改密码
java -jar -Dserver.port=8082 -Dsentinel.dashboard.auth.username=lanran -Dsentinel.dashboard.auth.password=123456 sentinel-dashboard-1.8.4.jar
| 配置项 | 默认值 | 最小值 | 详细 |
|---|---|---|---|
| sentinel.dashboard.app.hideAppNoMachineMillis | 0 | 60000 | 是否隐藏无健康节点的应用,距离最近一次主机心跳时间的毫秒数,默认关闭 |
| sentinel.dashboard.removeAppNoMachineMillis | 0 | 120000 | 是否自动删除无健康节点的应用,距离最近一次其下节点的心跳时间毫秒数,默认关闭 |
| sentinel.dashboard.unhealthyMachineMillis | 60000 | 30000 | 主机失联判定,不可关闭 |
| sentinel.dashboard.autoRemoveMachineMillis | 0 | 300000 | 距离最近心跳时间超过指定时间是否自动删除失联节点,默认关闭 |
| server.port | 8080 | - | 指定端口 |
| csp.sentinel.dashboard.server | localhost:8080 | - | 指定地址 |
| project.name | - | - | 指定程序的名称 |
| sentinel.dashboard.auth.username [1.6版本开始支持] | sentinel | - | Sentinel Dashboard登录账号 |
| sentinel.dashboard.auth.password [1.6版本开始支持] | sentinel | - | Sentinel Dashboard登录密码 |
| server.servlet.session.timeout [1.6版本开始支持] | 30分钟 | - | 登录Session过期时间。配置为7200表示7200秒;配置为60m表示60分钟 |
3 登录sentinel:http://localhost:8080/ ,登录账号:sentinel 密码:sentinel

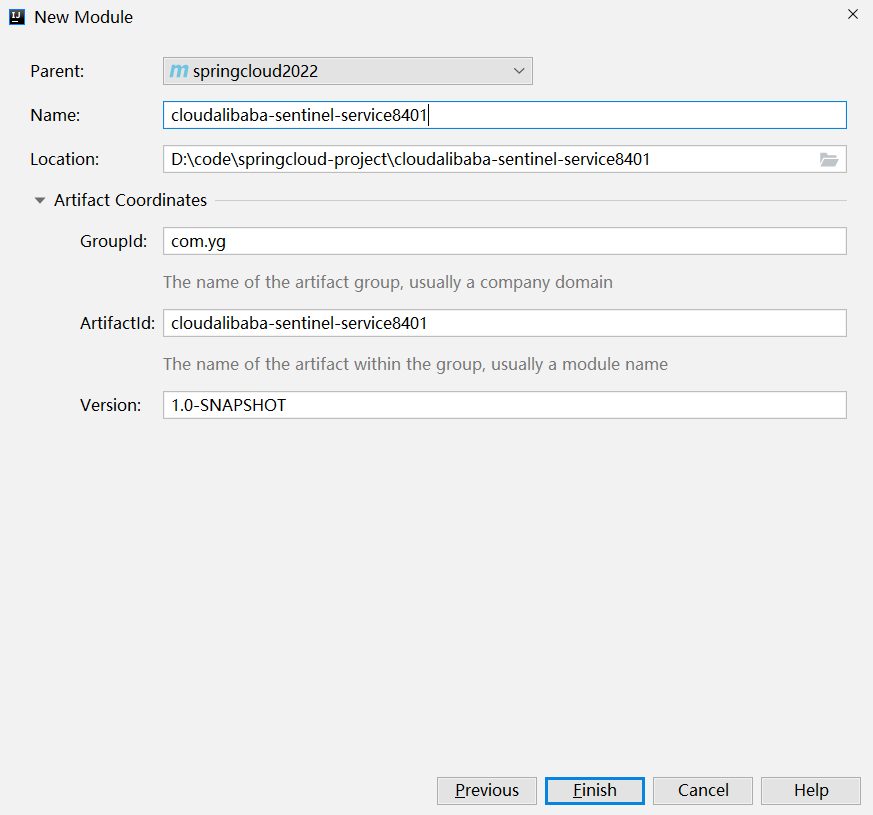
4 新建cloudalibaba-sentinel-service8401微服务
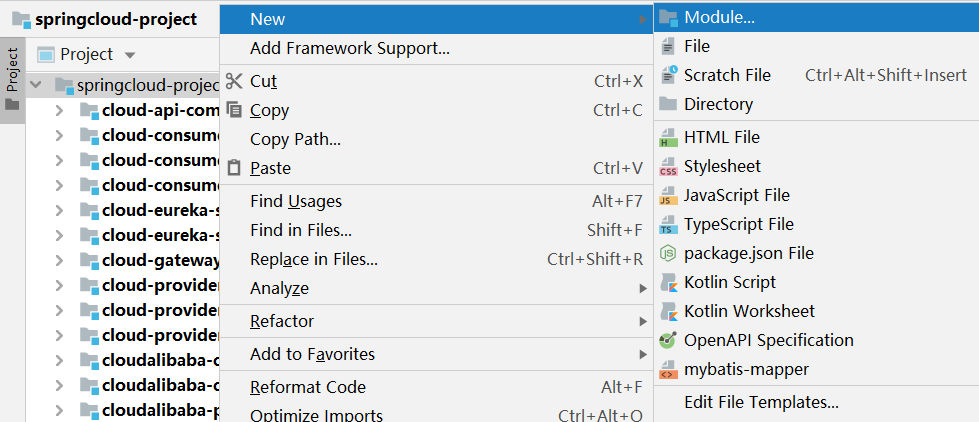
5 选择jdk1.8
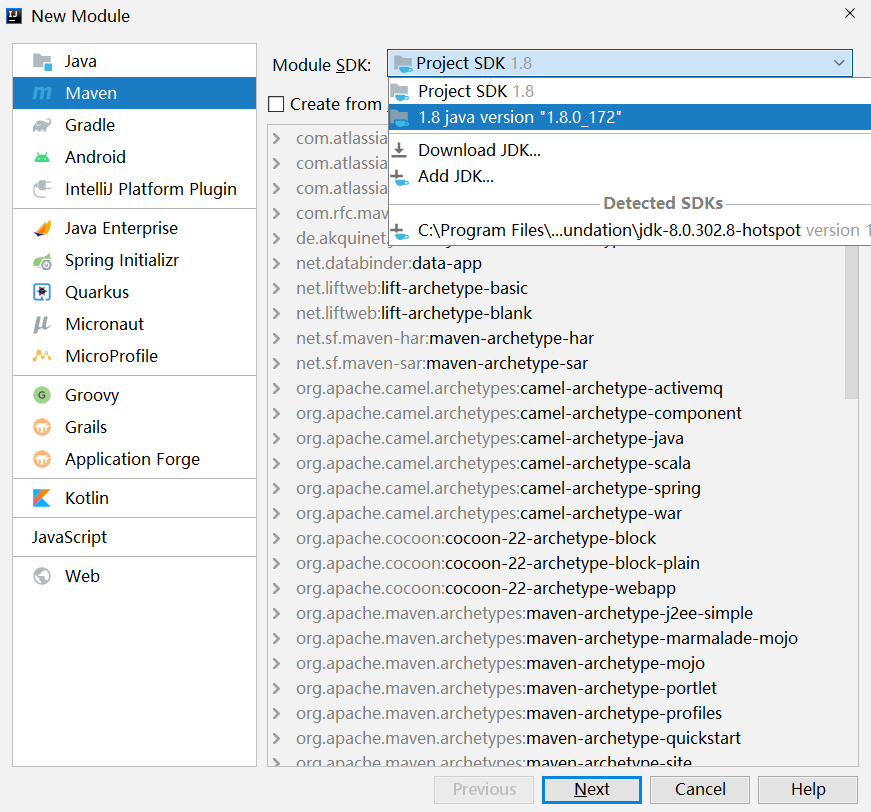
6 输入服务名:cloudalibaba-sentinel-service8401
7 引入pom依赖
<?xml version="1.0" encoding="UTF-8"?>
<project xmlns="http://maven.apache.org/POM/4.0.0"
         xmlns:xsi="http://www.w3.org/2001/XMLSchema-instance"
         xsi:schemaLocation="http://maven.apache.org/POM/4.0.0 http://maven.apache.org/xsd/maven-4.0.0.xsd">
    <parent>
        <artifactId>springcloud2022</artifactId>
        <groupId>com.yg</groupId>
        <version>1.0-SNAPSHOT</version>
    </parent>
    <modelVersion>4.0.0</modelVersion>

    <artifactId>cloudalibaba-sentinel-service8401</artifactId>

    <dependencies>
        <!--SpringCloud ailibaba nacos -->
        <dependency>
            <groupId>com.alibaba.cloud</groupId>
            <artifactId>spring-cloud-starter-alibaba-nacos-discovery</artifactId>
        </dependency>
        <!--SpringCloud ailibaba sentinel-datasource-nacos 后续做持久化用到-->
        <dependency>
            <groupId>com.alibaba.csp</groupId>
            <artifactId>sentinel-datasource-nacos</artifactId>
        </dependency>
        <!--SpringCloud ailibaba sentinel -->
        <dependency>
            <groupId>com.alibaba.cloud</groupId>
            <artifactId>spring-cloud-starter-alibaba-sentinel</artifactId>
        </dependency>
        <!--openfeign-->
        <dependency>
            <groupId>org.springframework.cloud</groupId>
            <artifactId>spring-cloud-starter-openfeign</artifactId>
        </dependency>
        <!-- SpringBoot整合Web组件+actuator -->
        <dependency>
            <groupId>org.springframework.boot</groupId>
            <artifactId>spring-boot-starter-web</artifactId>
        </dependency>
        <dependency>
            <groupId>org.springframework.boot</groupId>
            <artifactId>spring-boot-starter-actuator</artifactId>
        </dependency>
        <!--日常通用jar包配置-->
        <dependency>
            <groupId>org.springframework.boot</groupId>
            <artifactId>spring-boot-devtools</artifactId>
            <scope>runtime</scope>
            <optional>true</optional>
        </dependency>
        <dependency>
            <groupId>cn.hutool</groupId>
            <artifactId>hutool-all</artifactId>
            <version>4.6.3</version>
        </dependency>
        <dependency>
            <groupId>org.projectlombok</groupId>
            <artifactId>lombok</artifactId>
            <optional>true</optional>
        </dependency>
        <dependency>
            <groupId>org.springframework.boot</groupId>
            <artifactId>spring-boot-starter-test</artifactId>
            <scope>test</scope>
        </dependency>
    </dependencies>

</project>
8 添加application.yml文件
server:
  port: 8401

spring:
  application:
    name: cloudalibaba-sentinel-service
  cloud:
    nacos:
      discovery:
        #Nacos服务注册中心地址
        server-addr: localhost:8848
    sentinel:
      transport:
        #配置Sentinel dashboard地址
        dashboard: localhost:8080
        #默认8719端口,假如被占用会自动从8719开始依次+1扫描,直至找到未被占用的端口
        port: 8719

management:
  endpoints:
    web:
      exposure:
        include: '*'
9 添加启动类
package com.yg.springcloud;

import org.springframework.boot.SpringApplication;
import org.springframework.boot.autoconfigure.SpringBootApplication;
import org.springframework.cloud.client.discovery.EnableDiscoveryClient;

/**
 * @Author suolong
 * @Date 2022/6/21 16:08
 * @Version 2.0
 */
@EnableDiscoveryClient
@SpringBootApplication
public class MainApp8401 {

    public static void main(String[] args) {
        SpringApplication.run(MainApp8401.class, args);
    }

}
10 添加controller类
package com.yg.springcloud.controller;

import org.springframework.web.bind.annotation.GetMapping;
import org.springframework.web.bind.annotation.RestController;

/**
 * @Author suolong
 * @Date 2022/6/21 16:10
 * @Version 2.0
 */
@RestController
public class FlowLimitController {

    @GetMapping("/testA")
    public String testA()
    {
        return "------testA";
    }

    @GetMapping("/testB")
    public String testB()
    {
        return "------testB";
    }

}
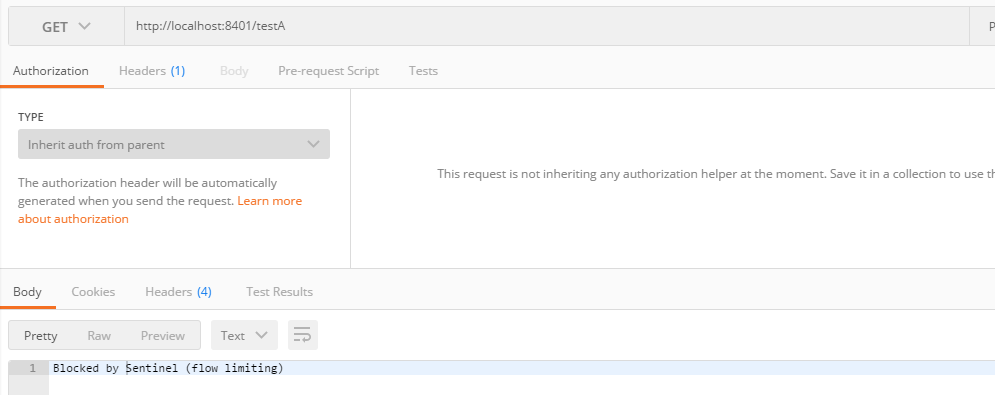
11 启动微服务,打开postman调用:http://localhost:8401/testA http://localhost:8401/testB

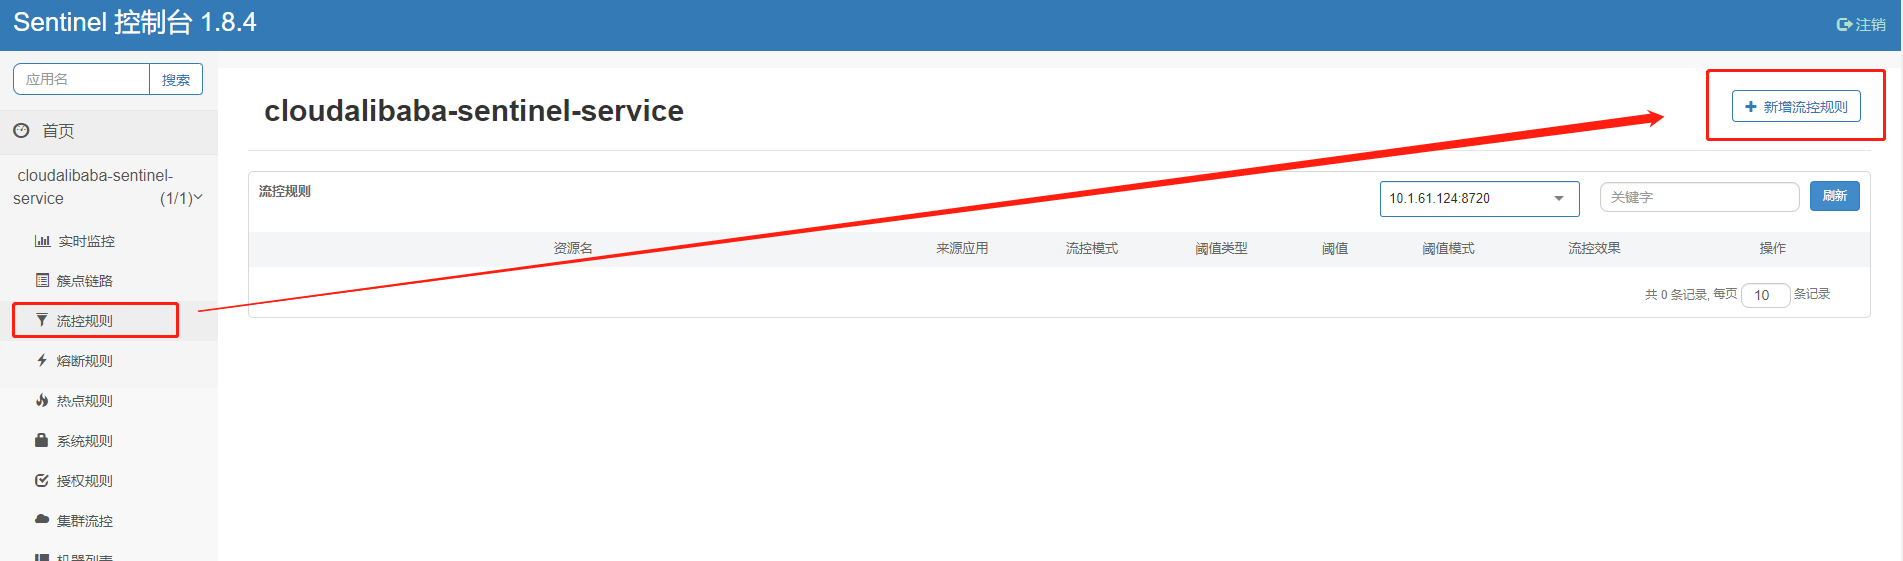
12 查看sentinel:http://localhost:8080/

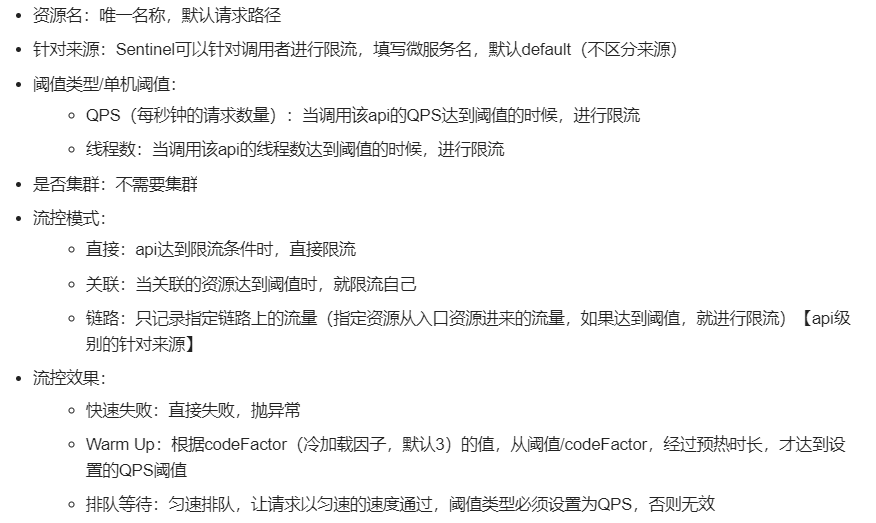
13 基本概念
14 添加流控的两种方式
- 第一种,使用簇点链路

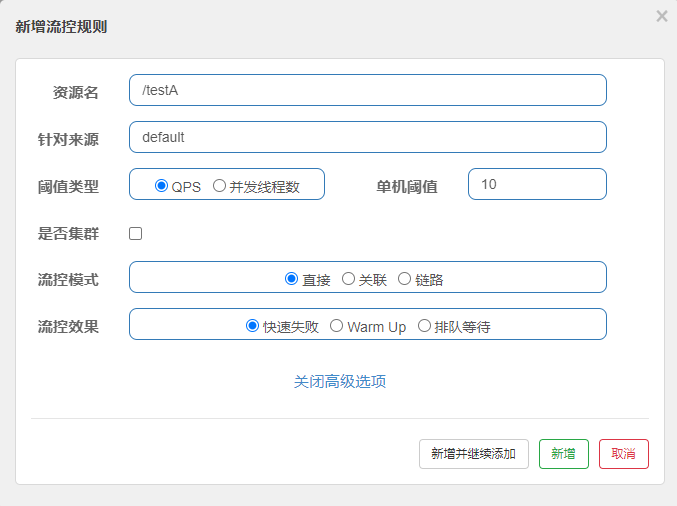
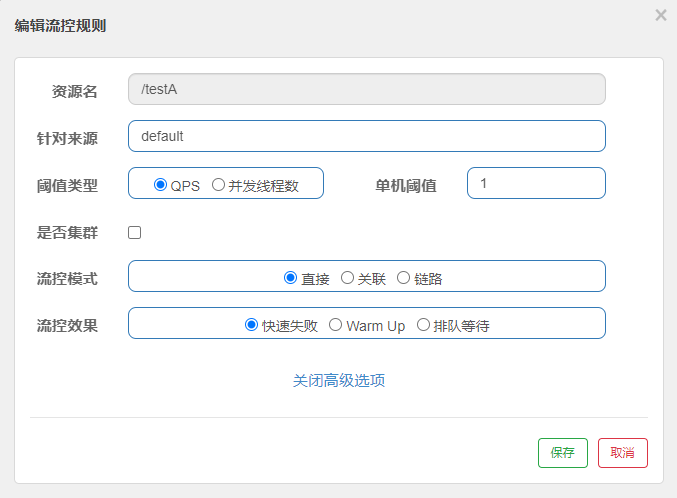
- 第二种,流控规则
15 测试qps限流,超过一秒一次就进行限流
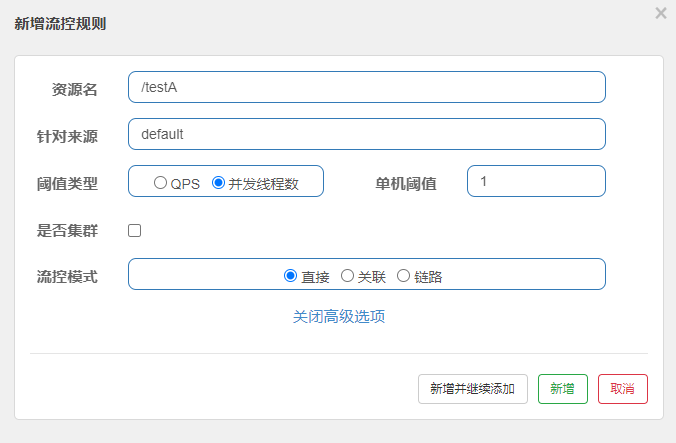
16 测试线程限流,超过线程数就进行限流
更改controller代码
    @GetMapping("/testA")
    public String testA()
    {
        try {
            TimeUnit.SECONDS.sleep(3);
        }catch (InterruptedException e) {
            e.printStackTrace();
        }
        return "------testA";
    }
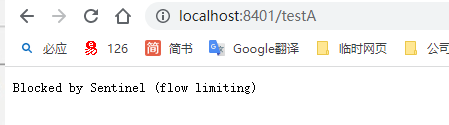
连续点两次
17 当与A关联的资源B达到阀值后,就限流A自己
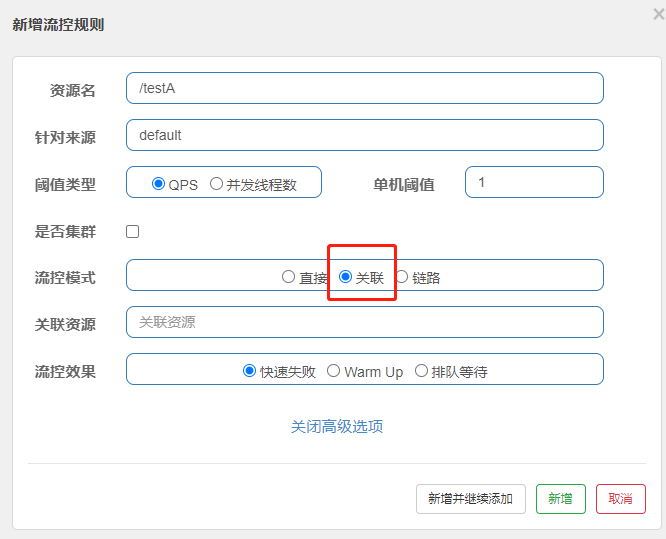
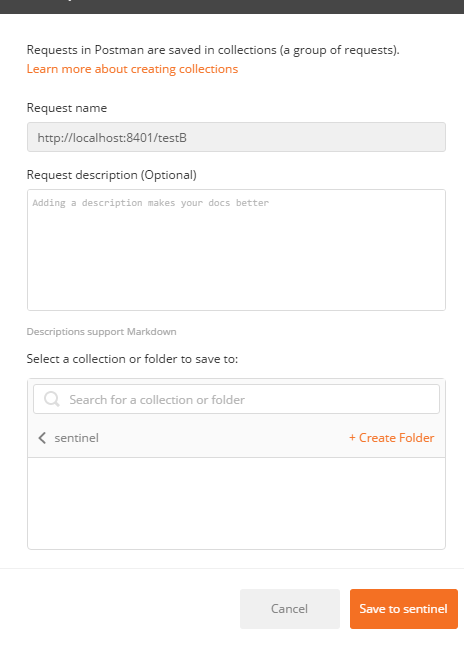
postman模拟并发密集访问testB,新建collections

保存http://localhost:8401/testB 到集合

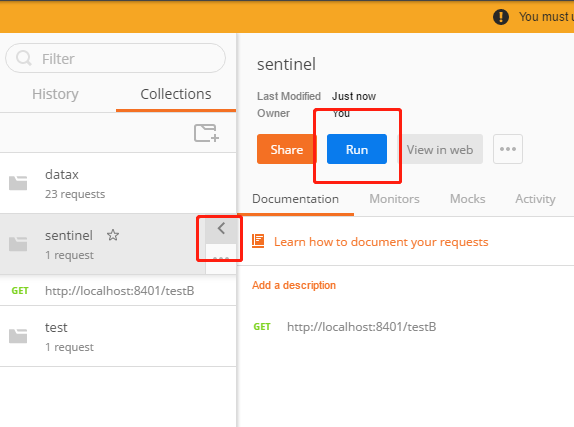
点击Run
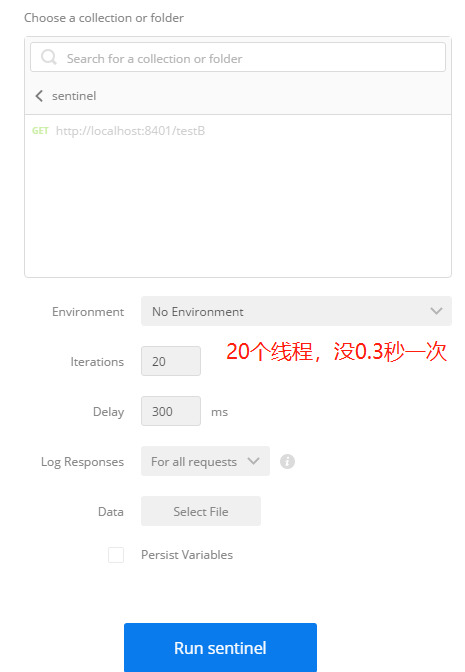
运行了B之后,去访问A,可以看见A被限流了

18 预热:阈值除以coldFactor(默认值为3),经过预热时长后才会达到阈值
- 默认coldFactor为3,即请求 QPS 从 threshold / 3 开始,经预热时长逐渐升至设定的 QPS 阈值
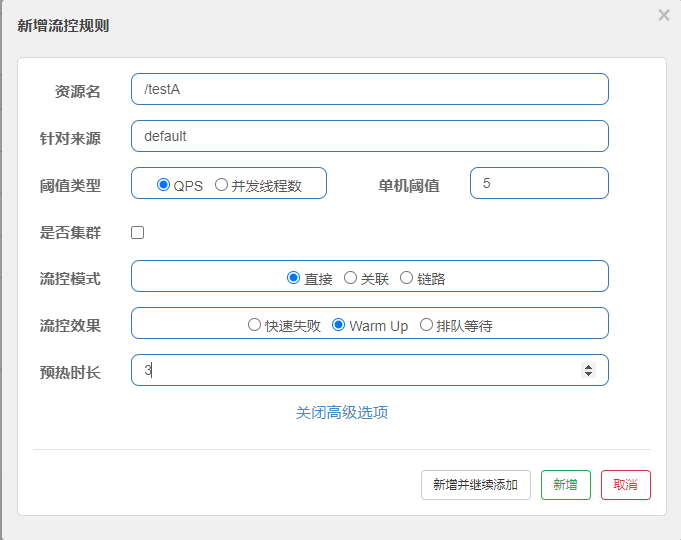
- 预热意思就是,系统初始化的阀值为5 / 3 约等于1, 即阀值刚开始为1;然后过了3秒后阀值才慢慢升高恢复到5
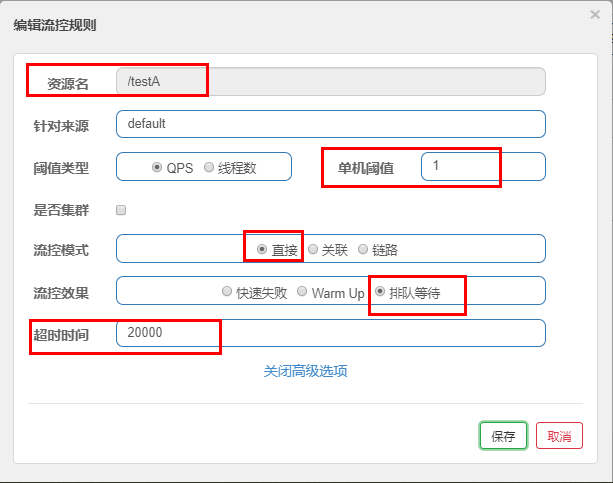
19 匀速排队,阈值必须设置为QPS

- 匀速排队,让请求以均匀的速度通过,阀值类型必须设成QPS,否则无效
- 设置含义:/testA每秒1次请求,超过的话就排队等待,等待的超时时间为20000毫秒
sentinel熔断降级
1 Sentinel 熔断降级会在调用链路中某个资源出现不稳定状态时(例如调用超时或异常比例升高),对这个资源的调用进行限制,让请求快速失败,避免影响到其它的资源而导致级联错误
2 当资源被降级后,在接下来的降级时间窗口之内,对该资源的调用都自动熔断(默认行为是抛出 DegradeException)
3 参数说明
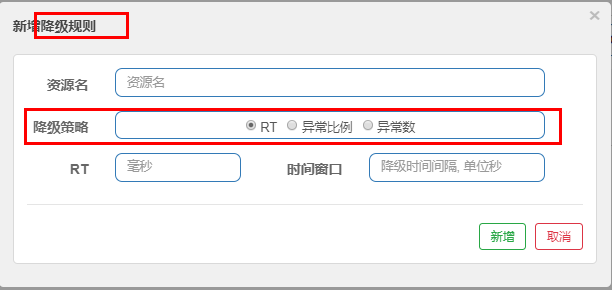
-
RT(平均响应时间,秒级)
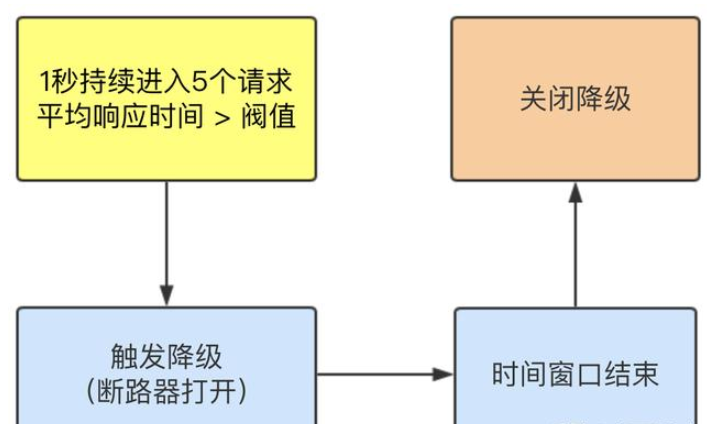
平均响应时间 超出阈值 且 在时间窗口内通过的请求>=5,两个条件同时满足后触发降级
窗口期过后关闭断路器
RT最大4900(更大的需要通过-Dcsp.sentinel.statistic.max.rt=XXXX才能生效) -
异常比列(秒级)
QPS >= 5 且异常比例(秒级统计)超过阈值时,触发降级;时间窗口结束后,关闭降级 -
异常数(分钟级)
异常数(分钟统计)超过阈值时,触发降级;时间窗口结束后,关闭降级
4 平均响应时间
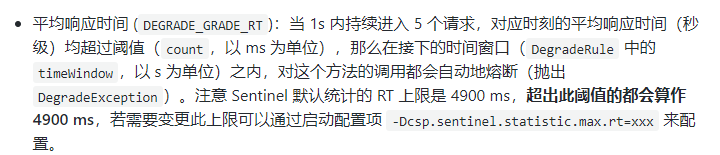
5 添加测试testD方法
@GetMapping("/testD")
public String testD()
{
    //暂停几秒钟线程
    try { TimeUnit.SECONDS.sleep(1); } catch (InterruptedException e) { e.printStackTrace(); }
    log.info("testD 测试RT");
    return "------testD";
}


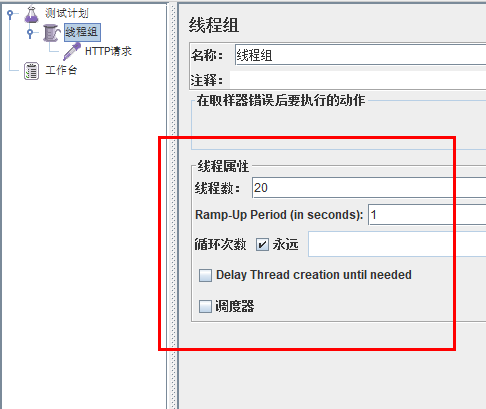
6 使用jmeter压测

- 永远一秒钟打进来10个线程(大于5个了)调用testD,希望200毫秒处理完本次任务,如果超过200毫秒还没处理完,在未来1秒钟的时间窗口内,断路器打开(保险丝跳闸)微服务不可用,保险丝跳闸断电了
- 后续停止jmeter,没有这么大的访问量了,断路器关闭(保险丝恢复),微服务恢复OK
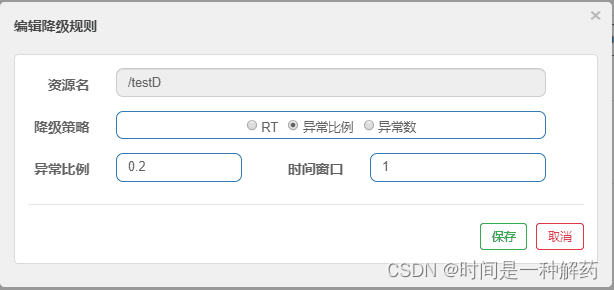
7 异常比例,同时满足QPS和异常比例两个条件


8 异常测试代码
@GetMapping("/testD")
public String testD()
{
    log.info("testD 测试RT");
    int age = 10/0;
    return "------testD";
}
10 设置熔断
11 jmeter测试
- 单独访问一次,必然来一次报错一次(int age = 10/0),调一次错一次
- 开启jmeter后,直接高并发发送请求,多次调用达到我们的配置条件了。断路器开启(保险丝跳闸),微服务不可用了,不再报错error而是服务降级了。
12 异常数,时间窗口一定要大于等于60秒


13 新增测试代码
@GetMapping("/testE")
public String testE()
{
    log.info("testE 测试异常比例");
    int age = 10/0;
    return "------testE 测试异常比例";
}
14 设置熔断降级

- 使用postman:http://localhost:8401/testE,第一次访问绝对报错,因为除数不能为零,可以看到error窗口,但是达到5次报错后,进入熔断后降级
SpringCloud无介绍快使用,Seata处理分布式事务(二十五)
SpringCloud无介绍快使用,sentinel服务熔断功能(二十四)
SpringCloud无介绍快使用,sentinel注解@SentinelResource的基本使用(二十三)
SpringCloud无介绍快使用,sentinel热点key限流与系统规则的基本使用(二十二)
SpringCloud无介绍快使用,sentinel熔断降级和限流的基本使用(二十一)
SpringCloud无介绍快使用,Nacos集群和Nginx代理(二十)
SpringCloud无介绍快使用,nacos配置中心的基本使用(十九)
SpringCloud无介绍快使用,nacos注册中心的基本使用(十八)
SpringCloud无介绍快使用,gateway通过微服务名实现动态路由(十七)
SpringCloud无介绍快使用,gateway的基本使用(十六)
SpringCloud无介绍快使用,Ribbon负载均衡工具与OpenFeign的使用(十五)
SpringCloud无介绍快使用,使用Zookeeper替换Eureka服务注册与发现(十四)
SpringCloud无介绍快使用,服务发现Discovery和Eureka自我保护(十三)
SpringCloud无介绍快使用,集群cloud-provider-payment8002搭建(十二)
SpringCloud无介绍快使用,集群Eureka服务注册中心cloud-eureka-server7002搭建(十一)
SpringCloud无介绍快使用,单机Eureka服务注册中心cloud-eureka-server7001搭建(十)
SpringCloud无介绍快使用,新建cloud-api-commons公共模块module(九)
SpringCloud无介绍快使用,新建子module消费者订单模块(八)
SpringCloud无介绍快使用,热部署devtools配置(七)
SpringCloud无介绍快使用,子module提供者支付微服务业务开发(六)
SpringCloud无介绍快使用,新建子module提供者支付微服务yml整合和新建启动类(五)
SpringCloud无介绍快使用,新建子module提供者支付微服务pom整合(四)
SpringCloud无介绍快使用,springcloud父工程pom文件整理(三)
SpringCloud无介绍快使用,IDEA新建springcloud父工程(二)
SpringCloud无介绍快使用,与Spingboot之间的兼容版本选择(一)
作为程序员第 188 篇文章,每次写一句歌词记录一下,看看人生有几首歌的时间,wahahaha … 


 918
918


 被折叠的 条评论
为什么被折叠?
被折叠的 条评论
为什么被折叠?
 到【灌水乐园】发言


